This document provides a step-by-step guide on how to create a WordPress instruction manual using AWS cloud computing. It covers topics such as creating an AWS account, launching an instance, configuring the instance, running the wp-admin, adding comments and photos, and securing the WordPress site.
Contribute Materials
Your contribution can guide someone’s learning journey. Share your
documents today.
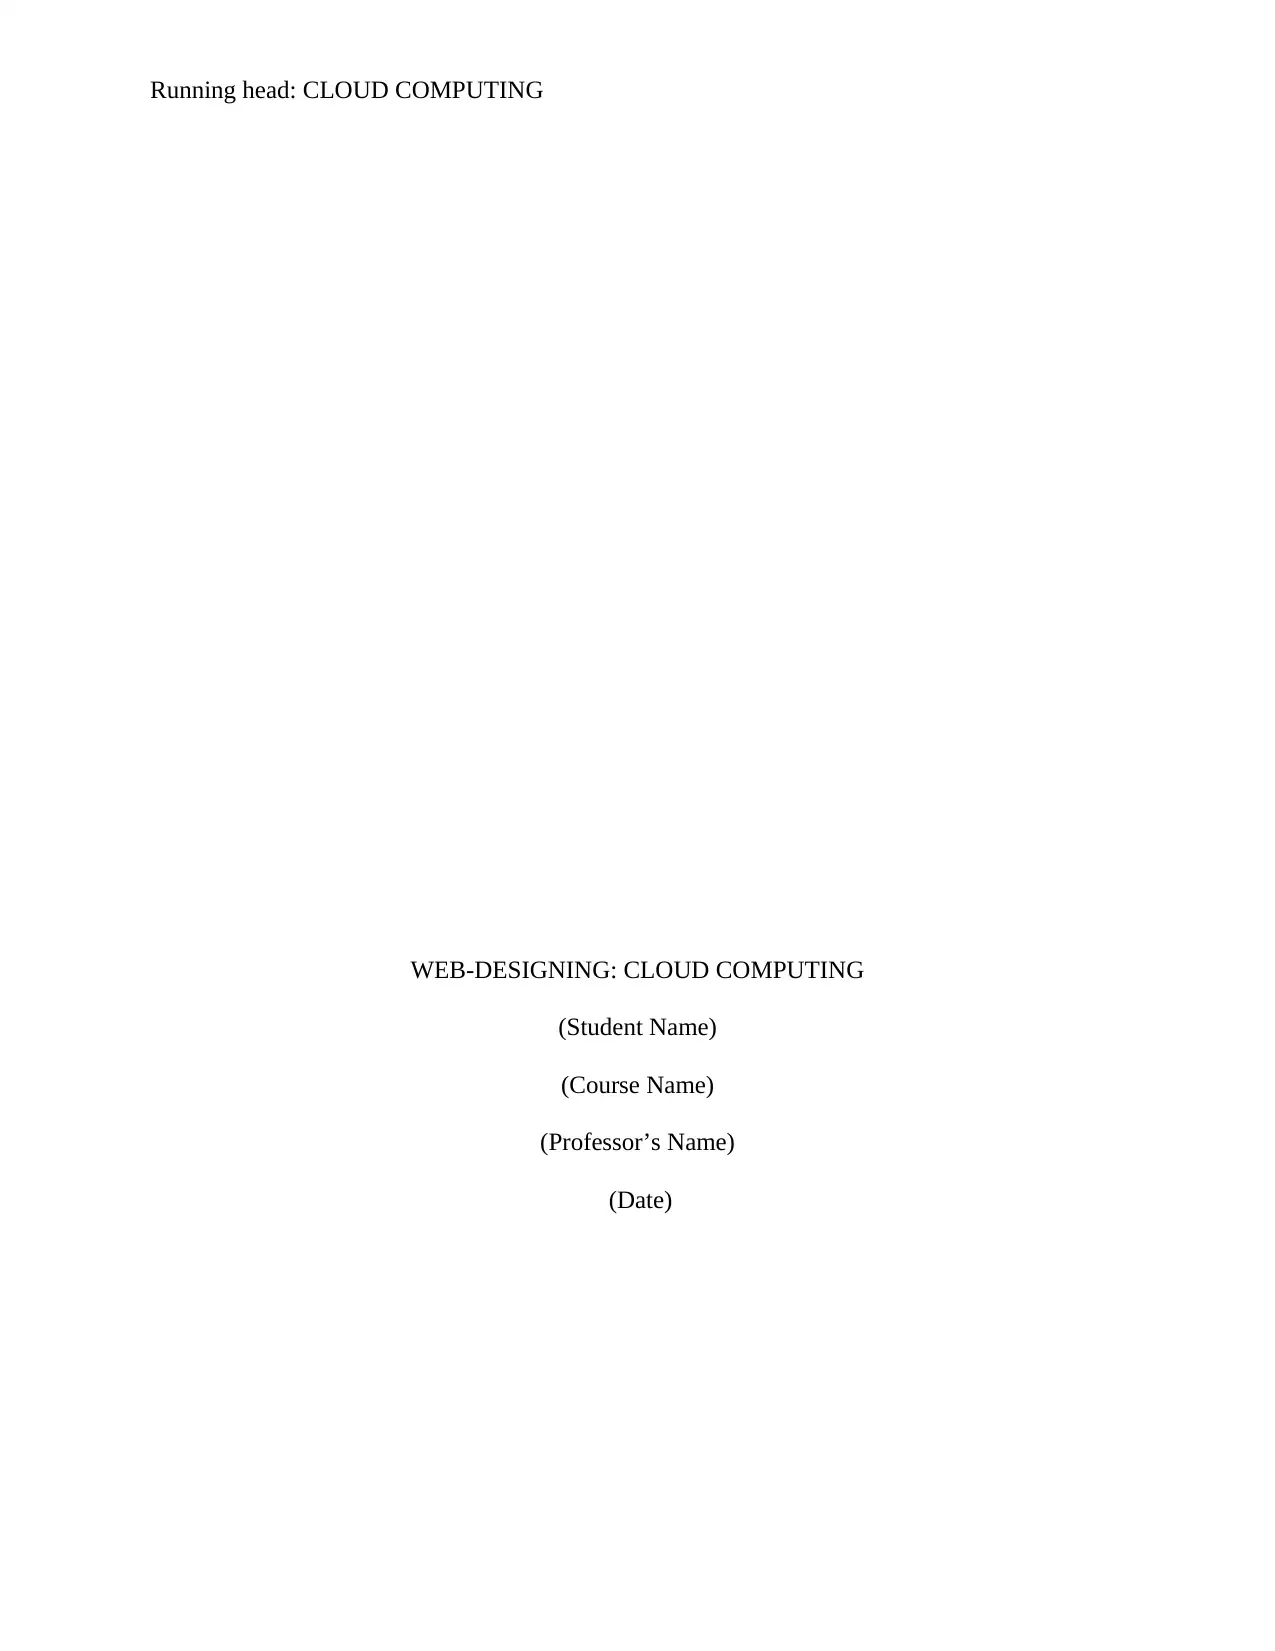
CLOUD COMPUTING2 Creating the WordPress instruction manual One first needs to create an AWS account and then login into the AWS system. The login page is as shown by the diagram below Figure 1: AWS login page
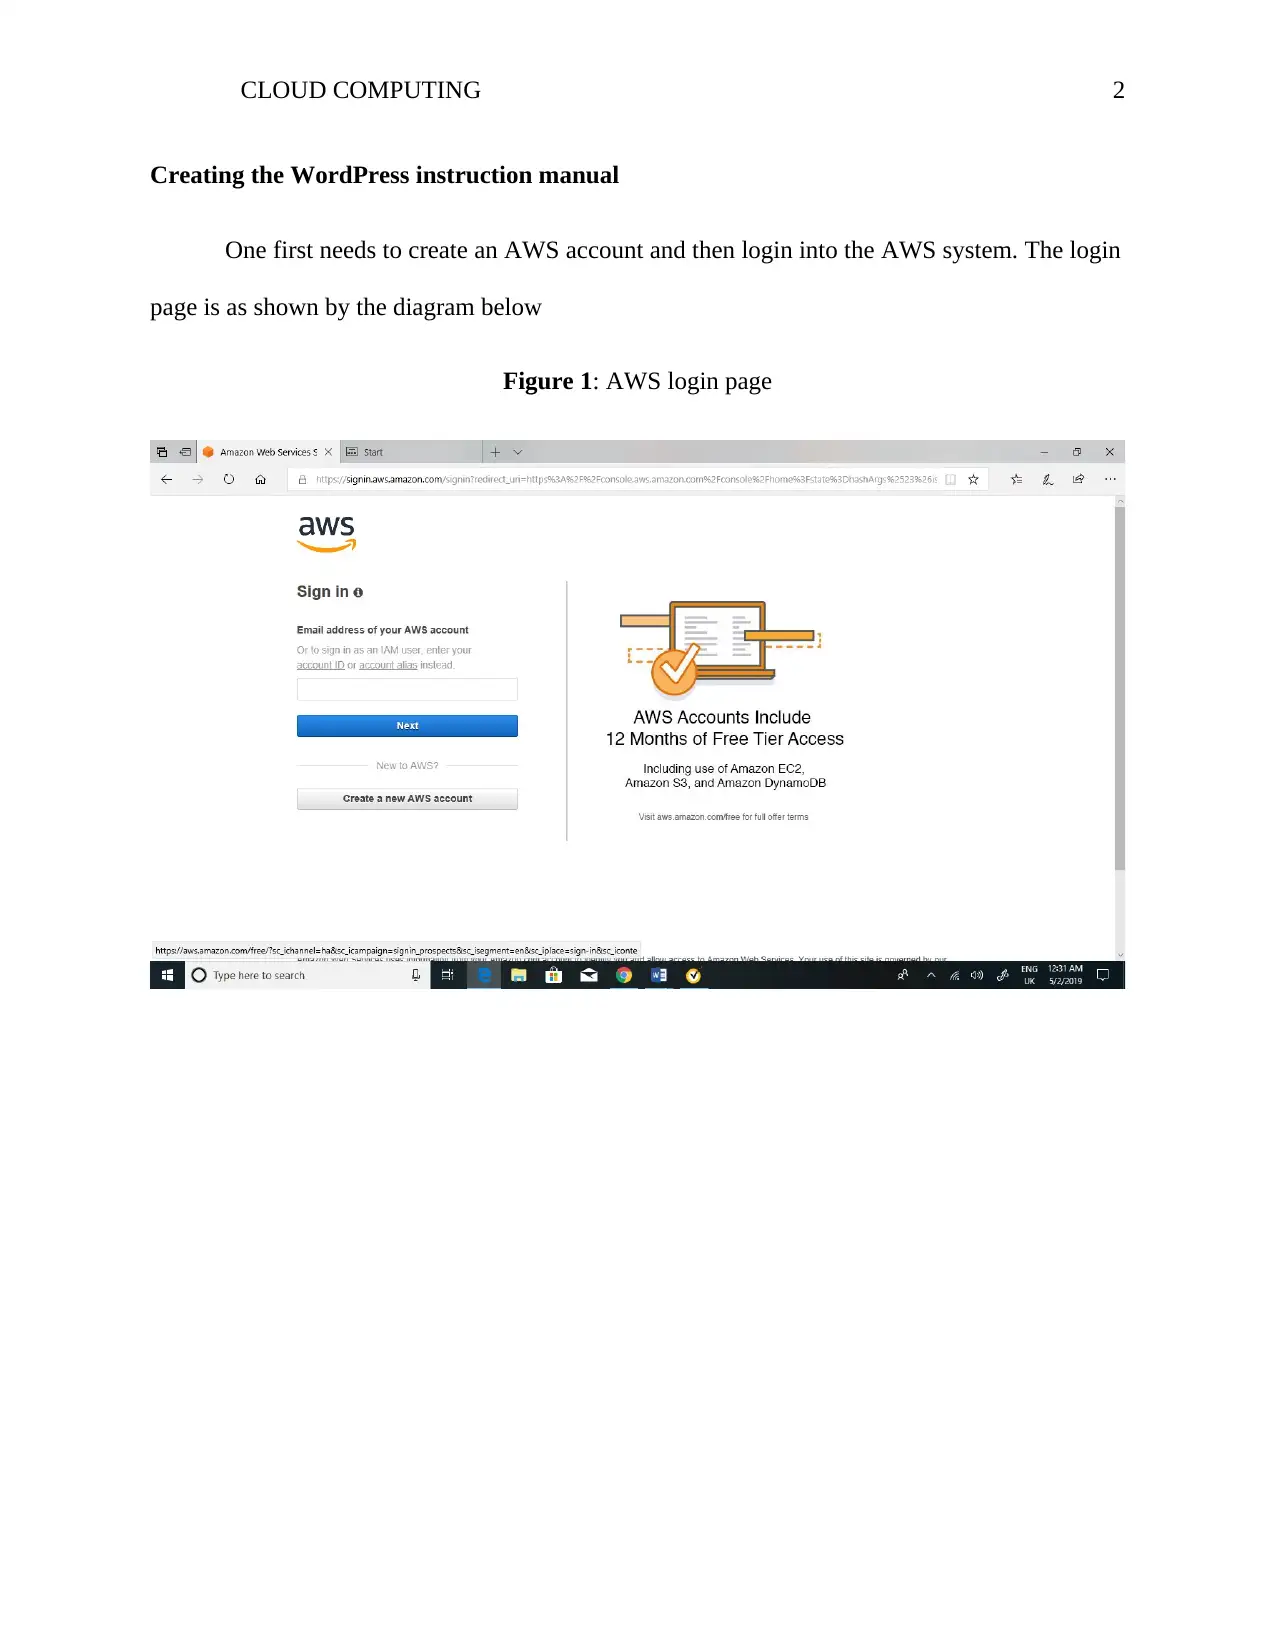
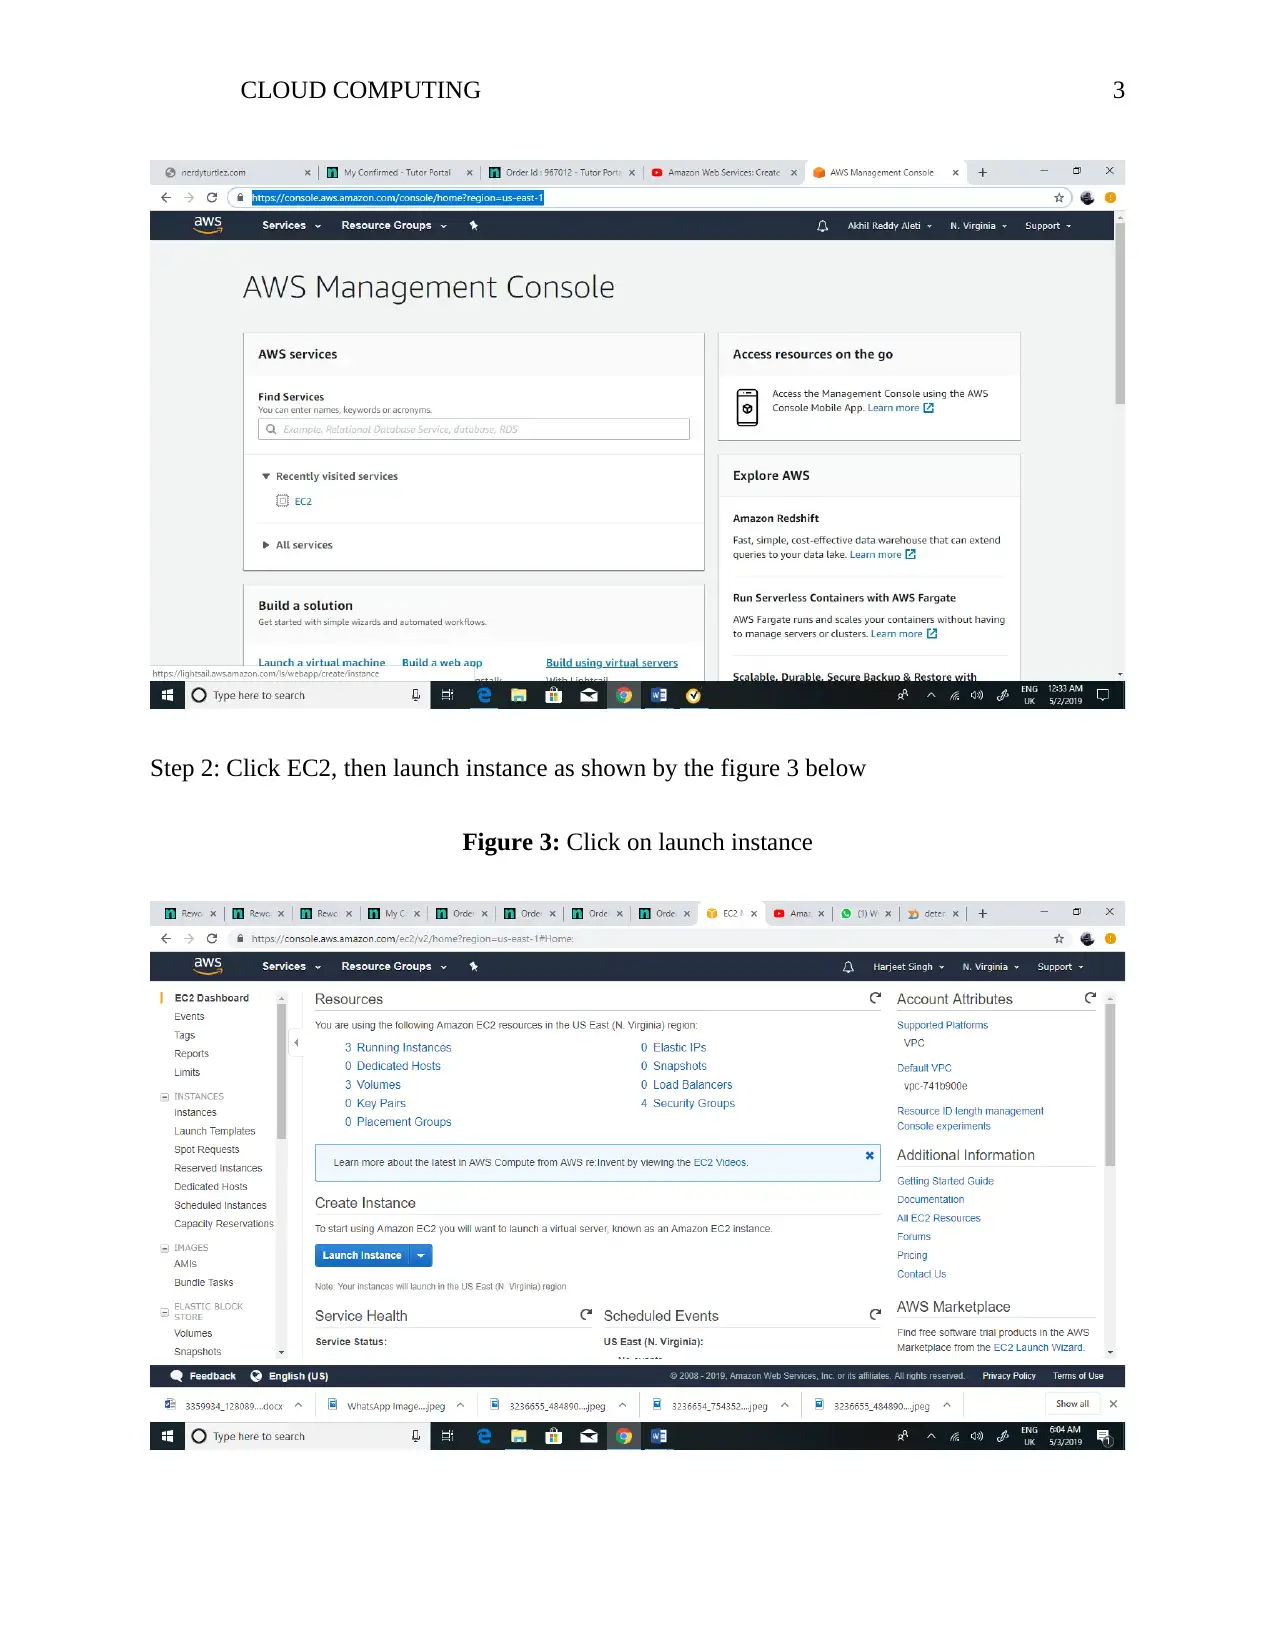
CLOUD COMPUTING3 Step 2: Click EC2, then launch instance as shown by the figure 3 below Figure 3:Click on launch instance
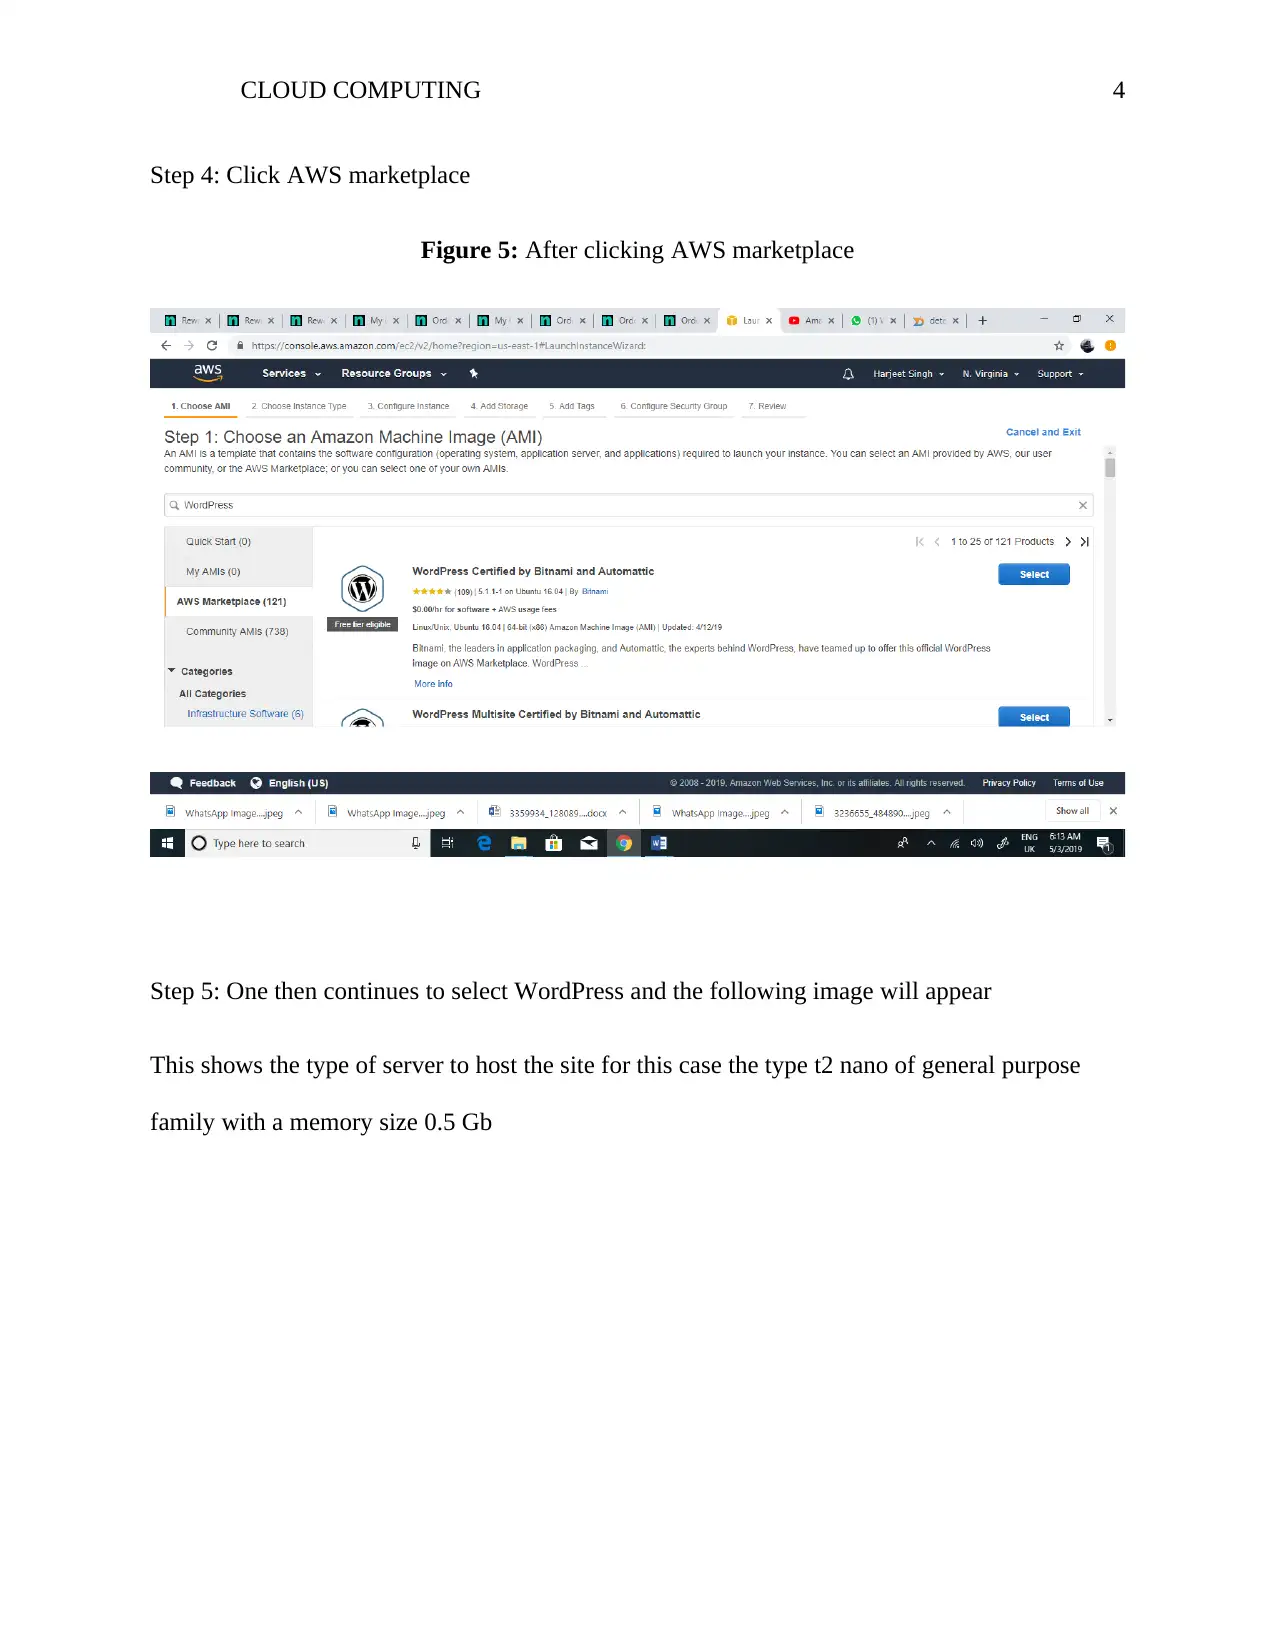
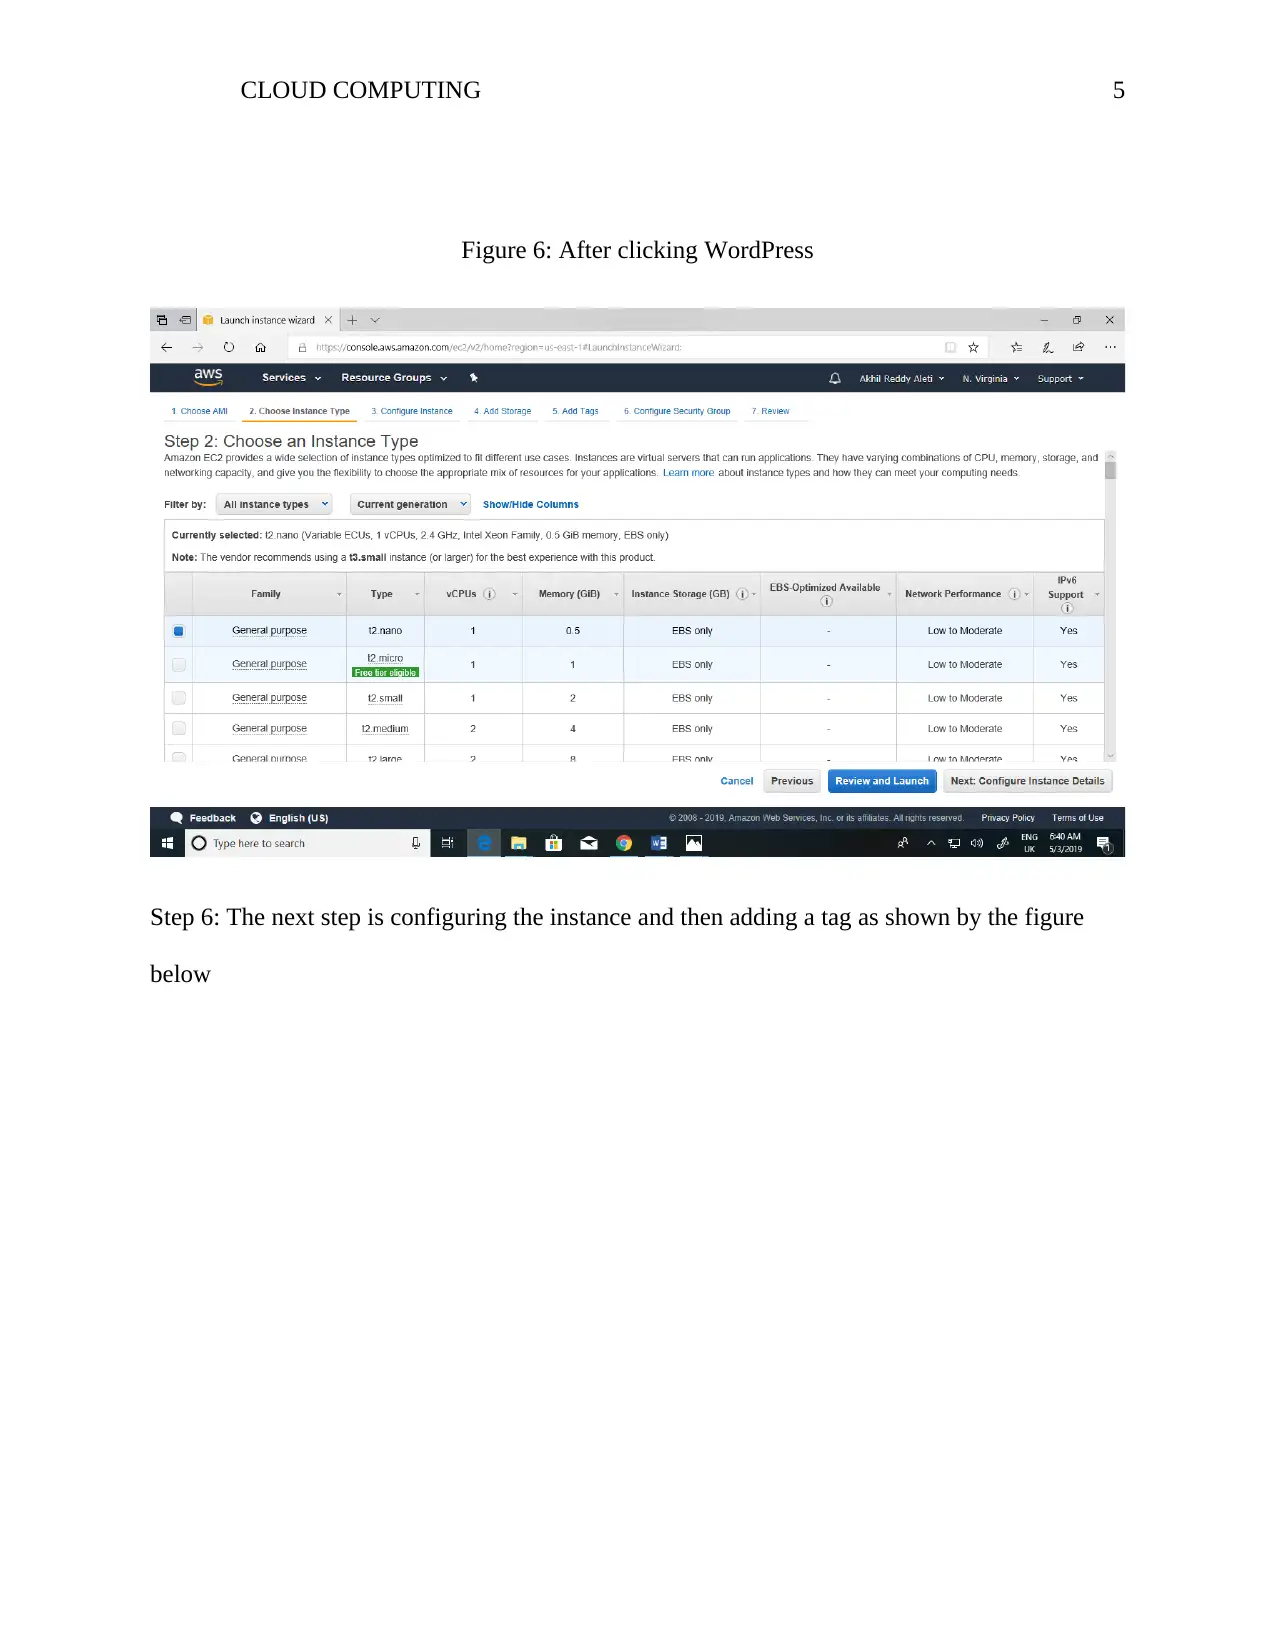
CLOUD COMPUTING4 Step 4: Click AWS marketplace Figure 5:After clicking AWS marketplace Step 5: One then continues to select WordPress and the following image will appear This shows the type of server to host the site for this case the type t2 nano of general purpose family with a memory size 0.5 Gb
Paraphrase This Document
Need a fresh take? Get an instant paraphrase of this document with our AI Paraphraser
CLOUD COMPUTING5 Figure 6: After clicking WordPress Step 6: The next step is configuring the instance and then adding a tag as shown by the figure below
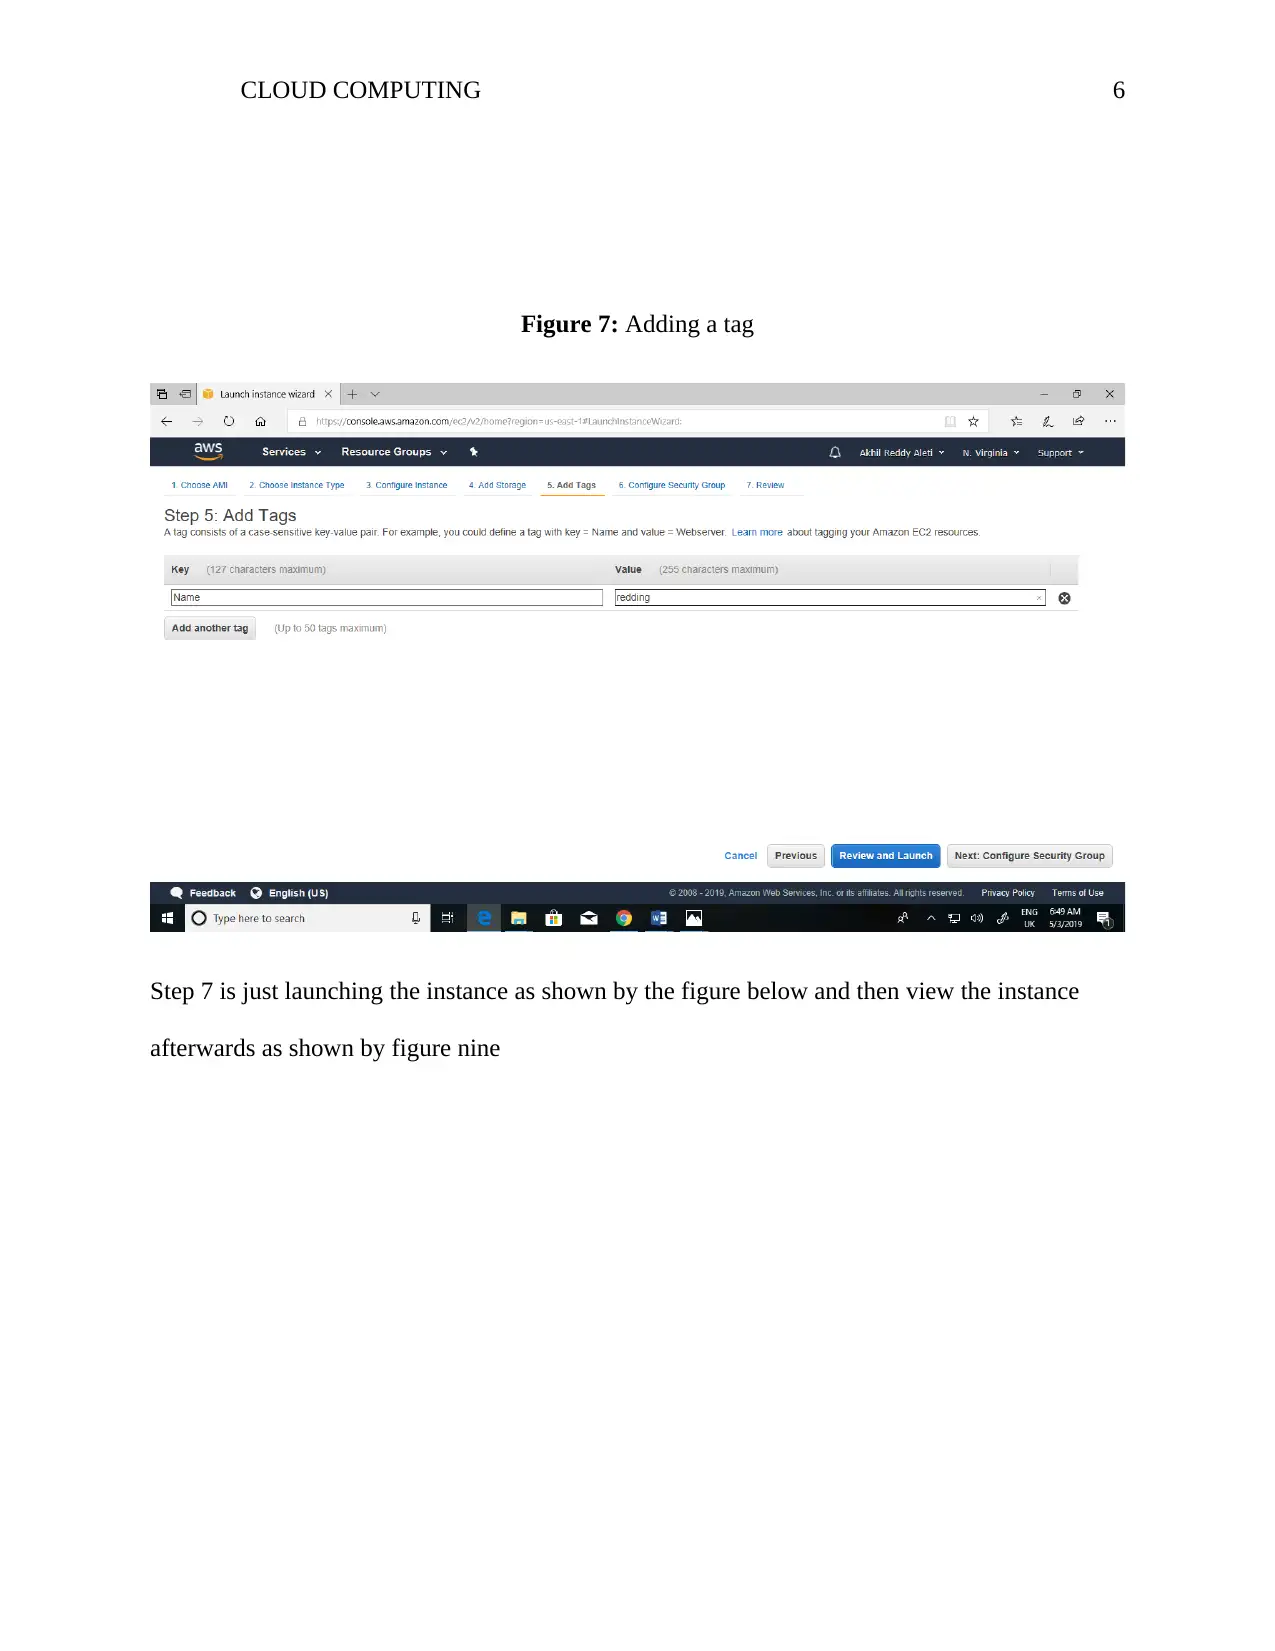
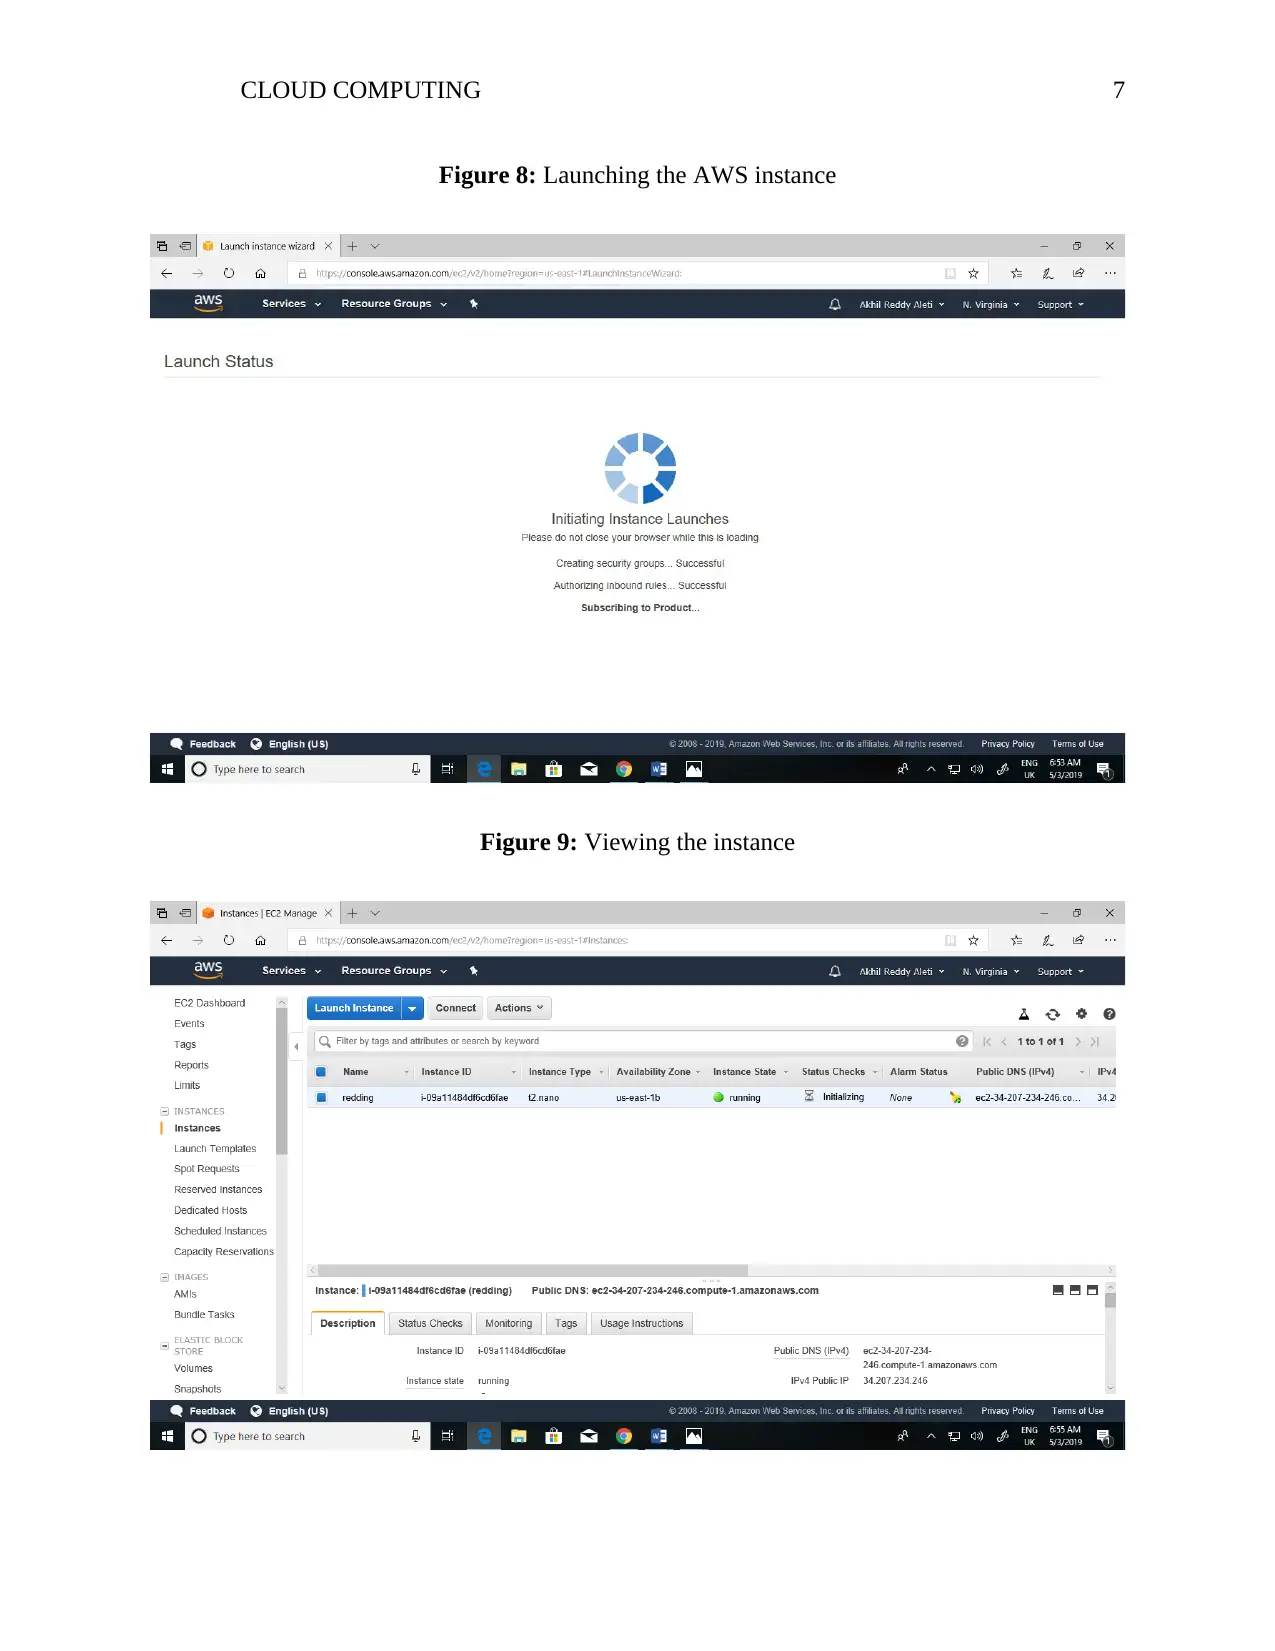
CLOUD COMPUTING6 Figure 7:Adding a tag Step 7 is just launching the instance as shown by the figure below and then view the instance afterwards as shown by figure nine
CLOUD COMPUTING7 Figure 8:Launching the AWS instance Figure 9:Viewing the instance
Secure Best Marks with AI Grader
Need help grading? Try our AI Grader for instant feedback on your assignments.
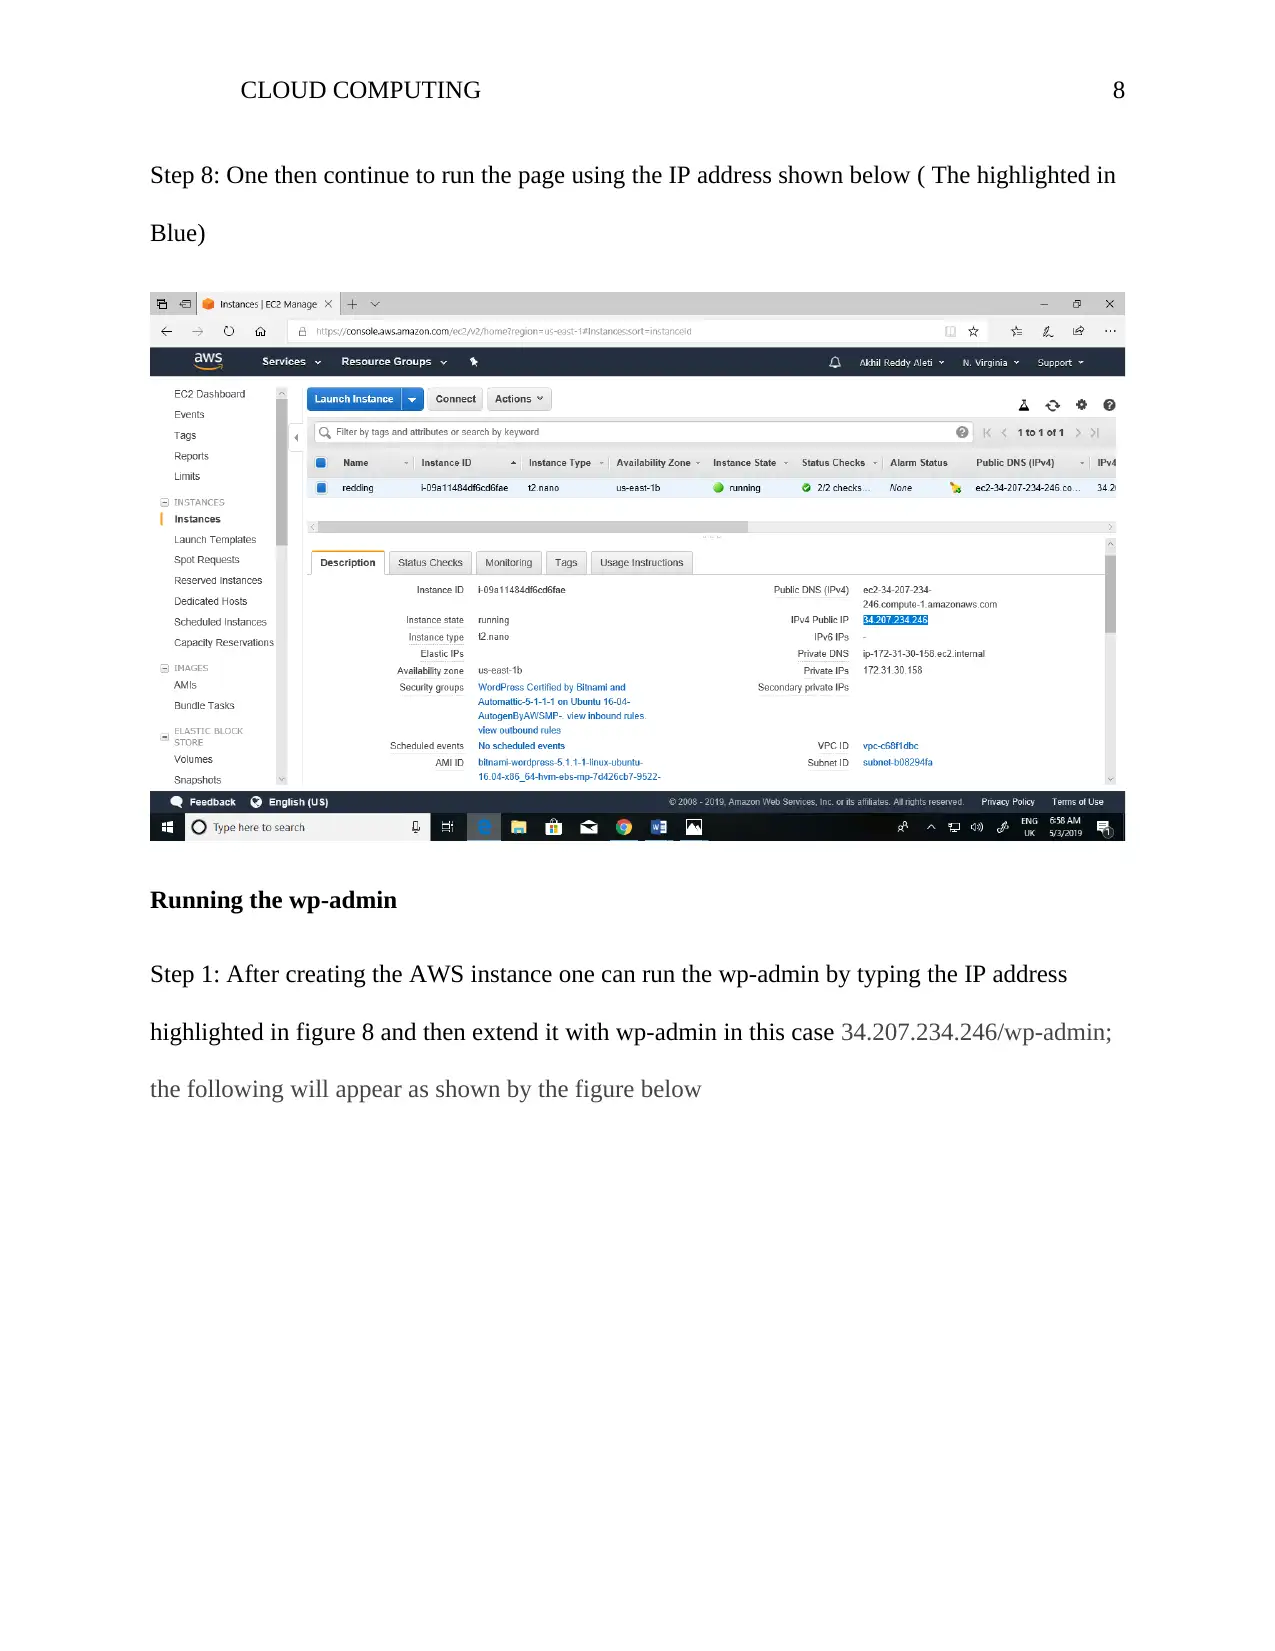
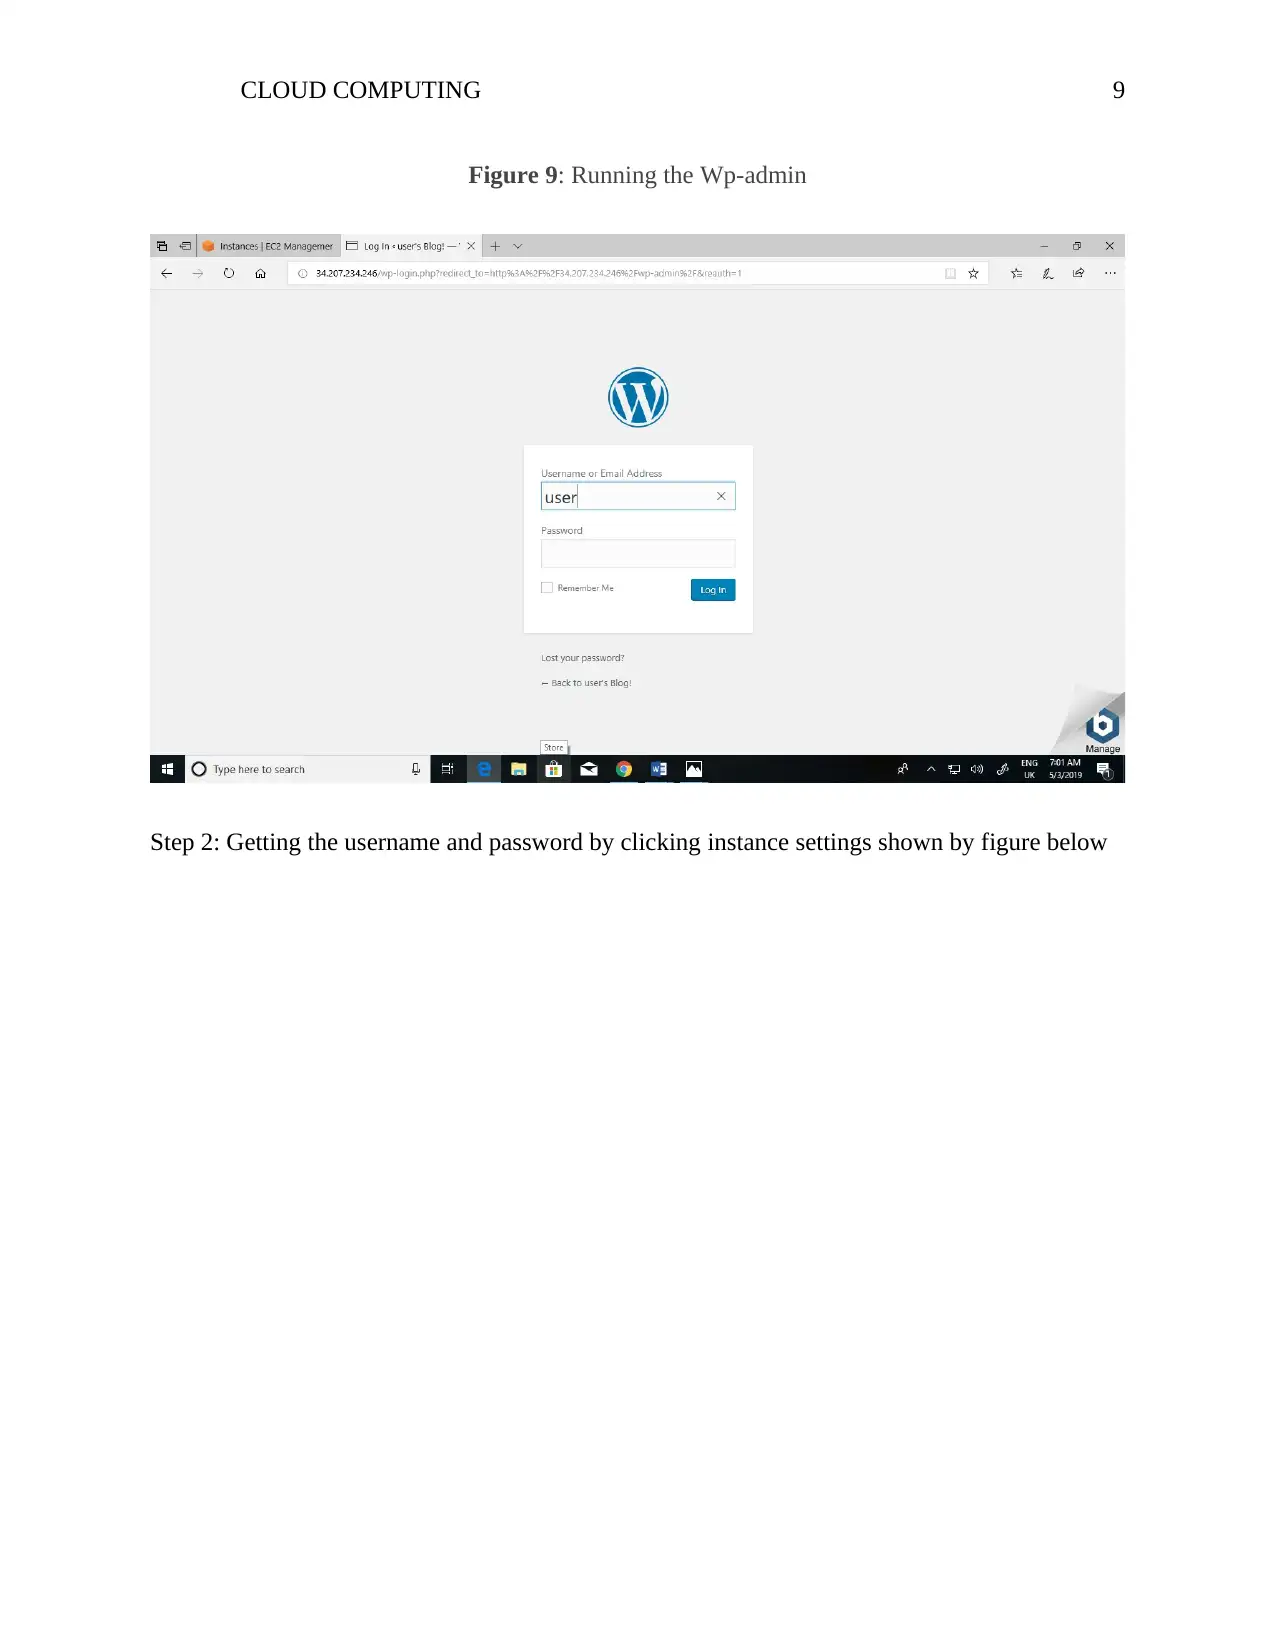
CLOUD COMPUTING8 Step 8: One then continue to run the page using the IP address shown below ( The highlighted in Blue) Running the wp-admin Step 1: After creating the AWS instance one can run the wp-admin by typing the IP address highlighted in figure 8 and then extend it with wp-admin in this case34.207.234.246/wp-admin; the following will appear as shown by the figure below
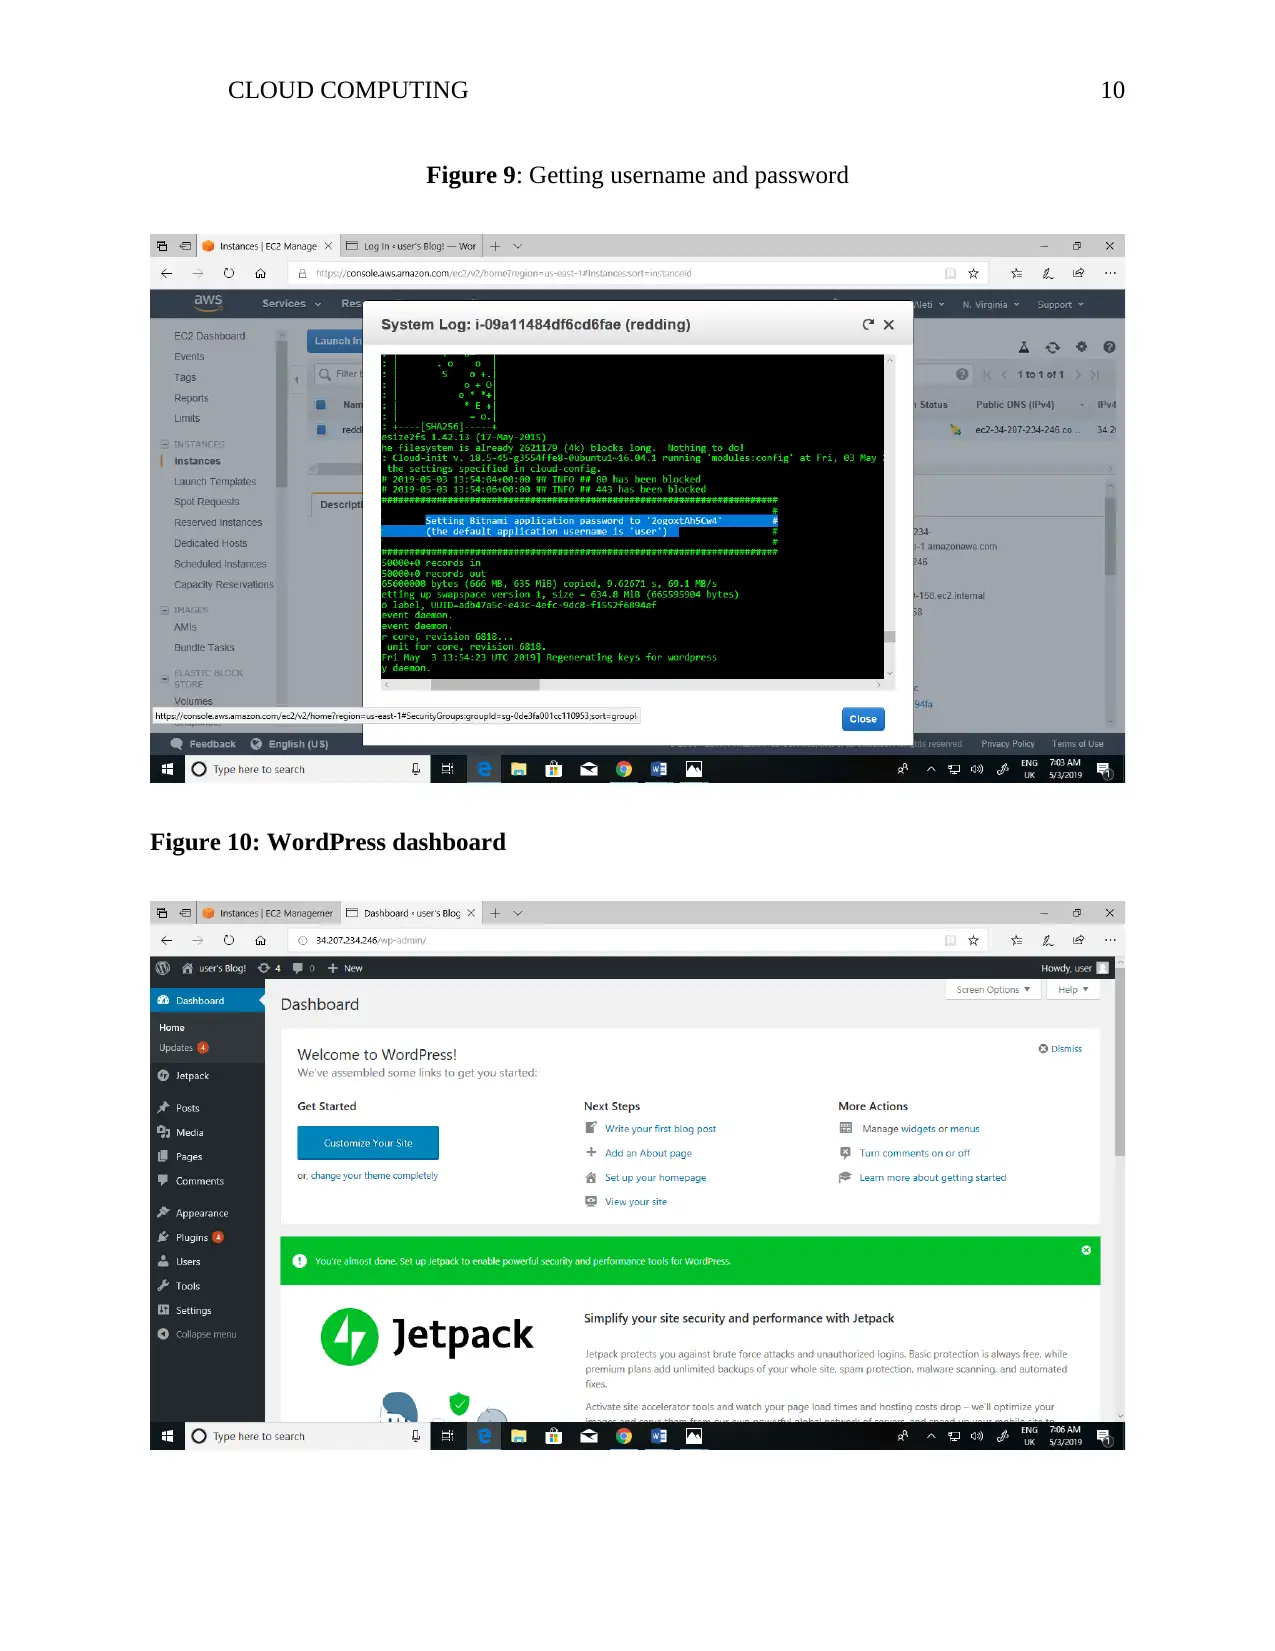
CLOUD COMPUTING9 Figure 9: Running the Wp-admin Step 2: Getting the username and password by clicking instance settings shown by figure below
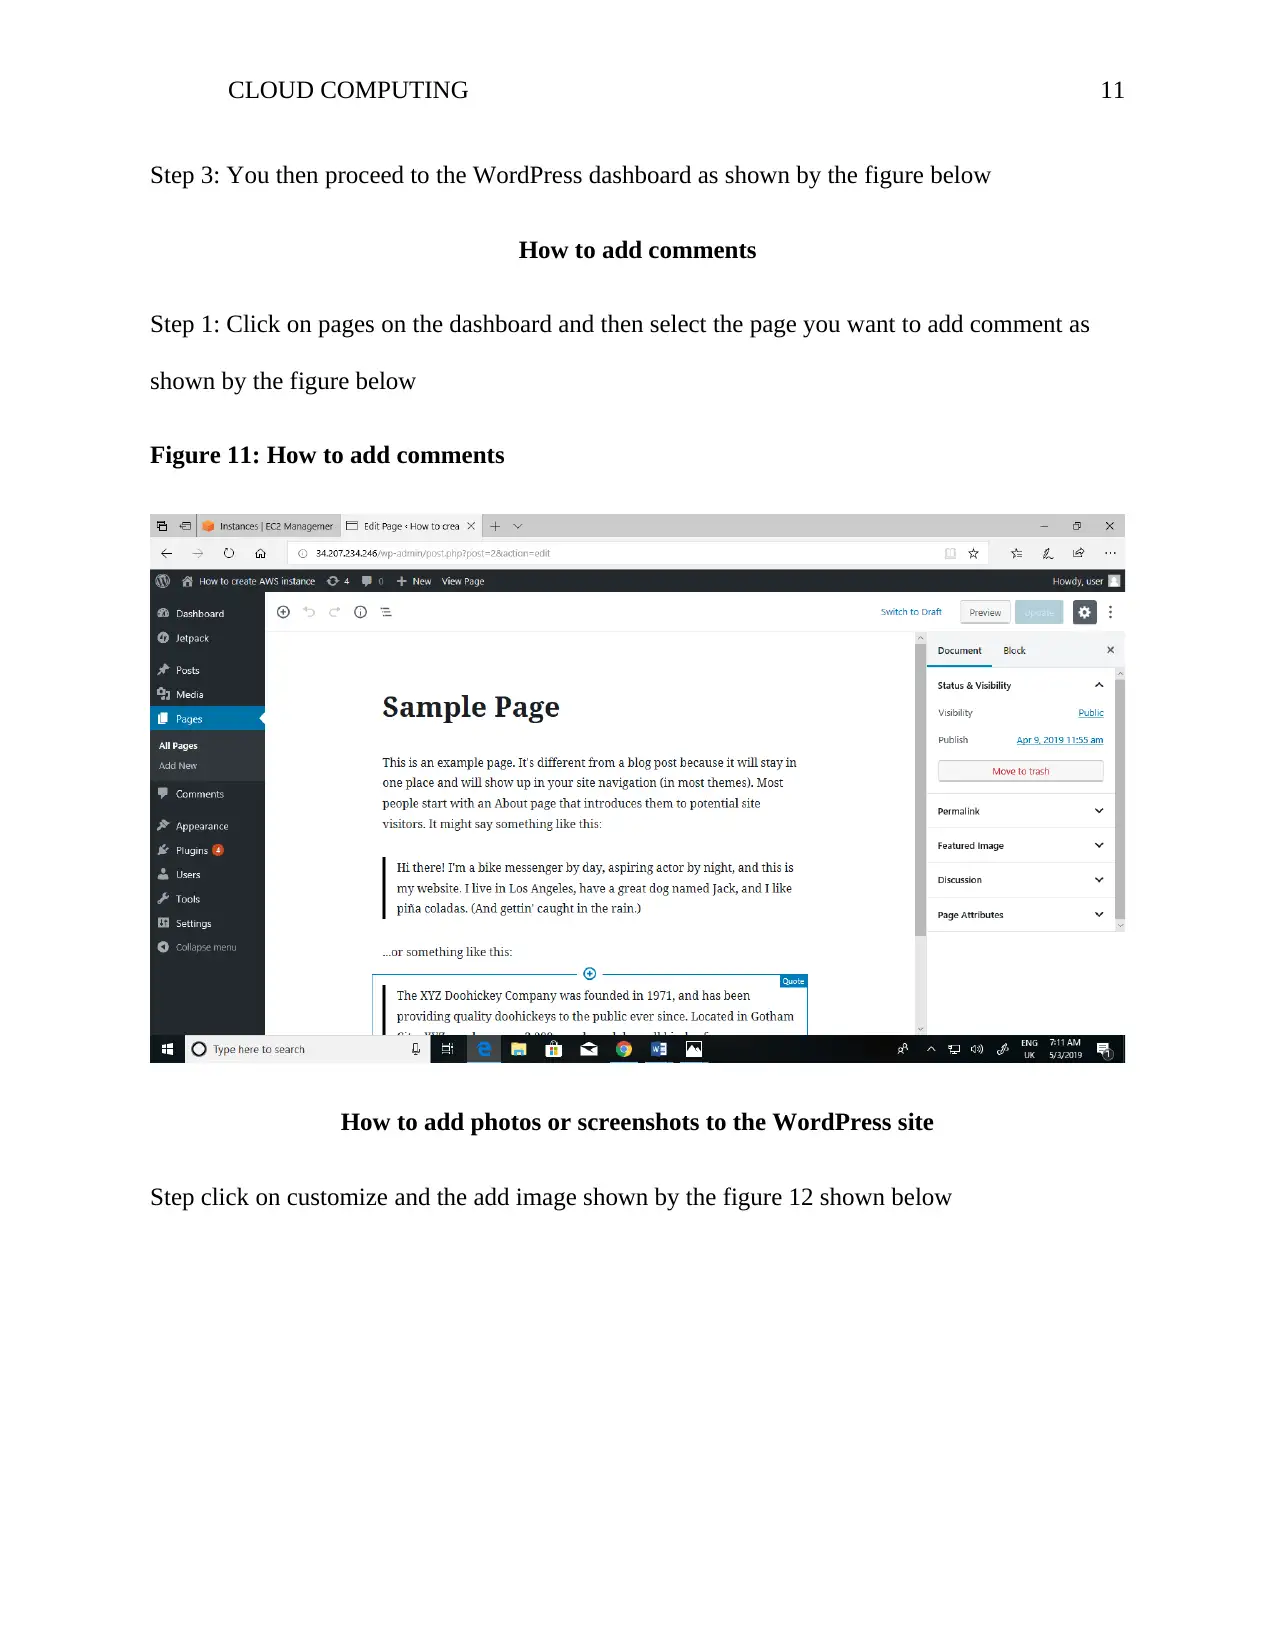
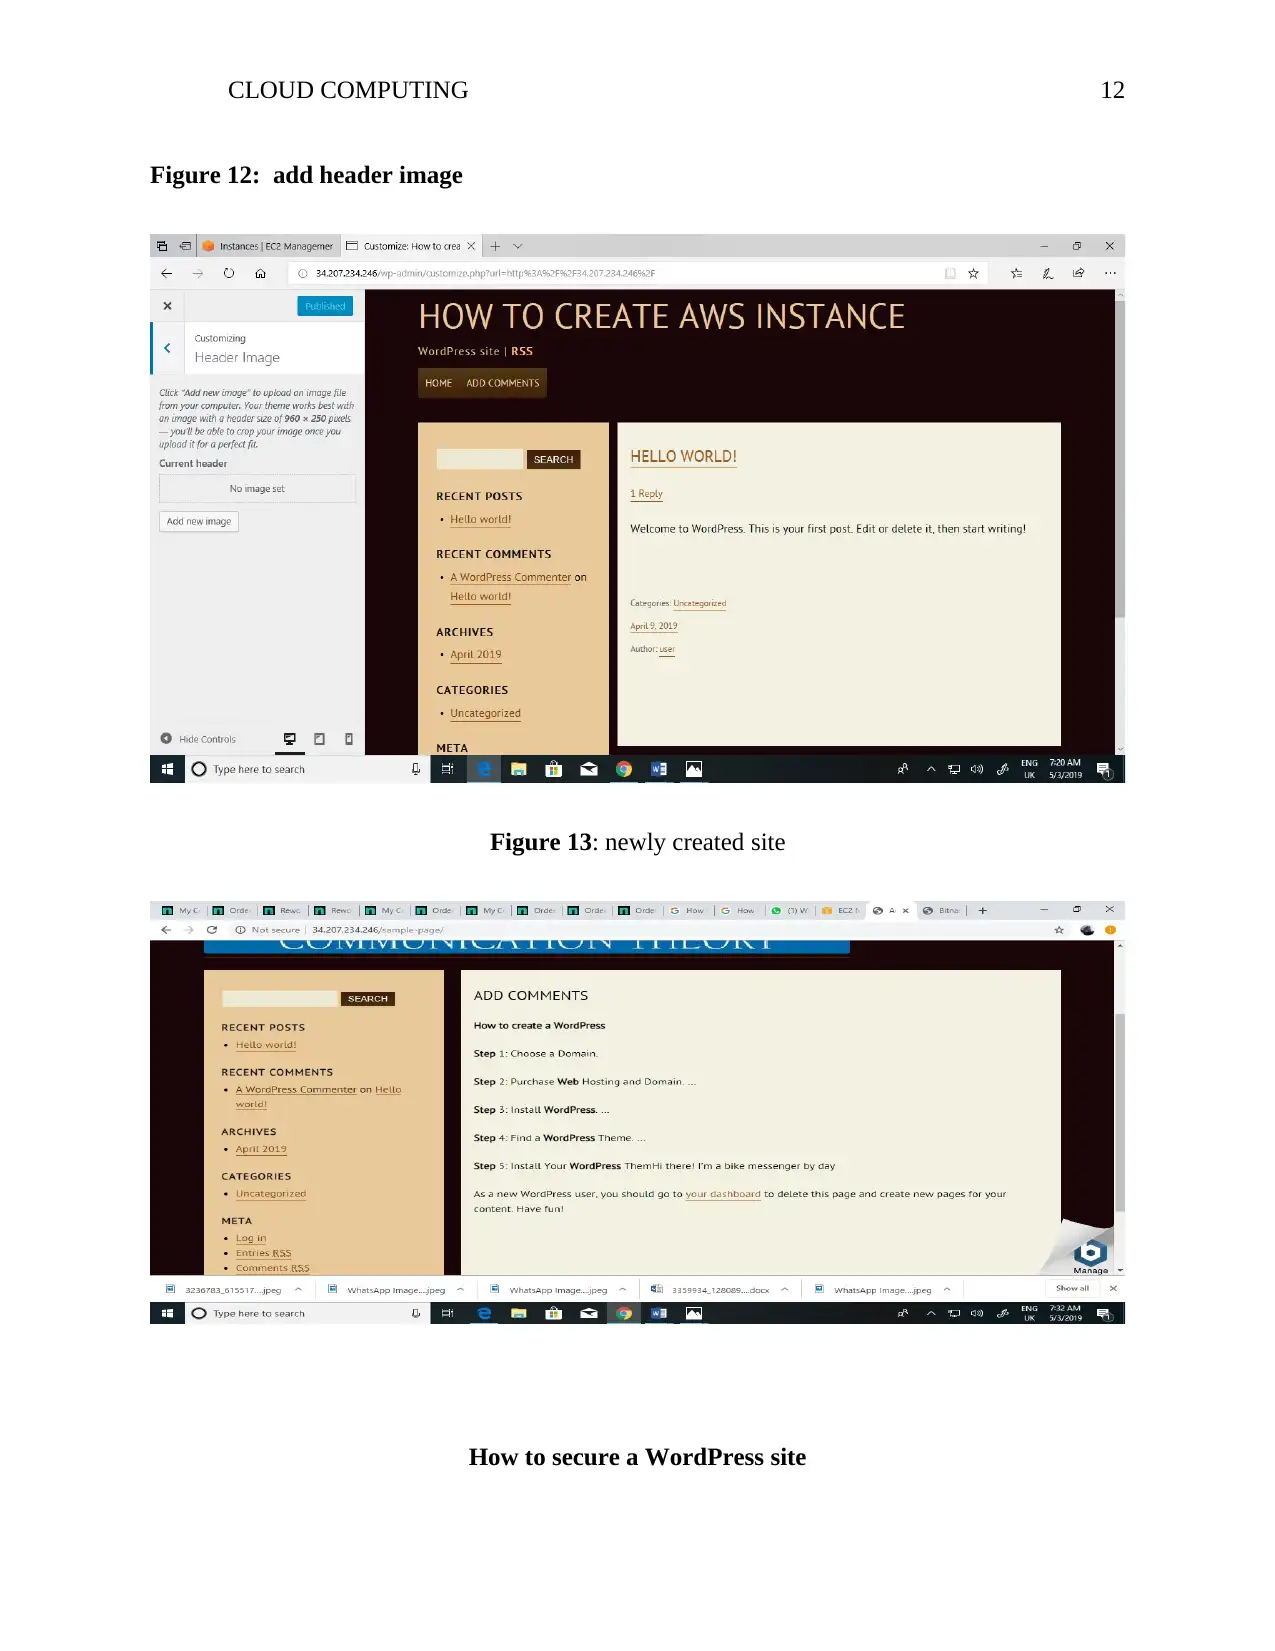
CLOUD COMPUTING11 Step 3: You then proceed to the WordPress dashboard as shown by the figure below How to add comments Step 1: Click on pages on the dashboard and then select the page you want to add comment as shown by the figure below Figure 11: How to add comments How to add photos or screenshots to the WordPress site Step click on customize and the add image shown by the figure 12 shown below
CLOUD COMPUTING12 Figure 12: add header image Figure 13: newly created site How to secure a WordPress site
CLOUD COMPUTING13 Choose a good hosting company Using nulled themes. Using very strong password Disabling the file editing option(Bhowmik, 2017) Securing WordPress users Using two-factor authentication feature Using a valid emaillogin(Rountree & Castrillo, 2016).
Secure Best Marks with AI Grader
Need help grading? Try our AI Grader for instant feedback on your assignments.
CLOUD COMPUTING14 References Bhowmik, S. (2017).cloud computing(3rd ed.). new york: springer press. Rountree, D., & Castrillo, I. (2016).The basics of cloud computing : understanding the fundamentals of cloud computing in theory and practice(2nd ed.). Chicago: Cisco Press. Vlad. (2019).Benefits of Ip 6 to clould computing.New York: Cisco Press.