Complete Guide: Setting Up & Maintaining a Standalone Computer System
VerifiedAdded on 2023/06/03
|24
|3845
|133
Practical Assignment
AI Summary
This document provides a comprehensive guide for setting up and maintaining a standalone computer system. It begins with the physical setup, emphasizing the importance of a static-free workspace and proper handling of components like RAM and hard drives. The guide details connecting peripherals such as the mouse, keyboard, and monitor, followed by hardware and software installation, including the operating system, office suite, and antivirus software. The document outlines improvements for routine maintenance, such as file organization, backup procedures, automatic scheduling and deletion of unwanted data, defragmentation, and deleting temporary files to ensure optimal system performance. This resource is invaluable for ICT technicians and anyone seeking to maintain their computer system effectively. Desklib provides past papers and solved assignments for students.

Running head: COMPUTER SYSTEM
Computer System
[Name of the Student]
[Name of the University]
[Author note]
Computer System
[Name of the Student]
[Name of the University]
[Author note]
Paraphrase This Document
Need a fresh take? Get an instant paraphrase of this document with our AI Paraphraser
2COMPUTER SYSTEM
Introduction:
Stand-alone computer or a laptop is associated with the operating by itself without any
kind of connection from the LAN or the local area network or the WAN or the wide area
network. Despite of being connected to the network it still exists as a stand-alone PC and this
would be working as long as the network connection is not mandatory for its general usage
(Batagelj & Solina, 2017). As an ICT technician it is vey important to secure the entire system
along with arranging a routine maintenance plan for the entire system. Some of the essential
security measures have been discussed below. Stored data are very important for any
organization so it is essential to regularly backup the data so as to make sure that the in case if a
data is lost then it can be revived.
Setting up of the Equipment’s:
The first step included in the process of setting up the new standalone computer system is
to become sure about the fact that there exists a clean along with an open workspace where
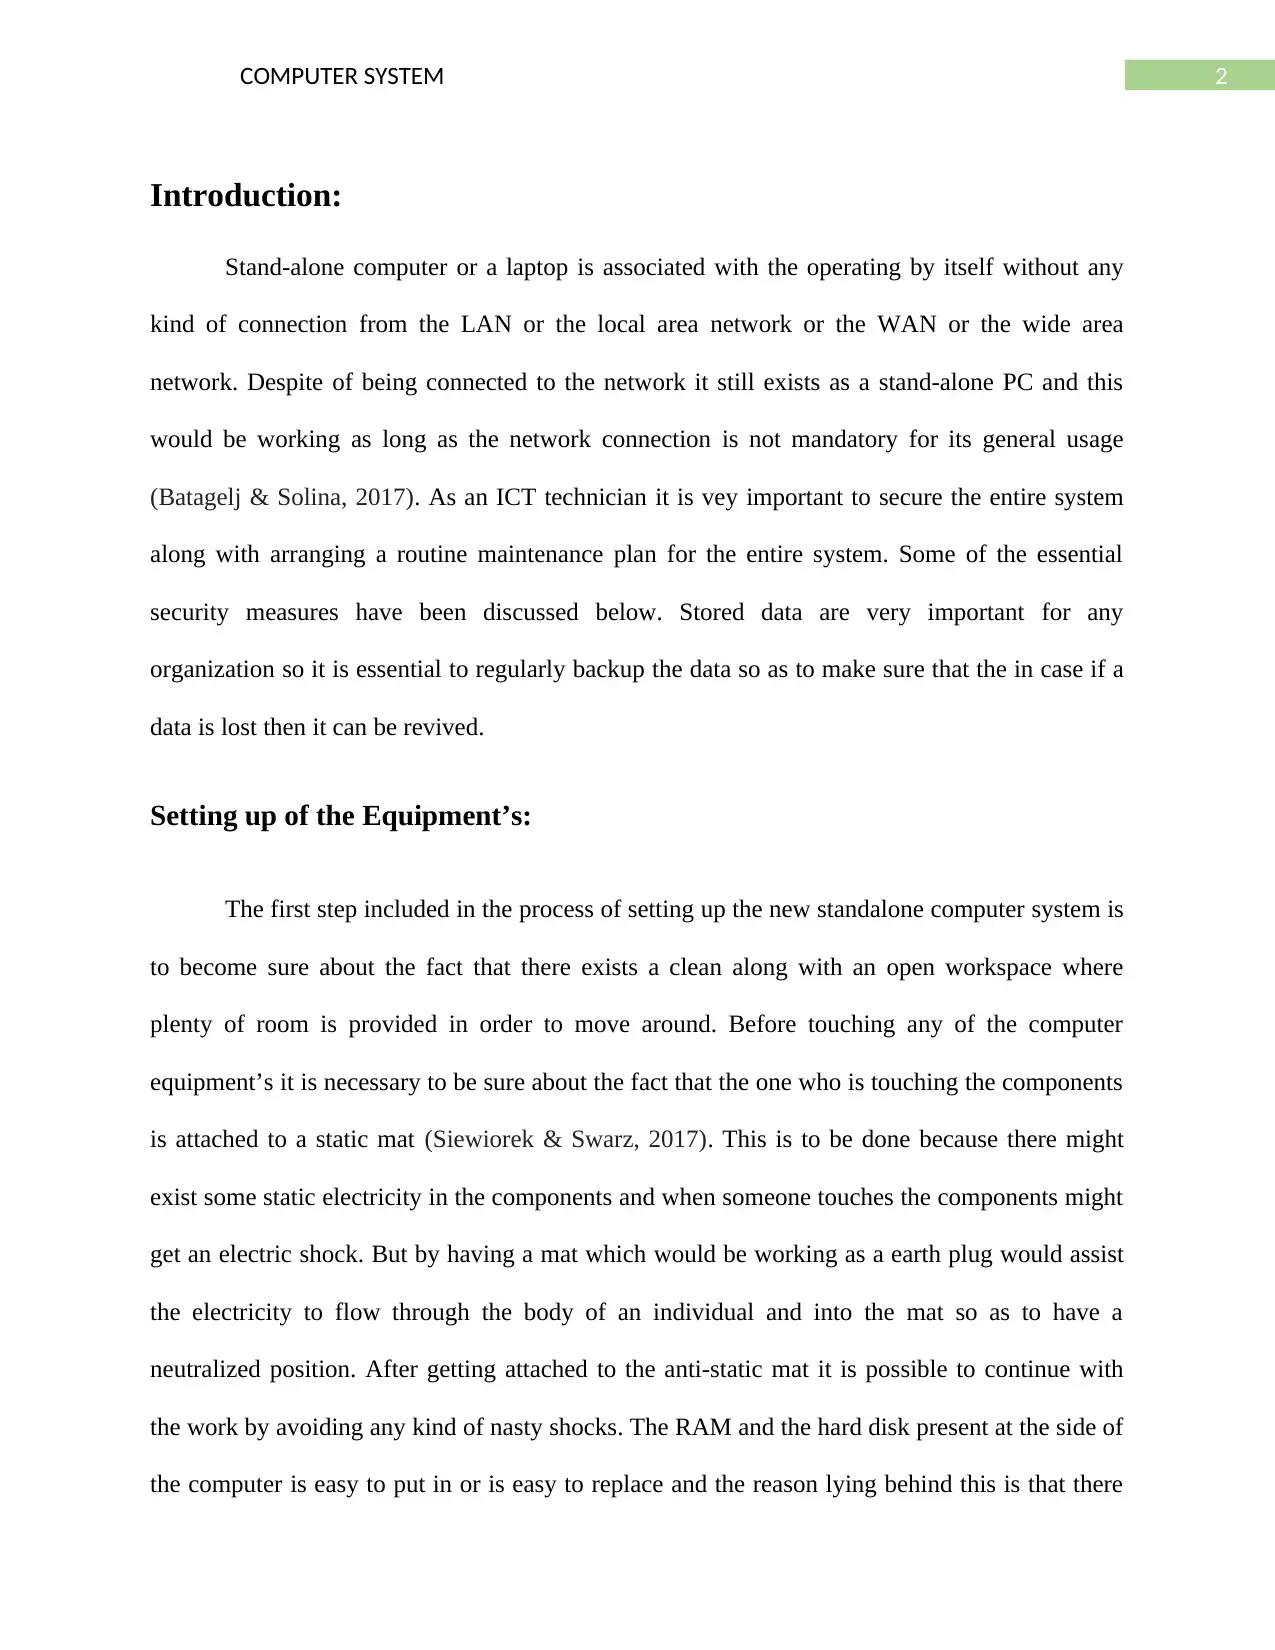
plenty of room is provided in order to move around. Before touching any of the computer
equipment’s it is necessary to be sure about the fact that the one who is touching the components
is attached to a static mat (Siewiorek & Swarz, 2017). This is to be done because there might
exist some static electricity in the components and when someone touches the components might
get an electric shock. But by having a mat which would be working as a earth plug would assist
the electricity to flow through the body of an individual and into the mat so as to have a
neutralized position. After getting attached to the anti-static mat it is possible to continue with
the work by avoiding any kind of nasty shocks. The RAM and the hard disk present at the side of
the computer is easy to put in or is easy to replace and the reason lying behind this is that there
Introduction:
Stand-alone computer or a laptop is associated with the operating by itself without any
kind of connection from the LAN or the local area network or the WAN or the wide area
network. Despite of being connected to the network it still exists as a stand-alone PC and this
would be working as long as the network connection is not mandatory for its general usage
(Batagelj & Solina, 2017). As an ICT technician it is vey important to secure the entire system
along with arranging a routine maintenance plan for the entire system. Some of the essential
security measures have been discussed below. Stored data are very important for any
organization so it is essential to regularly backup the data so as to make sure that the in case if a
data is lost then it can be revived.
Setting up of the Equipment’s:
The first step included in the process of setting up the new standalone computer system is
to become sure about the fact that there exists a clean along with an open workspace where
plenty of room is provided in order to move around. Before touching any of the computer
equipment’s it is necessary to be sure about the fact that the one who is touching the components
is attached to a static mat (Siewiorek & Swarz, 2017). This is to be done because there might
exist some static electricity in the components and when someone touches the components might
get an electric shock. But by having a mat which would be working as a earth plug would assist
the electricity to flow through the body of an individual and into the mat so as to have a
neutralized position. After getting attached to the anti-static mat it is possible to continue with
the work by avoiding any kind of nasty shocks. The RAM and the hard disk present at the side of
the computer is easy to put in or is easy to replace and the reason lying behind this is that there
3COMPUTER SYSTEM
exists big open slot which can be easily seen from outside. Besides this the wires that get connect
to the hard drive and to the mother board are distinct in nature and gets connected only to the
hard drive.
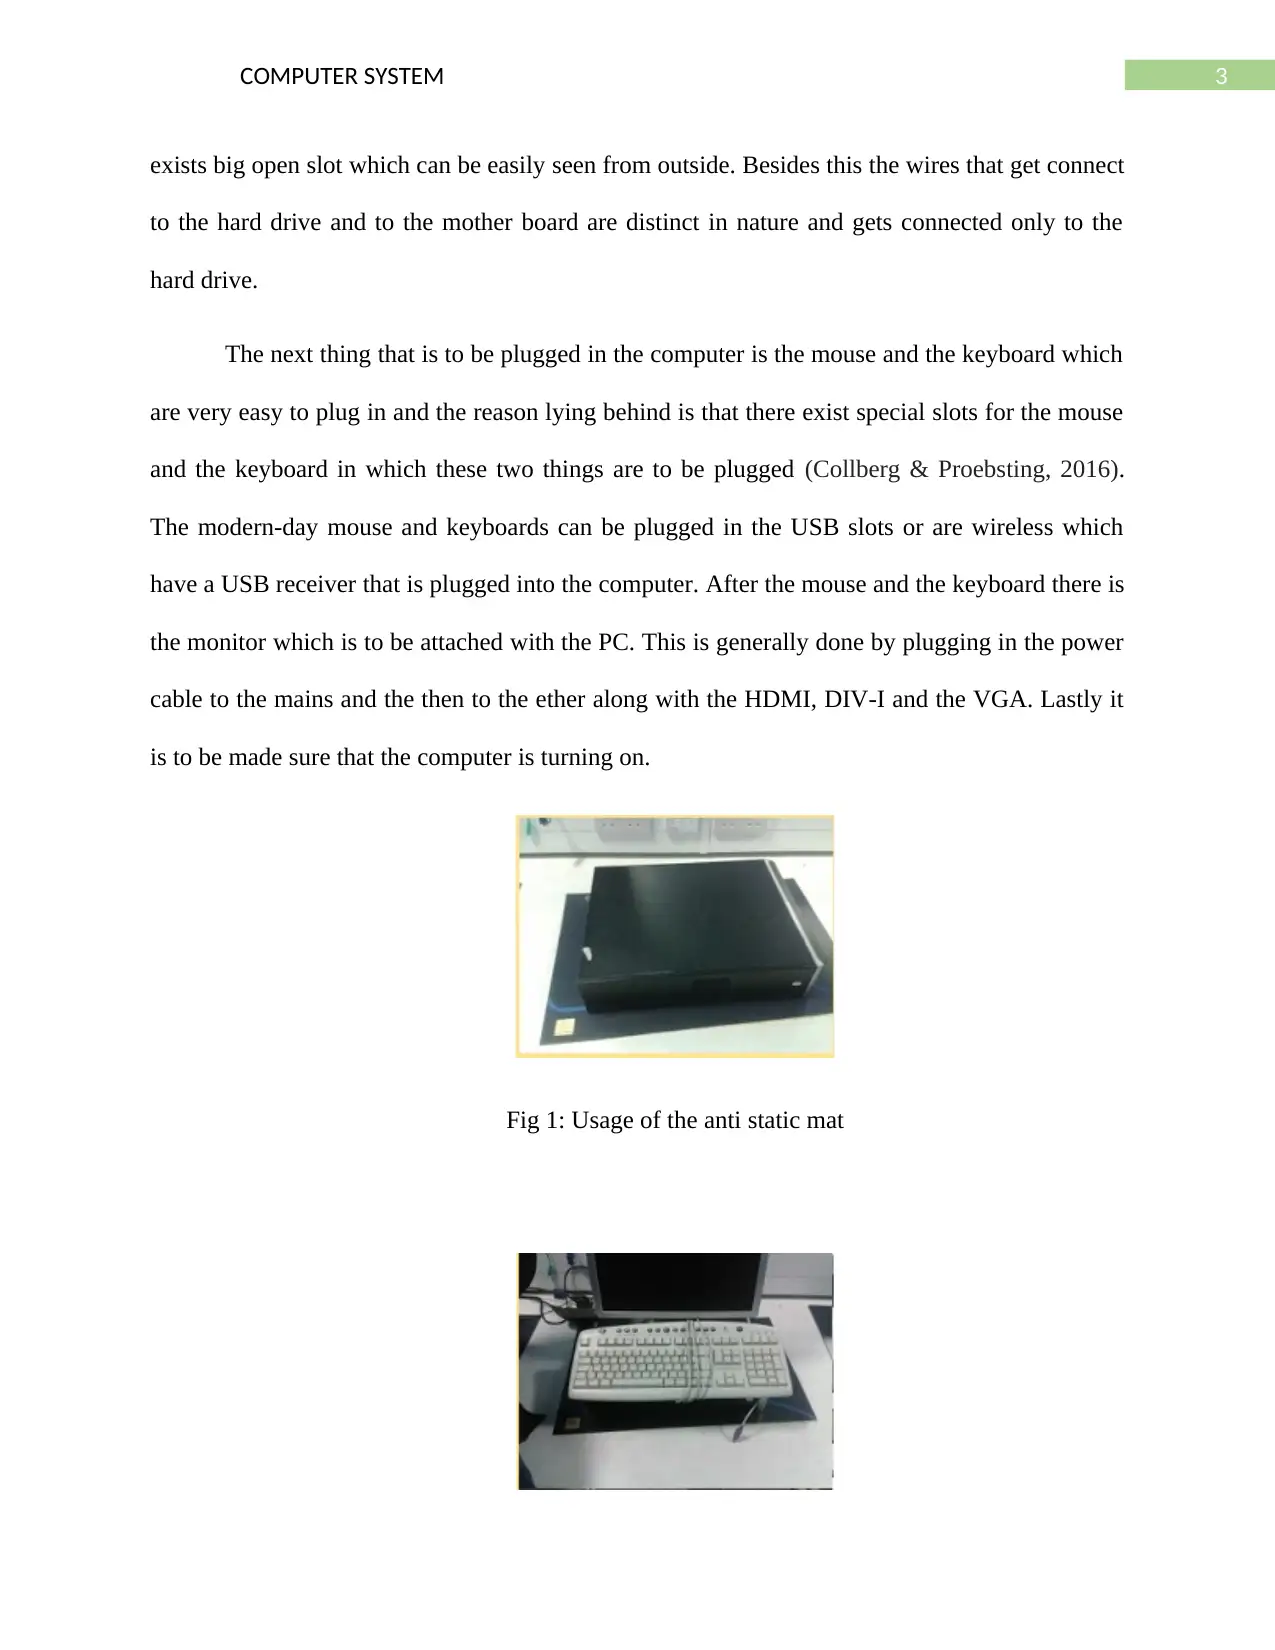
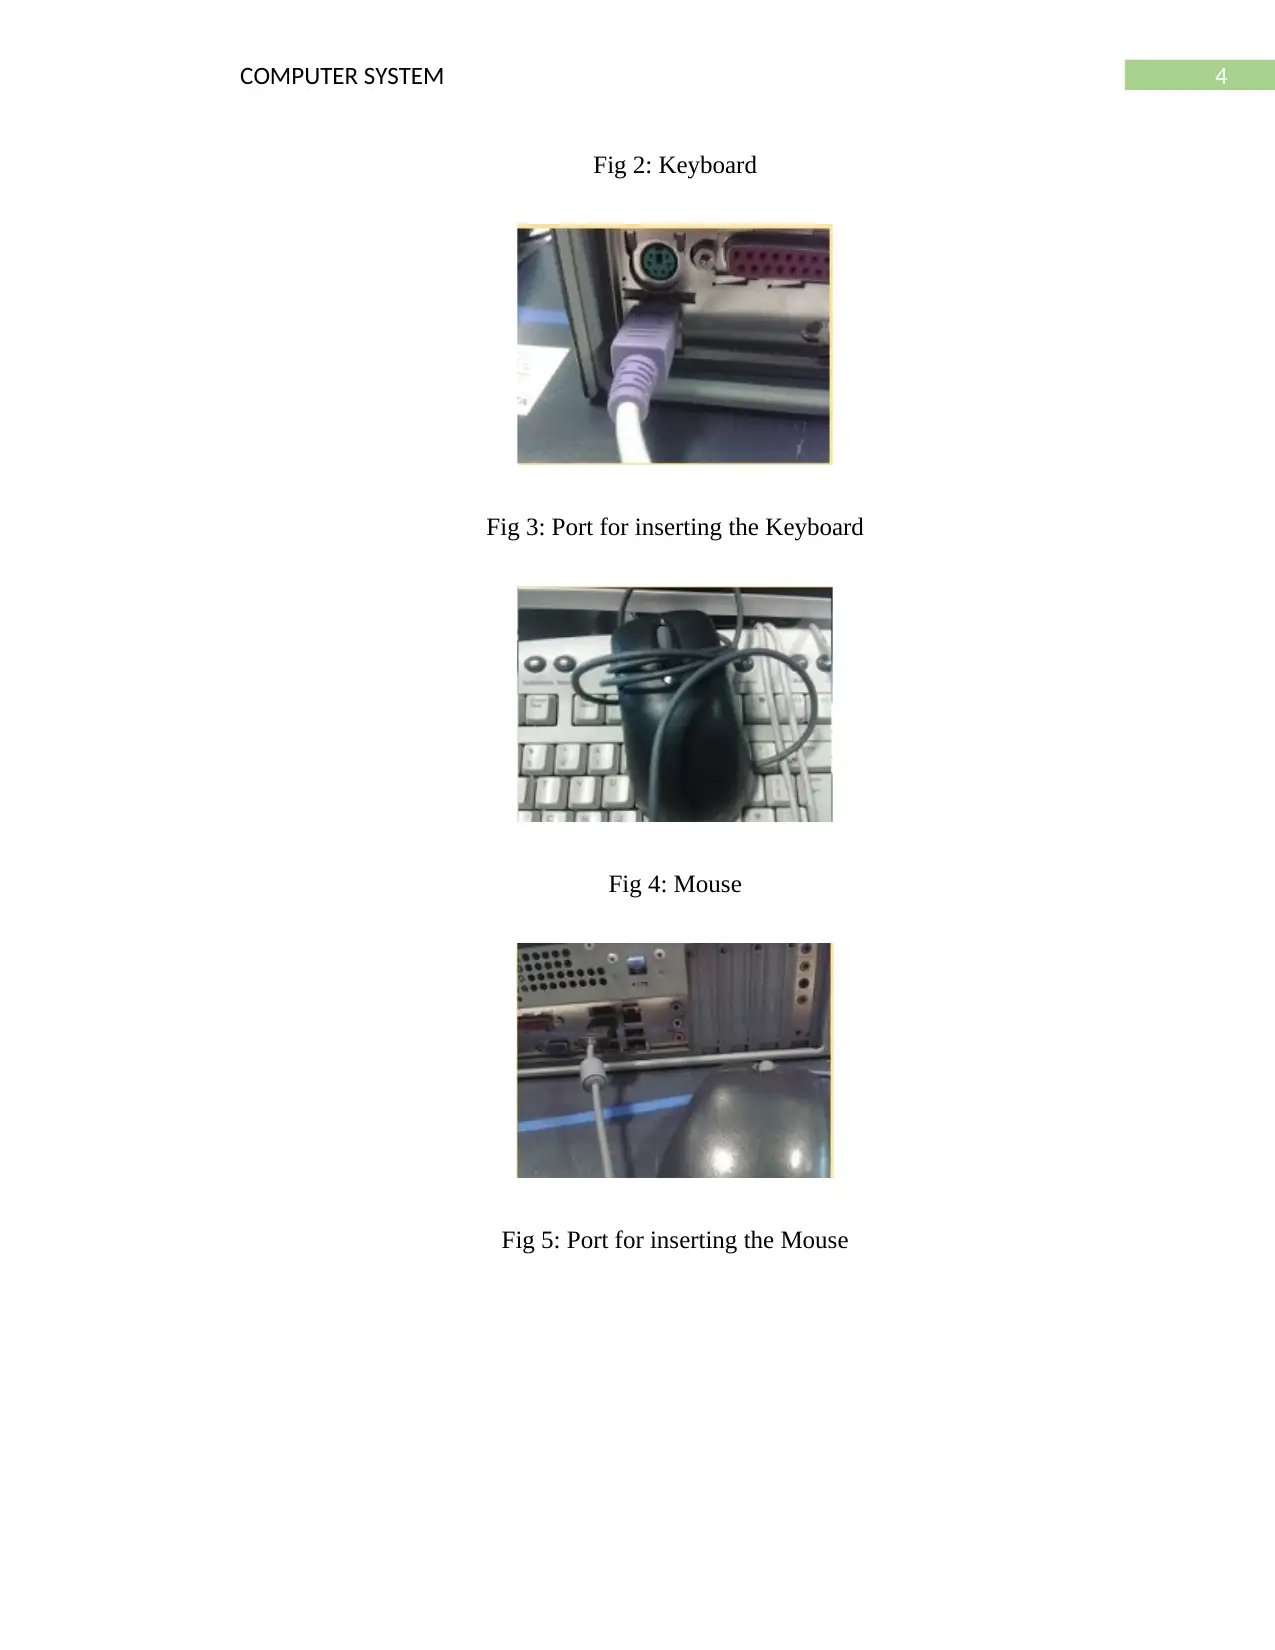
The next thing that is to be plugged in the computer is the mouse and the keyboard which
are very easy to plug in and the reason lying behind is that there exist special slots for the mouse
and the keyboard in which these two things are to be plugged (Collberg & Proebsting, 2016).
The modern-day mouse and keyboards can be plugged in the USB slots or are wireless which
have a USB receiver that is plugged into the computer. After the mouse and the keyboard there is
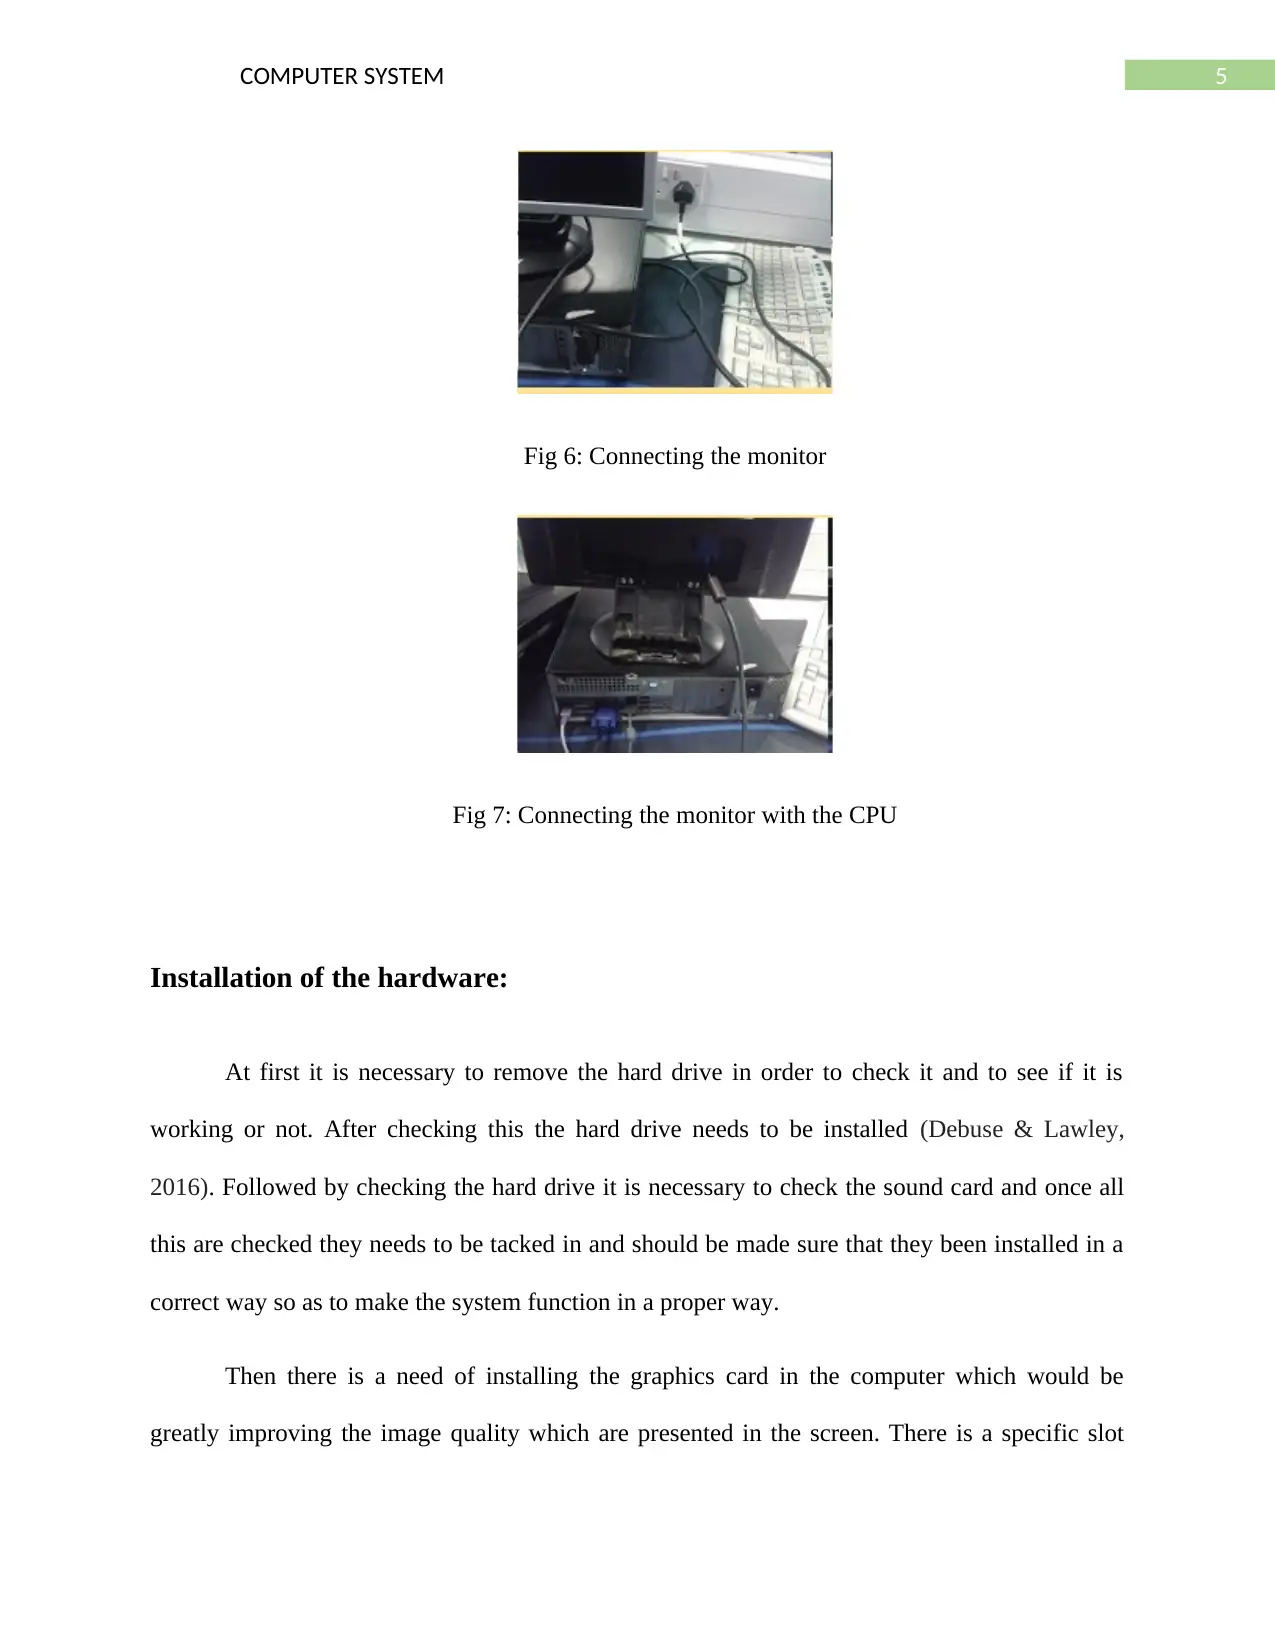
the monitor which is to be attached with the PC. This is generally done by plugging in the power
cable to the mains and the then to the ether along with the HDMI, DIV-I and the VGA. Lastly it
is to be made sure that the computer is turning on.
Fig 1: Usage of the anti static mat
exists big open slot which can be easily seen from outside. Besides this the wires that get connect
to the hard drive and to the mother board are distinct in nature and gets connected only to the
hard drive.
The next thing that is to be plugged in the computer is the mouse and the keyboard which
are very easy to plug in and the reason lying behind is that there exist special slots for the mouse
and the keyboard in which these two things are to be plugged (Collberg & Proebsting, 2016).
The modern-day mouse and keyboards can be plugged in the USB slots or are wireless which
have a USB receiver that is plugged into the computer. After the mouse and the keyboard there is
the monitor which is to be attached with the PC. This is generally done by plugging in the power
cable to the mains and the then to the ether along with the HDMI, DIV-I and the VGA. Lastly it
is to be made sure that the computer is turning on.
Fig 1: Usage of the anti static mat
⊘ This is a preview!⊘
Do you want full access?
Subscribe today to unlock all pages.
Trusted by 1+ million students worldwide
4COMPUTER SYSTEM
Fig 2: Keyboard
Fig 3: Port for inserting the Keyboard
Fig 4: Mouse
Fig 5: Port for inserting the Mouse
Fig 2: Keyboard
Fig 3: Port for inserting the Keyboard
Fig 4: Mouse
Fig 5: Port for inserting the Mouse
Paraphrase This Document
Need a fresh take? Get an instant paraphrase of this document with our AI Paraphraser
5COMPUTER SYSTEM
Fig 6: Connecting the monitor
Fig 7: Connecting the monitor with the CPU
Installation of the hardware:
At first it is necessary to remove the hard drive in order to check it and to see if it is
working or not. After checking this the hard drive needs to be installed (Debuse & Lawley,
2016). Followed by checking the hard drive it is necessary to check the sound card and once all
this are checked they needs to be tacked in and should be made sure that they been installed in a
correct way so as to make the system function in a proper way.
Then there is a need of installing the graphics card in the computer which would be
greatly improving the image quality which are presented in the screen. There is a specific slot

6COMPUTER SYSTEM
where the graphic card is to be fitted. Lastly in the final stage it is to be made sure that all the
components are present in the computer and the are connected with the correct wire.
where the graphic card is to be fitted. Lastly in the final stage it is to be made sure that all the
components are present in the computer and the are connected with the correct wire.
⊘ This is a preview!⊘
Do you want full access?
Subscribe today to unlock all pages.
Trusted by 1+ million students worldwide
7COMPUTER SYSTEM
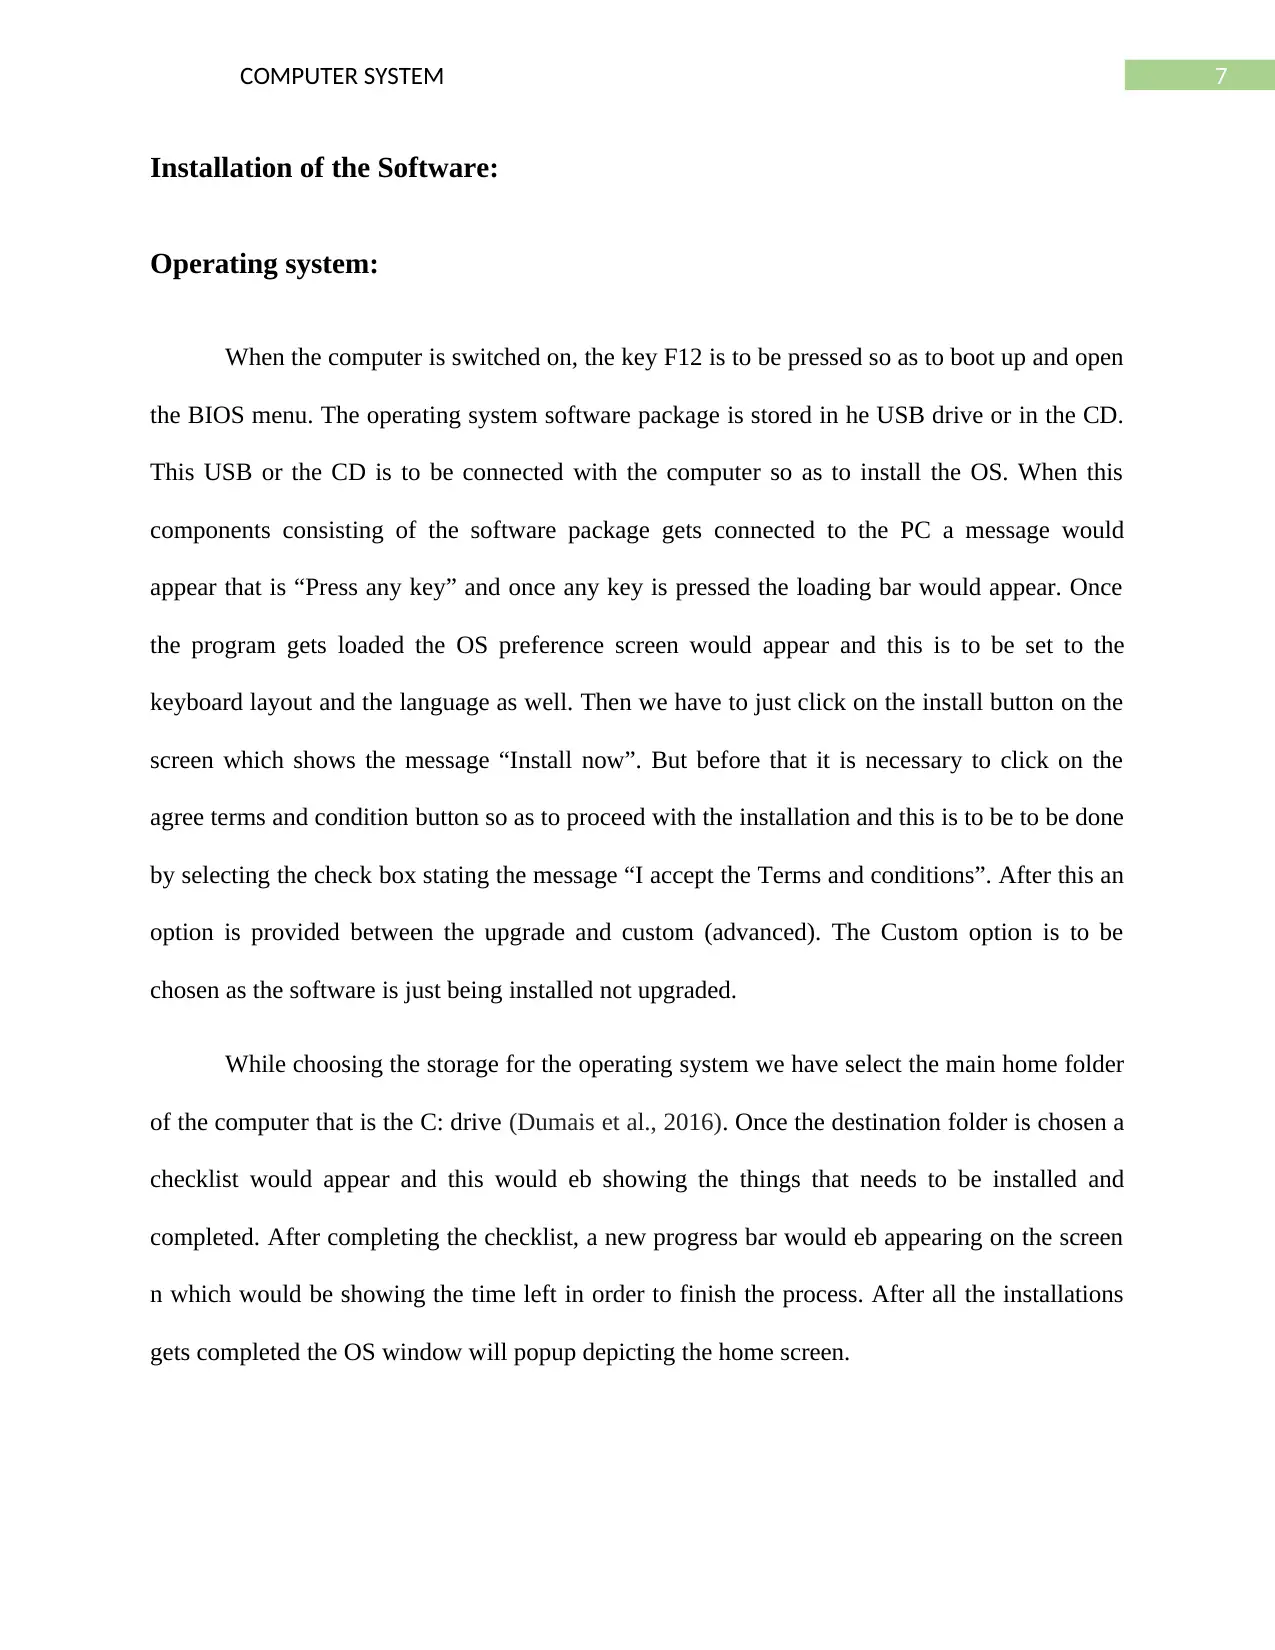
Installation of the Software:
Operating system:
When the computer is switched on, the key F12 is to be pressed so as to boot up and open
the BIOS menu. The operating system software package is stored in he USB drive or in the CD.
This USB or the CD is to be connected with the computer so as to install the OS. When this
components consisting of the software package gets connected to the PC a message would
appear that is “Press any key” and once any key is pressed the loading bar would appear. Once
the program gets loaded the OS preference screen would appear and this is to be set to the
keyboard layout and the language as well. Then we have to just click on the install button on the
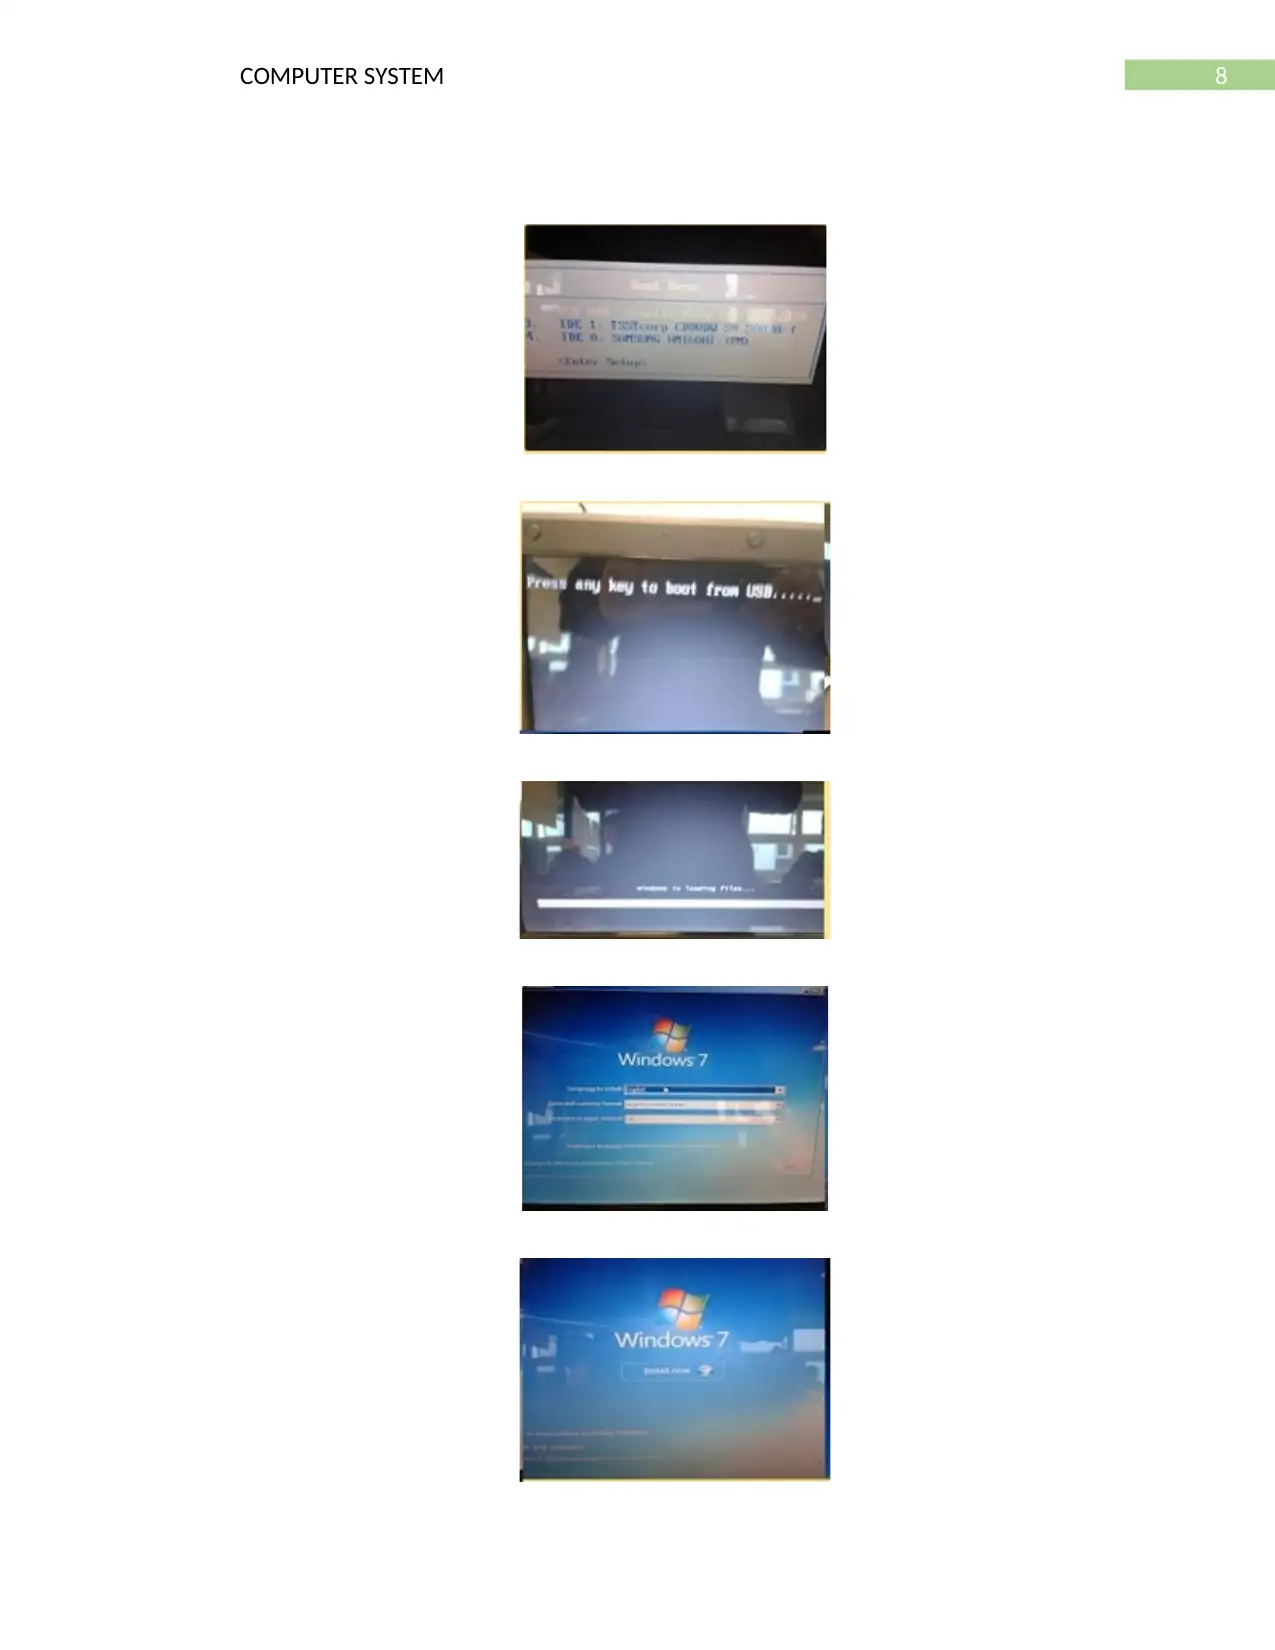
screen which shows the message “Install now”. But before that it is necessary to click on the
agree terms and condition button so as to proceed with the installation and this is to be to be done
by selecting the check box stating the message “I accept the Terms and conditions”. After this an
option is provided between the upgrade and custom (advanced). The Custom option is to be
chosen as the software is just being installed not upgraded.
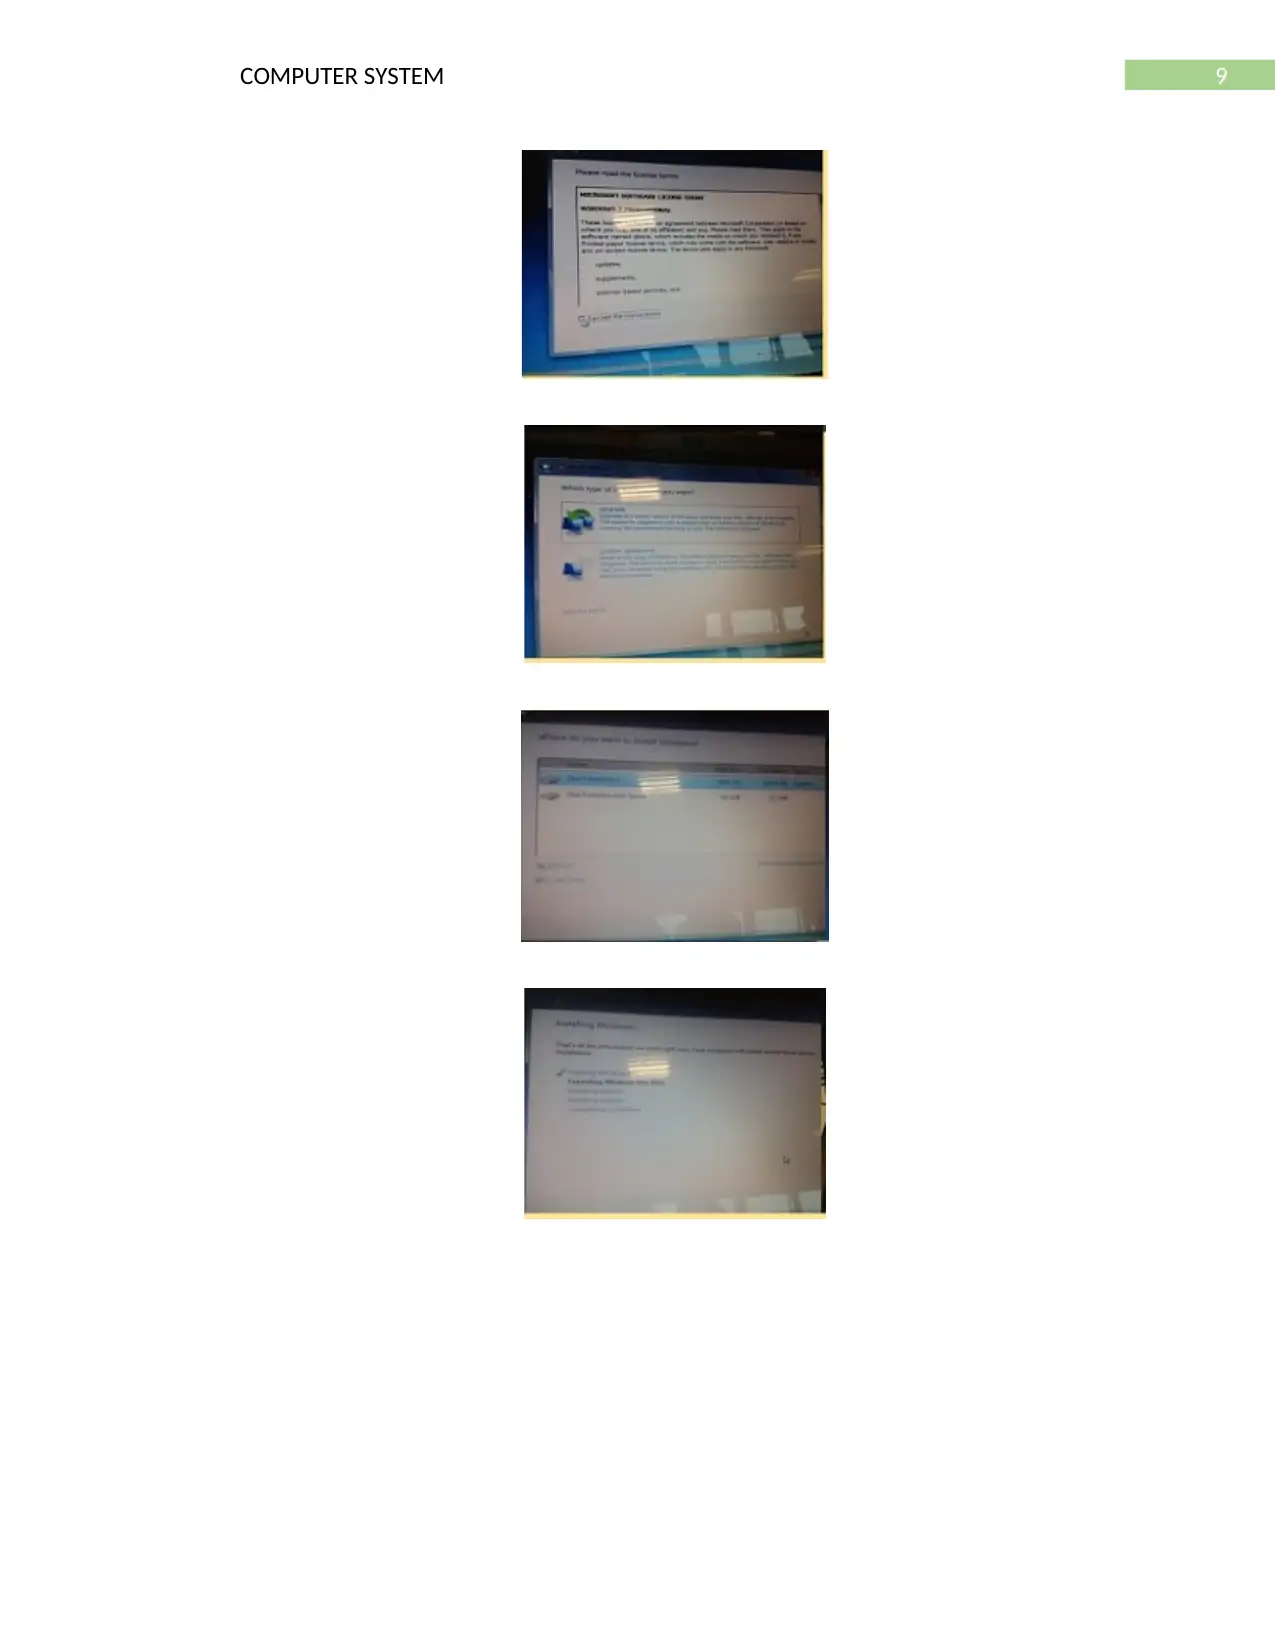
While choosing the storage for the operating system we have select the main home folder
of the computer that is the C: drive (Dumais et al., 2016). Once the destination folder is chosen a
checklist would appear and this would eb showing the things that needs to be installed and
completed. After completing the checklist, a new progress bar would eb appearing on the screen
n which would be showing the time left in order to finish the process. After all the installations
gets completed the OS window will popup depicting the home screen.
Installation of the Software:
Operating system:
When the computer is switched on, the key F12 is to be pressed so as to boot up and open
the BIOS menu. The operating system software package is stored in he USB drive or in the CD.
This USB or the CD is to be connected with the computer so as to install the OS. When this
components consisting of the software package gets connected to the PC a message would
appear that is “Press any key” and once any key is pressed the loading bar would appear. Once
the program gets loaded the OS preference screen would appear and this is to be set to the
keyboard layout and the language as well. Then we have to just click on the install button on the
screen which shows the message “Install now”. But before that it is necessary to click on the
agree terms and condition button so as to proceed with the installation and this is to be to be done
by selecting the check box stating the message “I accept the Terms and conditions”. After this an
option is provided between the upgrade and custom (advanced). The Custom option is to be
chosen as the software is just being installed not upgraded.
While choosing the storage for the operating system we have select the main home folder
of the computer that is the C: drive (Dumais et al., 2016). Once the destination folder is chosen a
checklist would appear and this would eb showing the things that needs to be installed and
completed. After completing the checklist, a new progress bar would eb appearing on the screen
n which would be showing the time left in order to finish the process. After all the installations
gets completed the OS window will popup depicting the home screen.
Paraphrase This Document
Need a fresh take? Get an instant paraphrase of this document with our AI Paraphraser
8COMPUTER SYSTEM
9COMPUTER SYSTEM
⊘ This is a preview!⊘
Do you want full access?
Subscribe today to unlock all pages.
Trusted by 1+ million students worldwide
10COMPUTER SYSTEM
Installation of the office:
Firstly, we have to click on the install icon and once the install icon is pressed a dialog
box would appear which would ask for the product key which is provided in the box in which the
disk is kept. After entering the correct product key, we have to click on the install now button so
as to start the installation process. After installation we have to click on the “Go to Office
Online” so as to start the program. However, before it is to eb made sure that the computer is
connected to the internet.
Installation of the Antivirus:
Paraphrase This Document
Need a fresh take? Get an instant paraphrase of this document with our AI Paraphraser
11COMPUTER SYSTEM
Firstly, it is to be made sure that the installer is opened and when it is opened it would eb
depicting a message box which would be saying this would be making some changes to your
computer then we have to click on the yes button so as to allow the process as it needs
permission for starting the installation of the antivirus (Van Ark et al., 2016). After this, a
progress bar would appear showing the progress of the installation process. Then the language
preference needs to be set and after this a dialog box would appear asking for agreeing with the
terms and condition and there we have to click on the check box so as to proceed with the
installation. Followed by this we have to click on the full protection button so as to activate the
full usage of the new antivirus software that is installed in the computer. In case of express
installation and custom installation we have to choose the express installation as this is done
automatically without any kind of effort and also does the setting automatically as well. After
this the anti-virus would be updated to the latest version from the internet. Once the update is
completed a fully operational antivirus system would be obtained.
Possible improvements:
Routine maintenance in stand-alone computer i9ns very important and this can be done
by the following ways:
Organisation and Naming of Files:
It is necessary to make sure that navigating to the virtual space is easy along with making
sure that the file and folders are provided with names which are suitable and are extremely
helpful while working with the computers.
12COMPUTER SYSTEM
Back-up Procedures:
Backing up of the files in some other disks or in some virtual space like the clouds is very
helpful in cases when the data gets lot. Physical storage space might be consisting of external
Hard Drive, USB Flash Drive or other forms of media. Loss of data might be occurring due to
numerous reasons and some of eth most common reasons due to which data is lost includes the
following: something as simple as a coffee spill, virus, Natural disasters and Malware, and many
more.
Automatic Scheduling and Deletion of unwanted data:
Automatic scheduling is possible which would be helping in deleting of files within a
specified folder and this is to be set up by the user (Collberg, Proebsting & Warren, 2015). This
type of automatic scheduling of the deleting process is done for the temporary folders and this is
generally done so as to make sure that all this type of folders is not having masses of data which
are unnecessary. Deleting of the unwanted data is mainly aimed towards the recycle bin which
means once the file is deleted it means that the file is not probably needed for any further usage.
In order to delete any file permanently, firstly the file needs to be deleted from the folder and
then from the recycle bin. The recycle bin is present in the desktop and would be depicted as
such that it has files inside it and would appear to be empty in cases when there are no files.
Archiving, Defragmentation:
Defragmentation is the process which is generally considered to be a good process of
keeping the computer performing at a good speed. Which means that defragmentation helps in
⊘ This is a preview!⊘
Do you want full access?
Subscribe today to unlock all pages.
Trusted by 1+ million students worldwide
1 out of 24


Your All-in-One AI-Powered Toolkit for Academic Success.
+13062052269
info@desklib.com
Available 24*7 on WhatsApp / Email
![[object Object]](/_next/static/media/star-bottom.7253800d.svg)
Unlock your academic potential
Copyright © 2020–2025 A2Z Services. All Rights Reserved. Developed and managed by ZUCOL.