ITC333: Configuring a Web Server with SSL and Network Analysis
VerifiedAdded on 2020/05/11
|13
|1404
|67
Practical Assignment
AI Summary
This learning diary documents the process of setting up a web server on a Linux environment using Nginx. The assignment begins with configuring a basic web server, followed by implementing SSL to enable secure HTTPS communication. The solution includes detailed steps, commands, and screenshots for installing and configuring Nginx, changing ownership of the root directory, and creating custom HTML content. Network traffic analysis is performed using Wireshark to examine the communication between a web browser and the server, both before and after SSL implementation. The second part of the assignment focuses on creating a self-signed SSL certificate, configuring Nginx to use it, and analyzing the resulting network traffic. The solution also addresses troubleshooting, including decrypting the SSL key to resolve a server startup issue. The assignment showcases practical server administration skills and an understanding of web server security.

ITC333 Server Maintenance and Administration - Assessment 3
[Name]
[Institution]
[Name]
[Institution]
Paraphrase This Document
Need a fresh take? Get an instant paraphrase of this document with our AI Paraphraser
Introduction
This learning diary presents procedures, screen shots, commands and configurations for setting
up a web server on a Linux environment. The first task involves configuring a web server
without security implementations. The second task extends the first configuration to include SSL
to allow the web server to communicate in a secure manner using HTTPS service. The third and
final task involves capturing of network packets and analyzing the communication between a
web browser and the web server in both the secure HTTPS and HTTP connections.
Kali Linux was used in setting up a nginx web server.
Task 1: Configuring a web Server
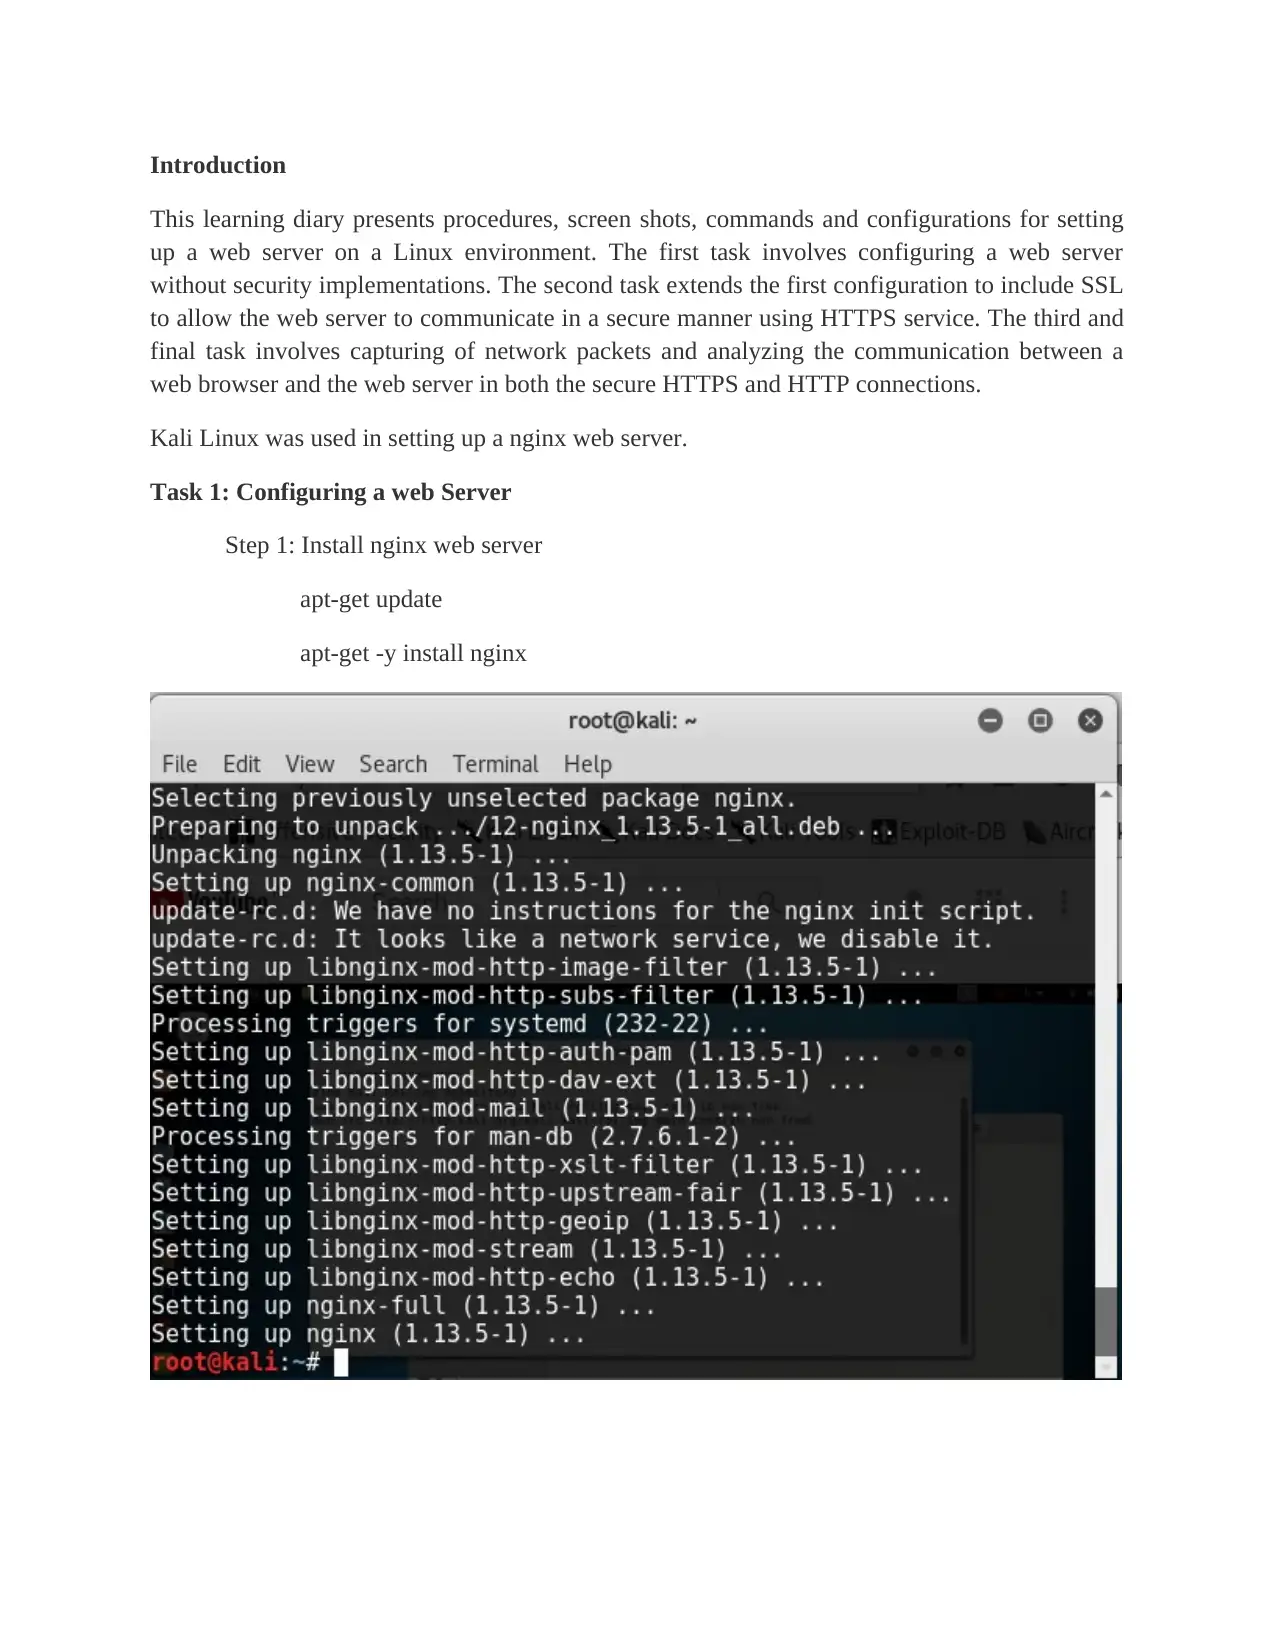
Step 1: Install nginx web server
apt-get update
apt-get -y install nginx
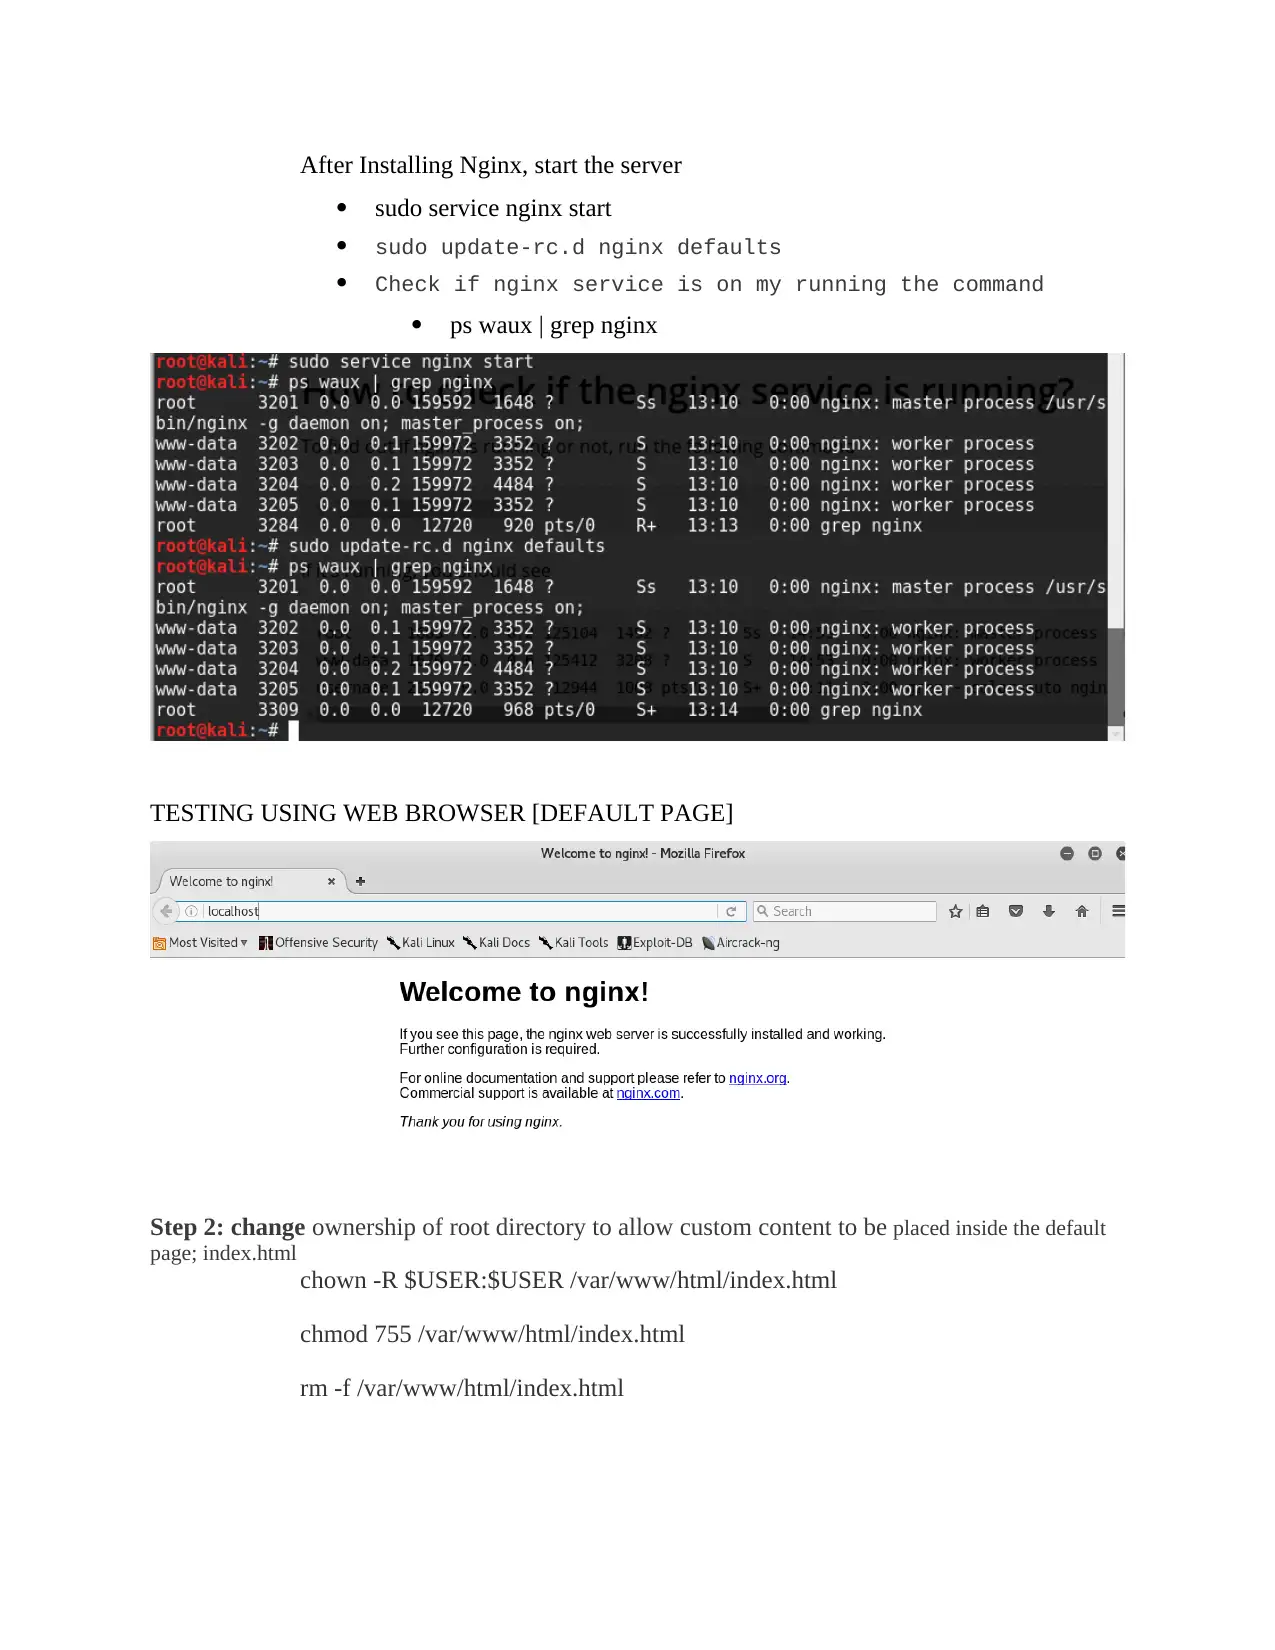
After Installing Nginx, start the server
sudo service nginx start
sudo update-rc.d nginx defaults
Check if nginx service is on my running the command
ps waux | grep nginx
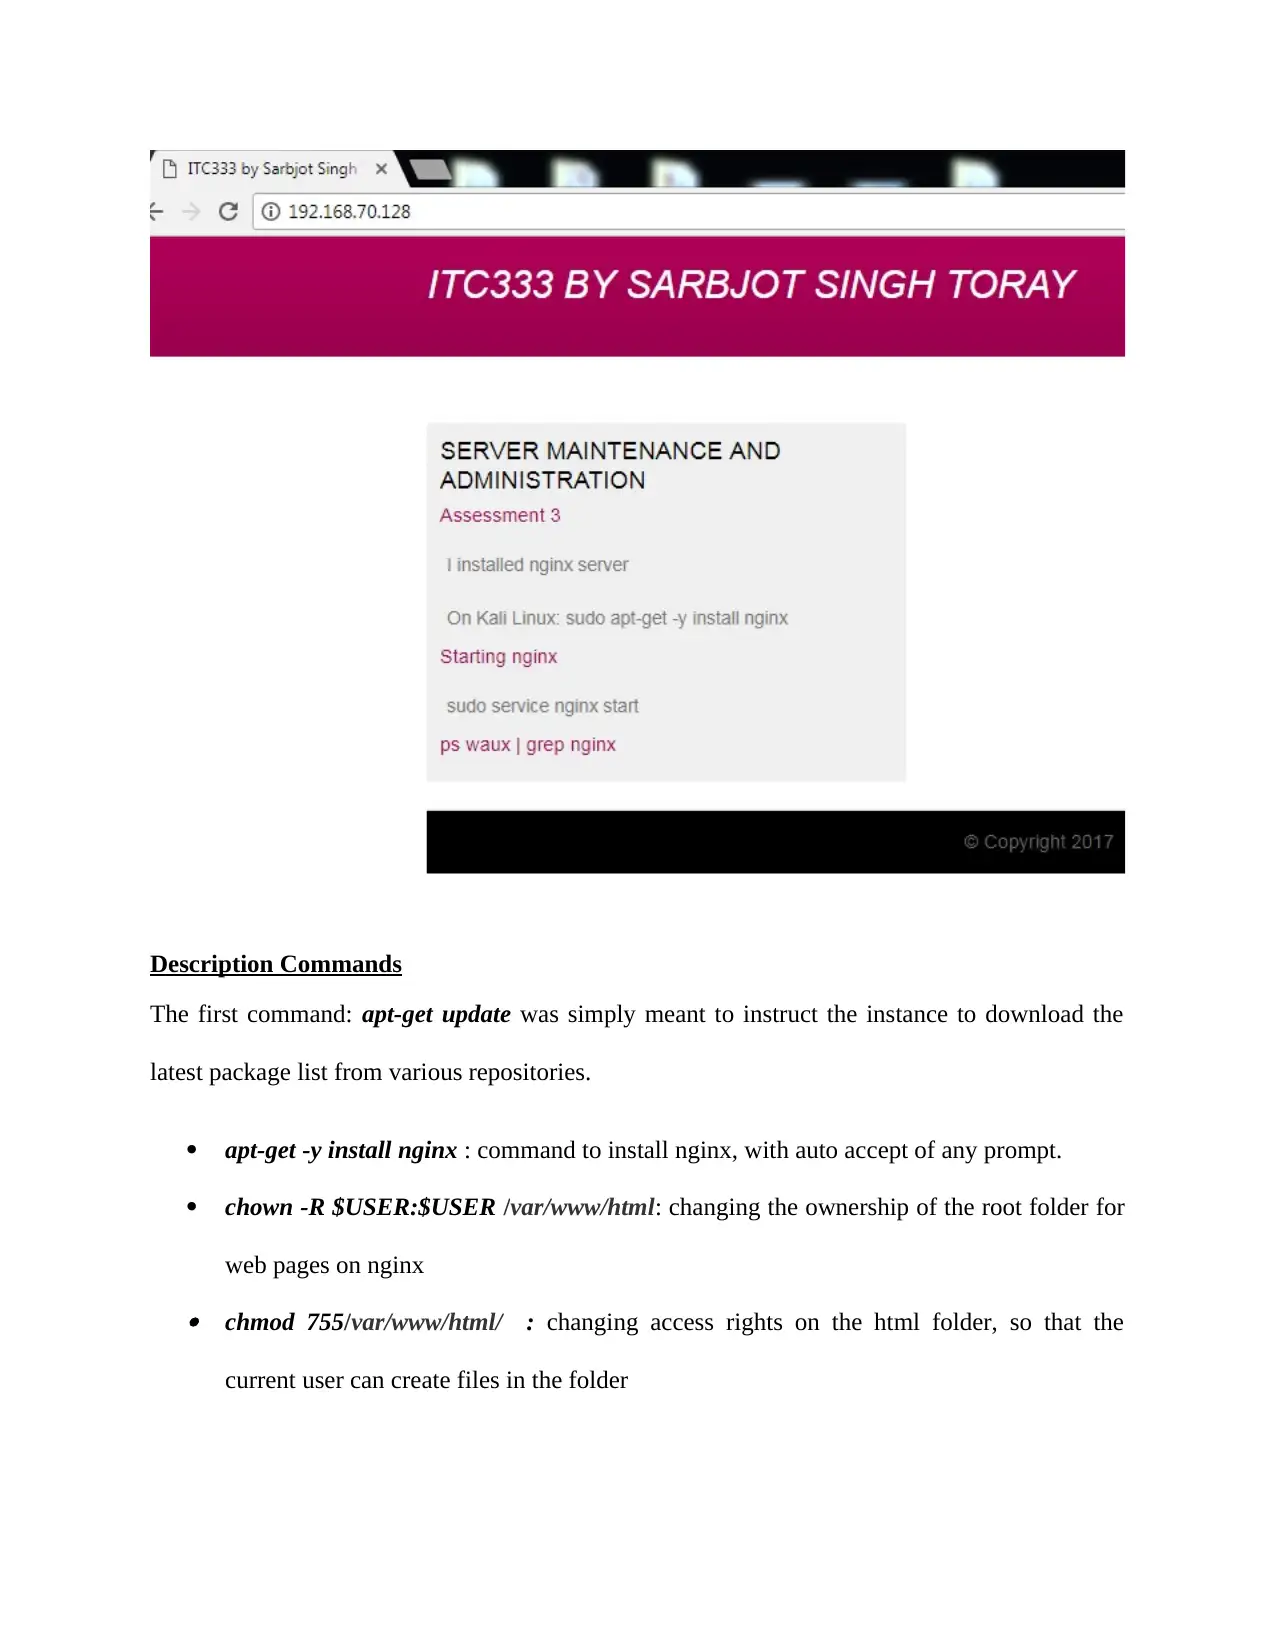
TESTING USING WEB BROWSER [DEFAULT PAGE]
Step 2: change ownership of root directory to allow custom content to be placed inside the default
page; index.html
chown -R $USER:$USER /var/www/html/index.html
chmod 755 /var/www/html/index.html
rm -f /var/www/html/index.html
⊘ This is a preview!⊘
Do you want full access?
Subscribe today to unlock all pages.

Trusted by 1+ million students worldwide
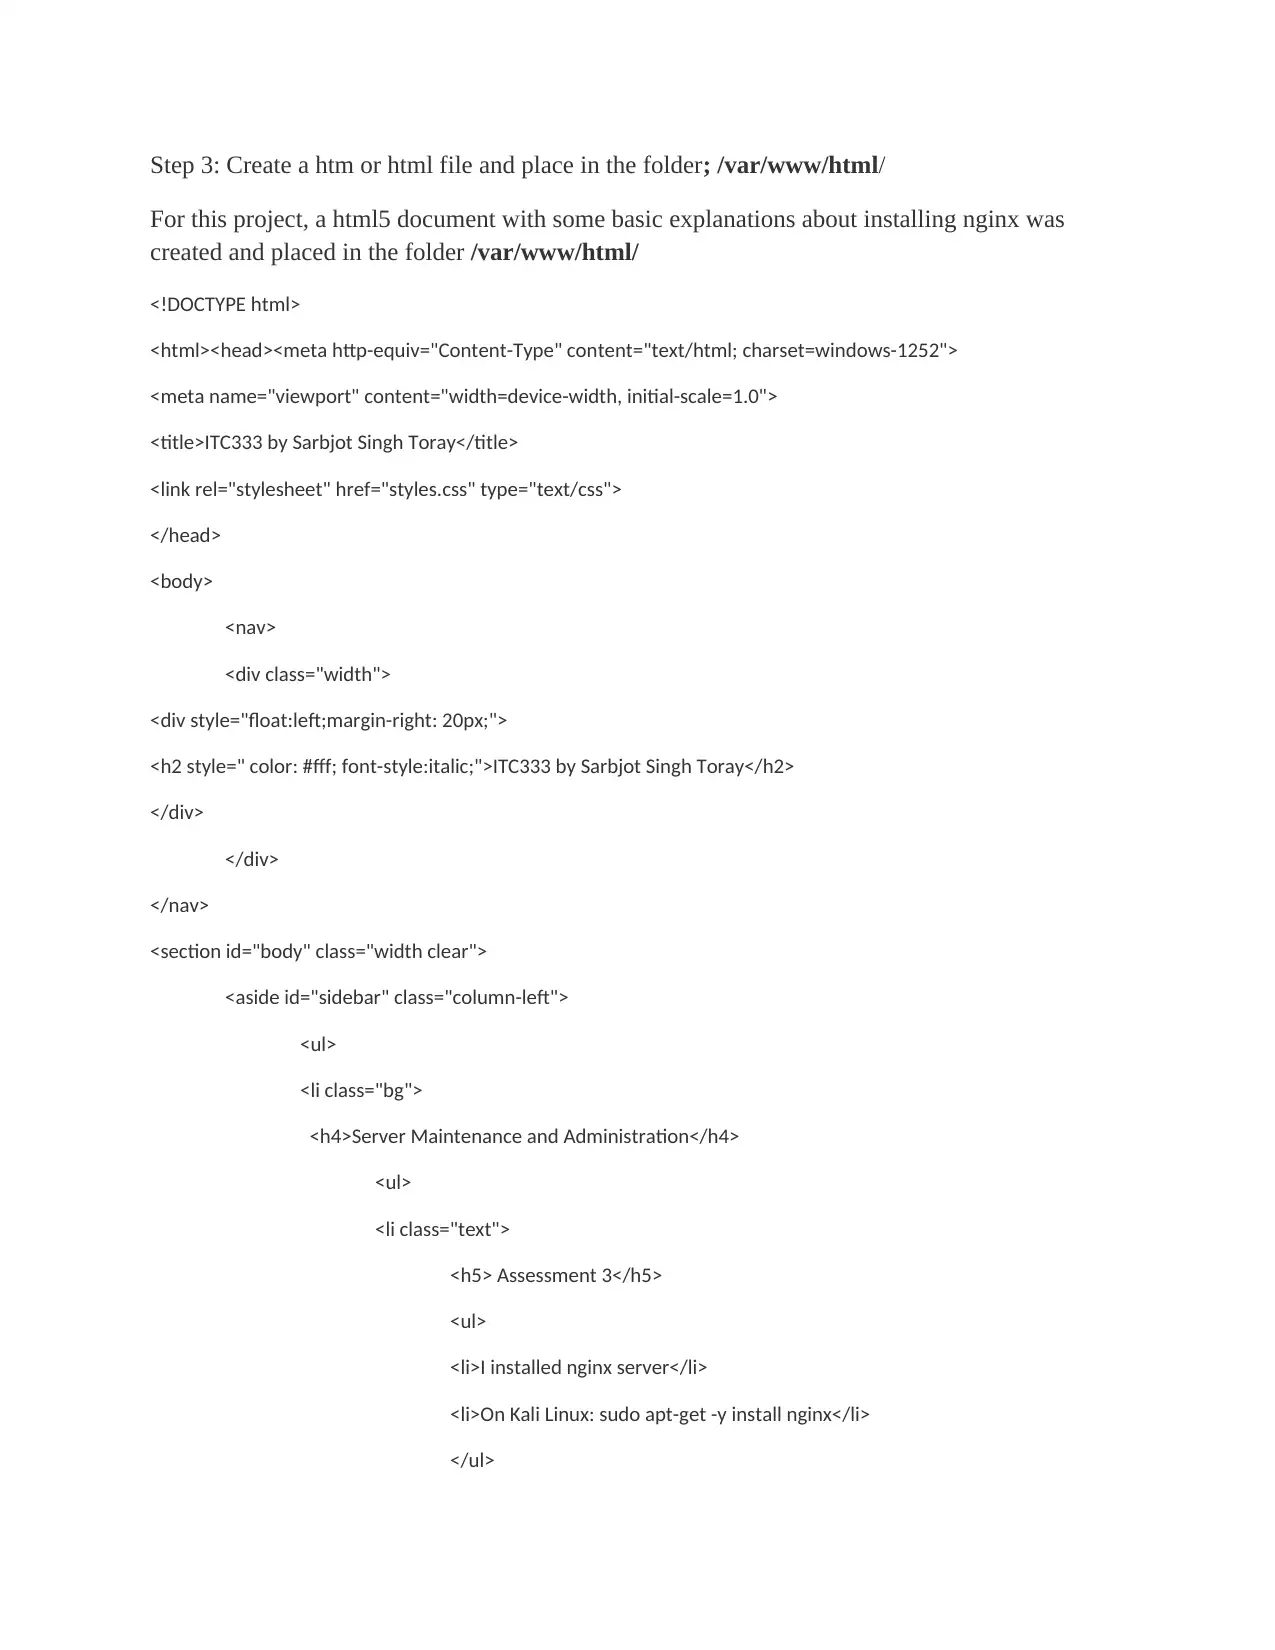
Step 3: Create a htm or html file and place in the folder; /var/www/html/
For this project, a html5 document with some basic explanations about installing nginx was
created and placed in the folder /var/www/html/
<!DOCTYPE html>
<html><head><meta http-equiv="Content-Type" content="text/html; charset=windows-1252">
<meta name="viewport" content="width=device-width, initial-scale=1.0">
<title>ITC333 by Sarbjot Singh Toray</title>
<link rel="stylesheet" href="styles.css" type="text/css">
</head>
<body>
<nav>
<div class="width">
<div style="float:left;margin-right: 20px;">
<h2 style=" color: #fff; font-style:italic;">ITC333 by Sarbjot Singh Toray</h2>
</div>
</div>
</nav>
<section id="body" class="width clear">
<aside id="sidebar" class="column-left">
<ul>
<li class="bg">
<h4>Server Maintenance and Administration</h4>
<ul>
<li class="text">
<h5> Assessment 3</h5>
<ul>
<li>I installed nginx server</li>
<li>On Kali Linux: sudo apt-get -y install nginx</li>
</ul>
Paraphrase This Document
Need a fresh take? Get an instant paraphrase of this document with our AI Paraphraser
<h5> Starting nginx</h5>
<ul>
<li>sudo service nginx start</li>
</ul>
<h5> ps waux | grep nginx</h5>
</li>
</ul>
</li>
</ul>
</aside>
<section id="content" class="column-right">
</section>
<footer class="clear">
<div class="footer-bottom">
<p>© Copyright 2017 Sarbjot Singh Toray
</a></footer><a>
</a></body></html>
A css file was also used to format the website and place background colors
Description Commands
The first command: apt-get update was simply meant to instruct the instance to download the
latest package list from various repositories.
apt-get -y install nginx : command to install nginx, with auto accept of any prompt.
chown -R $USER:$USER /var/www/html: changing the ownership of the root folder for
web pages on nginx chmod 755/var/www/html/ : changing access rights on the html folder, so that the
current user can create files in the folder
⊘ This is a preview!⊘
Do you want full access?
Subscribe today to unlock all pages.

Trusted by 1+ million students worldwide
rm -f /var/www/html/index.html : after installing nginx, by default an index.html file is
created, this command removes that file since we want to re-create index.html with
custom content.
Finally we echo out contents of our custom html file to the index.html file, since the file
does not exist, the command first creates the file.
Network Traffic Analysis
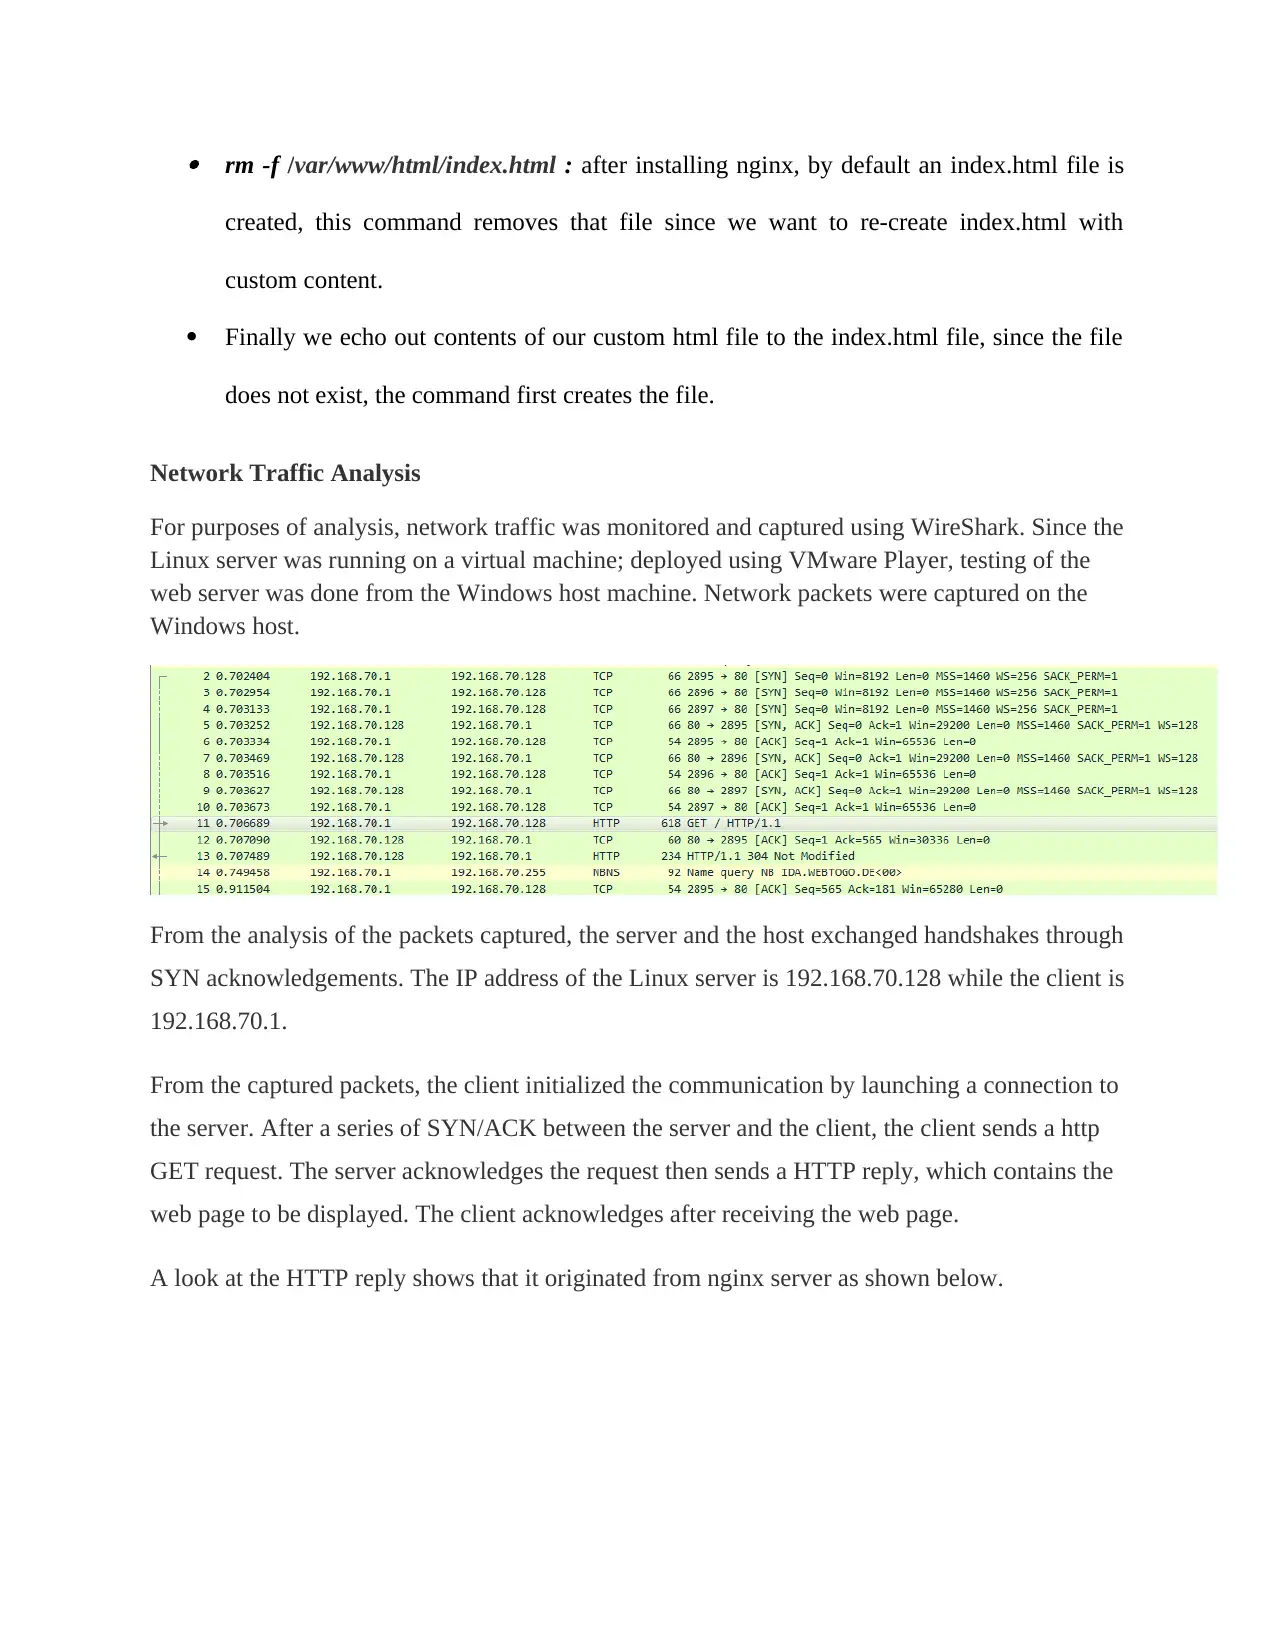
For purposes of analysis, network traffic was monitored and captured using WireShark. Since the
Linux server was running on a virtual machine; deployed using VMware Player, testing of the
web server was done from the Windows host machine. Network packets were captured on the
Windows host.
From the analysis of the packets captured, the server and the host exchanged handshakes through
SYN acknowledgements. The IP address of the Linux server is 192.168.70.128 while the client is
192.168.70.1.
From the captured packets, the client initialized the communication by launching a connection to
the server. After a series of SYN/ACK between the server and the client, the client sends a http
GET request. The server acknowledges the request then sends a HTTP reply, which contains the
web page to be displayed. The client acknowledges after receiving the web page.
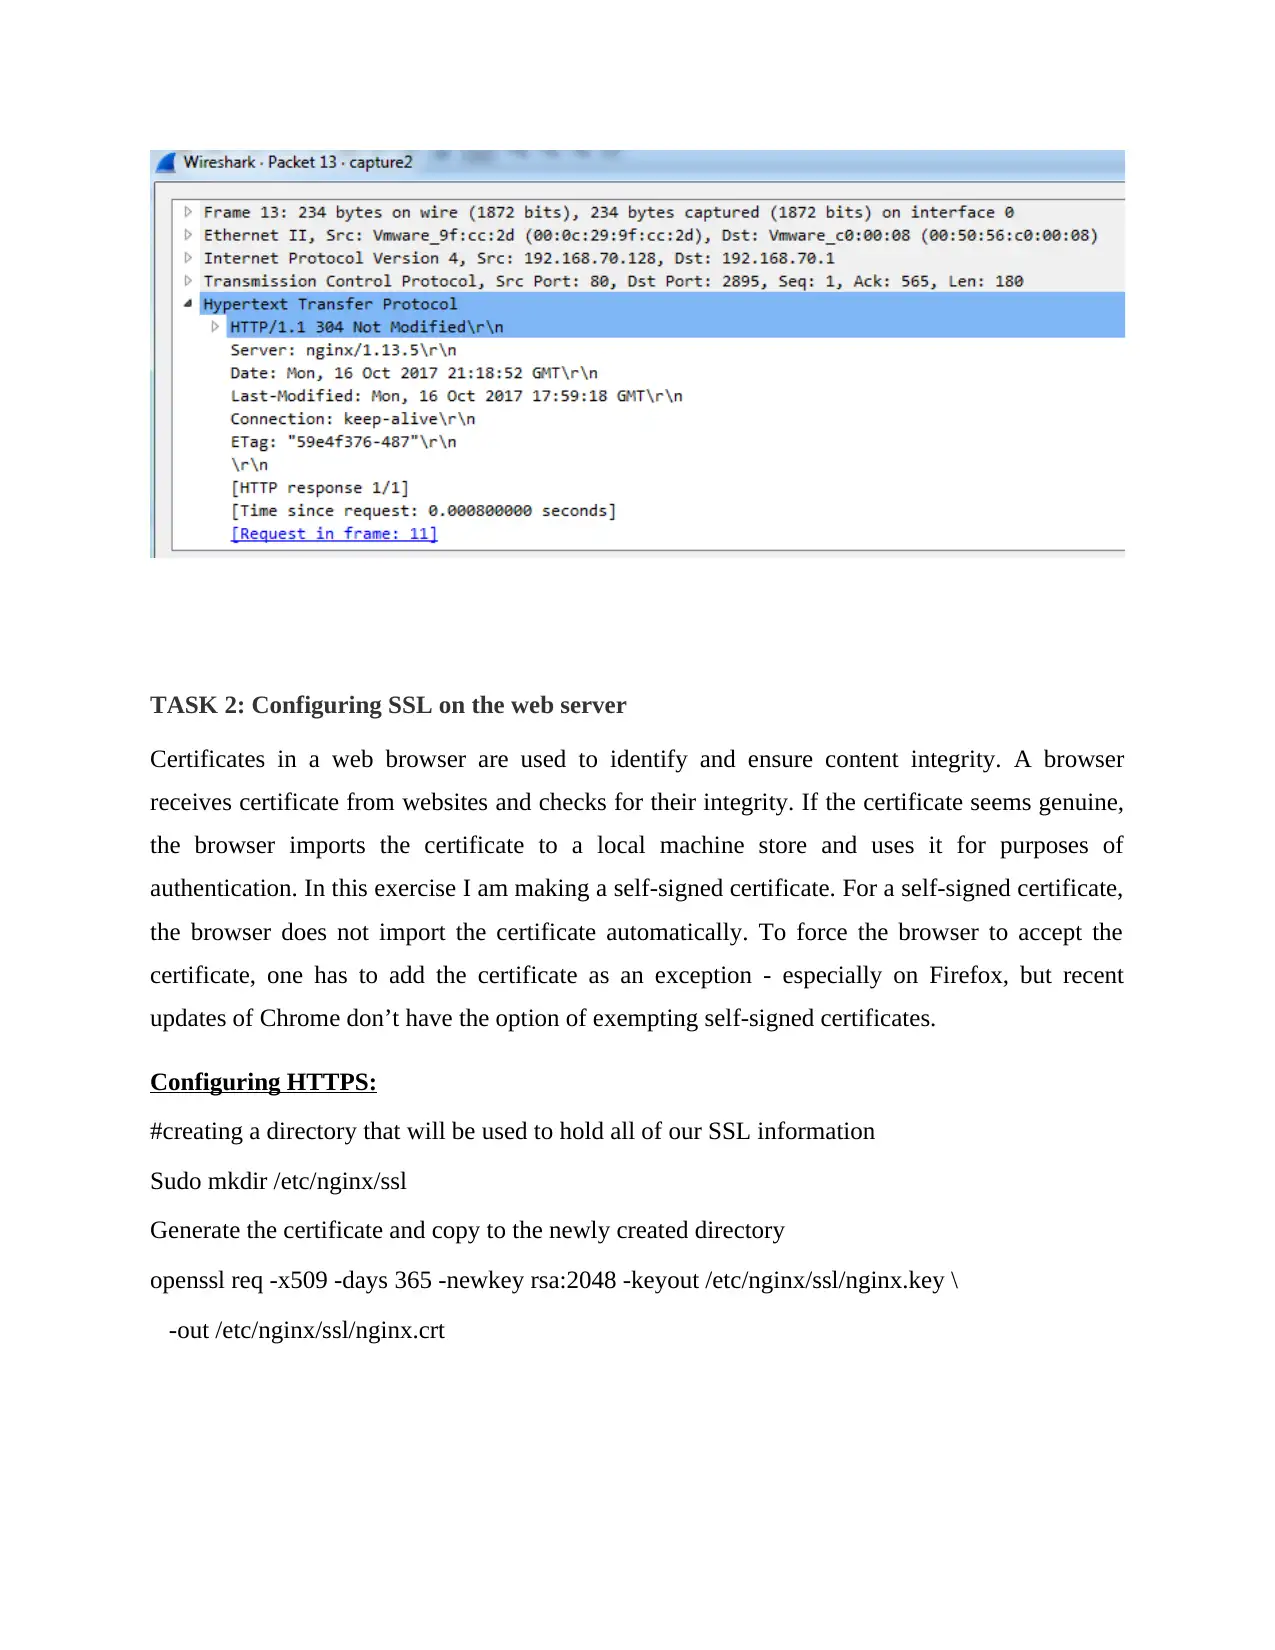
A look at the HTTP reply shows that it originated from nginx server as shown below.
Paraphrase This Document
Need a fresh take? Get an instant paraphrase of this document with our AI Paraphraser
TASK 2: Configuring SSL on the web server
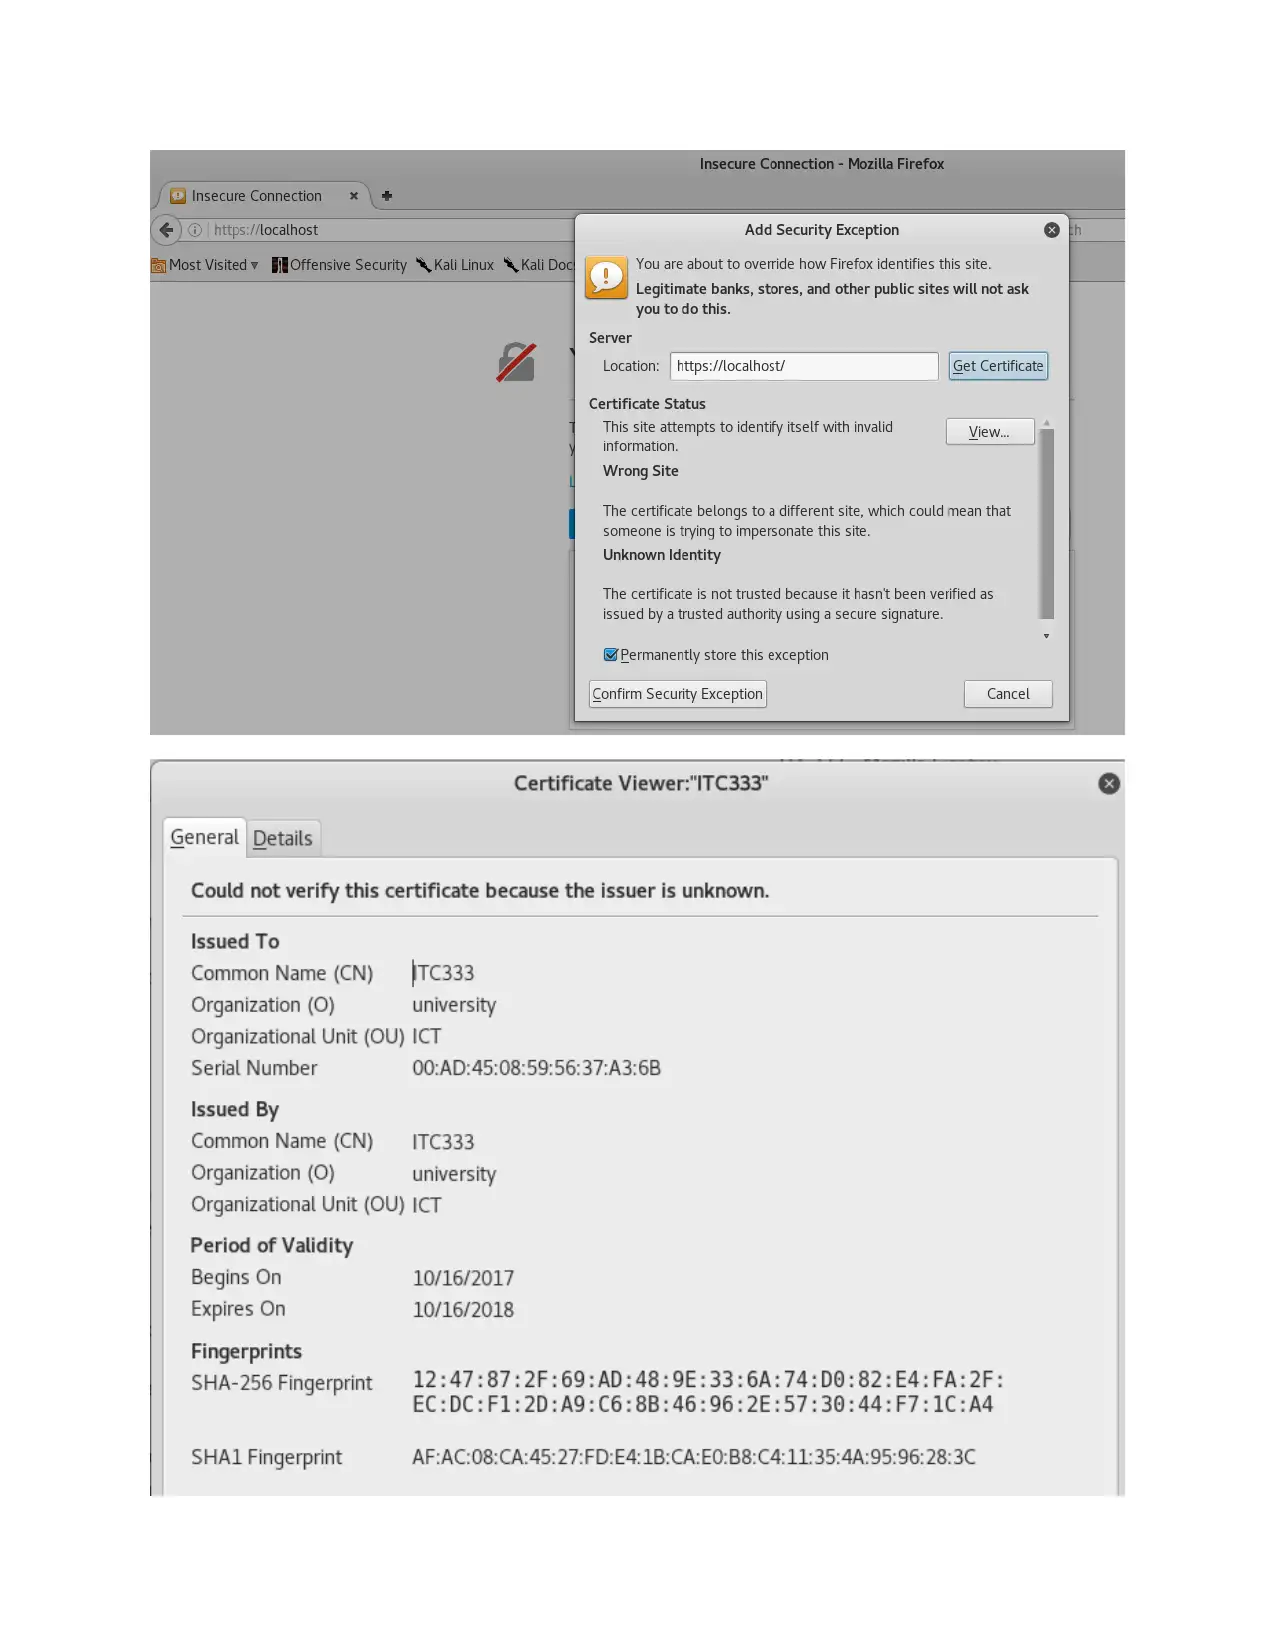
Certificates in a web browser are used to identify and ensure content integrity. A browser
receives certificate from websites and checks for their integrity. If the certificate seems genuine,
the browser imports the certificate to a local machine store and uses it for purposes of
authentication. In this exercise I am making a self-signed certificate. For a self-signed certificate,
the browser does not import the certificate automatically. To force the browser to accept the
certificate, one has to add the certificate as an exception - especially on Firefox, but recent
updates of Chrome don’t have the option of exempting self-signed certificates.
Configuring HTTPS:
#creating a directory that will be used to hold all of our SSL information
Sudo mkdir /etc/nginx/ssl
Generate the certificate and copy to the newly created directory
openssl req -x509 -days 365 -newkey rsa:2048 -keyout /etc/nginx/ssl/nginx.key \
-out /etc/nginx/ssl/nginx.crt
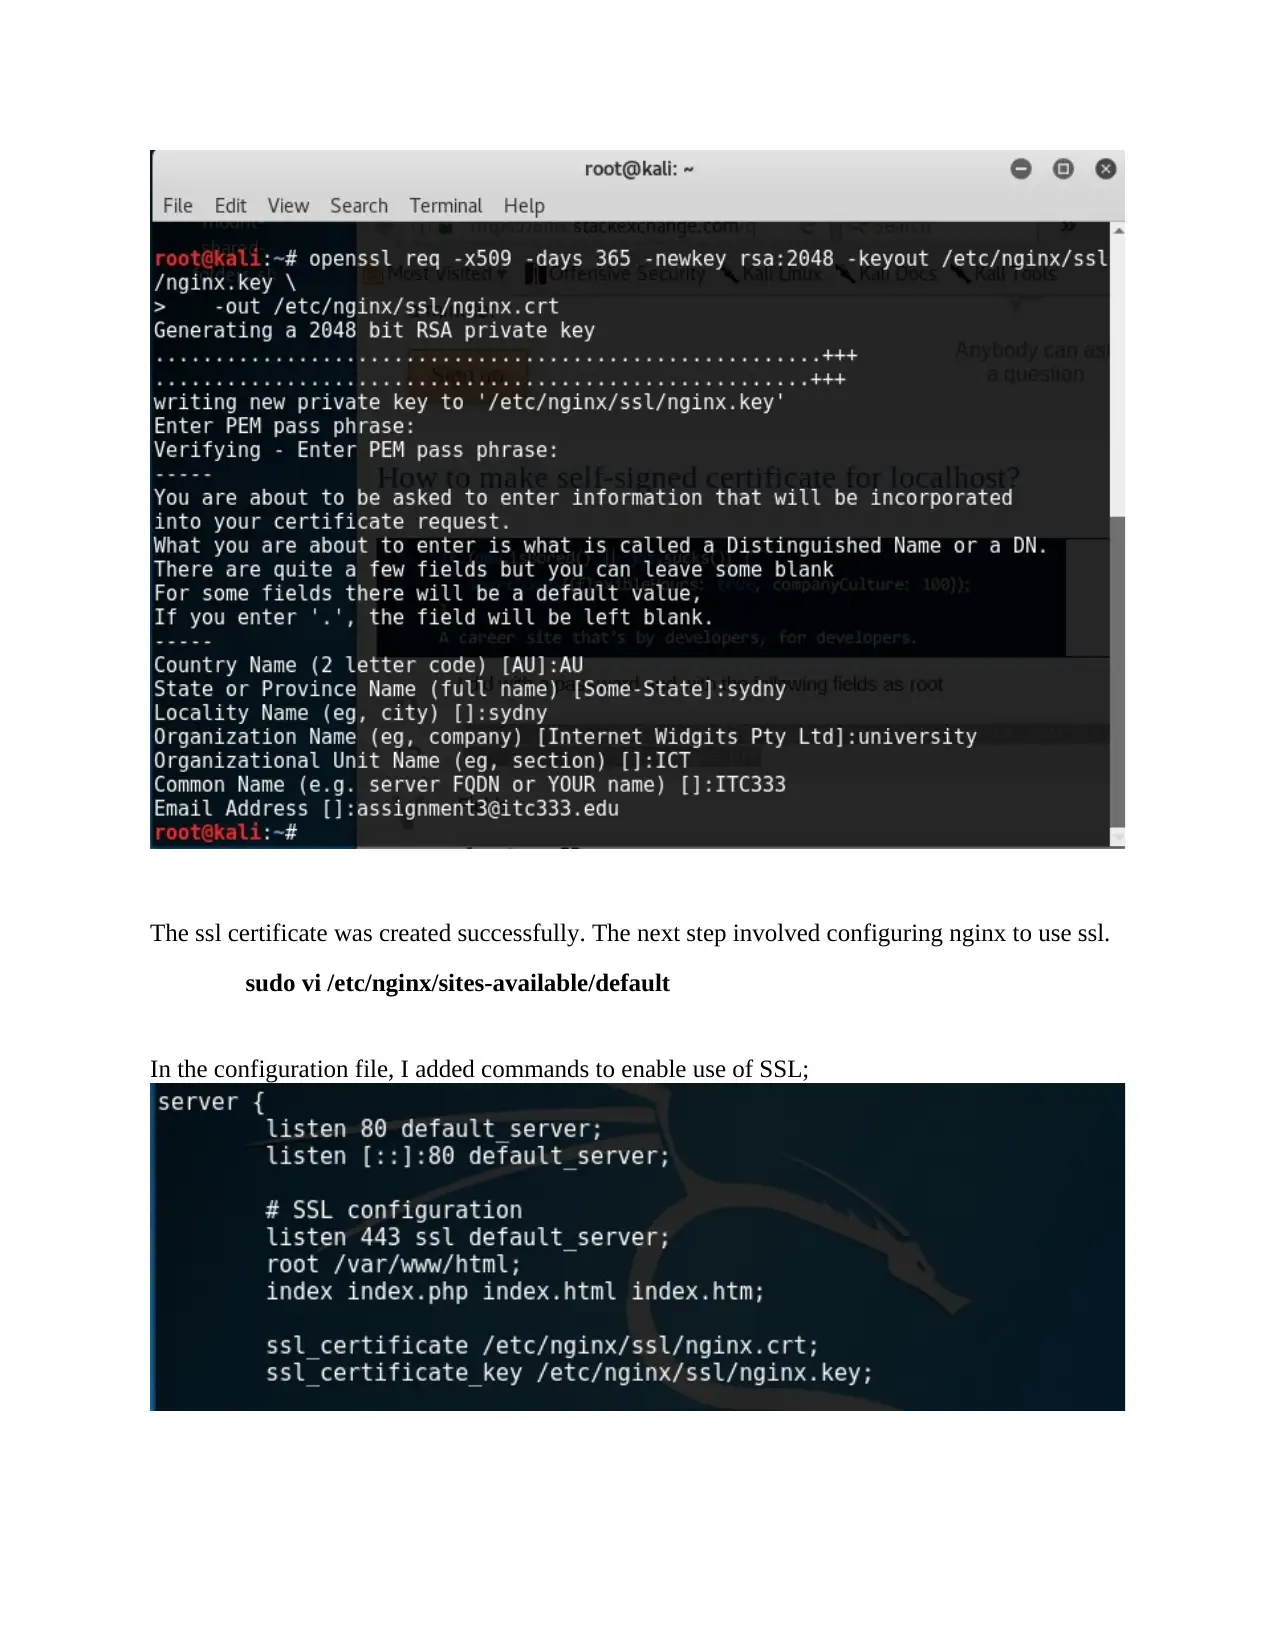
The ssl certificate was created successfully. The next step involved configuring nginx to use ssl.
sudo vi /etc/nginx/sites-available/default
In the configuration file, I added commands to enable use of SSL;
sudo vi /etc/nginx/sites-available/default
In the configuration file, I added commands to enable use of SSL;
⊘ This is a preview!⊘
Do you want full access?
Subscribe today to unlock all pages.

Trusted by 1+ million students worldwide
Paraphrase This Document
Need a fresh take? Get an instant paraphrase of this document with our AI Paraphraser
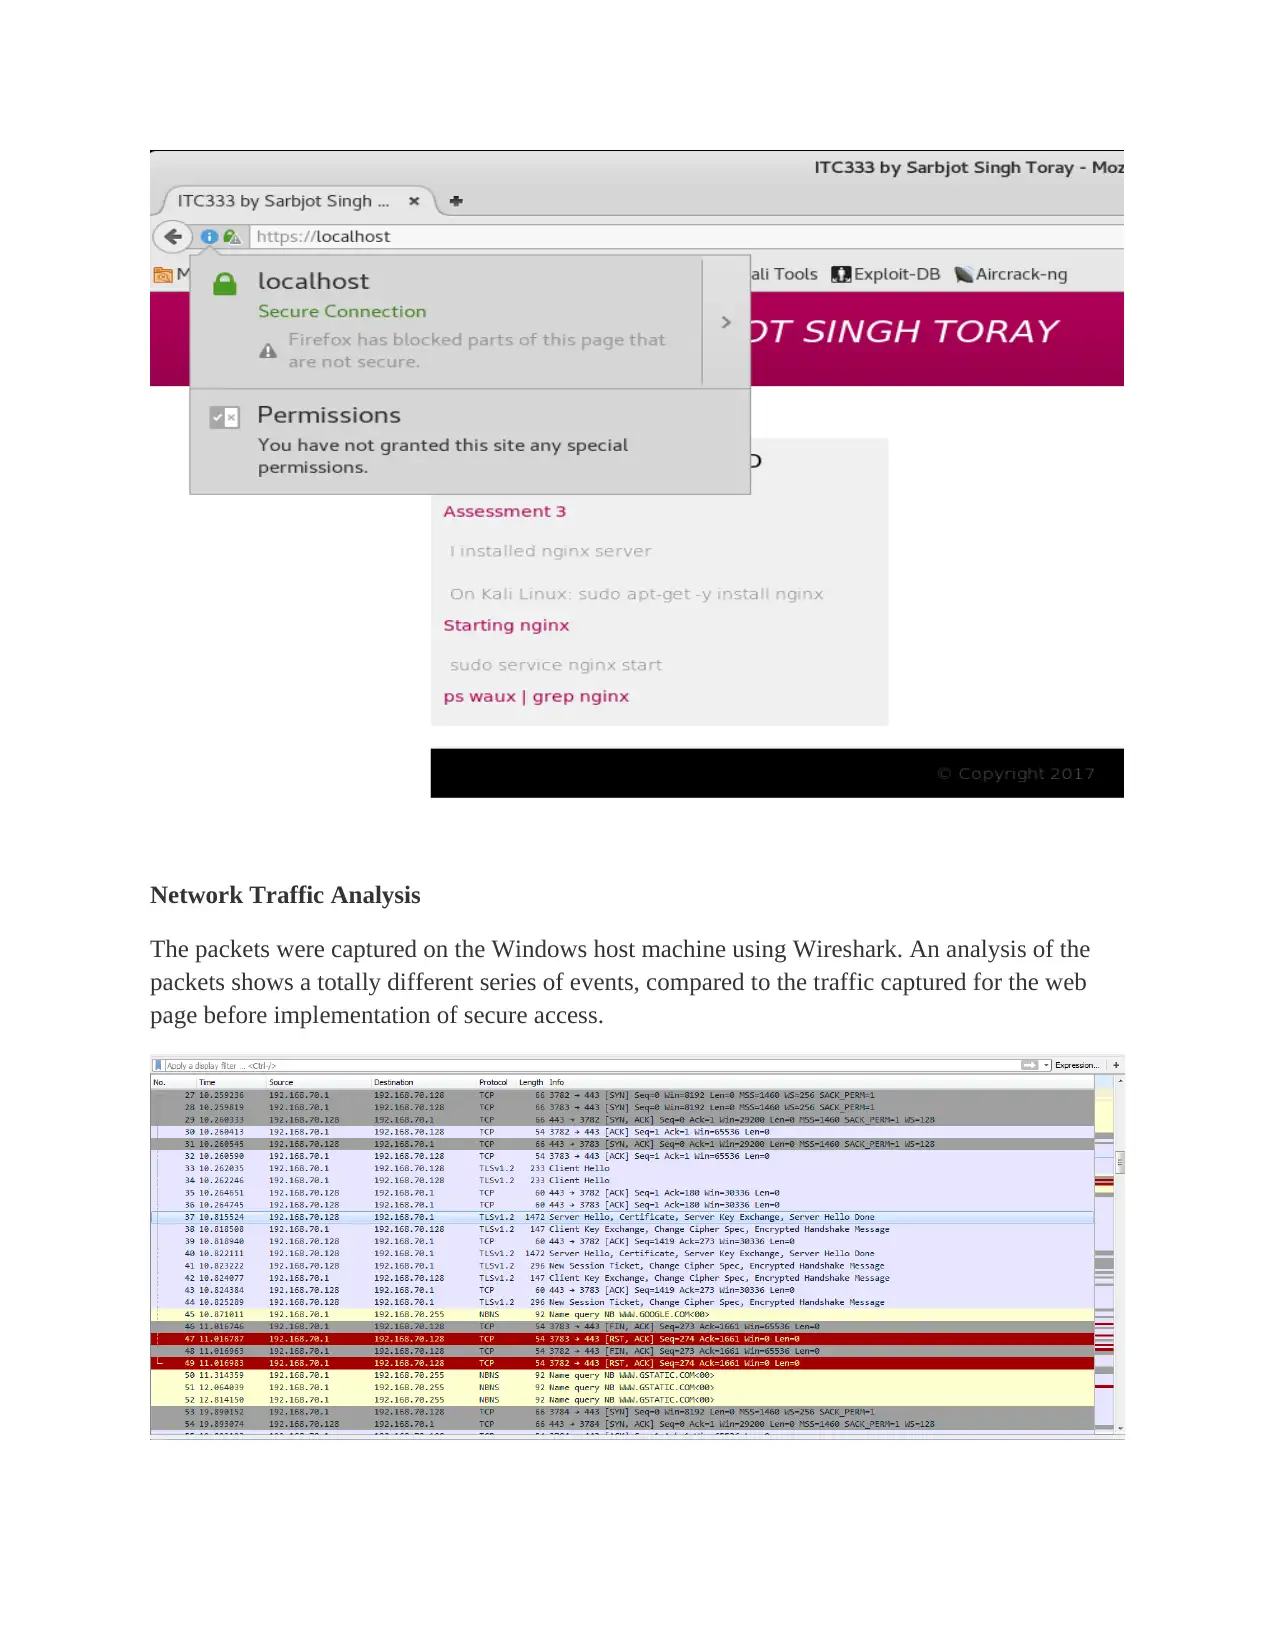
Network Traffic Analysis
The packets were captured on the Windows host machine using Wireshark. An analysis of the
packets shows a totally different series of events, compared to the traffic captured for the web
page before implementation of secure access.
The packets were captured on the Windows host machine using Wireshark. An analysis of the
packets shows a totally different series of events, compared to the traffic captured for the web
page before implementation of secure access.
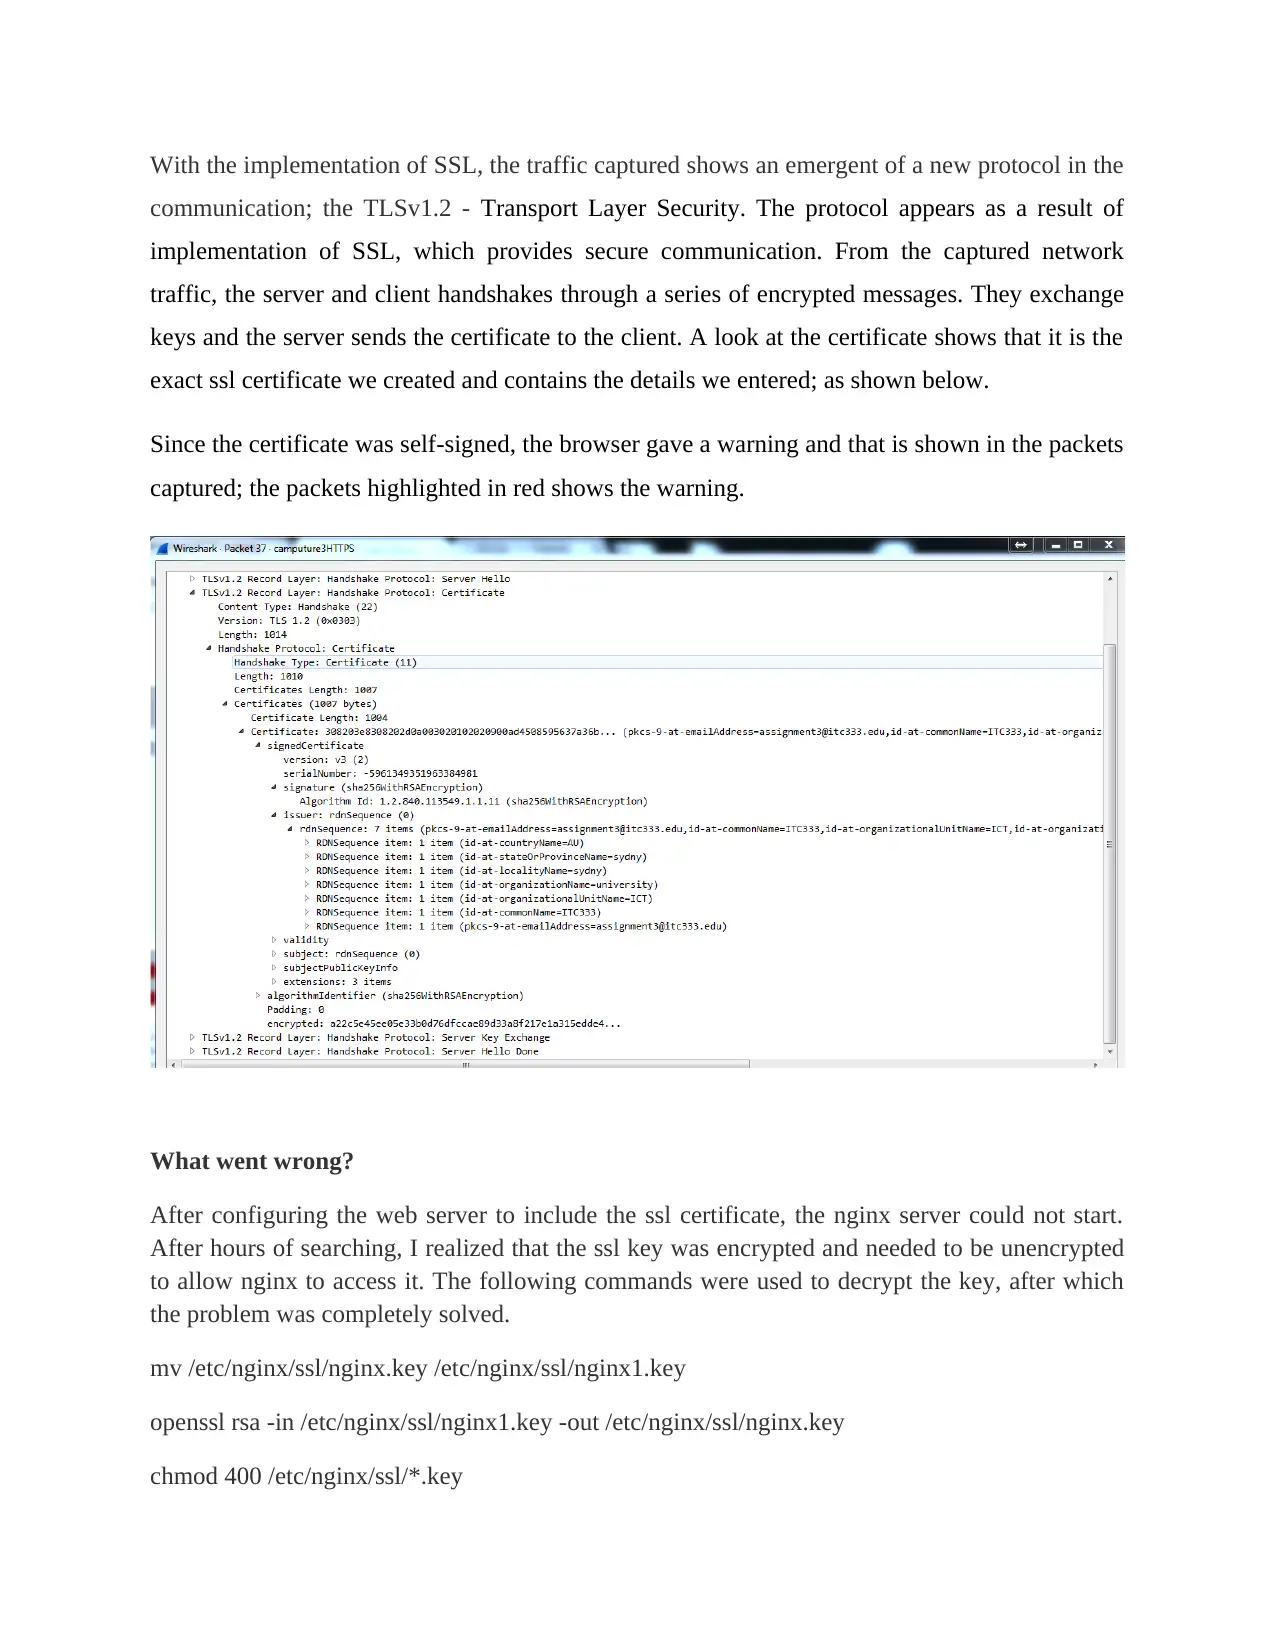
With the implementation of SSL, the traffic captured shows an emergent of a new protocol in the
communication; the TLSv1.2 - Transport Layer Security. The protocol appears as a result of
implementation of SSL, which provides secure communication. From the captured network
traffic, the server and client handshakes through a series of encrypted messages. They exchange
keys and the server sends the certificate to the client. A look at the certificate shows that it is the
exact ssl certificate we created and contains the details we entered; as shown below.
Since the certificate was self-signed, the browser gave a warning and that is shown in the packets
captured; the packets highlighted in red shows the warning.
What went wrong?
After configuring the web server to include the ssl certificate, the nginx server could not start.
After hours of searching, I realized that the ssl key was encrypted and needed to be unencrypted
to allow nginx to access it. The following commands were used to decrypt the key, after which
the problem was completely solved.
mv /etc/nginx/ssl/nginx.key /etc/nginx/ssl/nginx1.key
openssl rsa -in /etc/nginx/ssl/nginx1.key -out /etc/nginx/ssl/nginx.key
chmod 400 /etc/nginx/ssl/*.key
⊘ This is a preview!⊘
Do you want full access?
Subscribe today to unlock all pages.

Trusted by 1+ million students worldwide
1 out of 13
Your All-in-One AI-Powered Toolkit for Academic Success.
+13062052269
info@desklib.com
Available 24*7 on WhatsApp / Email
![[object Object]](/_next/static/media/star-bottom.7253800d.svg)
Unlock your academic potential
Copyright © 2020–2026 A2Z Services. All Rights Reserved. Developed and managed by ZUCOL.