ISY10221 Computing Project 1: Brothers Restaurant Website Design
VerifiedAdded on 2023/03/23
|10
|947
|27
Project
AI Summary
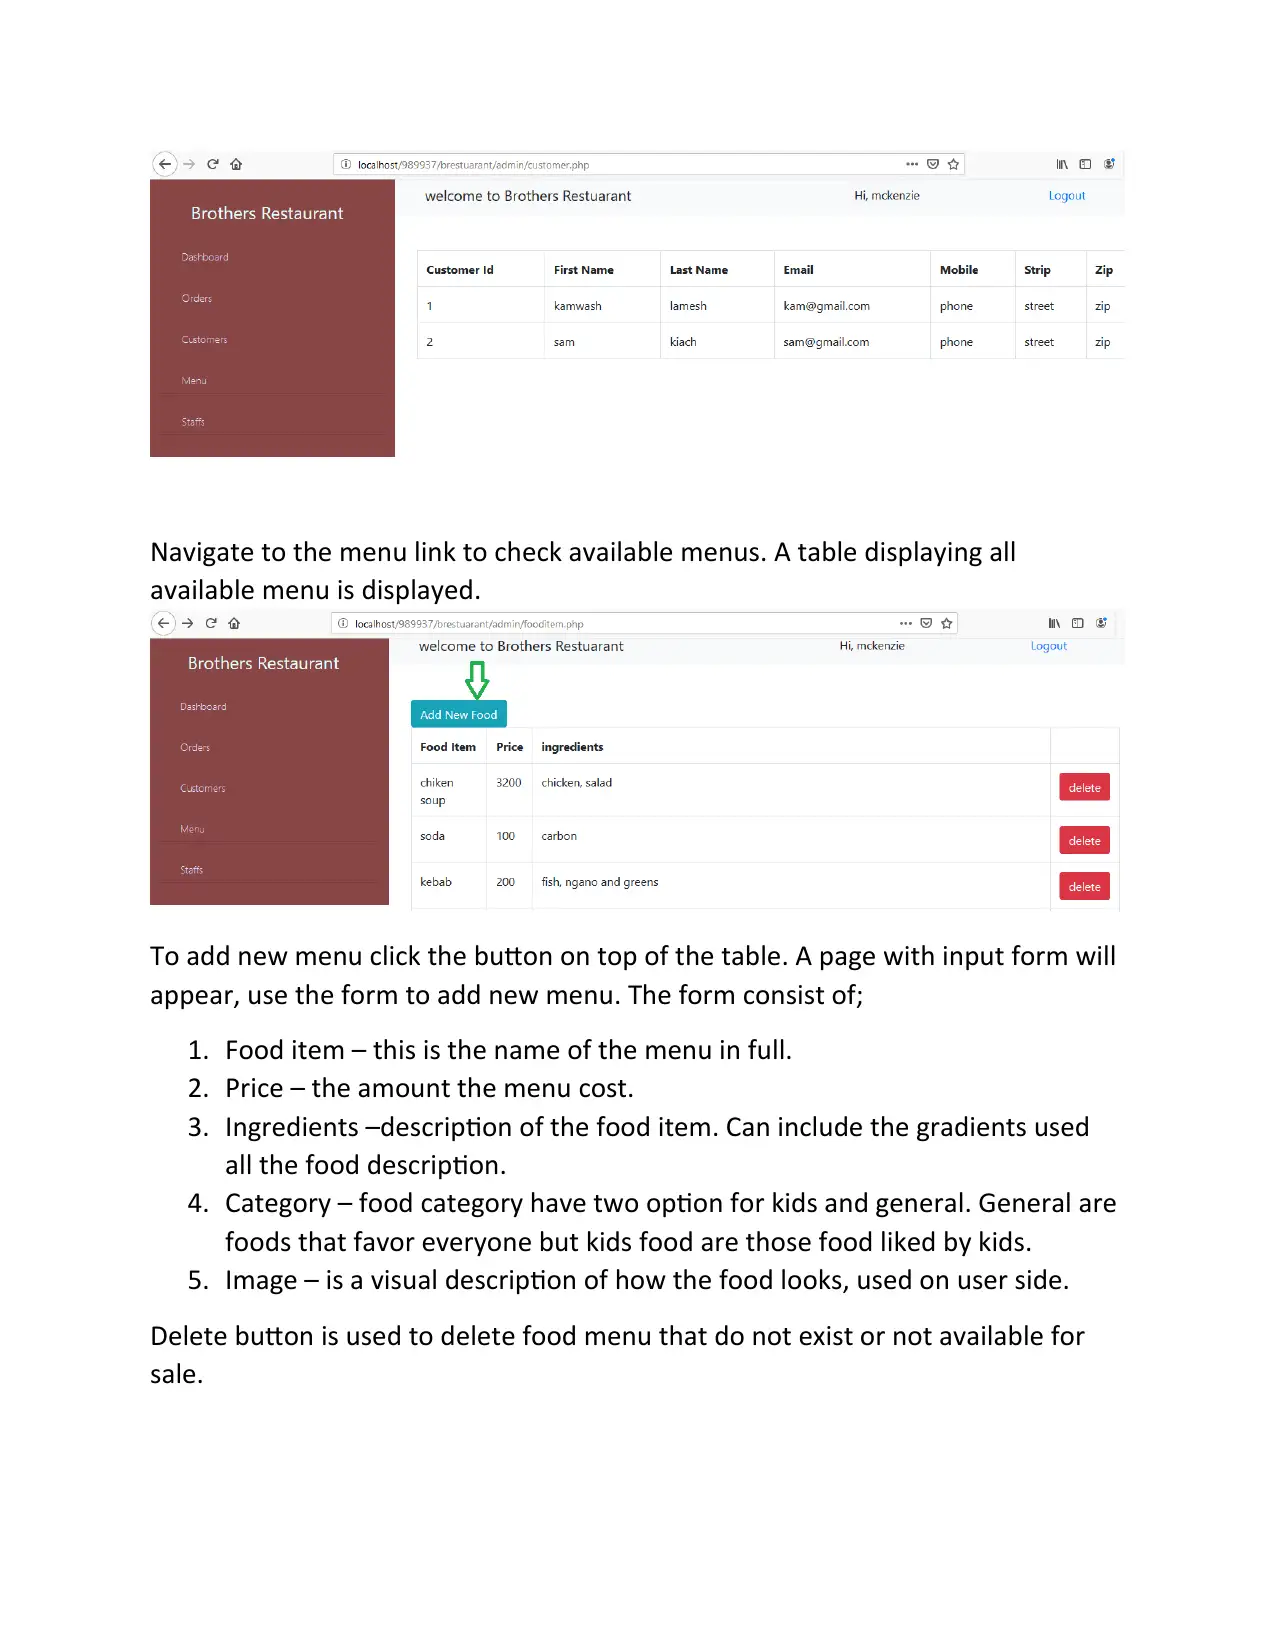
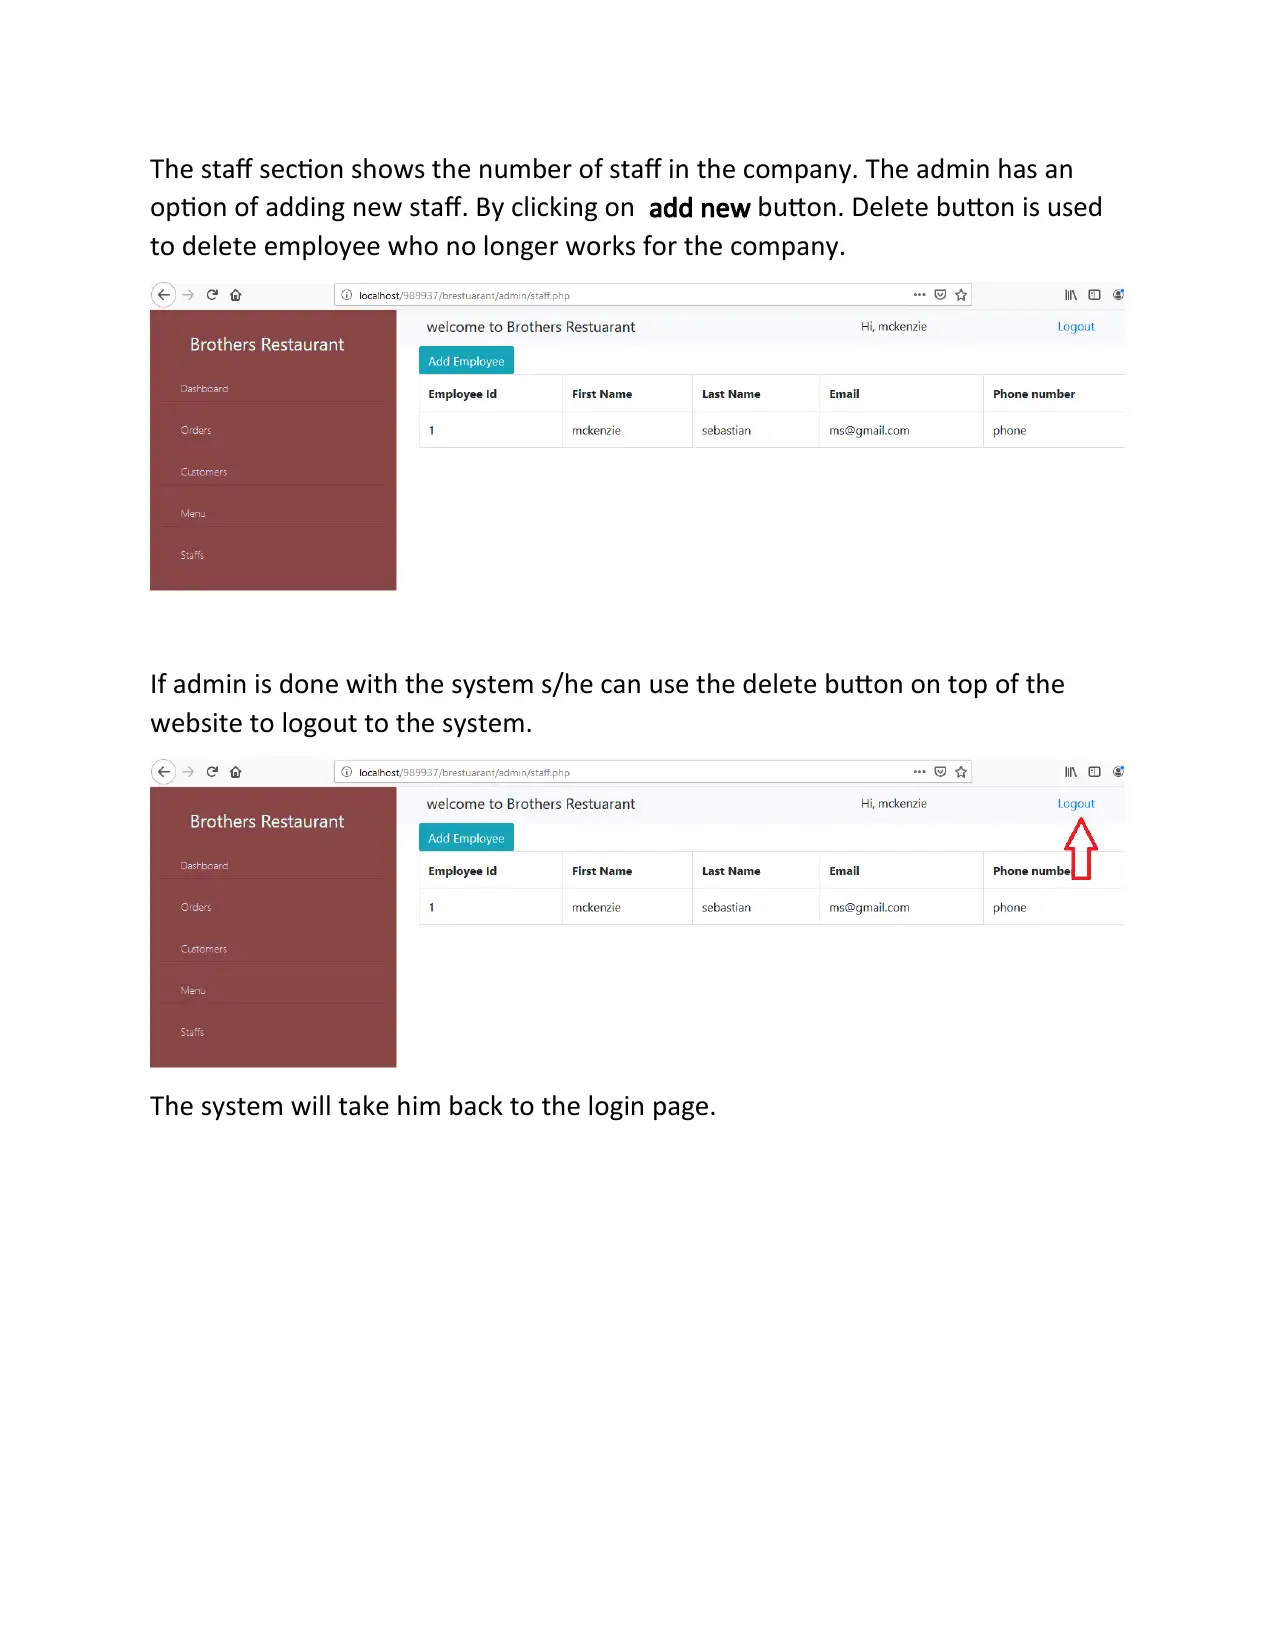
This document details the Brothers Restaurant website project, outlining the system's functionality for customers and administrators. It covers user registration and login, menu browsing, order placement, and payment processing for customers. For administrators, it describes adding and managing food items, staff members, and processing customer orders through an admin interface. The document includes a step-by-step installation guide using XAMPP, database setup, and instructions for running the system locally. Additionally, it provides a comprehensive admin user guide, explaining how to navigate the admin dashboard, manage orders, view customer details, update the menu, and manage staff information. The Southern Cross University assignment cover sheet is included, indicating the project was submitted for the ISY10221 Computing Project 1 course.
1 out of 10
Related Documents


Your All-in-One AI-Powered Toolkit for Academic Success.
+13062052269
info@desklib.com
Available 24*7 on WhatsApp / Email
![[object Object]](/_next/static/media/star-bottom.7253800d.svg)
Copyright © 2020–2026 A2Z Services. All Rights Reserved. Developed and managed by ZUCOL.