BSU6BPA Building Pathology: Inspection and Diagnosis Case Studies
VerifiedAdded on 2023/04/21
|21
|3472
|347
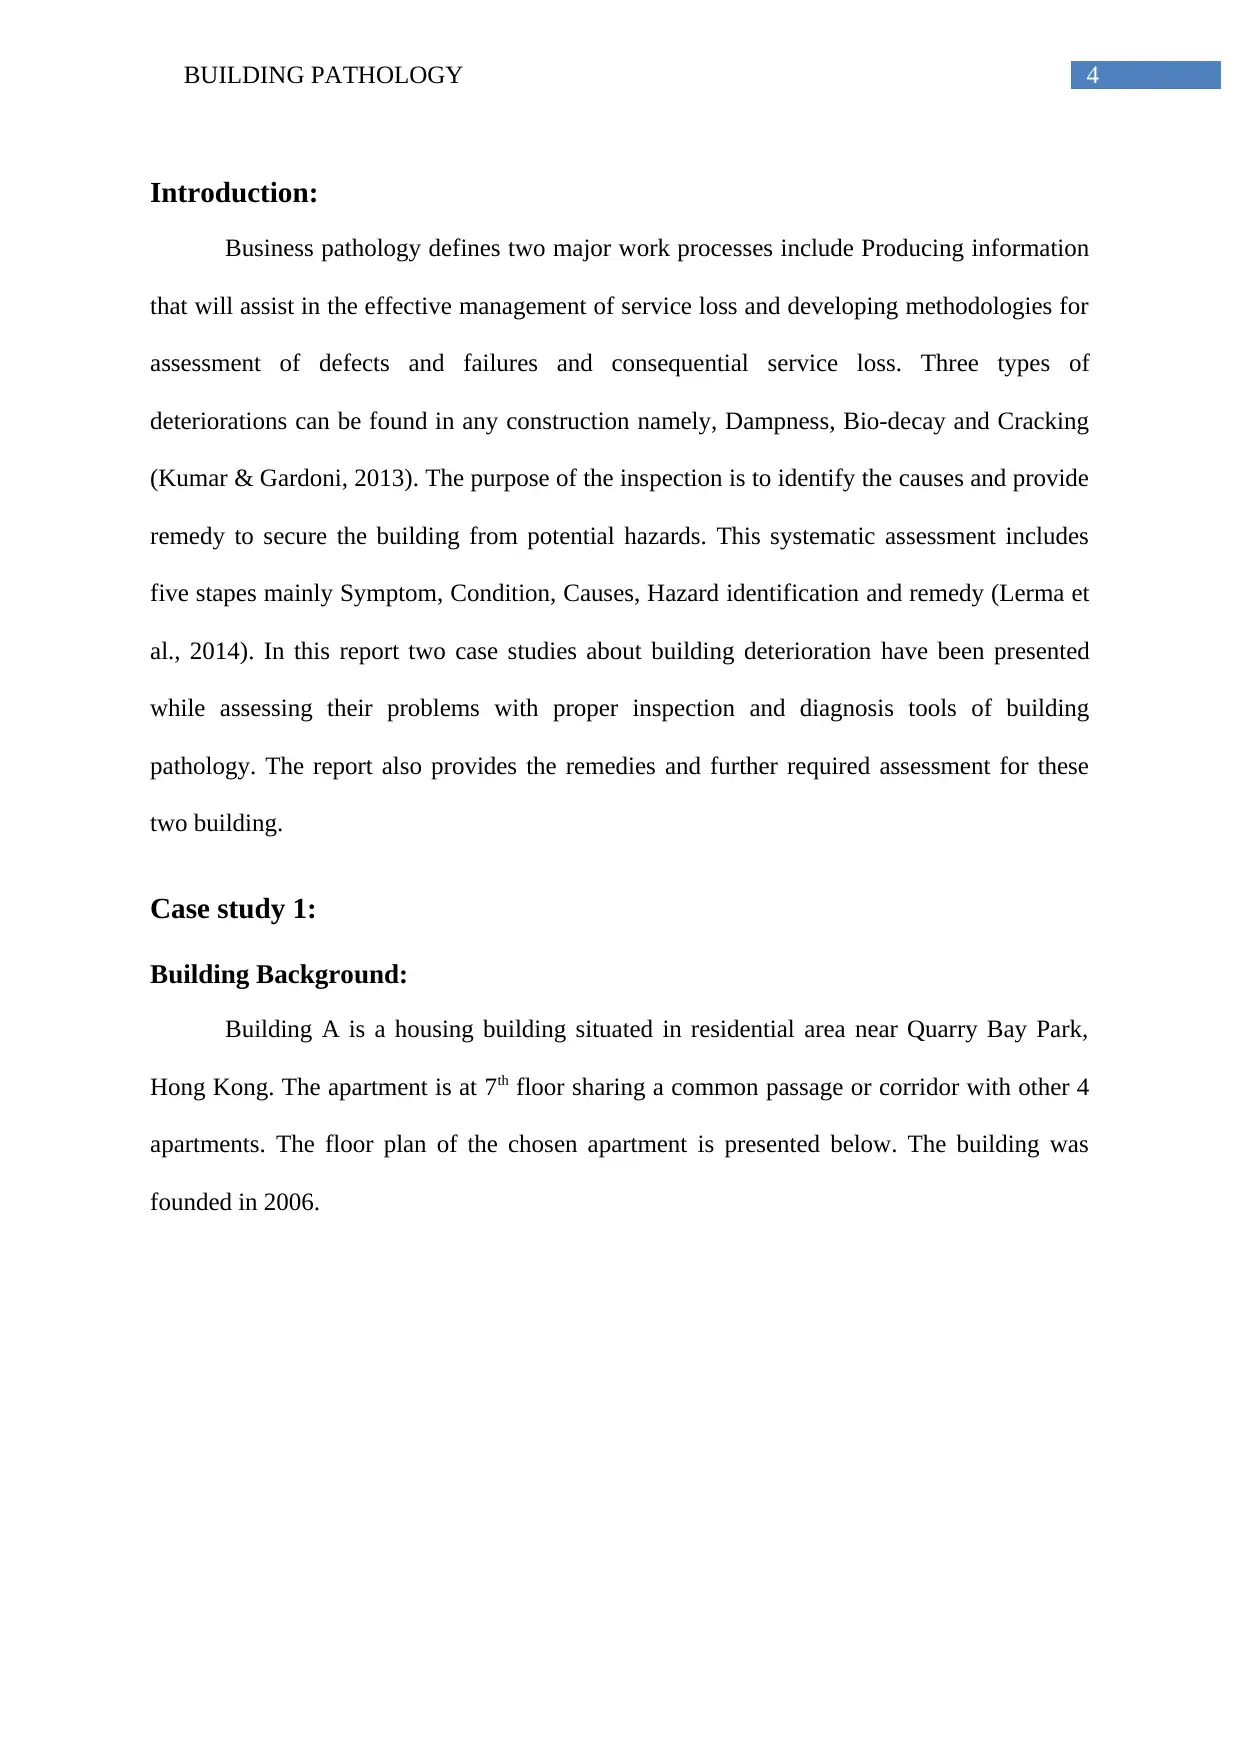
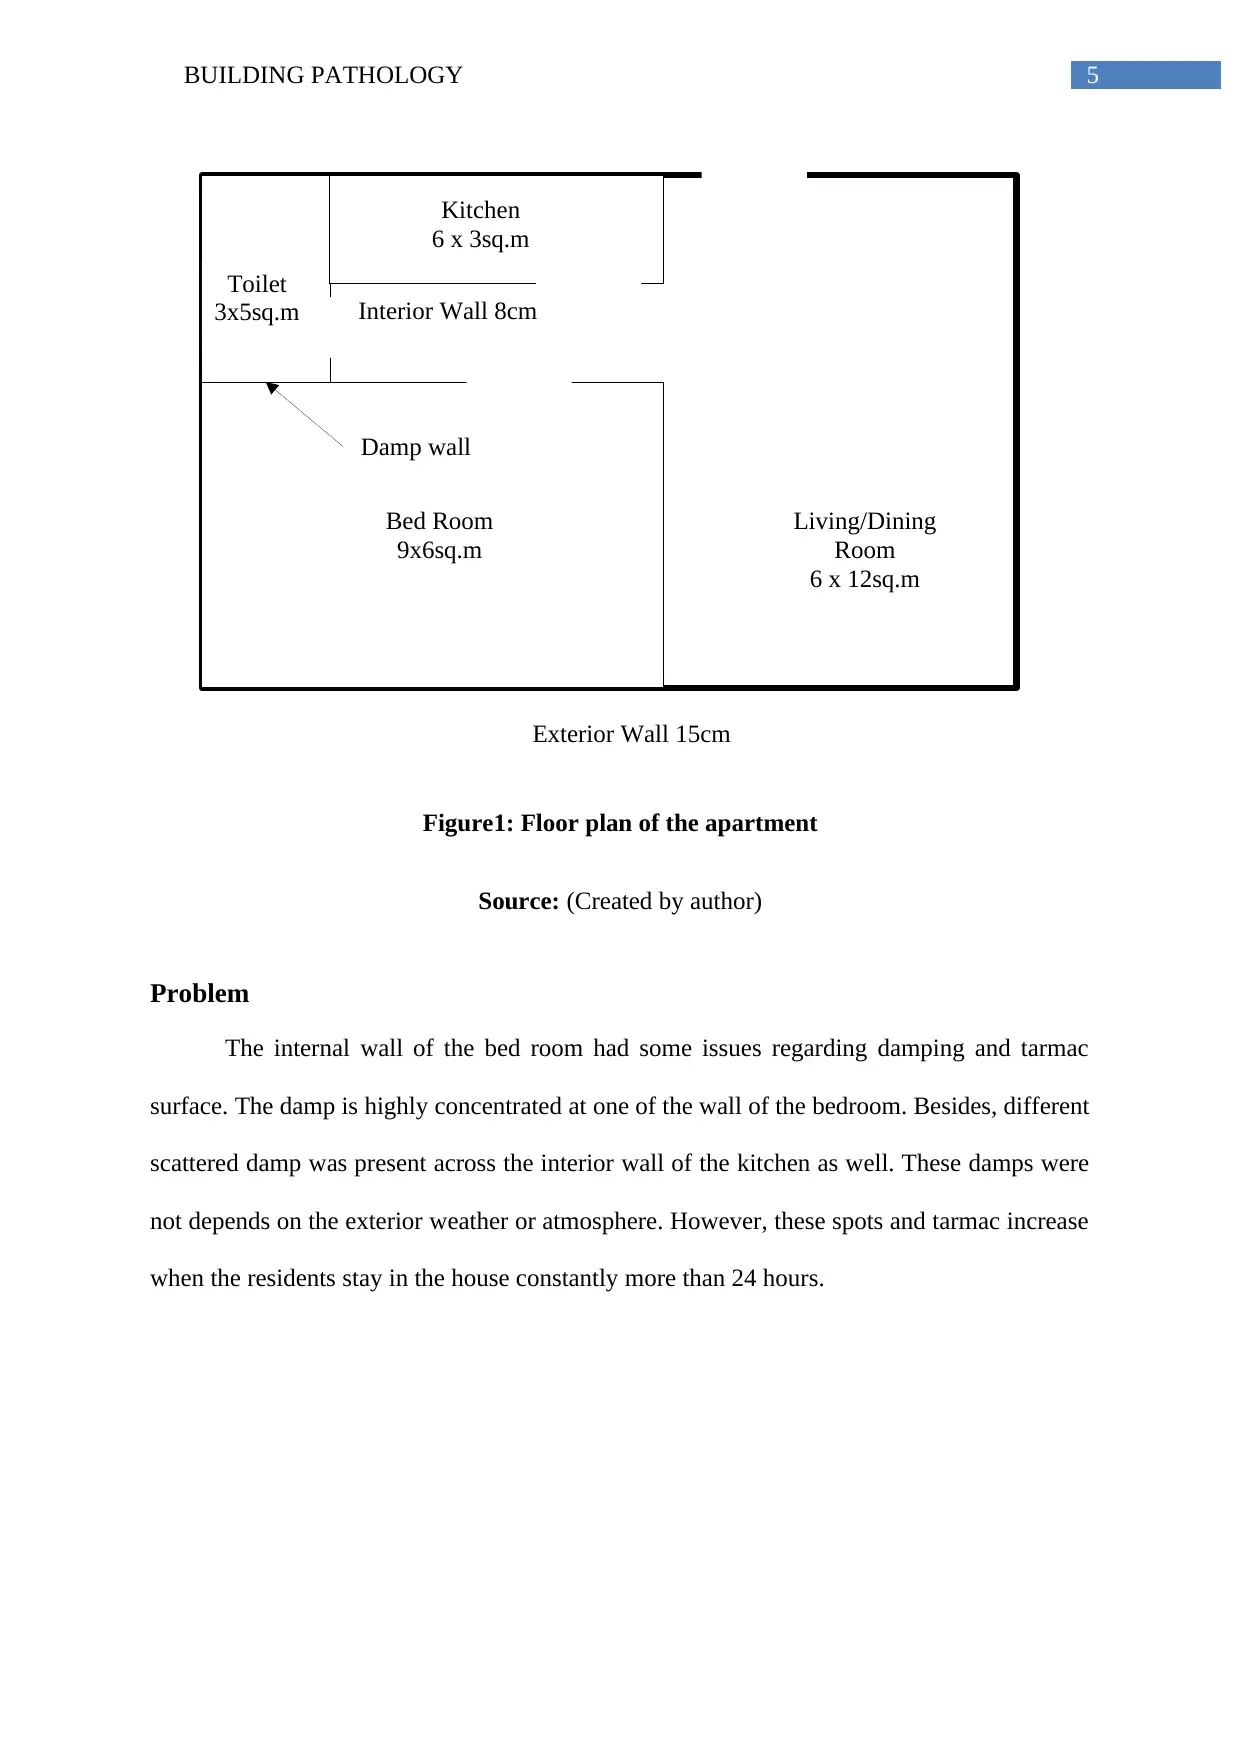
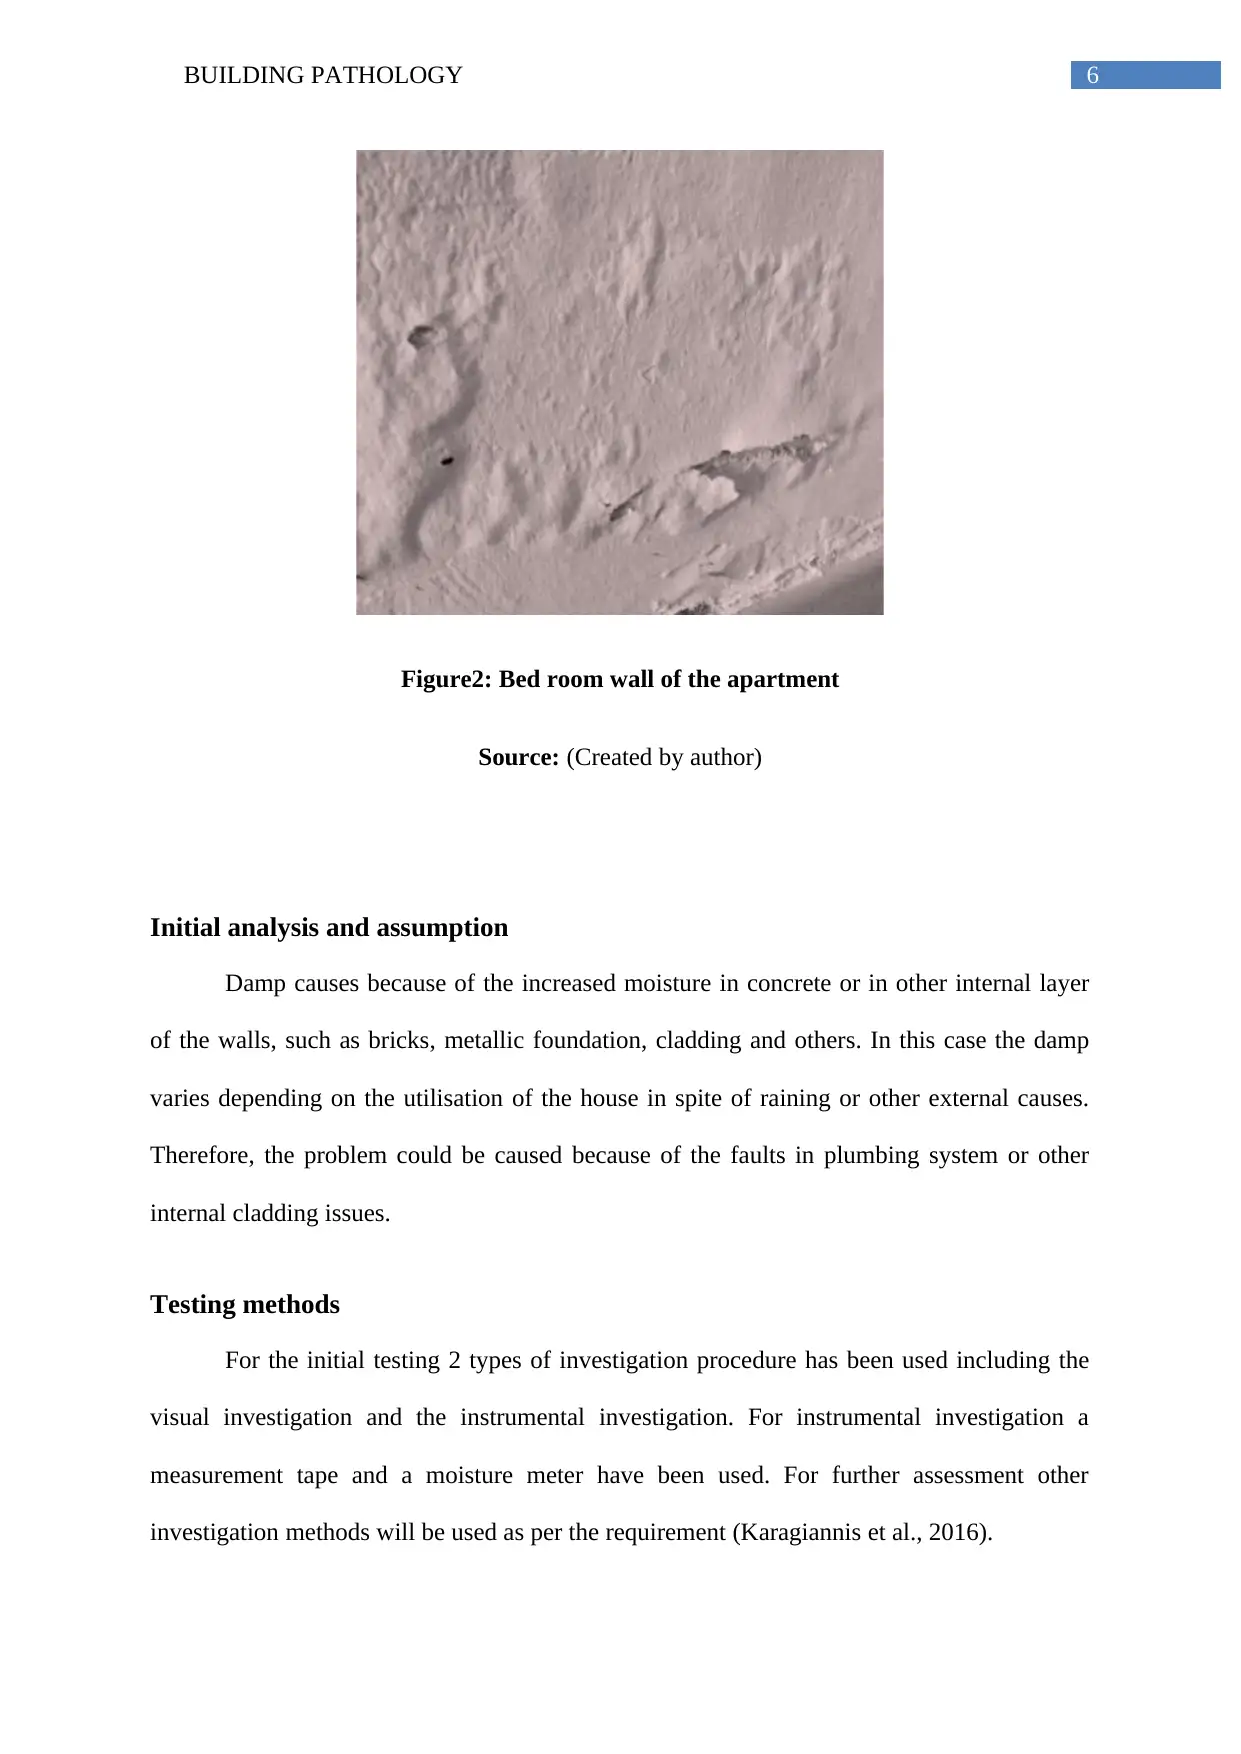
Case Study
AI Summary
This report presents two case studies on building deterioration, applying building pathology principles for inspection and diagnosis. The first case examines dampness in a residential apartment, utilizing visual and instrumental investigations to identify potential plumbing issues and moisture sources. The assessment includes moisture level testing and proposes further investigation involving concealed pipeline exposure. Risks include structural weakening and bio-chemical degradation. The recommended solution involves detailed plumbing inspection and potential wall reconstruction. The second case focuses on cracking in a restaurant building, employing visual inspection, crack measurement, and ultrasonic pulse velocity testing to assess structural integrity. The analysis reveals net-like cracking patterns, indicating stress and potential construction defects. The report highlights risks associated with material weakening and proposes remedial actions involving cladding replacement and structural reinforcement. Both case studies follow a systematic approach, including symptom identification, condition assessment, cause analysis, hazard identification, and remedy proposal, providing a comprehensive understanding of building pathology and its application in real-world scenarios. Desklib provides access to similar solved assignments and past papers for students.
1 out of 21

Your All-in-One AI-Powered Toolkit for Academic Success.
+13062052269
info@desklib.com
Available 24*7 on WhatsApp / Email
![[object Object]](/_next/static/media/star-bottom.7253800d.svg)
Copyright © 2020–2026 A2Z Services. All Rights Reserved. Developed and managed by ZUCOL.