COIT20262 Assignment 2 Questions: Advanced Network Security, 2019
VerifiedAdded on 2019/09/26
|10
|3292
|409
Homework Assignment
AI Summary
This assignment solution addresses advanced network security concepts within the COIT20262 course at CQUniversity, Term 1, 2019. It focuses on practical application and analysis using virtnet. Question 1 explores HTTPS and certificate setup, including creating a Certificate Signing Request, obtaining a certificate from a CA, configuring the Apache web server, and analyzing packet captures to understand the algorithms used. Question 2 delves into authentication and access control, requiring the creation of users and groups, setting permissions for web developers, and testing the implementation. Question 3 covers firewalls and iptables, involving changing the SSH server port, configuring an iptables-based firewall with specific security policies, and testing the firewall's functionality. The assignment requires students to implement, test, and analyze the security implications of each configuration.
COIT20262 Assignment 2 Questions Term 1, 2019
Advanced Network Security Page 1 of 10
2
COIT20262 - Advanced Network Security, Term 1, 2019
Assignment 2 Questions
Due date: 4 June 2019 ASSESSMENT
Weighting: 35%
Length: N/A
Instructions
Attempt all questions.
This is an individual assignment, and it is expected students answer the questions themselves.
Discussion of approaches to solving questions is allowed (and encouraged), however
each student should develop and write-up their own answers. See CQUniversity
resources on Referencing and Plagiarism. Guidelines for this assignment include:
• Do not exchange files (reports, captures, diagrams) with other students.
• Complete tasks with virtnet yourself – do not use results from another student.
• Draw your own diagrams. Do not use diagrams from other sources (Internet, textbooks)
or from other students.
• Write your own explanations. In some cases, students may arrive at the same
numerical answer, however their explanation of the answer should always be their
own.
• Do not copy text from websites or textbooks. During research you should read and
understand what others have written, and then write in your own words.
• Perform the tasks using the correct values listed in the question and using the correct
file names.
File Names and Parameters
Where you see [StudentID] in the text, replace it with your actual student ID. If your student
ID contains a letter (e.g. “s1234567”), make sure the letter is in lowercase.
Where you see [FirstName] in the text, replace it with your actual first name. If you do not
have a first name, then use your last name. Do NOT include any spaces or other
non- alphabetical characters (e.g. “-“).
Submission
Submit two files on Moodle only:
1. The report, based on the answer template, called [StudentID]-report.docx.
Paraphrase This Document
Need a fresh take? Get an instant paraphrase of this document with our AI Paraphraser
COIT20262 Assignment 2 Questions Term 1, 2019
Advanced Network Security Page 2 of 10
2. A ZIP file, called to [StudentID]-files.zip, containing all other files. Do
not include your report in this ZIP file, and do not include any directories. Only
include those files named in the questions. Do not use rar, 7z, tgz or other formats –
only ZIP.
Marking Scheme
A separate spreadsheet lists the detailed marking criteria.
Virtnet
Questions 1, 2 and 3 require you to use virtnet topology 5. The questions are related, so you
must use the same nodes for all three questions.
• node1: client; assumed to be external from the perspective of the firewall.
• node2: router; gateway between the internal network and external network. Also runs
the firewall.
• node3: server; assumed to be internal from the perspective of the firewall. Runs a web
server with HTTPS and a SSH server for external users (e.g. on node1) to login to.
Will contain accounts for multiple users.
COIT20262 Assignment 2 Questions Term 1, 2019
Advanced Network Security Page 3 of 10
Question 1. HTTPS and Certificates
For this question you must use virtnet to study HTTPS and certificates. This assumes you
have already setup and are familiar with virtnet. See Moodle and tutorial instructions for
information on setting up and using virtnet, deploying the website, and testing the website.
Your task is to setup a web server that supports HTTPS. The tasks and sub-questions
are grouped into multiple phases.
Phase 1: Setup Topology
1. Create topology 5 in virtnet.
2. Deploy the MyUni demo website, with node3 being the real web server.
3. Change the domain name from www.myuni.edu to www.[StudentID].edu by editing
the /etc/hosts file on node1.
Phase 2: Certificate Signing Request
You will need to use the files made available to you for download from Assignment 1.
1. Using [StudentID]-keypair.pem you must create a Certificate Signing Request
called [StudentID]-csr.pem. The CSR must contain these field values:
• State: state of your campus
• Locality: city of your campus
• Organisation Name: your full name
• Common Name: www.[StudentID].edu
• Email address: your @cqumail address
• Other field values must be selected appropriately.
Phase 3: Certificate from CA
Send your Certificate Signing Request file to your Certificate Authority. The method
of contacting your CA will be published on Moodle. You will be issued with a certificate
called [StudentID]-cert.pem from CA (or in the case of an error, a response indicating the
CSR is not valid).
Note that there may be a delay of up to 24 hours during weekdays (and 48 hours over the
weekend) for the CA to respond to your CSR. Further details of the process can be found on
Moodle.
Phase 3: HTTPs Configuration
1. Configure Apache web server on node3 to use HTTPS. Remember the domain name
must be www.[StudentID].edu where [StudentID] is replace with your actual student
ID.
2. Load the CA certificate into the client on node1. The CA certificate can be
downloaded from Moodle.
⊘ This is a preview!⊘
Do you want full access?
Subscribe today to unlock all pages.
Trusted by 1+ million students worldwide
COIT20262 Assignment 2 Questions Term 1, 2019
Advanced Network Security Page 4 of 10
Phase 4: Testing
1. Start capturing on node2 using tcpdump.
2. On node1, use lynx to visit https://www.[StudentID].edu/grades/ and login to
view some grades.
3. Exit lynx.
4. Stop the capturing and save the file as [StudentID]-https.pcap.
When capturing, make sure you capture a full HTTPS session, and avoiding capturing
multiple sessions.
Phase 5: Analysis
(a) Add the CSR [StudentID]-csr.pem to [StudentID]-files.zip.
(b) Add the issued certificate [StudentID]-cert.pem to [StudentID]-files.zip.
(c) Add the packet capture [StudentID]-https.pcap to [StudentID]-files.zip.
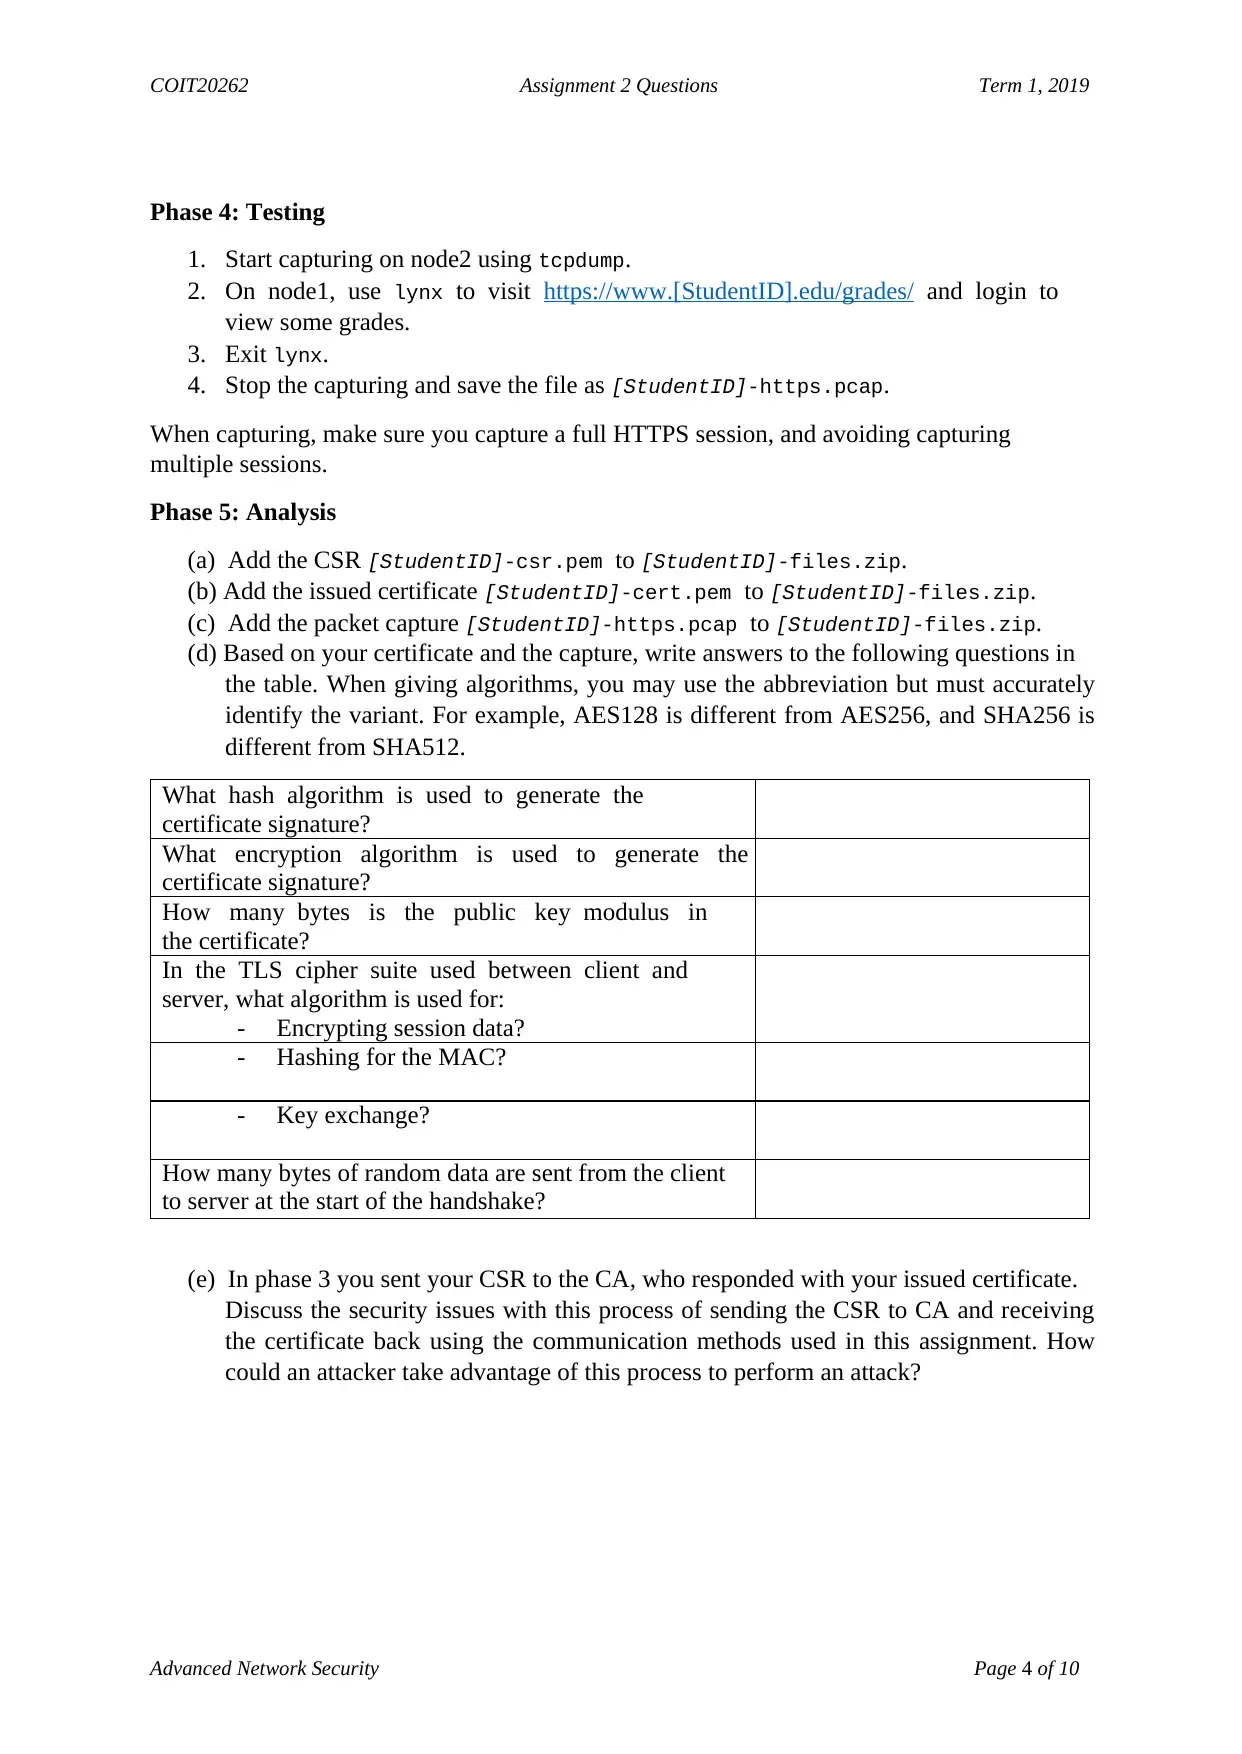
(d) Based on your certificate and the capture, write answers to the following questions in
the table. When giving algorithms, you may use the abbreviation but must accurately
identify the variant. For example, AES128 is different from AES256, and SHA256 is
different from SHA512.
What hash algorithm is used to generate the
certificate signature?
What encryption algorithm is used to generate the
certificate signature?
How many bytes is the public key modulus in
the certificate?
In the TLS cipher suite used between client and
server, what algorithm is used for:
- Encrypting session data?
- Hashing for the MAC?
- Key exchange?
How many bytes of random data are sent from the client
to server at the start of the handshake?
(e) In phase 3 you sent your CSR to the CA, who responded with your issued certificate.
Discuss the security issues with this process of sending the CSR to CA and receiving
the certificate back using the communication methods used in this assignment. How
could an attacker take advantage of this process to perform an attack?
Advanced Network Security Page 4 of 10
Phase 4: Testing
1. Start capturing on node2 using tcpdump.
2. On node1, use lynx to visit https://www.[StudentID].edu/grades/ and login to
view some grades.
3. Exit lynx.
4. Stop the capturing and save the file as [StudentID]-https.pcap.
When capturing, make sure you capture a full HTTPS session, and avoiding capturing
multiple sessions.
Phase 5: Analysis
(a) Add the CSR [StudentID]-csr.pem to [StudentID]-files.zip.
(b) Add the issued certificate [StudentID]-cert.pem to [StudentID]-files.zip.
(c) Add the packet capture [StudentID]-https.pcap to [StudentID]-files.zip.
(d) Based on your certificate and the capture, write answers to the following questions in
the table. When giving algorithms, you may use the abbreviation but must accurately
identify the variant. For example, AES128 is different from AES256, and SHA256 is
different from SHA512.
What hash algorithm is used to generate the
certificate signature?
What encryption algorithm is used to generate the
certificate signature?
How many bytes is the public key modulus in
the certificate?
In the TLS cipher suite used between client and
server, what algorithm is used for:
- Encrypting session data?
- Hashing for the MAC?
- Key exchange?
How many bytes of random data are sent from the client
to server at the start of the handshake?
(e) In phase 3 you sent your CSR to the CA, who responded with your issued certificate.
Discuss the security issues with this process of sending the CSR to CA and receiving
the certificate back using the communication methods used in this assignment. How
could an attacker take advantage of this process to perform an attack?
Paraphrase This Document
Need a fresh take? Get an instant paraphrase of this document with our AI Paraphraser
COIT20262 Assignment 2 Questions Term 1, 2019
Advanced Network Security Page 5 of 10
Question 2. Authentication and Access Control
This question uses the same nodes as Question 1.
You need to configure the server (node3) to allow multiple different users to access it. These
users will be web developers, creating and testing web content.
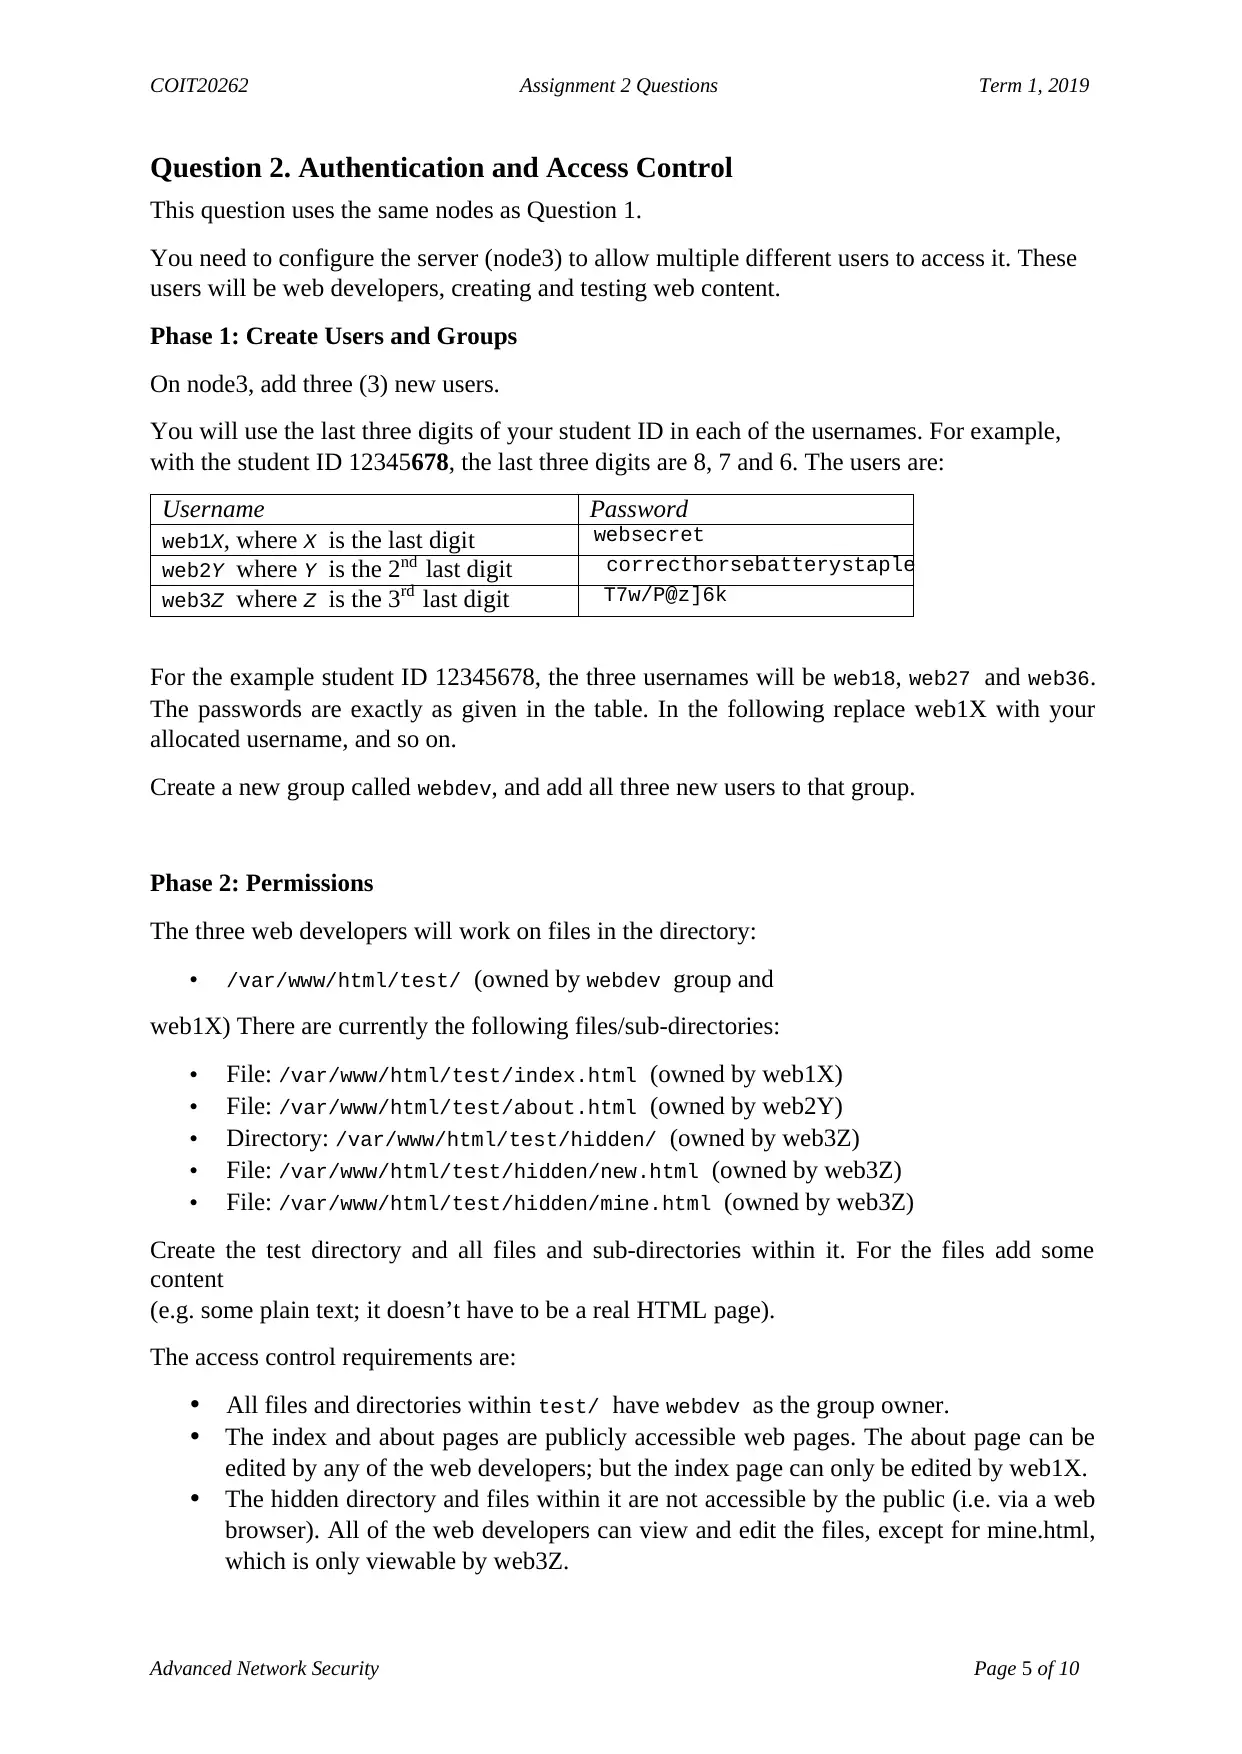
Phase 1: Create Users and Groups
On node3, add three (3) new users.
You will use the last three digits of your student ID in each of the usernames. For example,
with the student ID 12345678, the last three digits are 8, 7 and 6. The users are:
Username Password
web1X, where X is the last digit websecret
web2Y where Y is the 2nd last digit correcthorsebatterystaple
web3Z where Z is the 3rd last digit T7w/P@z]6k
For the example student ID 12345678, the three usernames will be web18, web27 and web36.
The passwords are exactly as given in the table. In the following replace web1X with your
allocated username, and so on.
Create a new group called webdev, and add all three new users to that group.
Phase 2: Permissions
The three web developers will work on files in the directory:
• /var/www/html/test/ (owned by webdev group and
web1X) There are currently the following files/sub-directories:
• File: /var/www/html/test/index.html (owned by web1X)
• File: /var/www/html/test/about.html (owned by web2Y)
• Directory: /var/www/html/test/hidden/ (owned by web3Z)
• File: /var/www/html/test/hidden/new.html (owned by web3Z)
• File: /var/www/html/test/hidden/mine.html (owned by web3Z)
Create the test directory and all files and sub-directories within it. For the files add some
content
(e.g. some plain text; it doesn’t have to be a real HTML page).
The access control requirements are:
• All files and directories within test/ have webdev as the group owner.
• The index and about pages are publicly accessible web pages. The about page can be
edited by any of the web developers; but the index page can only be edited by web1X.
• The hidden directory and files within it are not accessible by the public (i.e. via a web
browser). All of the web developers can view and edit the files, except for mine.html,
which is only viewable by web3Z.
Advanced Network Security Page 5 of 10
Question 2. Authentication and Access Control
This question uses the same nodes as Question 1.
You need to configure the server (node3) to allow multiple different users to access it. These
users will be web developers, creating and testing web content.
Phase 1: Create Users and Groups
On node3, add three (3) new users.
You will use the last three digits of your student ID in each of the usernames. For example,
with the student ID 12345678, the last three digits are 8, 7 and 6. The users are:
Username Password
web1X, where X is the last digit websecret
web2Y where Y is the 2nd last digit correcthorsebatterystaple
web3Z where Z is the 3rd last digit T7w/P@z]6k
For the example student ID 12345678, the three usernames will be web18, web27 and web36.
The passwords are exactly as given in the table. In the following replace web1X with your
allocated username, and so on.
Create a new group called webdev, and add all three new users to that group.
Phase 2: Permissions
The three web developers will work on files in the directory:
• /var/www/html/test/ (owned by webdev group and
web1X) There are currently the following files/sub-directories:
• File: /var/www/html/test/index.html (owned by web1X)
• File: /var/www/html/test/about.html (owned by web2Y)
• Directory: /var/www/html/test/hidden/ (owned by web3Z)
• File: /var/www/html/test/hidden/new.html (owned by web3Z)
• File: /var/www/html/test/hidden/mine.html (owned by web3Z)
Create the test directory and all files and sub-directories within it. For the files add some
content
(e.g. some plain text; it doesn’t have to be a real HTML page).
The access control requirements are:
• All files and directories within test/ have webdev as the group owner.
• The index and about pages are publicly accessible web pages. The about page can be
edited by any of the web developers; but the index page can only be edited by web1X.
• The hidden directory and files within it are not accessible by the public (i.e. via a web
browser). All of the web developers can view and edit the files, except for mine.html,
which is only viewable by web3Z.
COIT20262 Assignment 2 Questions Term 1, 2019
Advanced Network Security Page 6 of 10
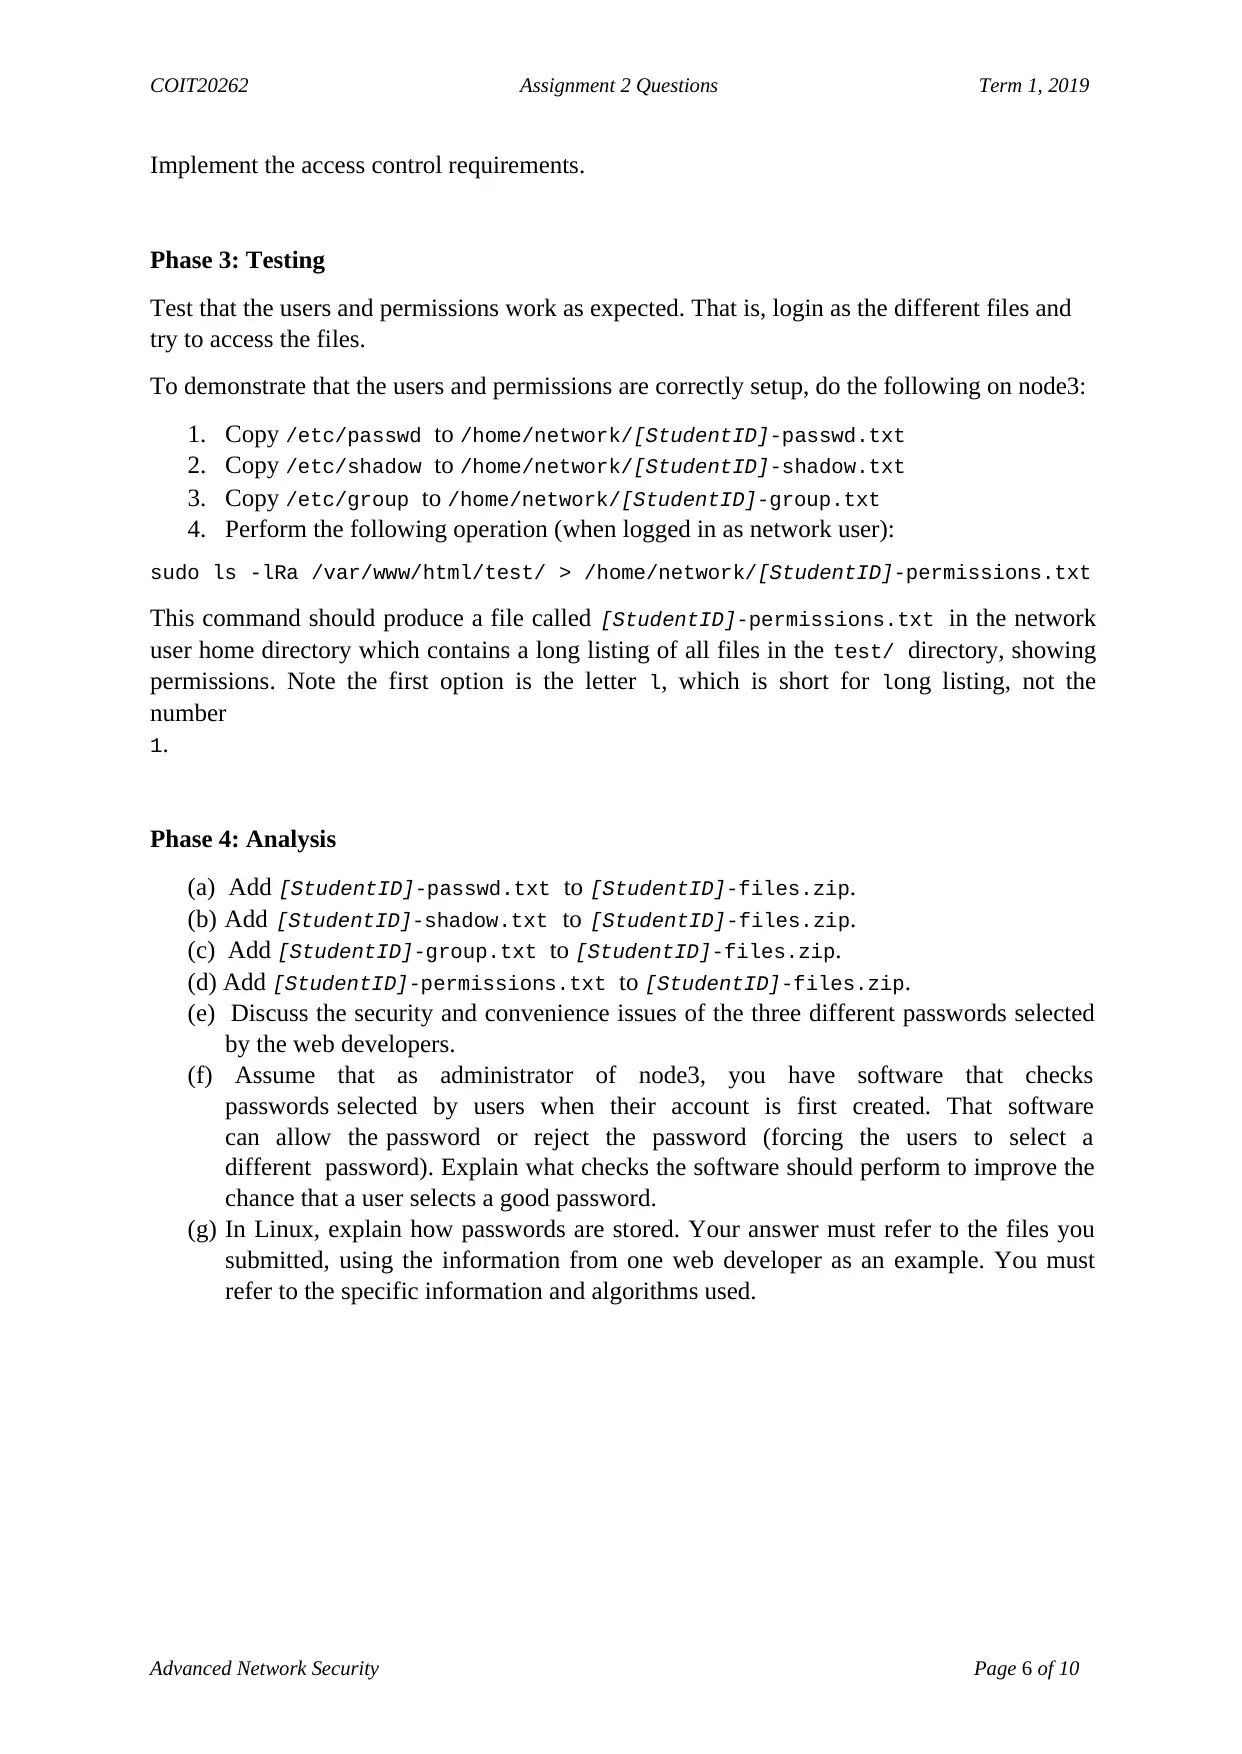
Implement the access control requirements.
Phase 3: Testing
Test that the users and permissions work as expected. That is, login as the different files and
try to access the files.
To demonstrate that the users and permissions are correctly setup, do the following on node3:
1. Copy /etc/passwd to /home/network/[StudentID]-passwd.txt
2. Copy /etc/shadow to /home/network/[StudentID]-shadow.txt
3. Copy /etc/group to /home/network/[StudentID]-group.txt
4. Perform the following operation (when logged in as network user):
sudo ls -lRa /var/www/html/test/ > /home/network/[StudentID]-permissions.txt
This command should produce a file called [StudentID]-permissions.txt in the network
user home directory which contains a long listing of all files in the test/ directory, showing
permissions. Note the first option is the letter l, which is short for long listing, not the
number
1.
Phase 4: Analysis
(a) Add [StudentID]-passwd.txt to [StudentID]-files.zip.
(b) Add [StudentID]-shadow.txt to [StudentID]-files.zip.
(c) Add [StudentID]-group.txt to [StudentID]-files.zip.
(d) Add [StudentID]-permissions.txt to [StudentID]-files.zip.
(e) Discuss the security and convenience issues of the three different passwords selected
by the web developers.
(f) Assume that as administrator of node3, you have software that checks
passwords selected by users when their account is first created. That software
can allow the password or reject the password (forcing the users to select a
different password). Explain what checks the software should perform to improve the
chance that a user selects a good password.
(g) In Linux, explain how passwords are stored. Your answer must refer to the files you
submitted, using the information from one web developer as an example. You must
refer to the specific information and algorithms used.
Advanced Network Security Page 6 of 10
Implement the access control requirements.
Phase 3: Testing
Test that the users and permissions work as expected. That is, login as the different files and
try to access the files.
To demonstrate that the users and permissions are correctly setup, do the following on node3:
1. Copy /etc/passwd to /home/network/[StudentID]-passwd.txt
2. Copy /etc/shadow to /home/network/[StudentID]-shadow.txt
3. Copy /etc/group to /home/network/[StudentID]-group.txt
4. Perform the following operation (when logged in as network user):
sudo ls -lRa /var/www/html/test/ > /home/network/[StudentID]-permissions.txt
This command should produce a file called [StudentID]-permissions.txt in the network
user home directory which contains a long listing of all files in the test/ directory, showing
permissions. Note the first option is the letter l, which is short for long listing, not the
number
1.
Phase 4: Analysis
(a) Add [StudentID]-passwd.txt to [StudentID]-files.zip.
(b) Add [StudentID]-shadow.txt to [StudentID]-files.zip.
(c) Add [StudentID]-group.txt to [StudentID]-files.zip.
(d) Add [StudentID]-permissions.txt to [StudentID]-files.zip.
(e) Discuss the security and convenience issues of the three different passwords selected
by the web developers.
(f) Assume that as administrator of node3, you have software that checks
passwords selected by users when their account is first created. That software
can allow the password or reject the password (forcing the users to select a
different password). Explain what checks the software should perform to improve the
chance that a user selects a good password.
(g) In Linux, explain how passwords are stored. Your answer must refer to the files you
submitted, using the information from one web developer as an example. You must
refer to the specific information and algorithms used.
⊘ This is a preview!⊘
Do you want full access?
Subscribe today to unlock all pages.
Trusted by 1+ million students worldwide
COIT20262 Assignment 2 Questions Term 1, 2019
Advanced Network Security Page 7 of 10
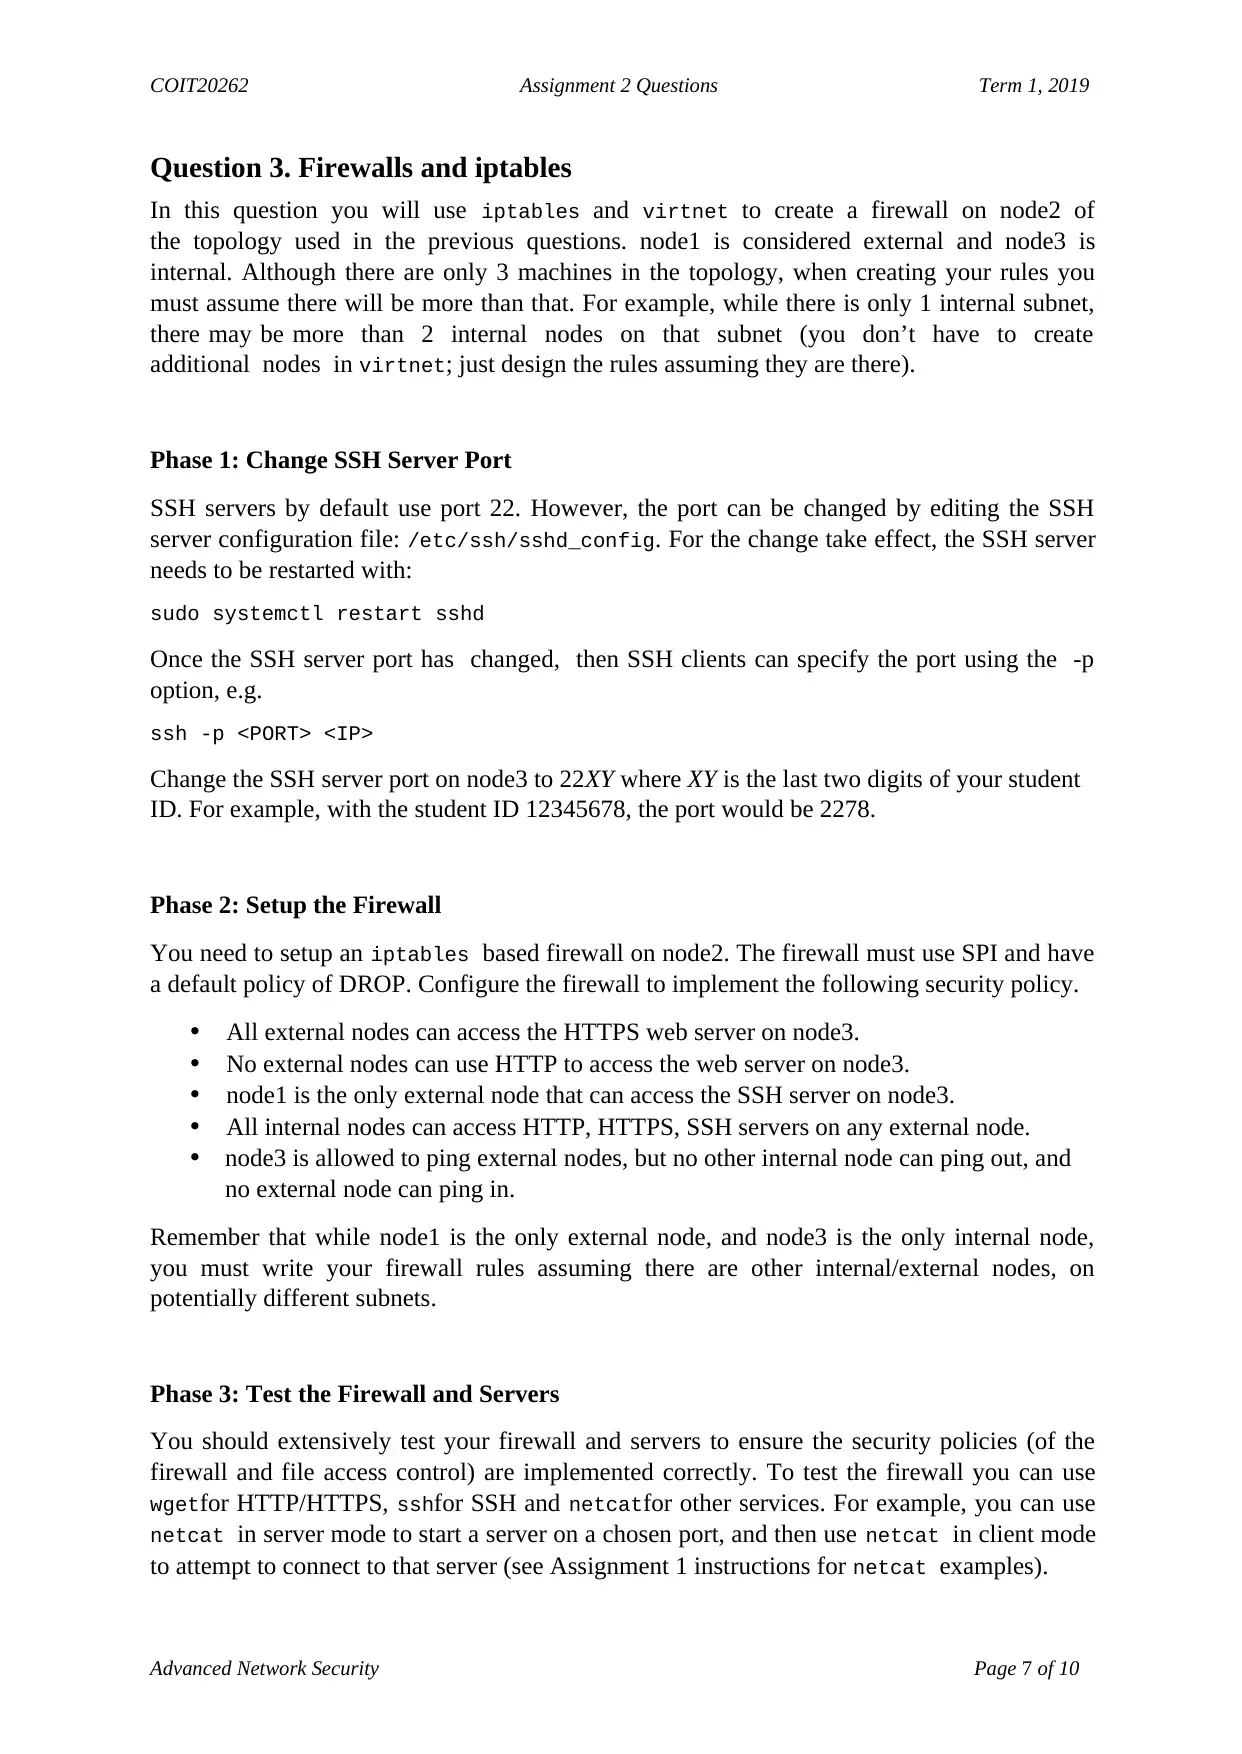
Question 3. Firewalls and iptables
In this question you will use iptables and virtnet to create a firewall on node2 of
the topology used in the previous questions. node1 is considered external and node3 is
internal. Although there are only 3 machines in the topology, when creating your rules you
must assume there will be more than that. For example, while there is only 1 internal subnet,
there may be more than 2 internal nodes on that subnet (you don’t have to create
additional nodes in virtnet; just design the rules assuming they are there).
Phase 1: Change SSH Server Port
SSH servers by default use port 22. However, the port can be changed by editing the SSH
server configuration file: /etc/ssh/sshd_config. For the change take effect, the SSH server
needs to be restarted with:
sudo systemctl restart sshd
Once the SSH server port has changed, then SSH clients can specify the port using the -p
option, e.g.
ssh -p <PORT> <IP>
Change the SSH server port on node3 to 22XY where XY is the last two digits of your student
ID. For example, with the student ID 12345678, the port would be 2278.
Phase 2: Setup the Firewall
You need to setup an iptables based firewall on node2. The firewall must use SPI and have
a default policy of DROP. Configure the firewall to implement the following security policy.
• All external nodes can access the HTTPS web server on node3.
• No external nodes can use HTTP to access the web server on node3.
• node1 is the only external node that can access the SSH server on node3.
• All internal nodes can access HTTP, HTTPS, SSH servers on any external node.
• node3 is allowed to ping external nodes, but no other internal node can ping out, and
no external node can ping in.
Remember that while node1 is the only external node, and node3 is the only internal node,
you must write your firewall rules assuming there are other internal/external nodes, on
potentially different subnets.
Phase 3: Test the Firewall and Servers
You should extensively test your firewall and servers to ensure the security policies (of the
firewall and file access control) are implemented correctly. To test the firewall you can use
wgetfor HTTP/HTTPS, sshfor SSH and netcatfor other services. For example, you can use
netcat in server mode to start a server on a chosen port, and then use netcat in client mode
to attempt to connect to that server (see Assignment 1 instructions for netcat examples).
Advanced Network Security Page 7 of 10
Question 3. Firewalls and iptables
In this question you will use iptables and virtnet to create a firewall on node2 of
the topology used in the previous questions. node1 is considered external and node3 is
internal. Although there are only 3 machines in the topology, when creating your rules you
must assume there will be more than that. For example, while there is only 1 internal subnet,
there may be more than 2 internal nodes on that subnet (you don’t have to create
additional nodes in virtnet; just design the rules assuming they are there).
Phase 1: Change SSH Server Port
SSH servers by default use port 22. However, the port can be changed by editing the SSH
server configuration file: /etc/ssh/sshd_config. For the change take effect, the SSH server
needs to be restarted with:
sudo systemctl restart sshd
Once the SSH server port has changed, then SSH clients can specify the port using the -p
option, e.g.
ssh -p <PORT> <IP>
Change the SSH server port on node3 to 22XY where XY is the last two digits of your student
ID. For example, with the student ID 12345678, the port would be 2278.
Phase 2: Setup the Firewall
You need to setup an iptables based firewall on node2. The firewall must use SPI and have
a default policy of DROP. Configure the firewall to implement the following security policy.
• All external nodes can access the HTTPS web server on node3.
• No external nodes can use HTTP to access the web server on node3.
• node1 is the only external node that can access the SSH server on node3.
• All internal nodes can access HTTP, HTTPS, SSH servers on any external node.
• node3 is allowed to ping external nodes, but no other internal node can ping out, and
no external node can ping in.
Remember that while node1 is the only external node, and node3 is the only internal node,
you must write your firewall rules assuming there are other internal/external nodes, on
potentially different subnets.
Phase 3: Test the Firewall and Servers
You should extensively test your firewall and servers to ensure the security policies (of the
firewall and file access control) are implemented correctly. To test the firewall you can use
wgetfor HTTP/HTTPS, sshfor SSH and netcatfor other services. For example, you can use
netcat in server mode to start a server on a chosen port, and then use netcat in client mode
to attempt to connect to that server (see Assignment 1 instructions for netcat examples).
Paraphrase This Document
Need a fresh take? Get an instant paraphrase of this document with our AI Paraphraser
COIT20262 Assignment 2 Questions Term 1, 2019
Advanced Network Security Page 8 of 10
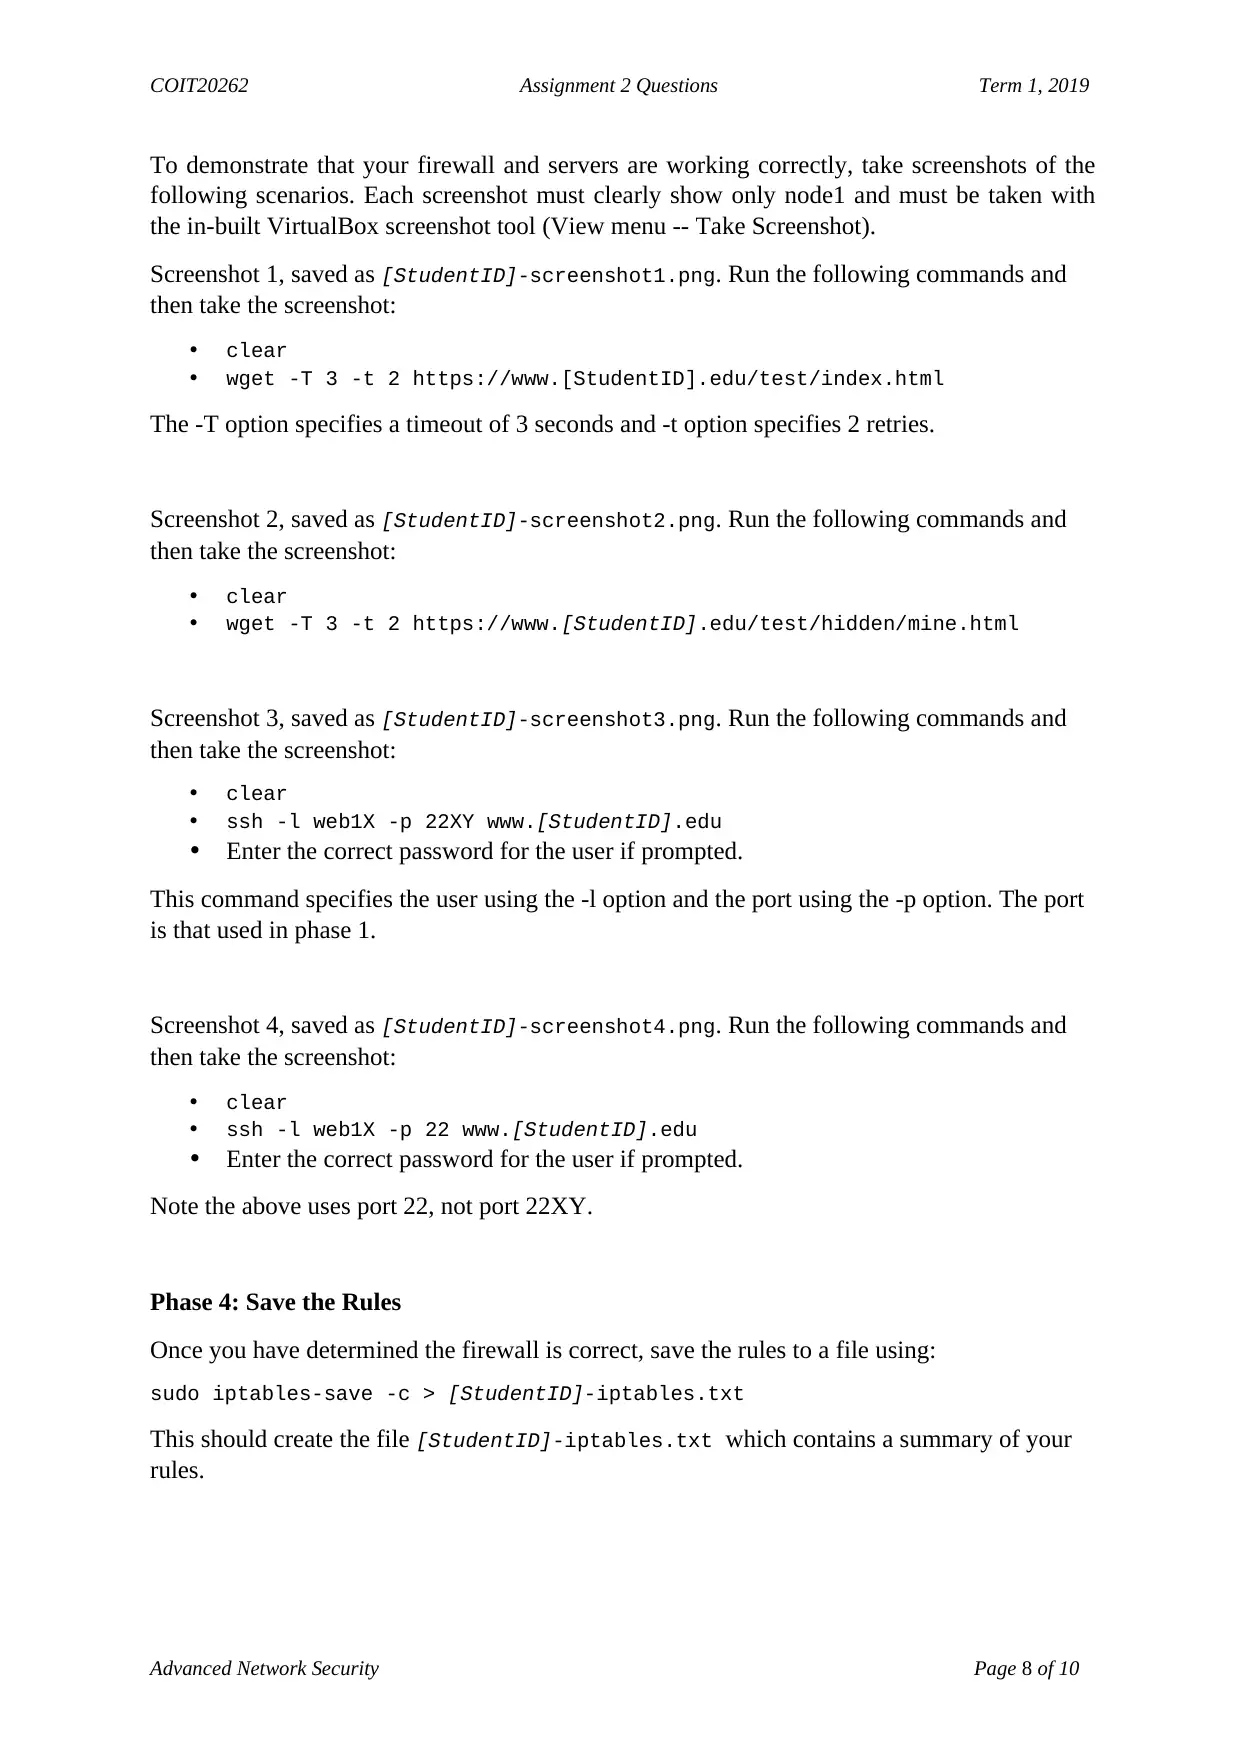
To demonstrate that your firewall and servers are working correctly, take screenshots of the
following scenarios. Each screenshot must clearly show only node1 and must be taken with
the in-built VirtualBox screenshot tool (View menu -- Take Screenshot).
Screenshot 1, saved as [StudentID]-screenshot1.png. Run the following commands and
then take the screenshot:
• clear
• wget -T 3 -t 2 https://www.[StudentID].edu/test/index.html
The -T option specifies a timeout of 3 seconds and -t option specifies 2 retries.
Screenshot 2, saved as [StudentID]-screenshot2.png. Run the following commands and
then take the screenshot:
• clear
• wget -T 3 -t 2 https://www.[StudentID].edu/test/hidden/mine.html
Screenshot 3, saved as [StudentID]-screenshot3.png. Run the following commands and
then take the screenshot:
• clear
• ssh -l web1X -p 22XY www.[StudentID].edu
• Enter the correct password for the user if prompted.
This command specifies the user using the -l option and the port using the -p option. The port
is that used in phase 1.
Screenshot 4, saved as [StudentID]-screenshot4.png. Run the following commands and
then take the screenshot:
• clear
• ssh -l web1X -p 22 www.[StudentID].edu
• Enter the correct password for the user if prompted.
Note the above uses port 22, not port 22XY.
Phase 4: Save the Rules
Once you have determined the firewall is correct, save the rules to a file using:
sudo iptables-save -c > [StudentID]-iptables.txt
This should create the file [StudentID]-iptables.txt which contains a summary of your
rules.
Advanced Network Security Page 8 of 10
To demonstrate that your firewall and servers are working correctly, take screenshots of the
following scenarios. Each screenshot must clearly show only node1 and must be taken with
the in-built VirtualBox screenshot tool (View menu -- Take Screenshot).
Screenshot 1, saved as [StudentID]-screenshot1.png. Run the following commands and
then take the screenshot:
• clear
• wget -T 3 -t 2 https://www.[StudentID].edu/test/index.html
The -T option specifies a timeout of 3 seconds and -t option specifies 2 retries.
Screenshot 2, saved as [StudentID]-screenshot2.png. Run the following commands and
then take the screenshot:
• clear
• wget -T 3 -t 2 https://www.[StudentID].edu/test/hidden/mine.html
Screenshot 3, saved as [StudentID]-screenshot3.png. Run the following commands and
then take the screenshot:
• clear
• ssh -l web1X -p 22XY www.[StudentID].edu
• Enter the correct password for the user if prompted.
This command specifies the user using the -l option and the port using the -p option. The port
is that used in phase 1.
Screenshot 4, saved as [StudentID]-screenshot4.png. Run the following commands and
then take the screenshot:
• clear
• ssh -l web1X -p 22 www.[StudentID].edu
• Enter the correct password for the user if prompted.
Note the above uses port 22, not port 22XY.
Phase 4: Save the Rules
Once you have determined the firewall is correct, save the rules to a file using:
sudo iptables-save -c > [StudentID]-iptables.txt
This should create the file [StudentID]-iptables.txt which contains a summary of your
rules.

COIT20262 Assignment 2 Questions Term 1, 2019
Advanced Network Security Page 9 of 10
Phase 5: Analysis
You must include the screenshots in your report – do not submit the screenshot files
separately. (a) Include [StudentID]-screenshot1.png in your report.
(b) Include [StudentID]-screenshot2.png in your report.
(c) Include [StudentID]-screenshot3.png in your report.
(d) Include [StudentID]-screenshot4.png in your report.
(e) Add [StudentID]-iptables.txt to [StudentID]-files.zip.
(f) If an internal SSH server is accessible to multiple external users, then discuss how an
attacker without an account on the SSH server attempt to gain access. As the SSH
server administrator, discuss countermeasures you may use, and for those
countermeasures, any limitations or negative side-effects.
(g) You changed the port of the SSH server from the default value to another
value.
Discuss the security and convenience issues of changing the port from it’s
default value.
(h) Explain how an external attacker could attempt to determine what servers are
accessible on the internal network, and which servers are blocked by the firewall.
⊘ This is a preview!⊘
Do you want full access?
Subscribe today to unlock all pages.
Trusted by 1+ million students worldwide
COIT20262 Assignment 2 Questions Term 1, 2019
Advanced Network Security Page 10 of 10
Question 4. Internet Privacy
Encryption is commonly used to provide data confidentiality in the Internet: when two hosts
communicate, other entities in the path between the two hosts cannot read the data being sent.
However encryption on its own does not privacy of who is communicating. Although the
other entities cannot read the data, they can determine which two hosts are communicating.
Assume you want to have privacy protection while web browsing. Normally, when your client
computer sends a HTTP GET request to a web server, the IP address of both your
client computer (C) and the web server (S) are included in the IP header of the
packet. Any intermediate node on the path between client and server in the Internet can see
the values of C and S, thereby learning who is communicating.
Three common techniques for privacy protection, i.e. hiding both values of C and S
from intermediate nodes, in the Internet are:
• VPNs
• Web proxies
• Tor
(a) Explain how a web proxy works. Your explanation should include what a user needs
to do when using a web proxy, what security it provides, and what are the security
and convenience limitations.
(b) Explain the benefits and limitations of a user gains by using a VPN, compared to a web
proxy.
(c) What are the security and convenience weaknesses of a home user using a VPN for
private browsing.
1 out of 10
Related Documents


Your All-in-One AI-Powered Toolkit for Academic Success.
+13062052269
info@desklib.com
Available 24*7 on WhatsApp / Email
![[object Object]](/_next/static/media/star-bottom.7253800d.svg)
Unlock your academic potential
Copyright © 2020–2026 A2Z Services. All Rights Reserved. Developed and managed by ZUCOL.