CIS 101 - Network Admin: Hard Drive Restriction & DHCP Configuration

Verified

Added on  2023/04/21

|13
|616
|473
Homework Assignment
AI Summary
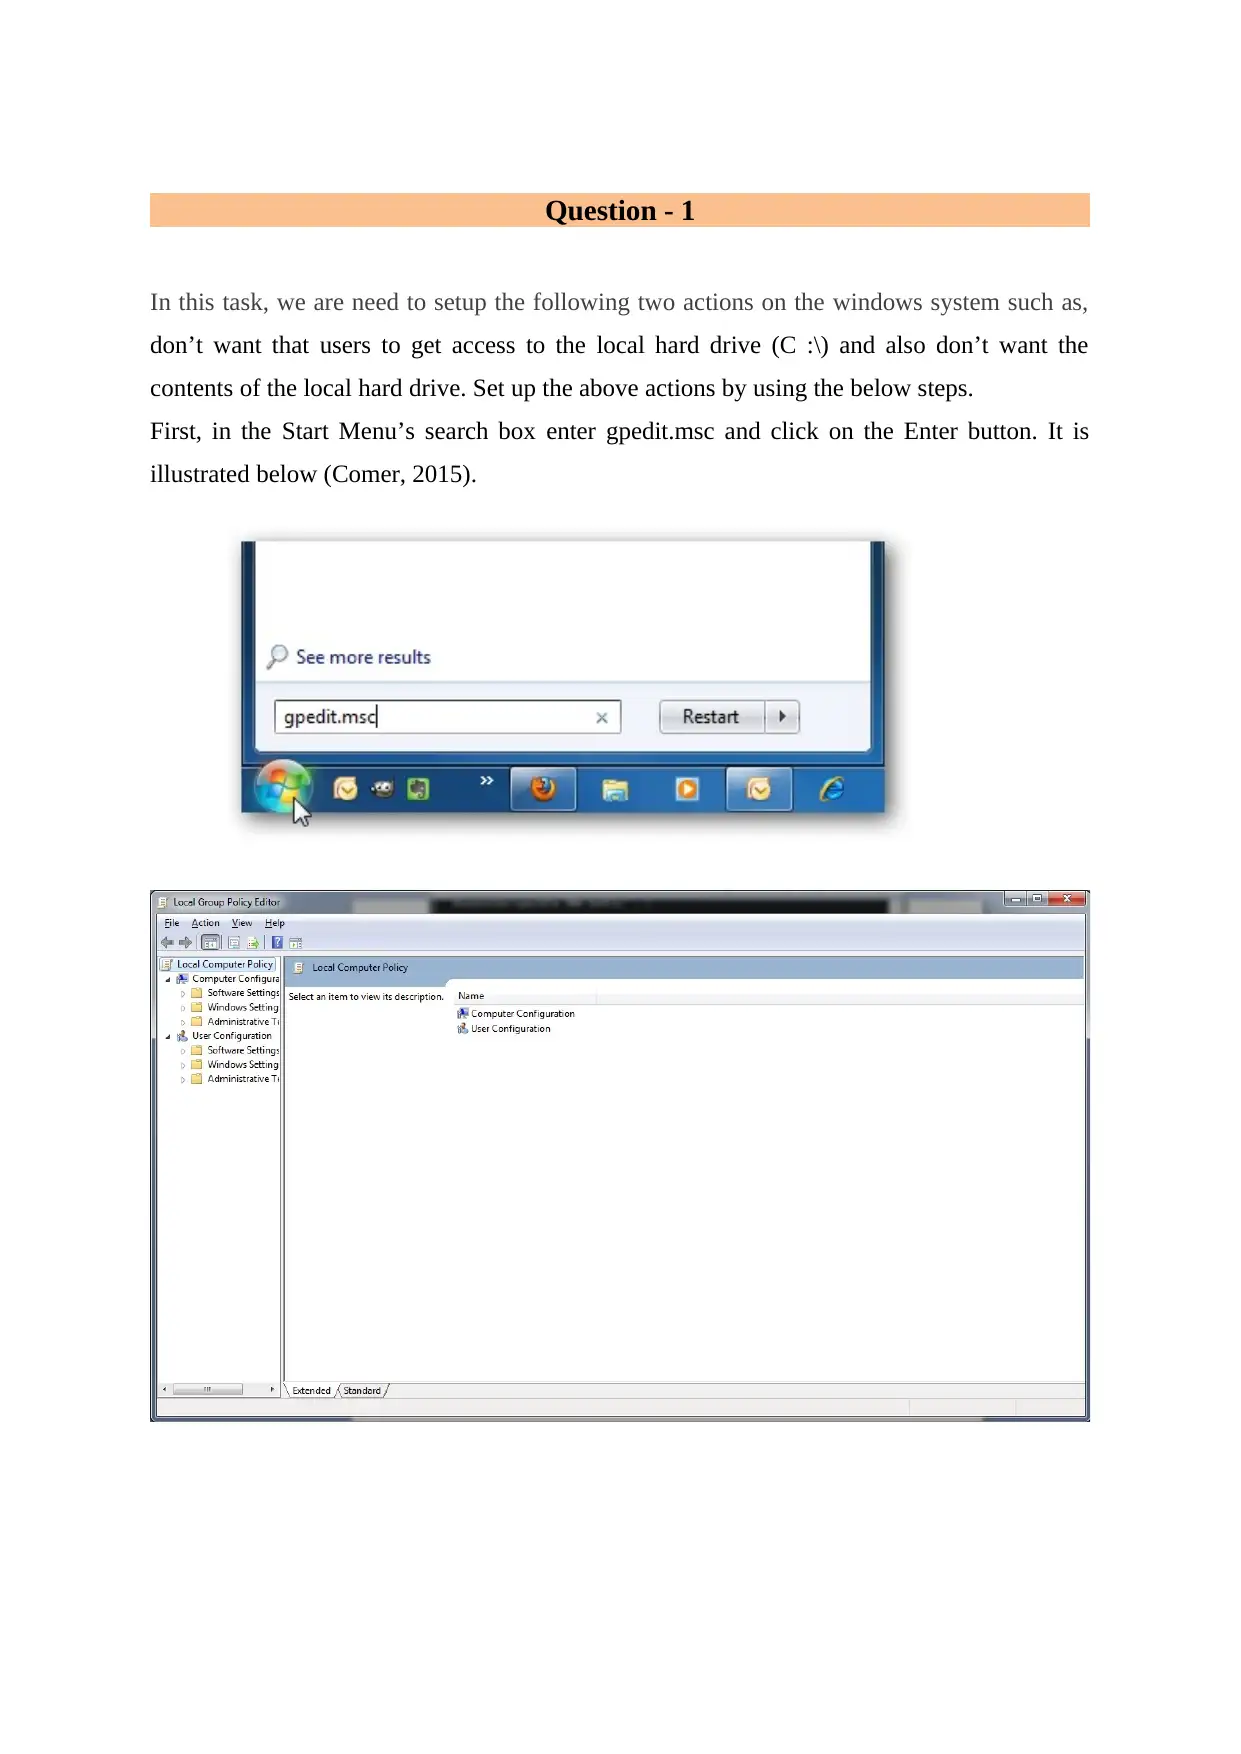
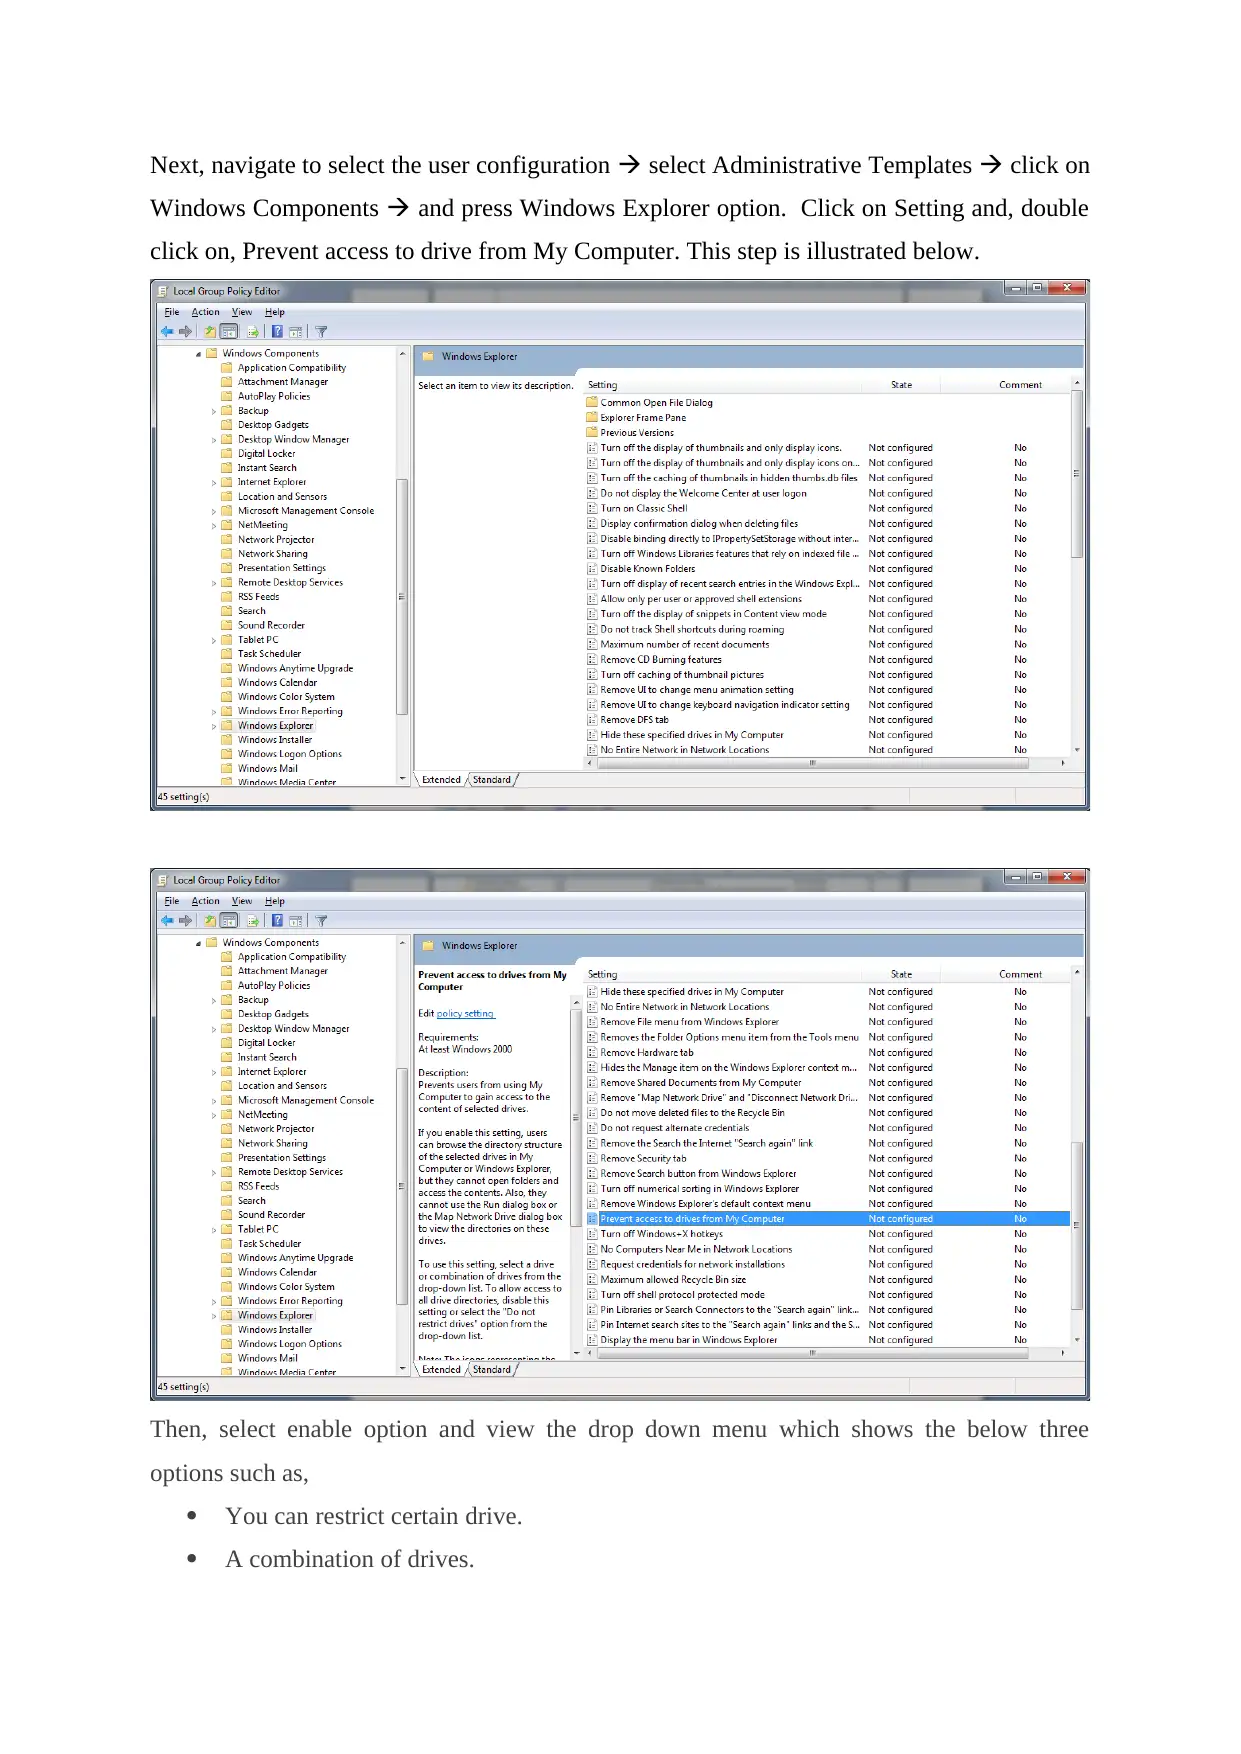
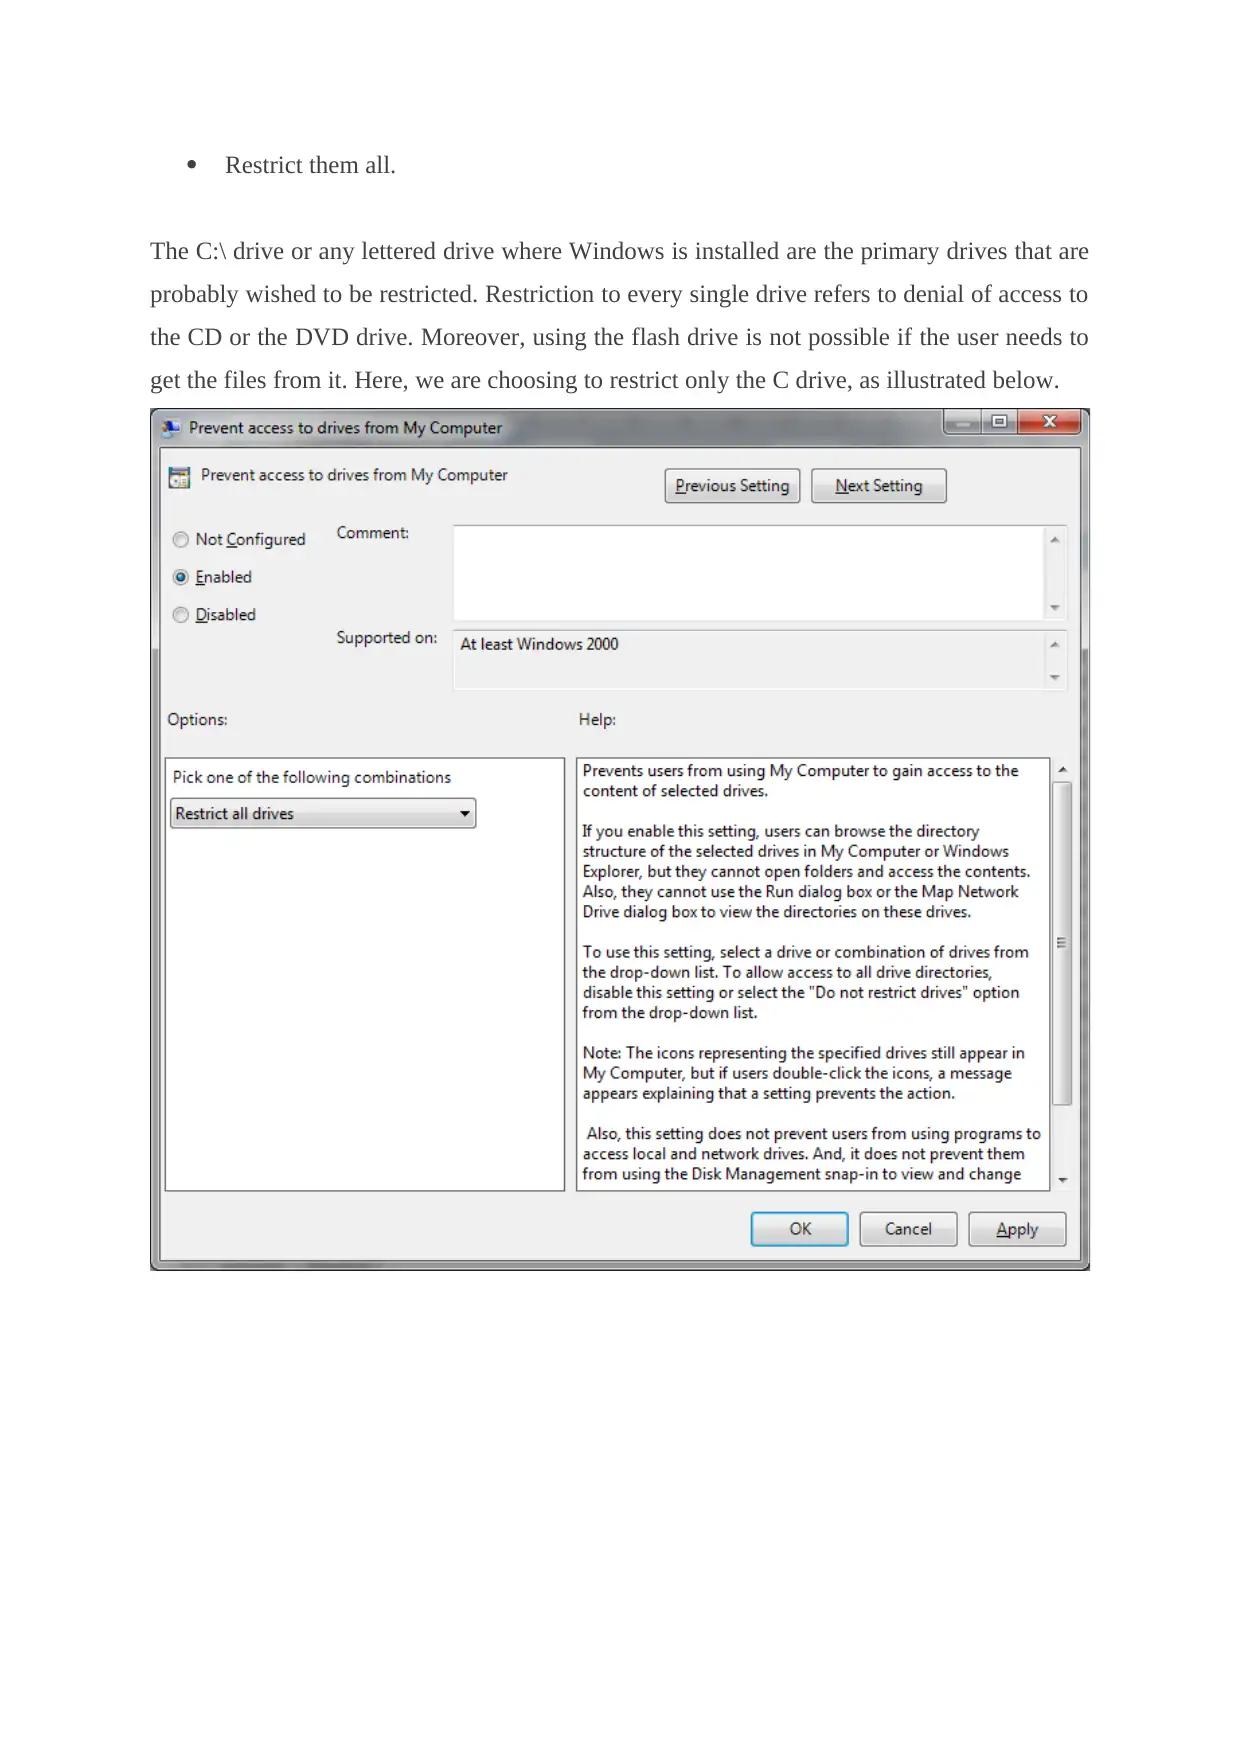
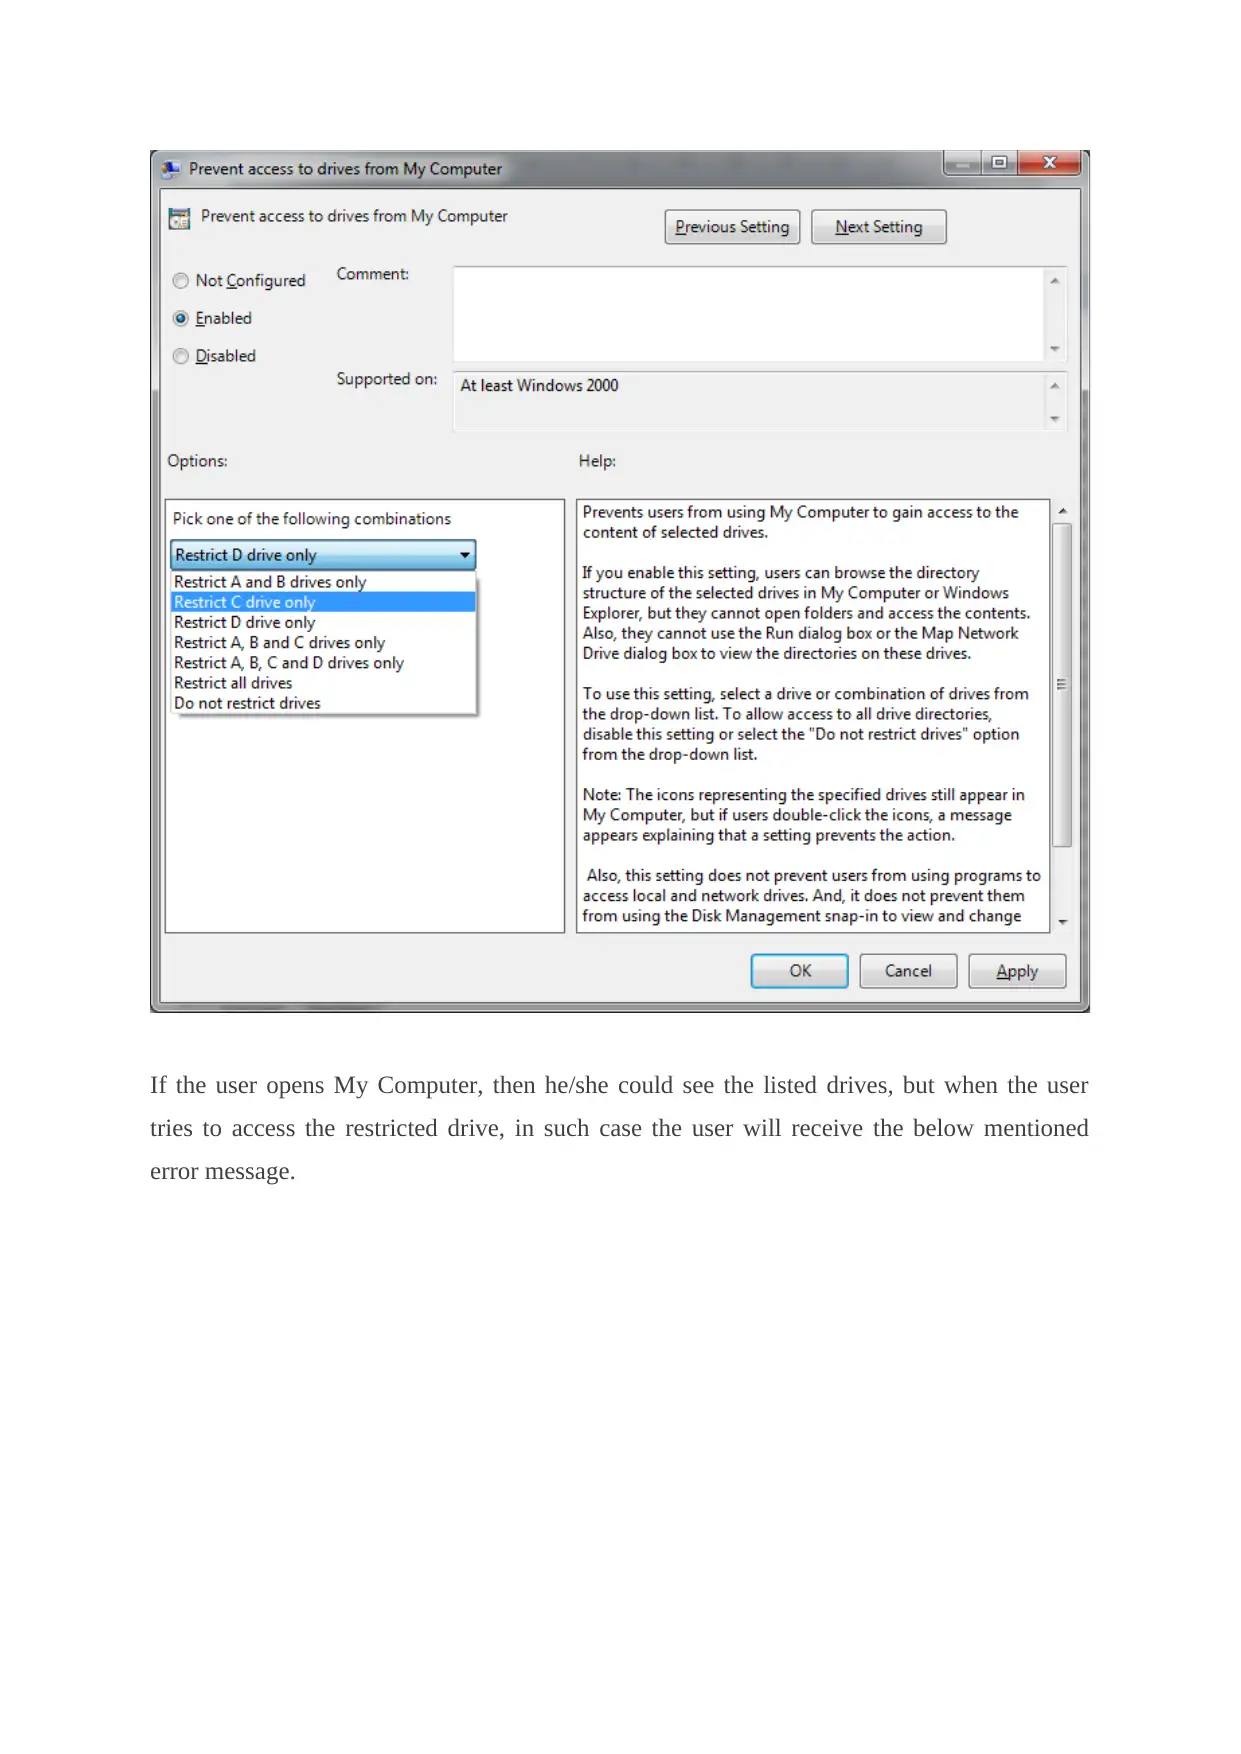
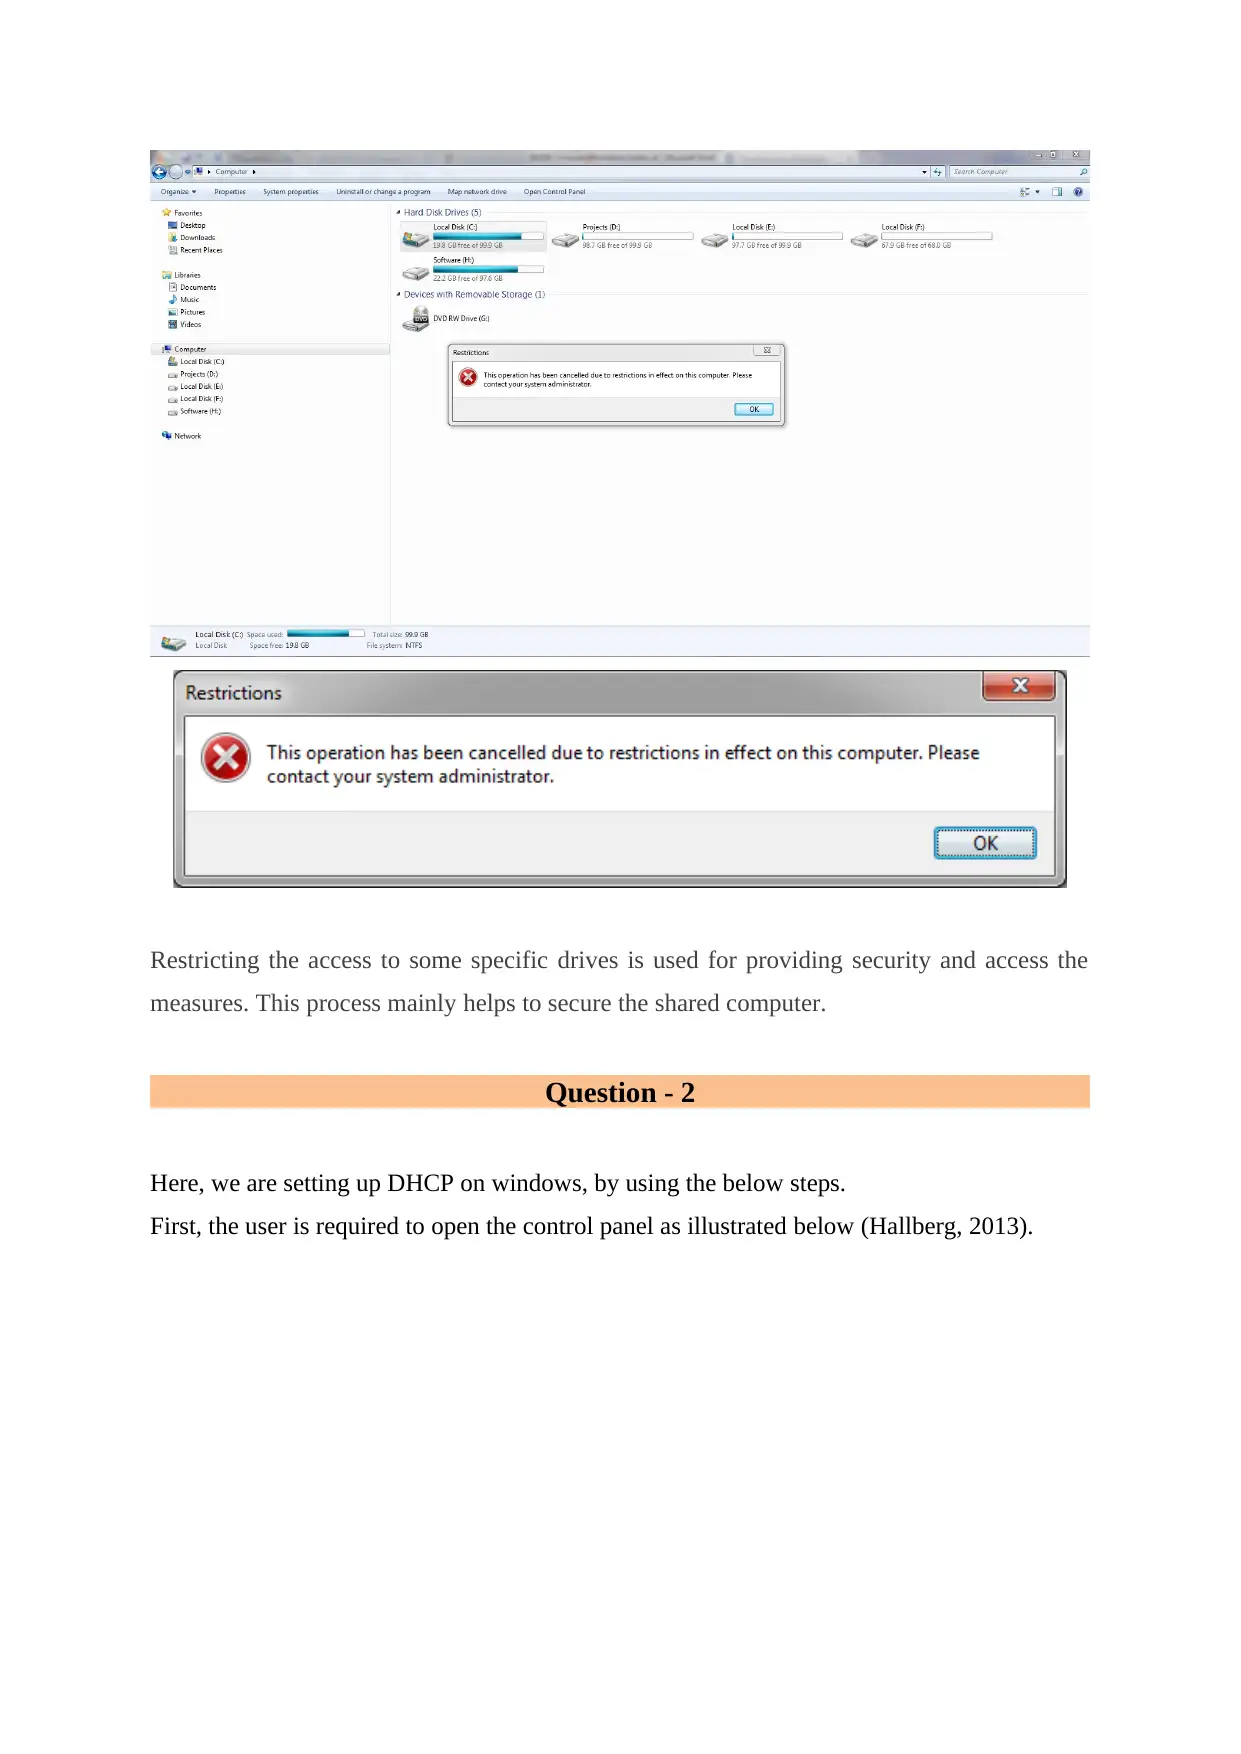
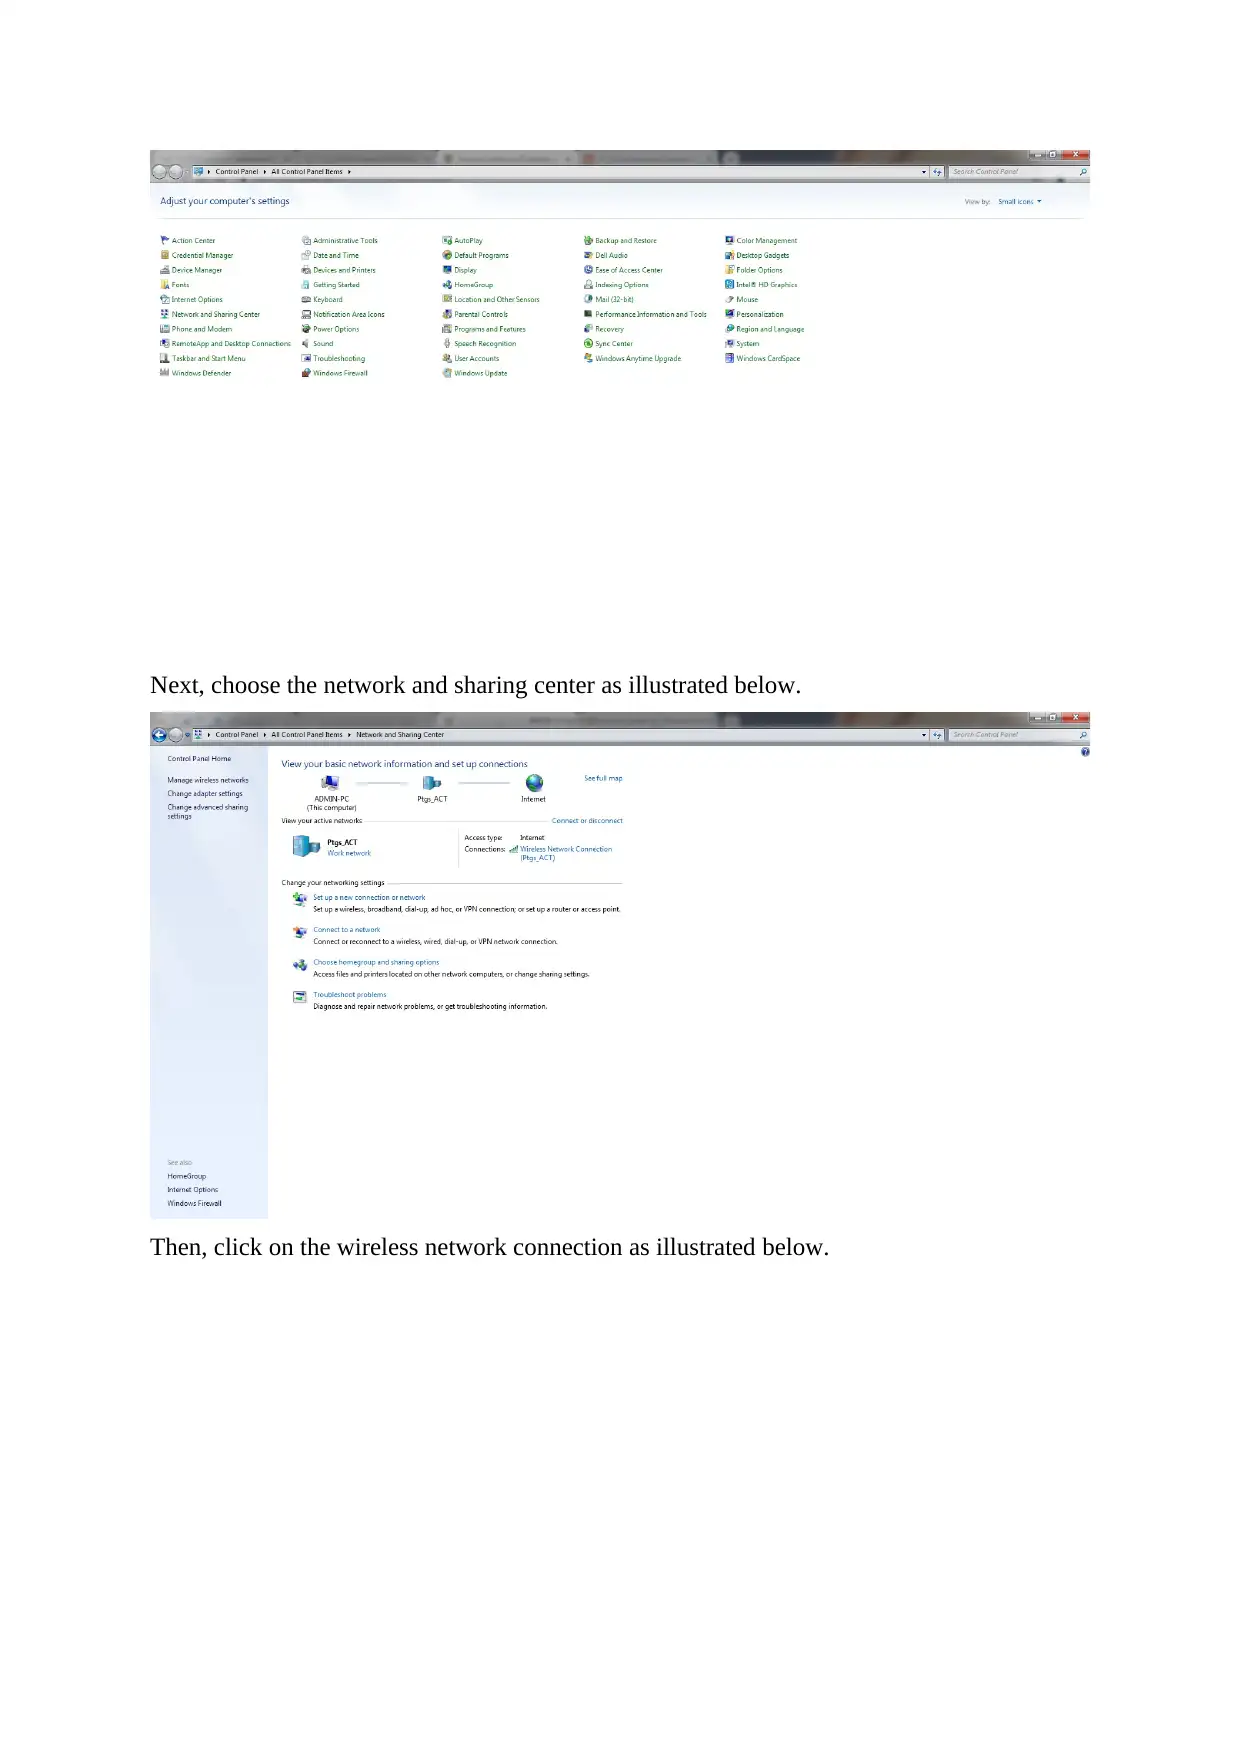
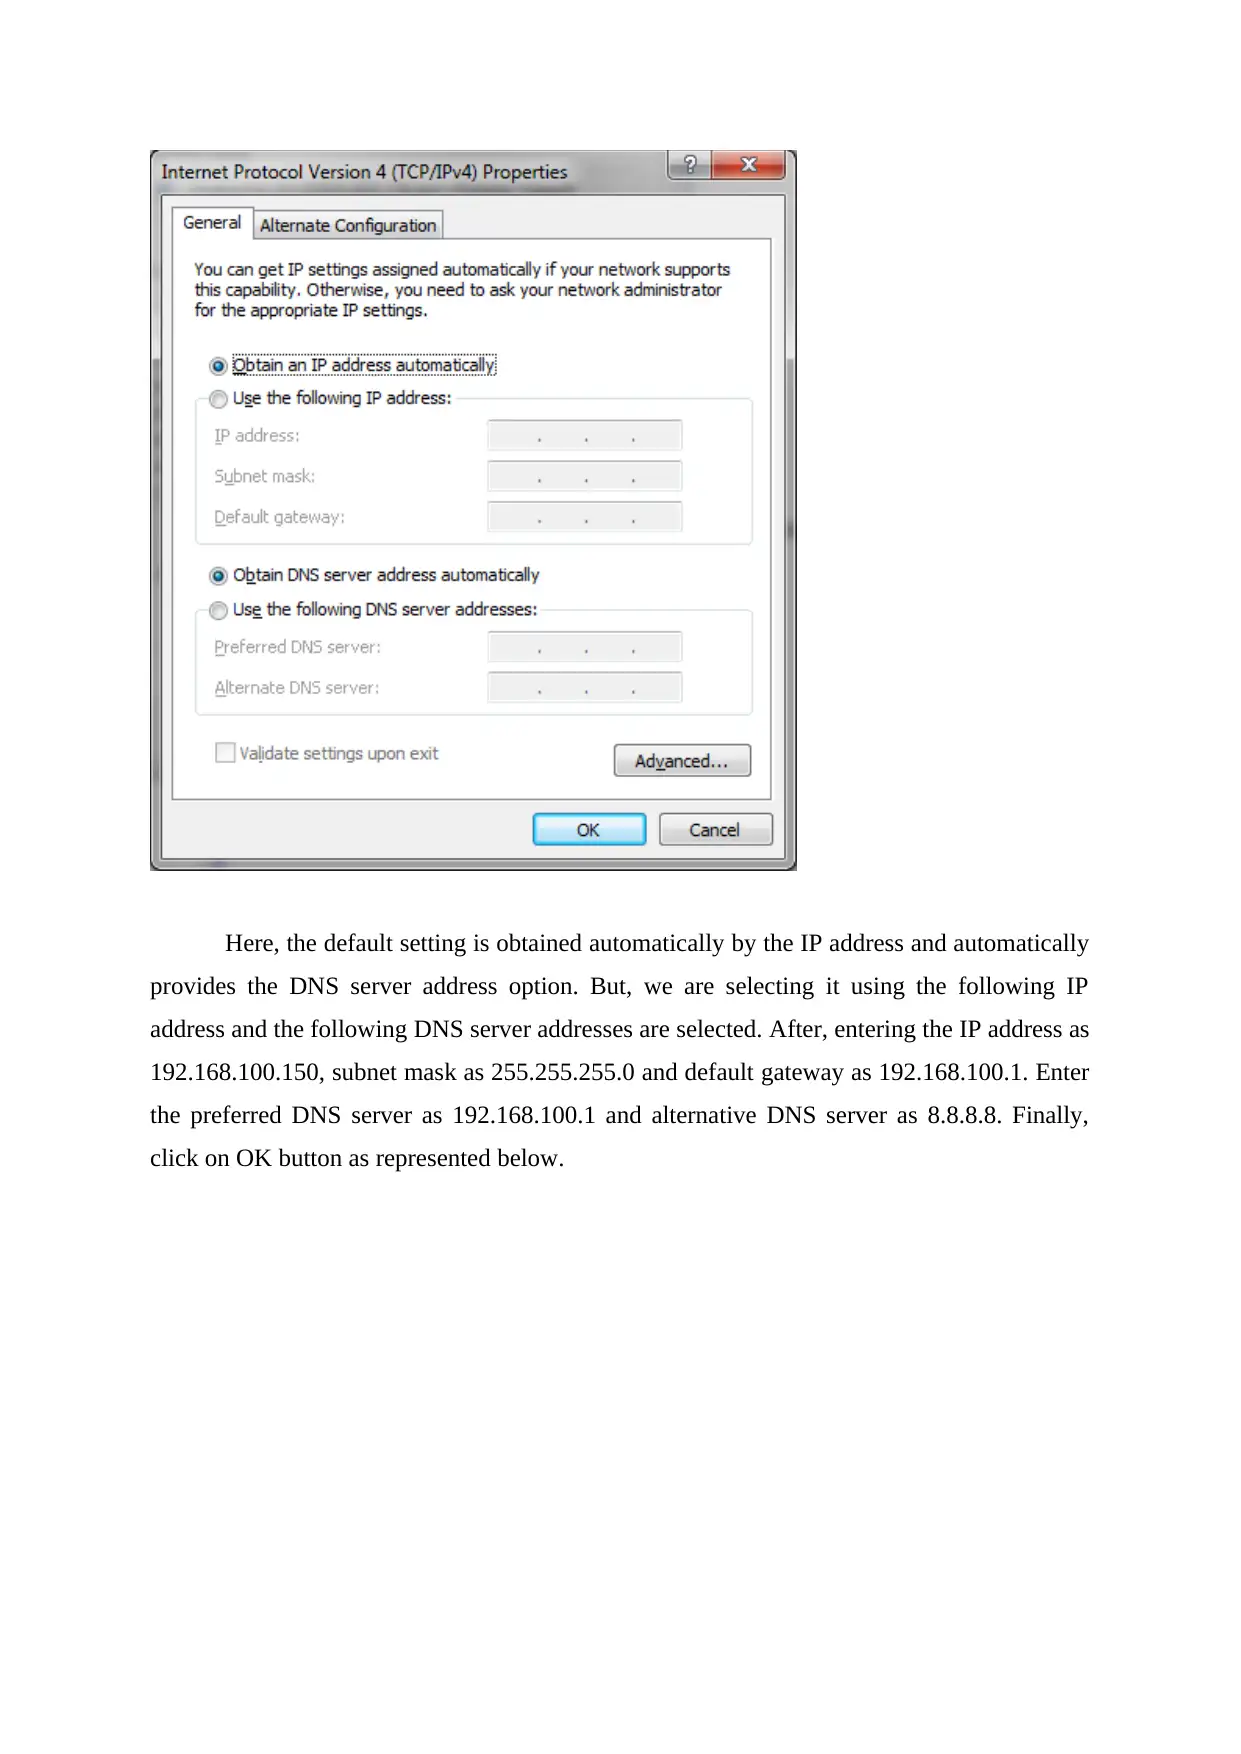
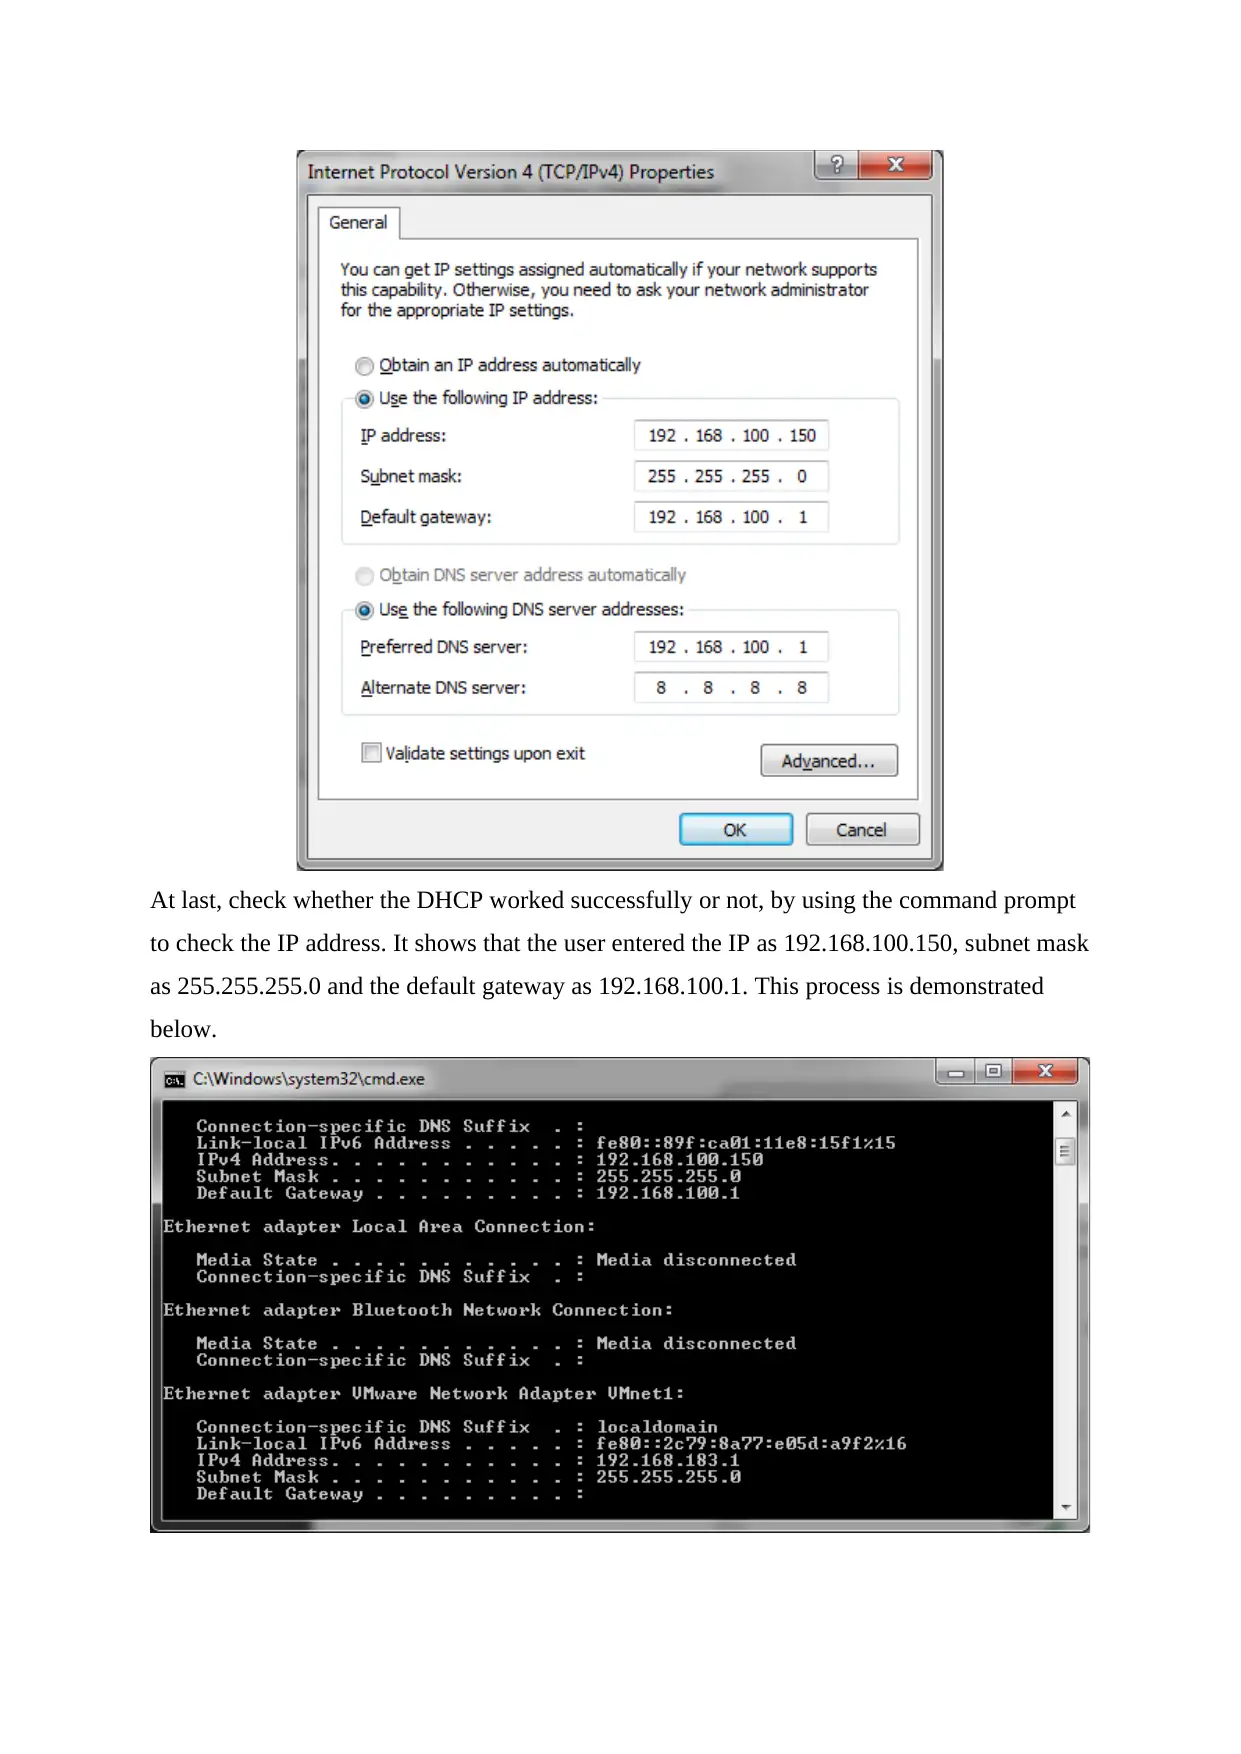
This document presents a detailed solution to a Computer Information Systems (CIS 101) assignment focused on network administration tasks. The assignment requires configuring two key aspects of a Windows system: restricting user access to the local hard drive (C:\) and setting up a DHCP server. The solution provides step-by-step instructions on how to prevent users from accessing the hard drive using the Group Policy Editor (gpedit.msc). It outlines the process of navigating the user configuration settings to enable the restriction and prevent access to the C drive. The solution also describes the process of setting up a DHCP server, including opening the control panel, navigating to network settings, configuring IP addresses (192.168.100.150-192.168.100.151), subnet mask (255.255.255.0), default gateway (192.168.100.1), and DNS server addresses (192.168.100.1 and 8.8.8.8). The document includes screenshots and references to support the configuration steps, providing a comprehensive guide for network administrators. The solution demonstrates the successful configuration of both hard drive restrictions and DHCP setup.
Document Page
Computer Information System
1
tabler-icon-diamond-filled.svg

Paraphrase This Document

Need a fresh take? Get an instant paraphrase of this document with our AI Paraphraser
Document Page
Table of Contents
Question - 1................................................................................................................................3
Question - 2................................................................................................................................7
References................................................................................................................................13
Document Page
Question - 1
In this task, we are need to setup the following two actions on the windows system such as,
don’t want that users to get access to the local hard drive (C :\) and also don’t want the
contents of the local hard drive. Set up the above actions by using the below steps.
First, in the Start Menu’s search box enter gpedit.msc and click on the Enter button. It is
illustrated below (Comer, 2015).
Document Page
Next, navigate to select the user configuration select Administrative Templates click on
Windows Components and press Windows Explorer option. Click on Setting and, double
click on, Prevent access to drive from My Computer. This step is illustrated below.
Then, select enable option and view the drop down menu which shows the below three
options such as,
You can restrict certain drive.
A combination of drives.
tabler-icon-diamond-filled.svg

Paraphrase This Document

Need a fresh take? Get an instant paraphrase of this document with our AI Paraphraser
Document Page
Restrict them all.
The C:\ drive or any lettered drive where Windows is installed are the primary drives that are
probably wished to be restricted. Restriction to every single drive refers to denial of access to
the CD or the DVD drive. Moreover, using the flash drive is not possible if the user needs to
get the files from it. Here, we are choosing to restrict only the C drive, as illustrated below.
Document Page
If the user opens My Computer, then he/she could see the listed drives, but when the user
tries to access the restricted drive, in such case the user will receive the below mentioned
error message.
Document Page
Restricting the access to some specific drives is used for providing security and access the
measures. This process mainly helps to secure the shared computer.
Question - 2
Here, we are setting up DHCP on windows, by using the below steps.
First, the user is required to open the control panel as illustrated below (Hallberg, 2013).
tabler-icon-diamond-filled.svg

Paraphrase This Document

Need a fresh take? Get an instant paraphrase of this document with our AI Paraphraser
Document Page
Next, choose the network and sharing center as illustrated below.
Then, click on the wireless network connection as illustrated below.
Document Page
Then, click on the internet protocol version 4 (TCP/ IPv4) as shown below.
Document Page
Further, click on internet protocol version 4 properties as represented below.
tabler-icon-diamond-filled.svg

Paraphrase This Document

Need a fresh take? Get an instant paraphrase of this document with our AI Paraphraser
Document Page
Here, the default setting is obtained automatically by the IP address and automatically
provides the DNS server address option. But, we are selecting it using the following IP
address and the following DNS server addresses are selected. After, entering the IP address as
192.168.100.150, subnet mask as 255.255.255.0 and default gateway as 192.168.100.1. Enter
the preferred DNS server as 192.168.100.1 and alternative DNS server as 8.8.8.8. Finally,
click on OK button as represented below.
Document Page
At last, check whether the DHCP worked successfully or not, by using the command prompt
to check the IP address. It shows that the user entered the IP as 192.168.100.150, subnet mask
as 255.255.255.0 and the default gateway as 192.168.100.1. This process is demonstrated
below.
chevron_up_icon
1 out of 13
circle_padding
hide_on_mobile
zoom_out_icon
[object Object]