Postgraduate Ethical Hacking and Defence Case Study Report CSI5208

Verified

Added on  2023/06/04

|19
|1954
|321
Report
AI Summary
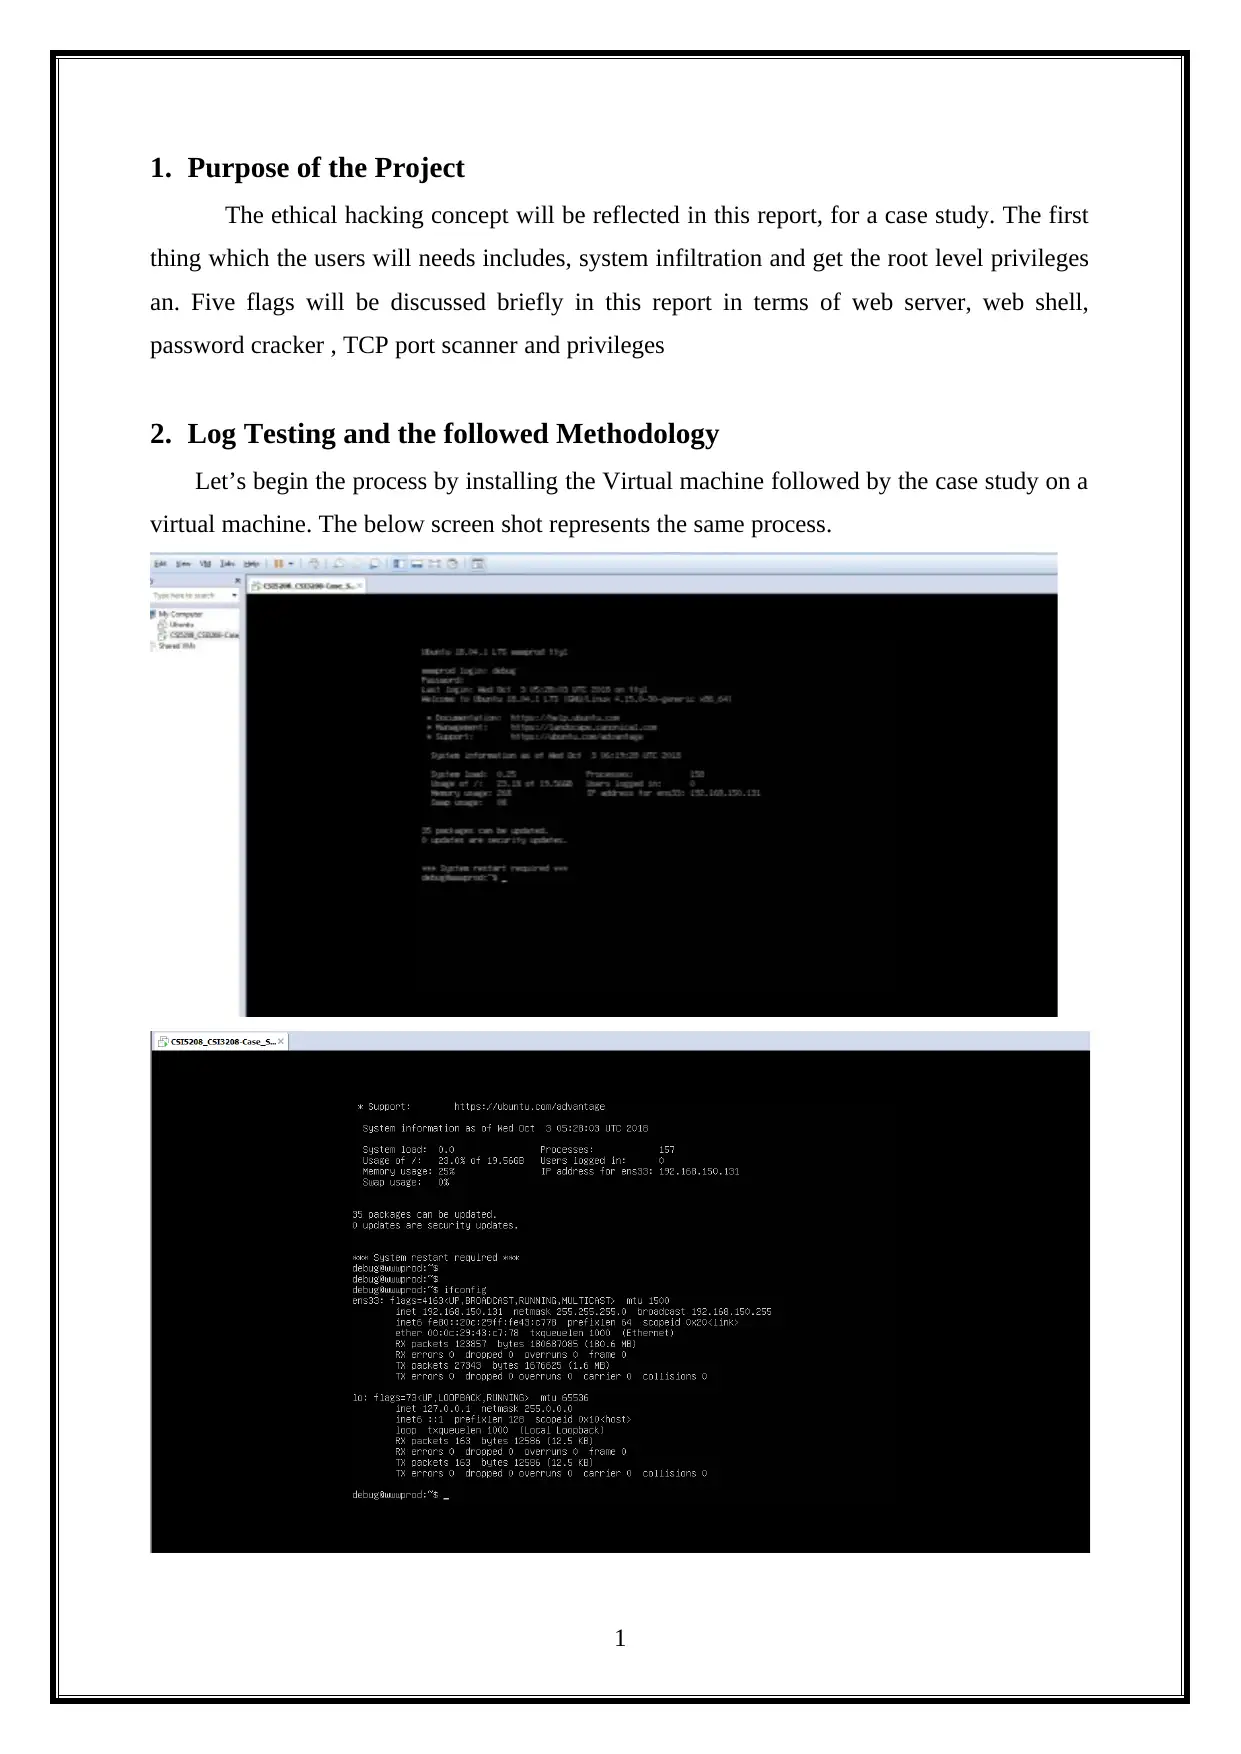
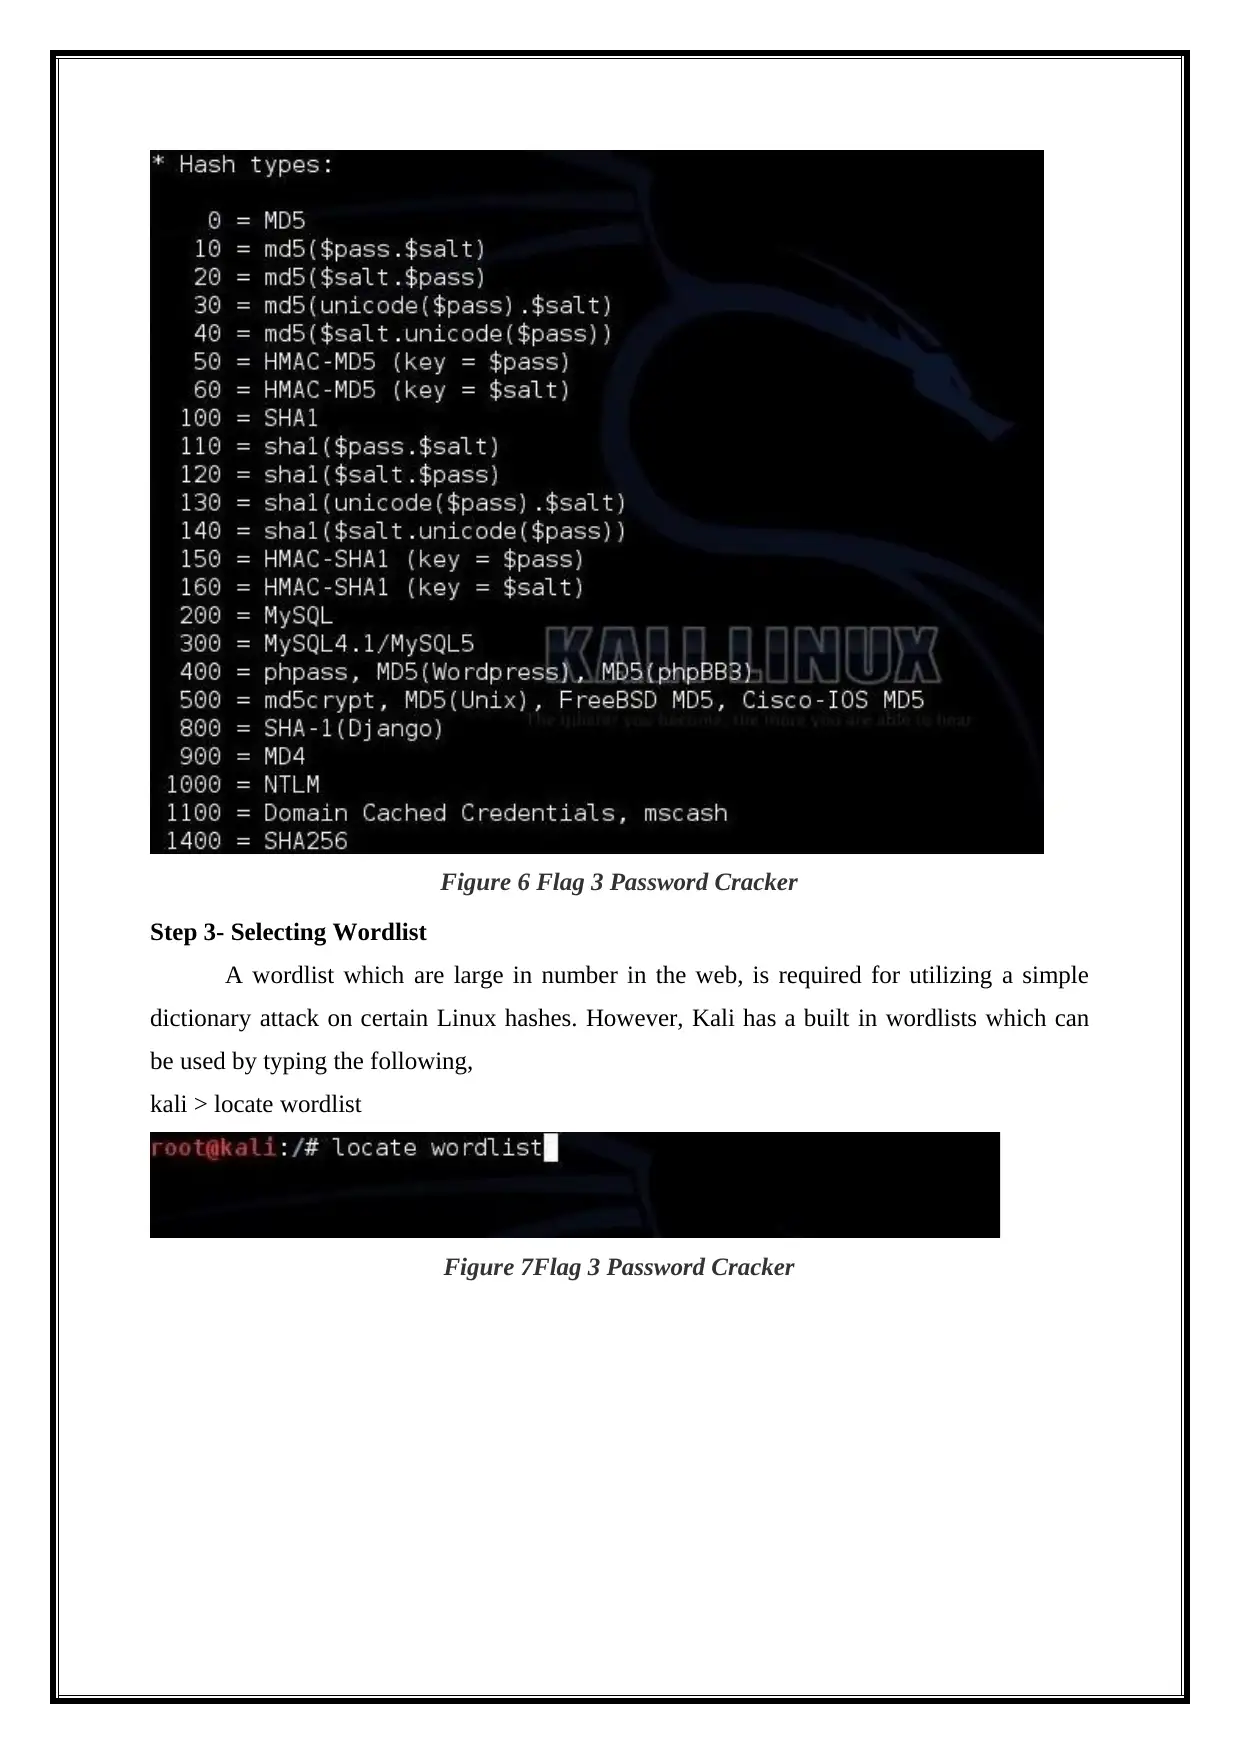
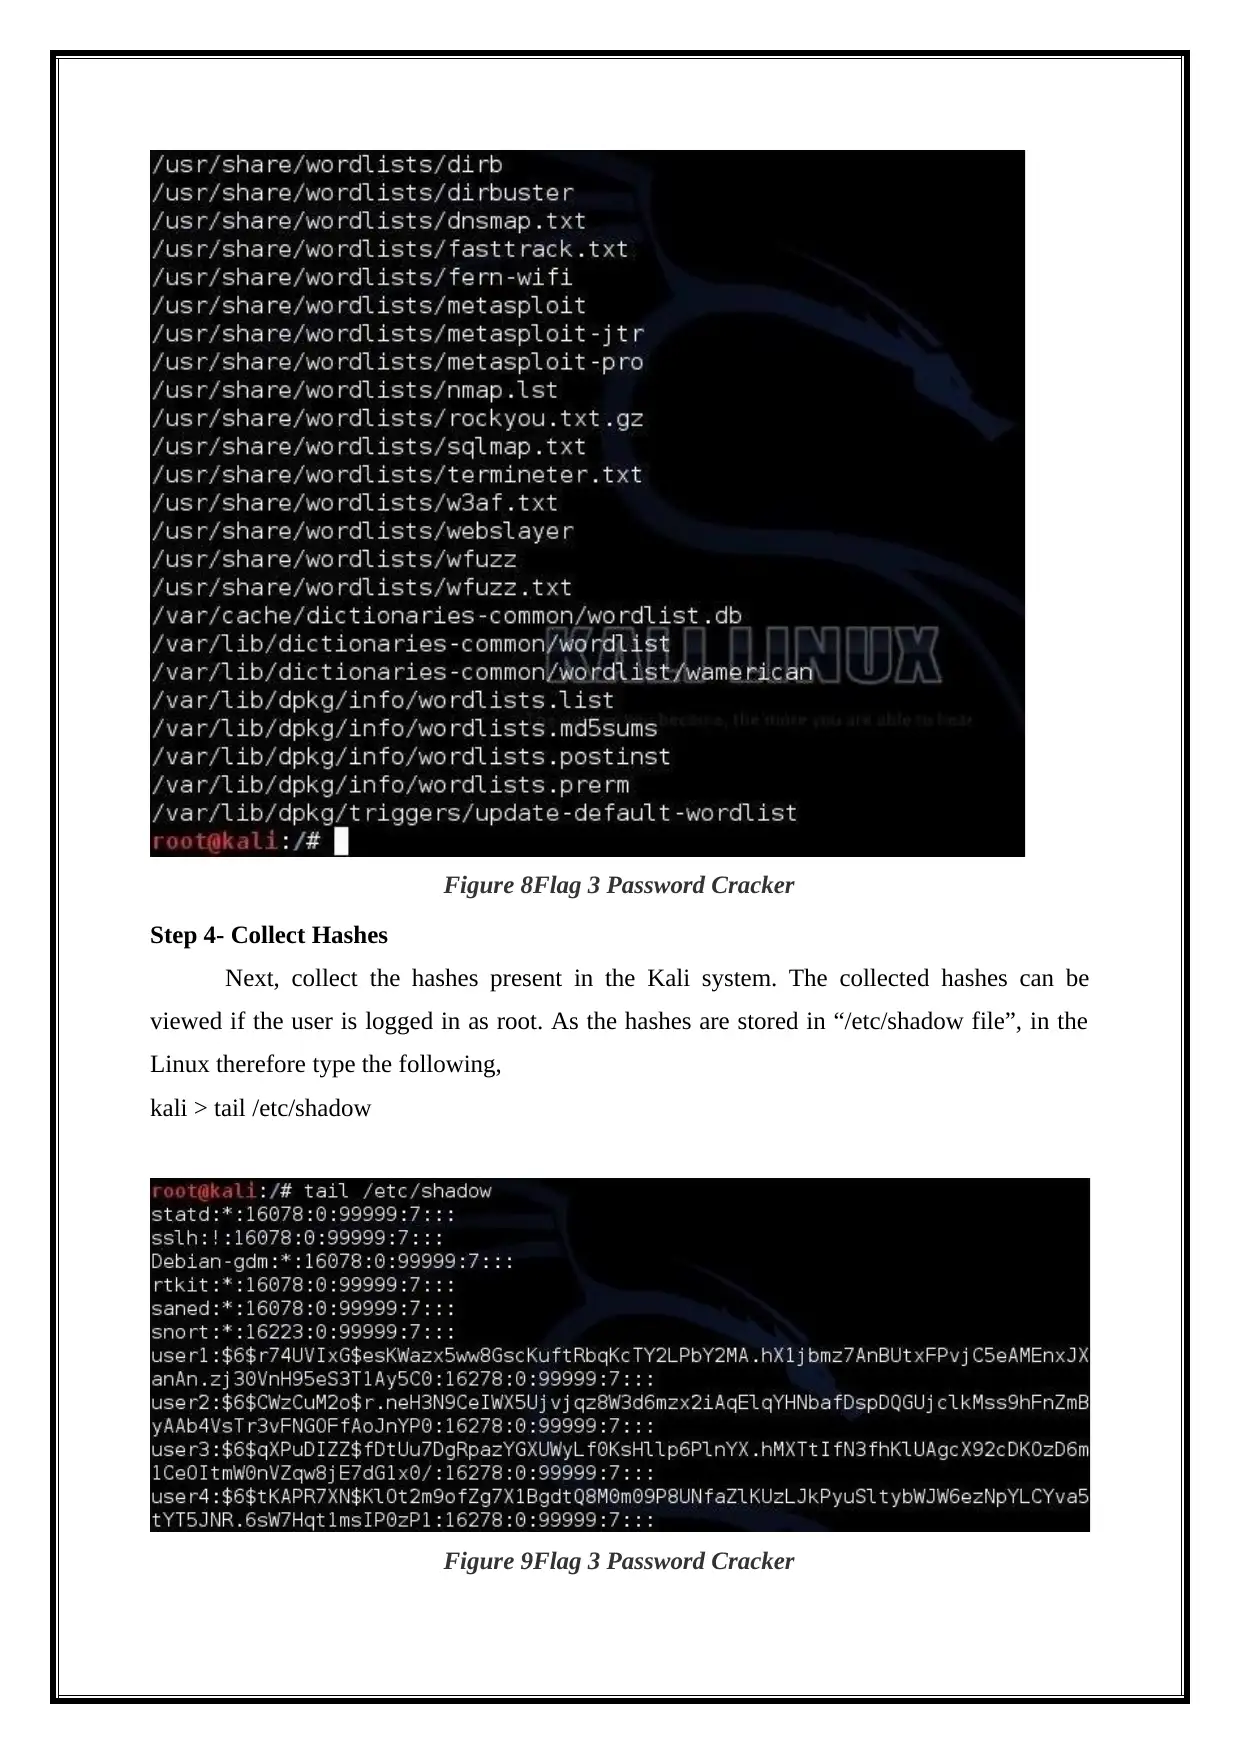
This report presents a comprehensive analysis of ethical hacking techniques applied to a case study, focusing on system infiltration and the identification of five distinct flags. The report details the methodologies employed, including web server analysis, web shell exploitation, password cracking using tools like Hashcat, network scanning with Nmap, and privilege escalation techniques. It outlines each step taken during the penetration testing process, providing screenshots and code snippets to illustrate the attacks and defenses. The report covers the purpose of the project, the log testing and followed methodology, results, and conclusion, along with the source code and completion instructions. The report is focused on the CSI5208 course, covering key aspects of ethical hacking and defense strategies, including the use of Kali Linux and the exploitation of vulnerabilities to gain system access and root privileges. The report also includes detailed sections on password cracking, port scanning, and privilege escalation, providing a practical guide to ethical hacking principles and practices.
Document Page
0
Ethical Hacking and Defence
tabler-icon-diamond-filled.svg

Paraphrase This Document

Need a fresh take? Get an instant paraphrase of this document with our AI Paraphraser
Document Page
Executive Summary
Ethical hacking refers to a method to accurately analyses any organisation's data security
structure. It is observed that the IT professionals known as ethical hackers are increasing in
number and are gaining high status. These ethical hacker intentionally penetrate the security
systems for fixing the weak points. Here, the report completely deals with ethical hacking by
using a provided case study. The points determined from the case study displays five flags,
which are discussed briefly.
Document Page
Table of Contents
1. Purpose of the Project......................................................................................................1
2. Log Testing and the followed Methodology...................................................................1
1.1 Flag: 1- Web server...................................................................................................2
1.2 Flag: 2- Web Shells....................................................................................................3
1.3 Flag: 3- Password cracker........................................................................................4
1.4 Flag: 4- TCP port scanner – NMAP......................................................................10
1.5 Flag: 5- Privilege......................................................................................................12
3. Result and Conclusion....................................................................................................12
4. Source Code.....................................................................................................................12
4.1 NMAP – TCP port Scanner....................................................................................12
4.2 Password Cracker...................................................................................................13
5. Completion instructions.................................................................................................13
References...............................................................................................................................14
Document Page
tabler-icon-diamond-filled.svg

Paraphrase This Document

Need a fresh take? Get an instant paraphrase of this document with our AI Paraphraser
Document Page
1. Purpose of the Project
The ethical hacking concept will be reflected in this report, for a case study. The first
thing which the users will needs includes, system infiltration and get the root level privileges
an. Five flags will be discussed briefly in this report in terms of web server, web shell,
password cracker , TCP port scanner and privileges
2. Log Testing and the followed Methodology
Let’s begin the process by installing the Virtual machine followed by the case study on a
virtual machine. The below screen shot represents the same process.
1
Document Page
1.1 Flag: 1- Web server
The web servers help in delivering the requested web pages for their clients. As it is
known that each web server contains domain name and IP Address, to help with
identification. The local web server setup is set by the server administrator. The web
browsers such as, chrome, Google, Firefox and so on are used by the clients for accessing the
web pages. The IP address or the URL will be entered on the web browser’s address bar
which delivers the request using the web server scripting (Delgado, 2018). Whereas, in Kali
Linux it is required to make changes in the web server setup, as Kali Linux pre-installs
apache2 webserver. This ensures that the attackers to utilize this web server for delivering the
web page which has malicious code. It is possible to trap such attackers with the help of
social engineering method like, Phishing. The below screen shot represents the web server
content ("Hack Like a Pro: How to Find Directories in Websites Using DirBuster", 2018).
/etc/init.d/apache2
The below screen shot represents the same.
Figure 1 Flag 1 web server contents
Document Page
1.2 Flag: 2- Web Shells
The web shells refer to small programs which could be uploaded to the vulnerable
server. It can later be opened with the help of the web browsers, for providing a web based
interface that actually helps to run the system commands. The web server must have
supporting web shell script, for instance, for a php web server, a php web shell is required.
The web shells can be instantly setup and used but, it also contains certain drawbacks
such as, they do not have the interactive style of a terminal. Web shells provide a quick gui
interface to do common tasks such as the following ("backdoors-using-web-shells", 2018)
a) View files
b) Travel across directories
c) Execute MySql queries / commands
d) Execute shell commands
e) Download files
f) Upload files
g) Delete files
h) Permissions to directory/folders
i) Edit files
j) Bypass mod_security
The following screen shot represents it ("Kali Linux Cookbook", 2018).
tabler-icon-diamond-filled.svg

Paraphrase This Document

Need a fresh take? Get an instant paraphrase of this document with our AI Paraphraser
Document Page
Figure 2 Flag 2 Web shells
1.3 Flag: 3- Password cracker
The recent and best designed password crackers are used here such as, hashcat. It
concentrates on the versatility and speed, which helps in cracking various hashes, in
various methods, instantly ("Webshells", 2018).
Step 1- Opening Hashcat
Go to Applications -> Kali Linux -> Password Attacks -> Offline Attacks -> hashcat,
as represented in the below screen shot ("Cracking Passwords Using John the Ripper", 2018).
Document Page
Figure 3 Flag 3 Password Cracker
The help screen is opened as the hashcat menu item is clicked ("Hack Like a Pro: How to
Crack Passwords, Part 3 (Using Hashcat)", 2018).
Figure 4 Flag 3 Password Cracker
Document Page
The basic hashcat syntax can be represented as follows:
kali > hashcat options hashfile mask|wordfiles|directories
Step 2- More Extensive Options
Initially, the hashcat allows the rules which permit us to apply the rules which are
specifically designed for using on the wordlist file ("What are web shells – Tutorial", 2018).
Figure 5 Flag 3 Password Cracker
The following shows the list of certain hash types which the hashcat could work with.
tabler-icon-diamond-filled.svg

Paraphrase This Document

Need a fresh take? Get an instant paraphrase of this document with our AI Paraphraser
Document Page
Figure 6 Flag 3 Password Cracker
Step 3- Selecting Wordlist
A wordlist which are large in number in the web, is required for utilizing a simple
dictionary attack on certain Linux hashes. However, Kali has a built in wordlists which can
be used by typing the following,
kali > locate wordlist
Figure 7Flag 3 Password Cracker
Document Page
Figure 8Flag 3 Password Cracker
Step 4- Collect Hashes
Next, collect the hashes present in the Kali system. The collected hashes can be
viewed if the user is logged in as root. As the hashes are stored in “/etc/shadow file”, in the
Linux therefore type the following,
kali > tail /etc/shadow
Figure 9Flag 3 Password Cracker
chevron_up_icon
1 out of 19
circle_padding
hide_on_mobile
zoom_out_icon
[object Object]