Development of a Diary Web Application using HTML, CSS, and JavaScript

Verified

Added on  2022/08/23

|5
|1116
|16
Homework Assignment
AI Summary
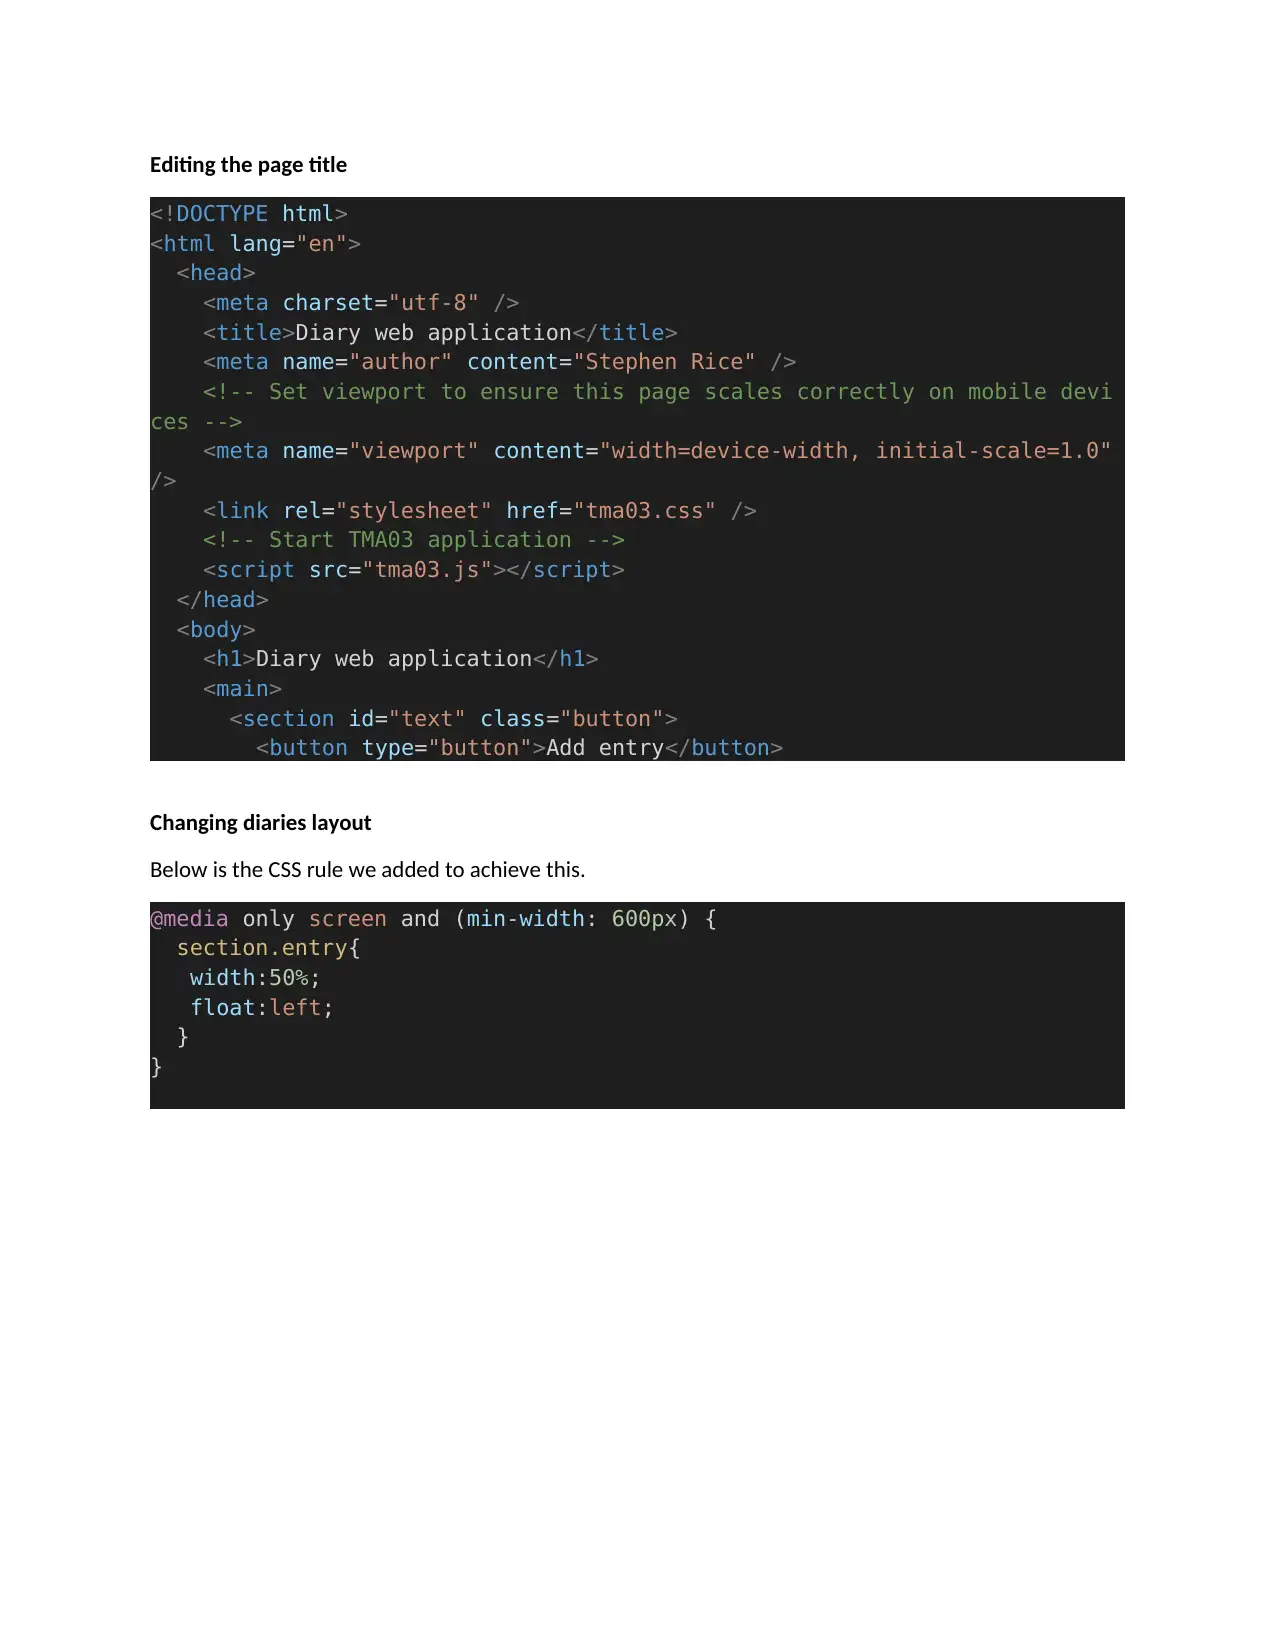
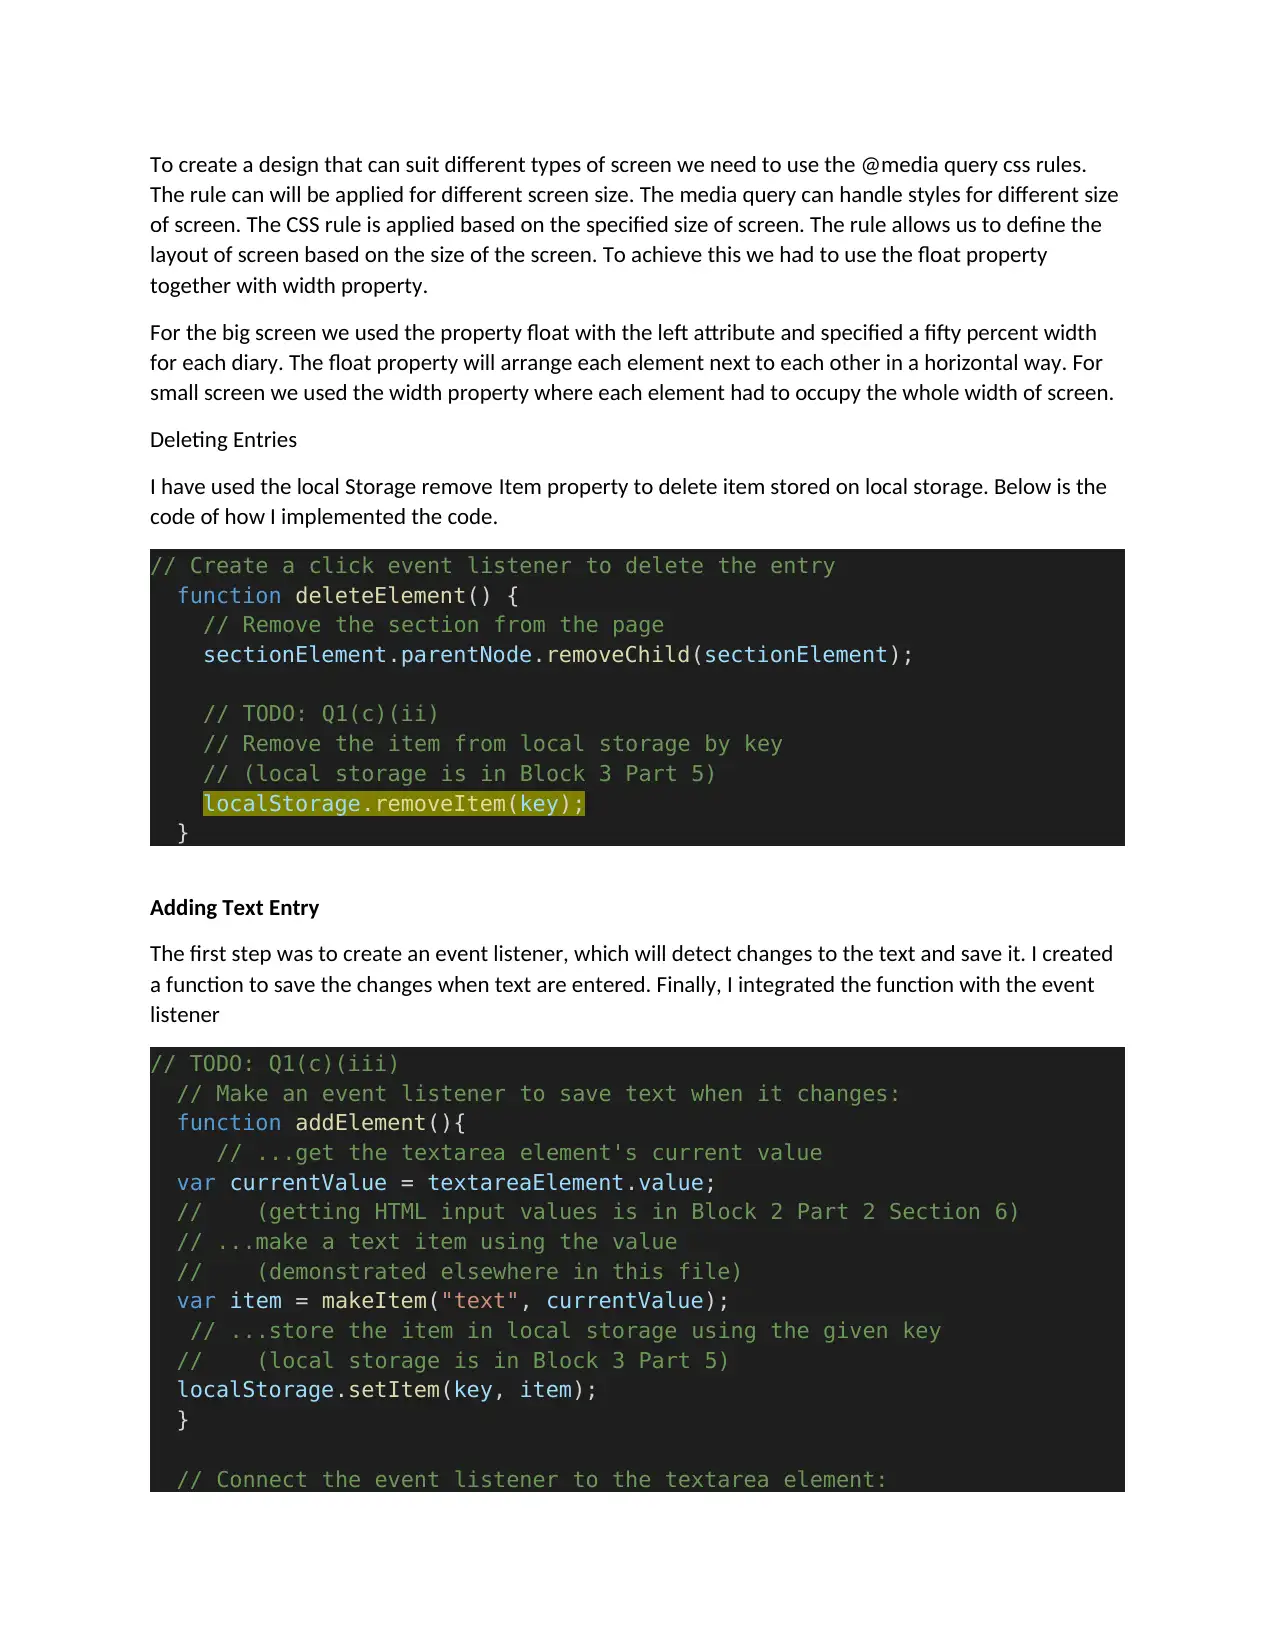
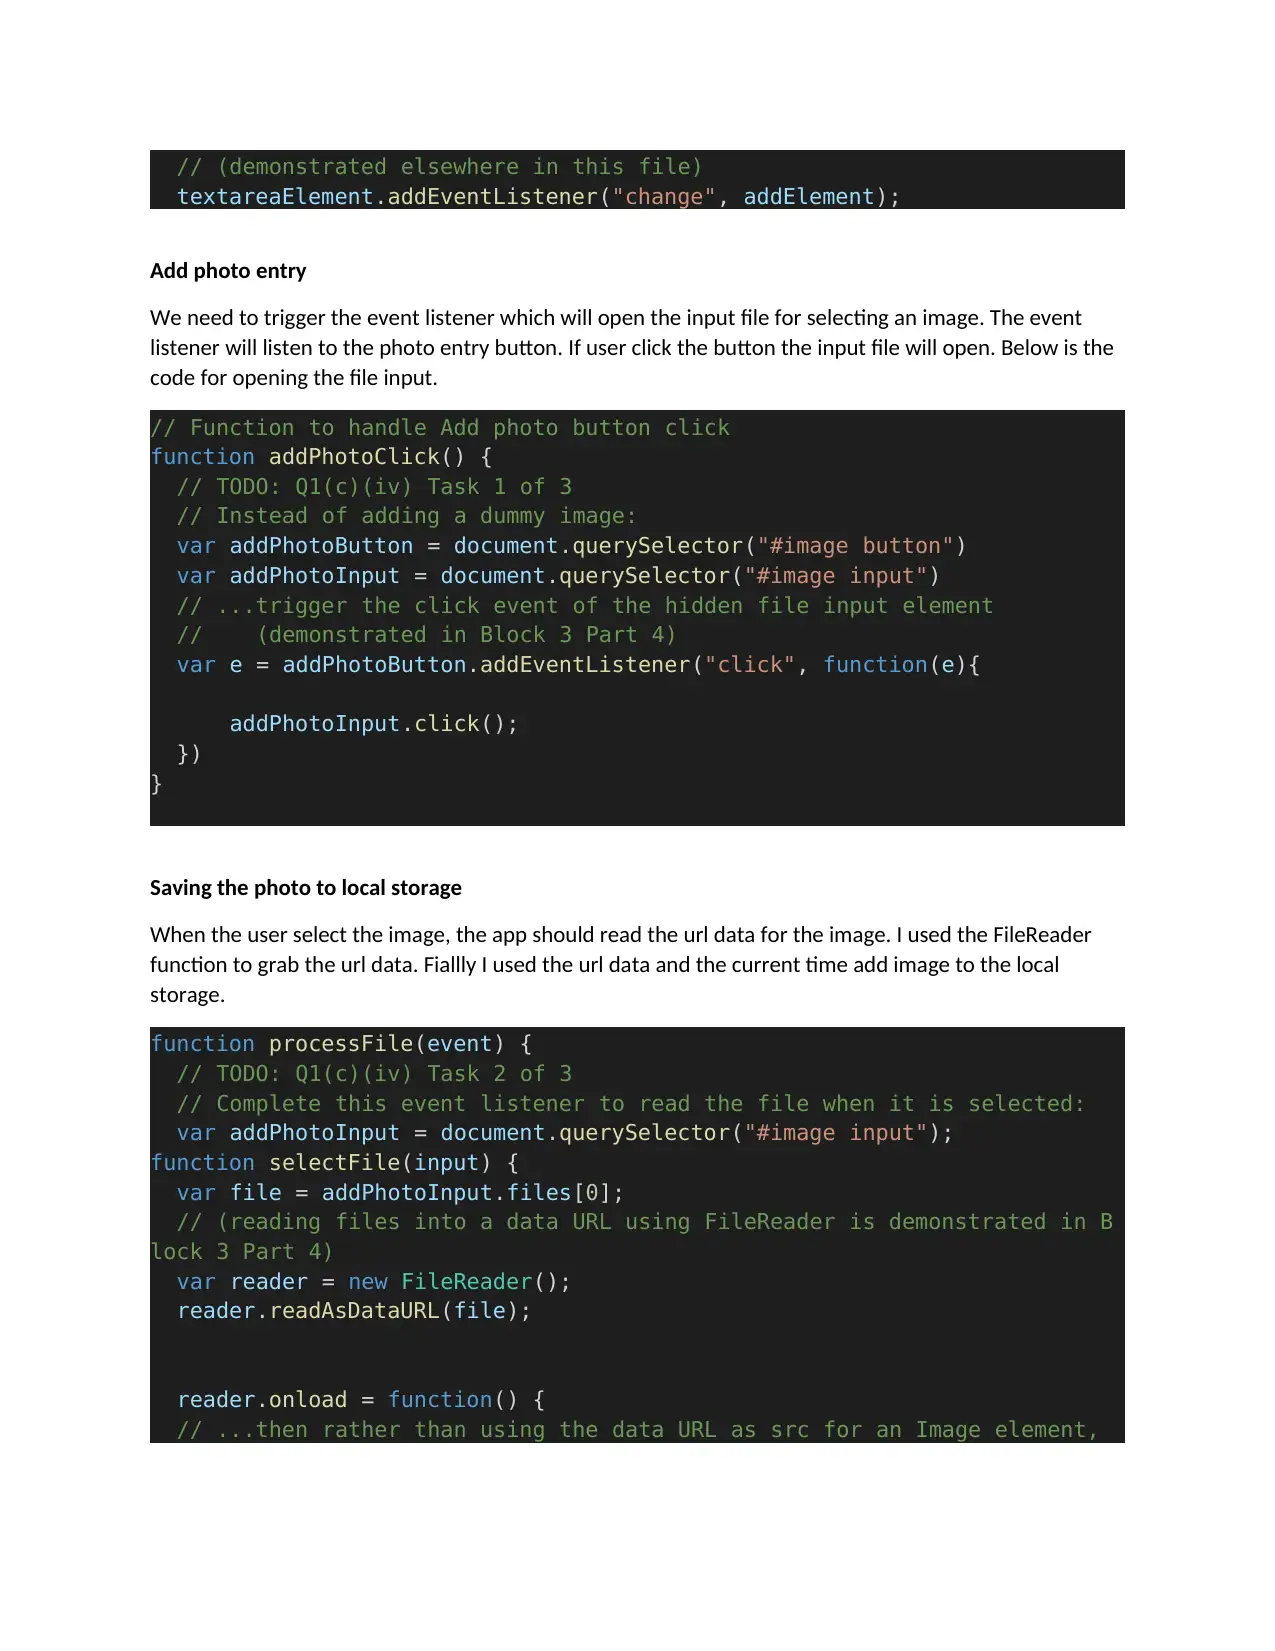
This assignment solution details the development of a diary web application using HTML, CSS, and JavaScript. The code includes functionalities for adding and deleting text entries, implementing a responsive design using media queries, and integrating local storage for data persistence. The solution covers the use of event listeners to capture user interactions, such as adding text and uploading photos. The code also demonstrates the use of the FileReader function to handle image uploads and store the image data in local storage. Validation of the HTML code is also included, with screenshots showing the results. The solution provides detailed explanations of the code, including how to implement features such as deleting entries, adding photo entries, and saving the photos to local storage. This assignment showcases a practical implementation of web development concepts, providing a comprehensive guide to building a functional diary web application.
Document Page
Editing the page title
<!DOCTYPE html>
<html lang="en">
<head>
<meta charset="utf-8" />
<title>Diary web application</title>
<meta name="author" content="Stephen Rice" />
<!-- Set viewport to ensure this page scales correctly on mobile devi
ces -->
<meta name="viewport" content="width=device-width, initial-scale=1.0"
/>
<link rel="stylesheet" href="tma03.css" />
<!-- Start TMA03 application -->
<script src="tma03.js"></script>
</head>
<body>
<h1>Diary web application</h1>
<main>
<section id="text" class="button">
<button type="button">Add entry</button>
Changing diaries layout
Below is the CSS rule we added to achieve this.
@media only screen and (min-width: 600px) {
section.entry{
width:50%;
float:left;
}
}
tabler-icon-diamond-filled.svg

Paraphrase This Document

Need a fresh take? Get an instant paraphrase of this document with our AI Paraphraser
Document Page
For mobile device I arranged each diary in its row. To achieve this I used the CSS below,
@media only screen and (max-width: 600px) {
section.entry{
width:100%
}
}
Document Page
To create a design that can suit different types of screen we need to use the @media query css rules.
The rule can will be applied for different screen size. The media query can handle styles for different size
of screen. The CSS rule is applied based on the specified size of screen. The rule allows us to define the
layout of screen based on the size of the screen. To achieve this we had to use the float property
together with width property.
For the big screen we used the property float with the left attribute and specified a fifty percent width
for each diary. The float property will arrange each element next to each other in a horizontal way. For
small screen we used the width property where each element had to occupy the whole width of screen.
Deleting Entries
I have used the local Storage remove Item property to delete item stored on local storage. Below is the
code of how I implemented the code.
// Create a click event listener to delete the entry
function deleteElement() {
// Remove the section from the page
sectionElement.parentNode.removeChild(sectionElement);
// TODO: Q1(c)(ii)
// Remove the item from local storage by key
// (local storage is in Block 3 Part 5)
localStorage.removeItem(key);
}
Adding Text Entry
The first step was to create an event listener, which will detect changes to the text and save it. I created
a function to save the changes when text are entered. Finally, I integrated the function with the event
listener
// TODO: Q1(c)(iii)
// Make an event listener to save text when it changes:
function addElement(){
// ...get the textarea element's current value
var currentValue = textareaElement.value;
// (getting HTML input values is in Block 2 Part 2 Section 6)
// ...make a text item using the value
// (demonstrated elsewhere in this file)
var item = makeItem("text", currentValue);
// ...store the item in local storage using the given key
// (local storage is in Block 3 Part 5)
localStorage.setItem(key, item);
}
// Connect the event listener to the textarea element:
Document Page
// (demonstrated elsewhere in this file)
textareaElement.addEventListener("change", addElement);
Add photo entry
We need to trigger the event listener which will open the input file for selecting an image. The event
listener will listen to the photo entry button. If user click the button the input file will open. Below is the
code for opening the file input.
// Function to handle Add photo button click
function addPhotoClick() {
// TODO: Q1(c)(iv) Task 1 of 3
// Instead of adding a dummy image:
var addPhotoButton = document.querySelector("#image button")
var addPhotoInput = document.querySelector("#image input")
// ...trigger the click event of the hidden file input element
// (demonstrated in Block 3 Part 4)
var e = addPhotoButton.addEventListener("click", function(e){
addPhotoInput.click();
})
}
Saving the photo to local storage
When the user select the image, the app should read the url data for the image. I used the FileReader
function to grab the url data. Fiallly I used the url data and the current time add image to the local
storage.
function processFile(event) {
// TODO: Q1(c)(iv) Task 2 of 3
// Complete this event listener to read the file when it is selected:
var addPhotoInput = document.querySelector("#image input");
function selectFile(input) {
var file = addPhotoInput.files[0];
// (reading files into a data URL using FileReader is demonstrated in B
lock 3 Part 4)
var reader = new FileReader();
reader.readAsDataURL(file);
reader.onload = function() {
// ...then rather than using the data URL as src for an Image element,
tabler-icon-diamond-filled.svg

Paraphrase This Document

Need a fresh take? Get an instant paraphrase of this document with our AI Paraphraser
Document Page
// ...use it to add a new image entry, using the current timestamp to m
ake a key
// (demonstrated elsewhere in this file)
var url = reader.result;
var key = "diary" + Date.now();
addImageEntry(key, url)
// TODO: Q1(c)(iv) Task 3 of 3
// In the same event listener, make an image item using the data URL
var item = makeItem("image", url)
// (demonstrated elsewhere in this file)
// Store the item in local storage using the given key
localStorage.setItem(key, item)
};
Validating the HTML code
Only two warnings were identified after validating the code. There was no errors meaning the code was
ok. Below is the screen shot
chevron_up_icon
1 out of 5
circle_padding
hide_on_mobile
zoom_out_icon
[object Object]