Installation and Implementation of Java Client-Server Socket Program

Verified

Added on  2023/06/10

|17
|1542
|79
Practical Assignment
AI Summary
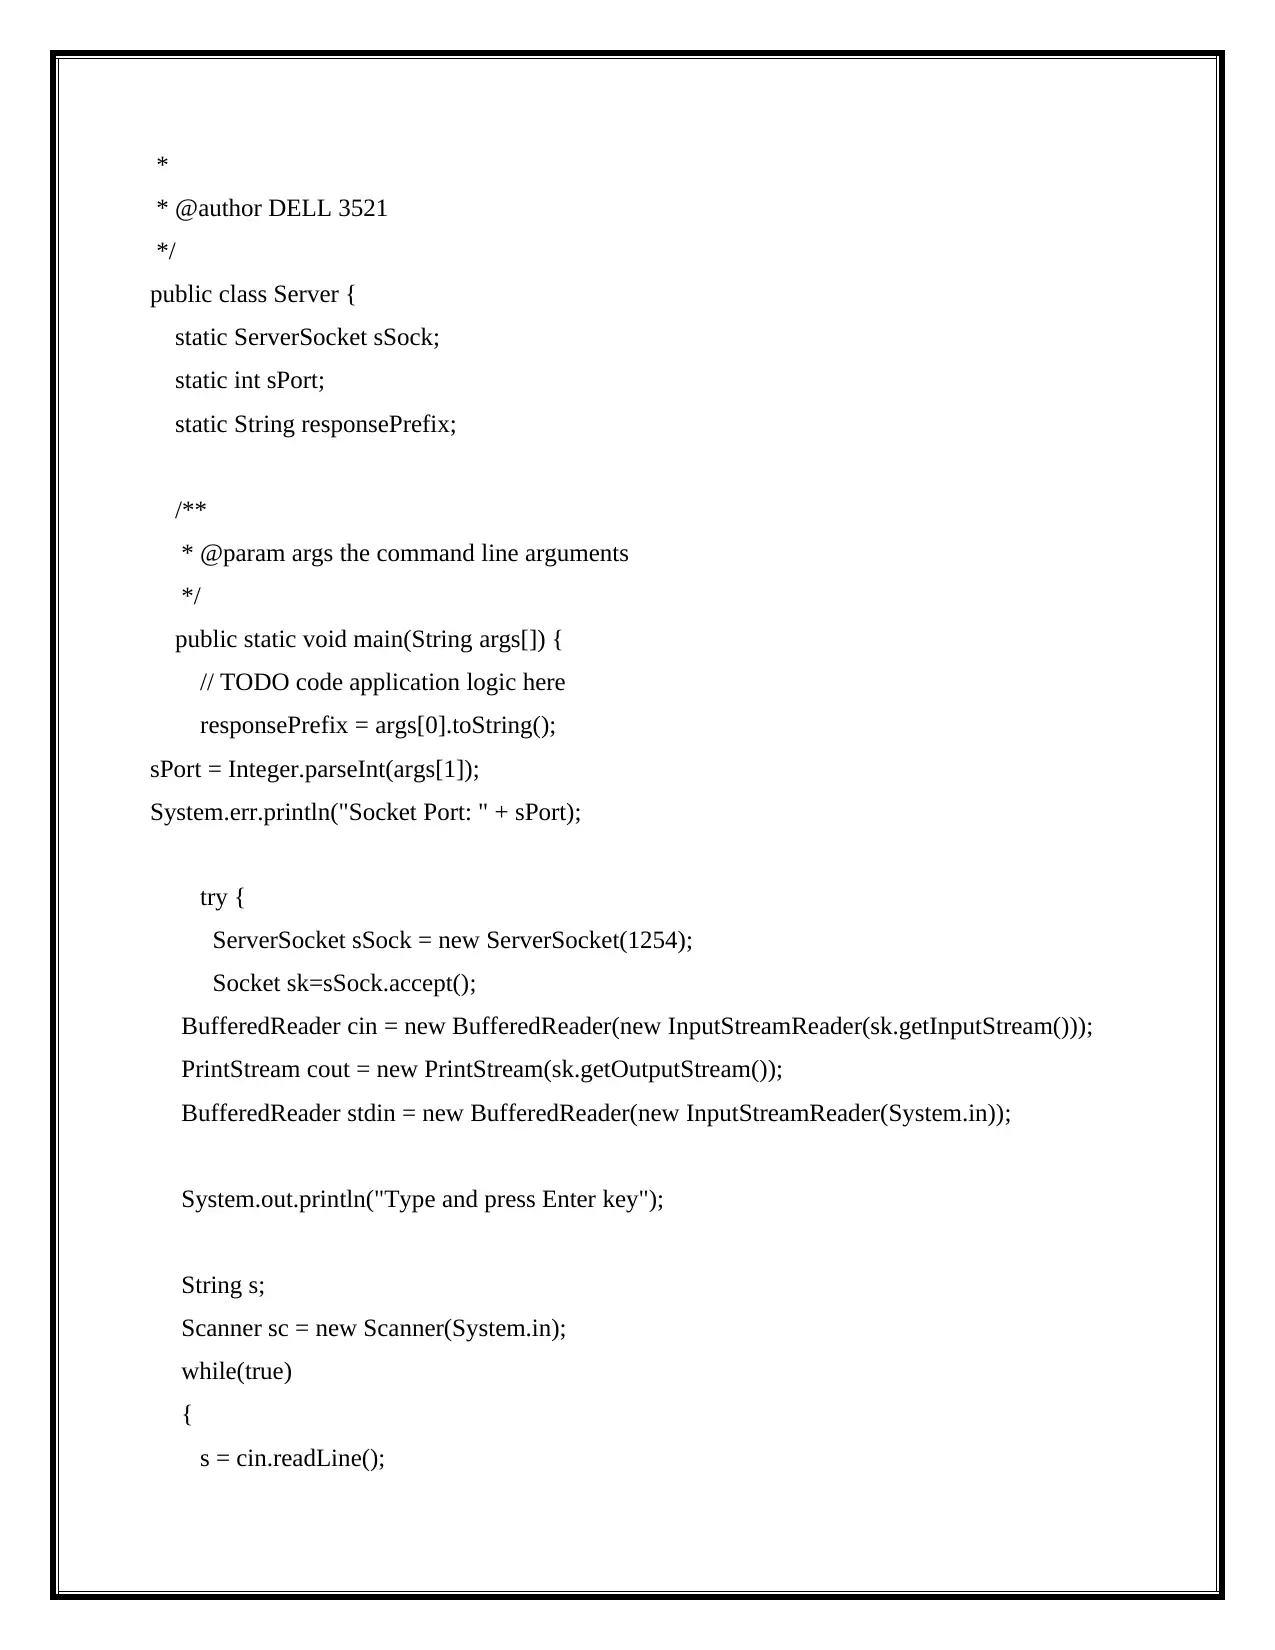
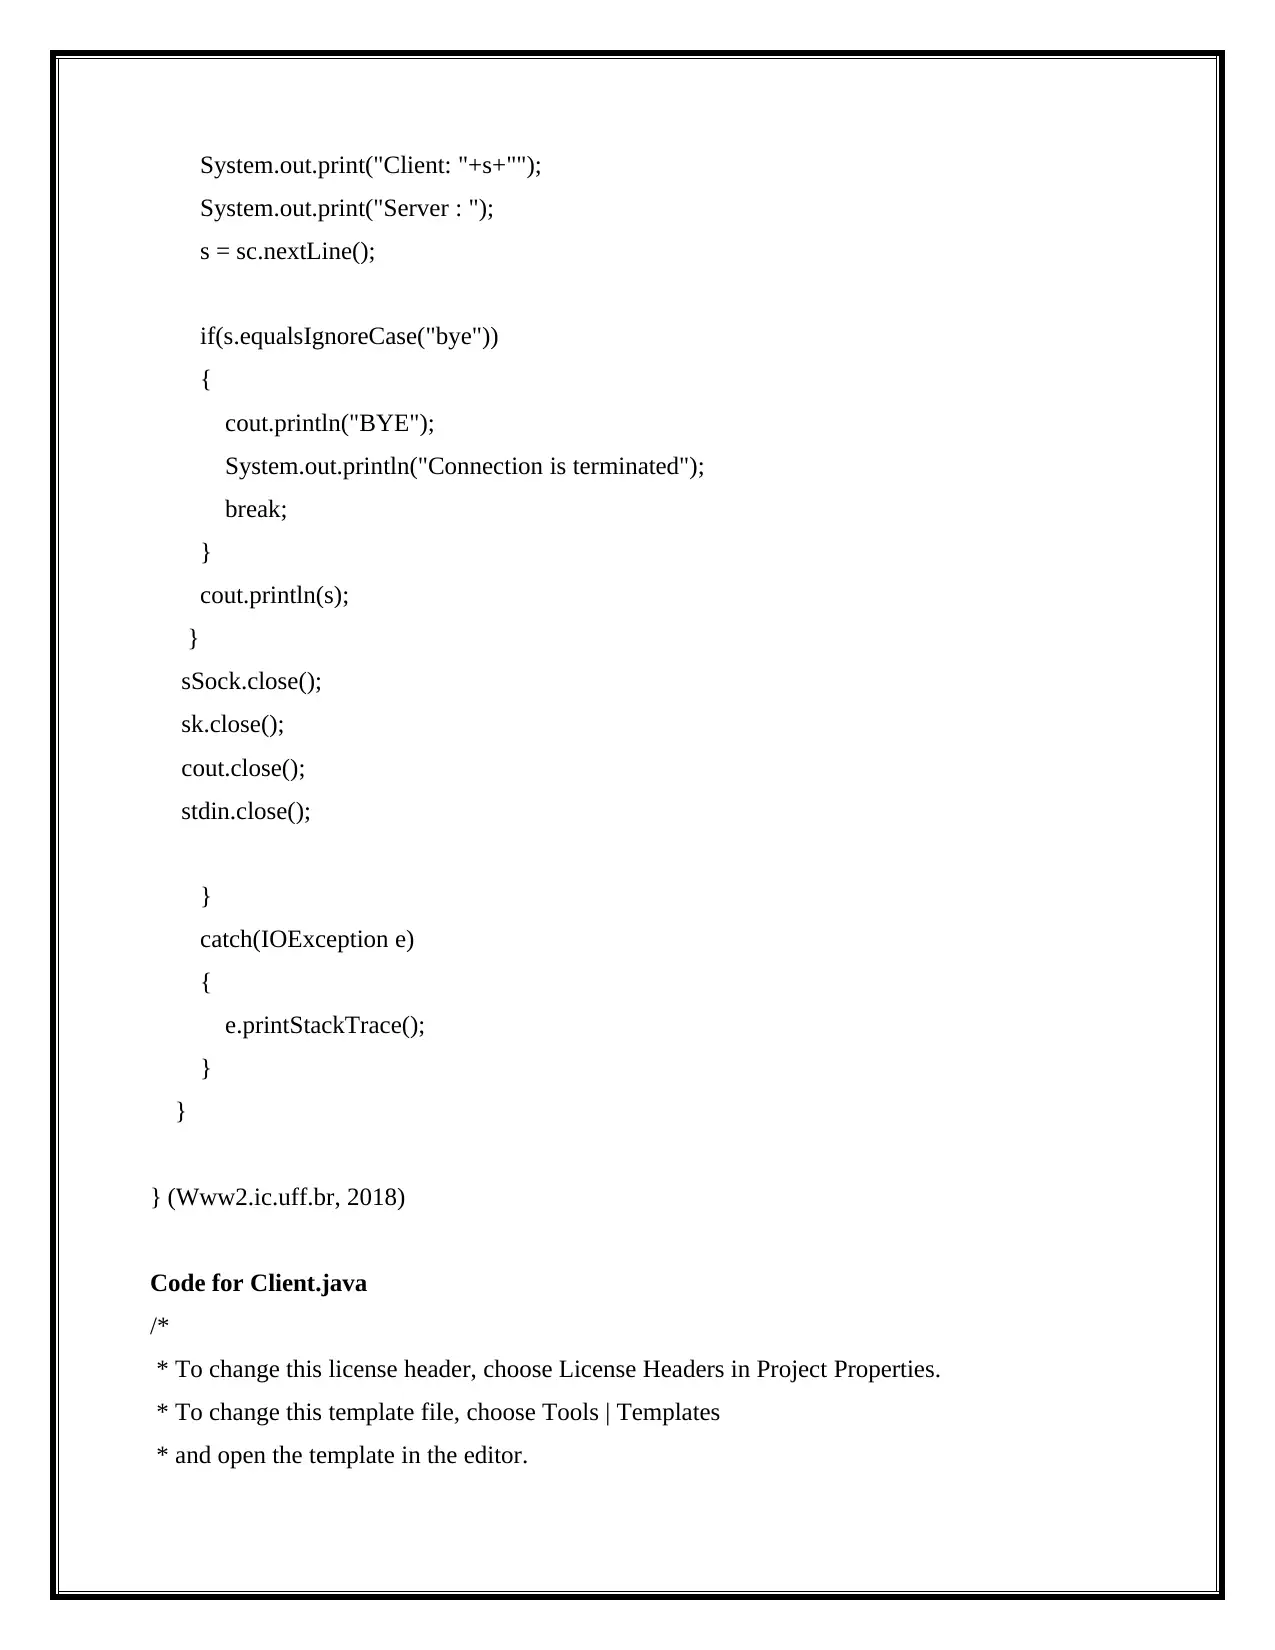
This assignment provides a detailed guide to Java client-server socket programming. It begins with instructions on installing the necessary software, including the Java Development Kit (JDK) and NetBeans IDE. The assignment then walks through the process of creating a client-server chat program, including code for both the server and client sides. The server code handles incoming connections and messages, while the client code sends and receives messages. The assignment also includes a class diagram to illustrate the program's structure and the relationships between different components. The code examples are provided with explanations, and the assignment concludes with a list of references used. The assignment covers key concepts such as socket creation, binding, TCP connections, and message handling, which are crucial for understanding and implementing network communication in Java.
Document Page
JAVA PROGRAMMING ASSIGNMENT
How to Install NetBeans and JDK for Java Programming
To complete the client server socket programming, we need to install JDK and NetBeans
software. Download the softwares from oracle.com website (Oracle.com, 2018). The below
image is the oracle website. First accept the license agreement and then click the link as per our
operating system.
After downloading the software, we need to run it for complete the installation on the
system.
tabler-icon-diamond-filled.svg

Paraphrase This Document

Need a fresh take? Get an instant paraphrase of this document with our AI Paraphraser
Document Page
After completing the configuration, the below window will be opened. Click the next
button to select the path for installing the software.
Select the path for JDK as mentioned in the below image. Default path is viewed in
below image. We can change the path for installing the software by choosing the browse button.
Document Page
Also we can select the path for JDK installation for NetBeans IDE and then click the next
button.
Document Page
After clicking the net button, the below window is opened. Then click the install button
to install the software.
tabler-icon-diamond-filled.svg

Paraphrase This Document

Need a fresh take? Get an instant paraphrase of this document with our AI Paraphraser
Document Page
After completion of JDK software, NetBeans (Netbeans.org, 2018) software is started to
install as viewd in below image.
Java Socket Program
Open the NetBeans software and click the file menu and then click the “New Project” as
viewed in the below window. It opens the new window select the project name and package.
Document Page
Select the option Java and Java Application and then click the next button to create the
Java program.
Then give the name for the java program and select the path to save the program and then
click finish button.
Document Page
After that creating the server class, right click on the project name on the left side panel
and click the option new class to create the client class. It will open the new window to give the
class name.
Then click the finish button to create a client class. After completing the code for both
class we can run the client server chat program.
tabler-icon-diamond-filled.svg

Paraphrase This Document

Need a fresh take? Get an instant paraphrase of this document with our AI Paraphraser
Document Page
How to Run the Client Server Socket Programming
Etract the file as viewed in below image. Then go to the NetBeans software to open the
java program.
Select the file menu and then select the Open Project. It will open a new window to
choose the java file.
Document Page
Select the java file and click the open project button is available on the lower right corner
of the window. It will open the project on NetBeans window.
To run the client server program, right click on the project name on the left side panel of
NetBeans window.
Document Page
Code for Server.java
/*
* To change this license header, choose License Headers in Project Properties.
* To change this template file, choose Tools | Templates
* and open the template in the editor.
*/
package server;
import java.io.BufferedReader;
import java.io.IOException;
import java.io.InputStreamReader;
import java.io.PrintStream;
import java.net.ServerSocket;
import java.net.Socket;
import java.util.Scanner;
/**
tabler-icon-diamond-filled.svg

Paraphrase This Document

Need a fresh take? Get an instant paraphrase of this document with our AI Paraphraser
Document Page
*
* @author DELL 3521
*/
public class Server {
static ServerSocket sSock;
static int sPort;
static String responsePrefix;
/**
* @param args the command line arguments
*/
public static void main(String args[]) {
// TODO code application logic here
responsePrefix = args[0].toString();
sPort = Integer.parseInt(args[1]);
System.err.println("Socket Port: " + sPort);
try {
ServerSocket sSock = new ServerSocket(1254);
Socket sk=sSock.accept();
BufferedReader cin = new BufferedReader(new InputStreamReader(sk.getInputStream()));
PrintStream cout = new PrintStream(sk.getOutputStream());
BufferedReader stdin = new BufferedReader(new InputStreamReader(System.in));
System.out.println("Type and press Enter key");
String s;
Scanner sc = new Scanner(System.in);
while(true)
{
s = cin.readLine();
Document Page
System.out.print("Client: "+s+"");
System.out.print("Server : ");
s = sc.nextLine();
if(s.equalsIgnoreCase("bye"))
{
cout.println("BYE");
System.out.println("Connection is terminated");
break;
}
cout.println(s);
}
sSock.close();
sk.close();
cout.close();
stdin.close();
}
catch(IOException e)
{
e.printStackTrace();
}
}
} (Www2.ic.uff.br, 2018)
Code for Client.java
/*
* To change this license header, choose License Headers in Project Properties.
* To change this template file, choose Tools | Templates
* and open the template in the editor.
chevron_up_icon
1 out of 17
circle_padding
hide_on_mobile
zoom_out_icon
[object Object]