Network Vulnerability: Installation and Hardening Report (BIT354)
VerifiedAdded on 2022/12/23
|12
|1168
|75
Report
AI Summary
This report details the installation of a network on an Ubuntu server, covering initial IP configuration and the allocation of DHCP. The core of the report focuses on network hardening, presenting various techniques to enhance security. These techniques include installing and configuring a UFW firewall, enabling SSH access, closing unused network ports, implementing clock synchronization using NTP, securing routers and wireless devices with strong passwords, closing unused physical interfaces, utilizing secure hypertext transfer protocol (HTTPS) through SSL certificates, enabling switch port security, and enabling DHCP snooping. Each technique is explained with relevant commands, configurations, and screenshots, providing a comprehensive guide to securing a network against potential vulnerabilities. The report emphasizes the importance of each measure in creating a layered defense against threats, referencing security concepts like the 'onion' model of network security.

1
Installation of network:
Student’s Name:
Institution Affiliation:
Installation of network:
Student’s Name:
Institution Affiliation:
Paraphrase This Document
Need a fresh take? Get an instant paraphrase of this document with our AI Paraphraser
2
Installation of network in Linux server
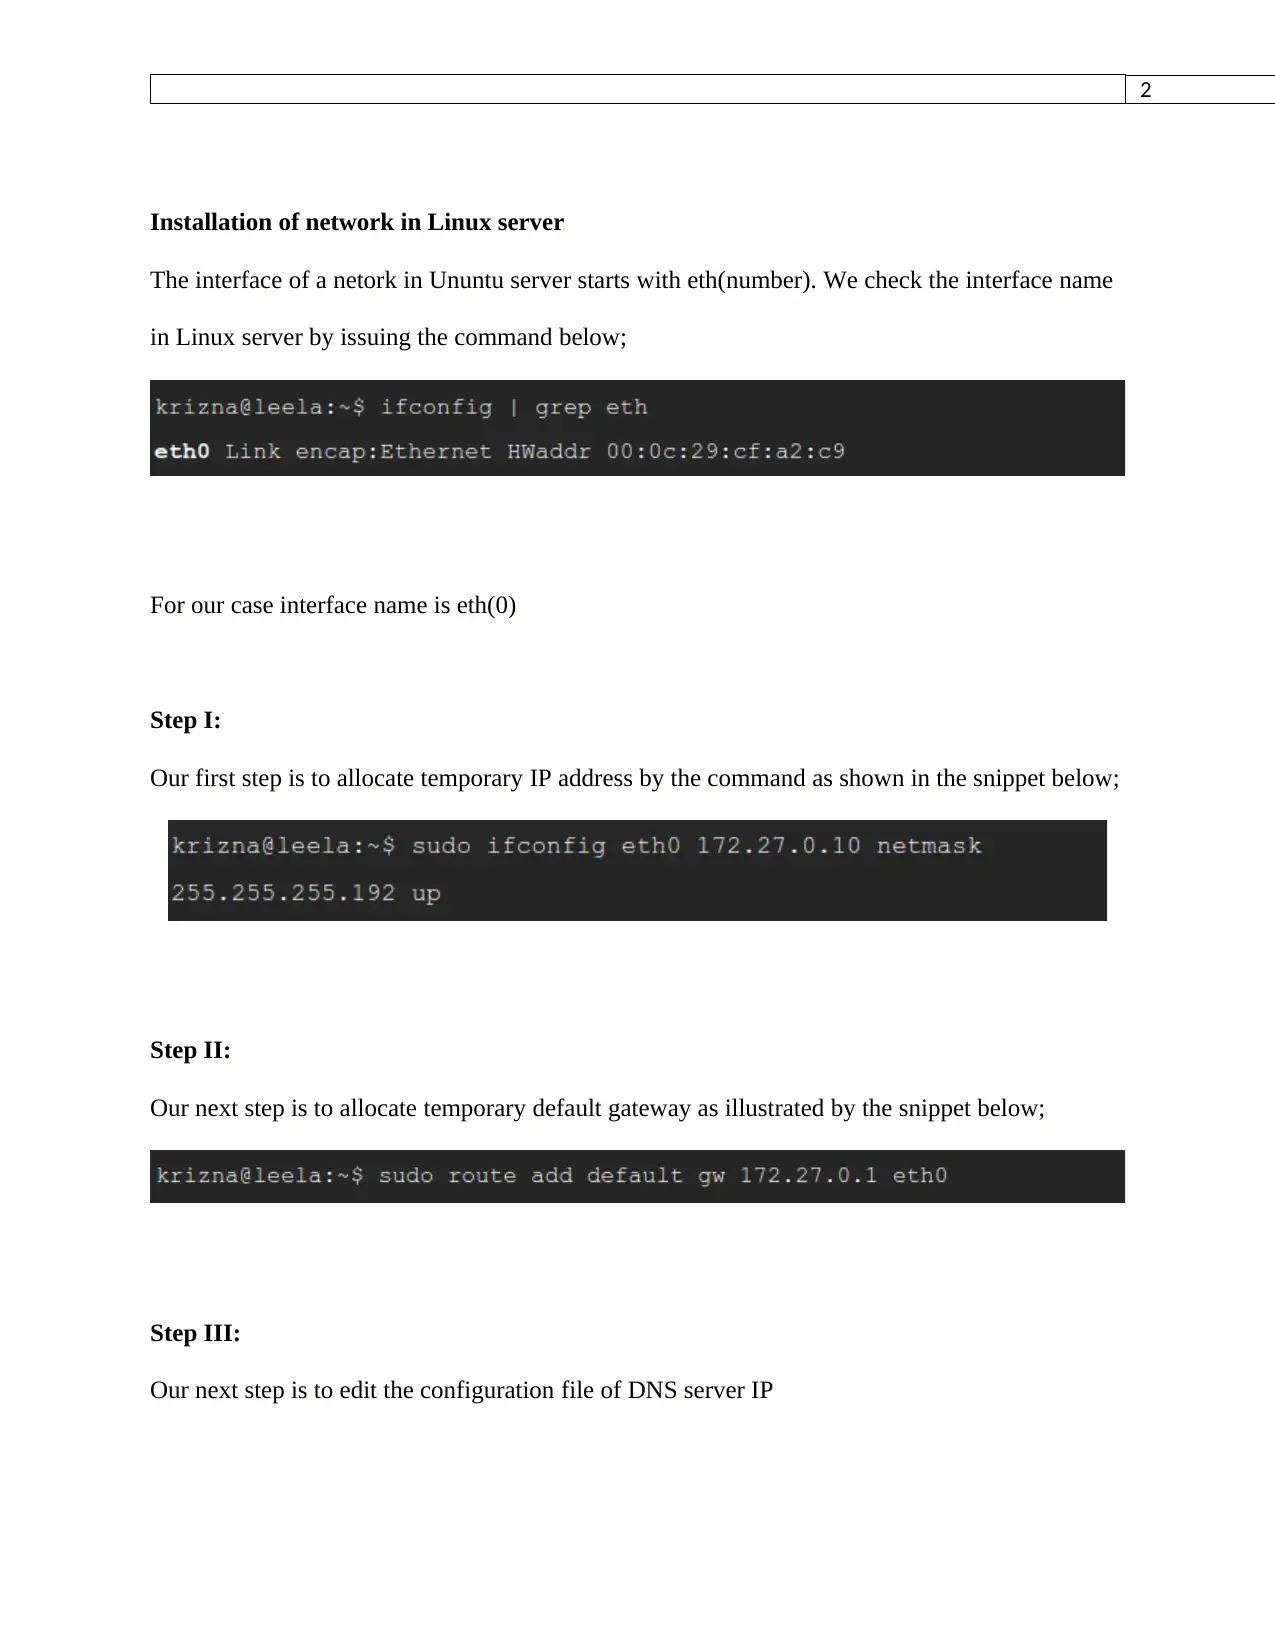
The interface of a netork in Ununtu server starts with eth(number). We check the interface name
in Linux server by issuing the command below;
For our case interface name is eth(0)
Step I:
Our first step is to allocate temporary IP address by the command as shown in the snippet below;
Step II:
Our next step is to allocate temporary default gateway as illustrated by the snippet below;
Step III:
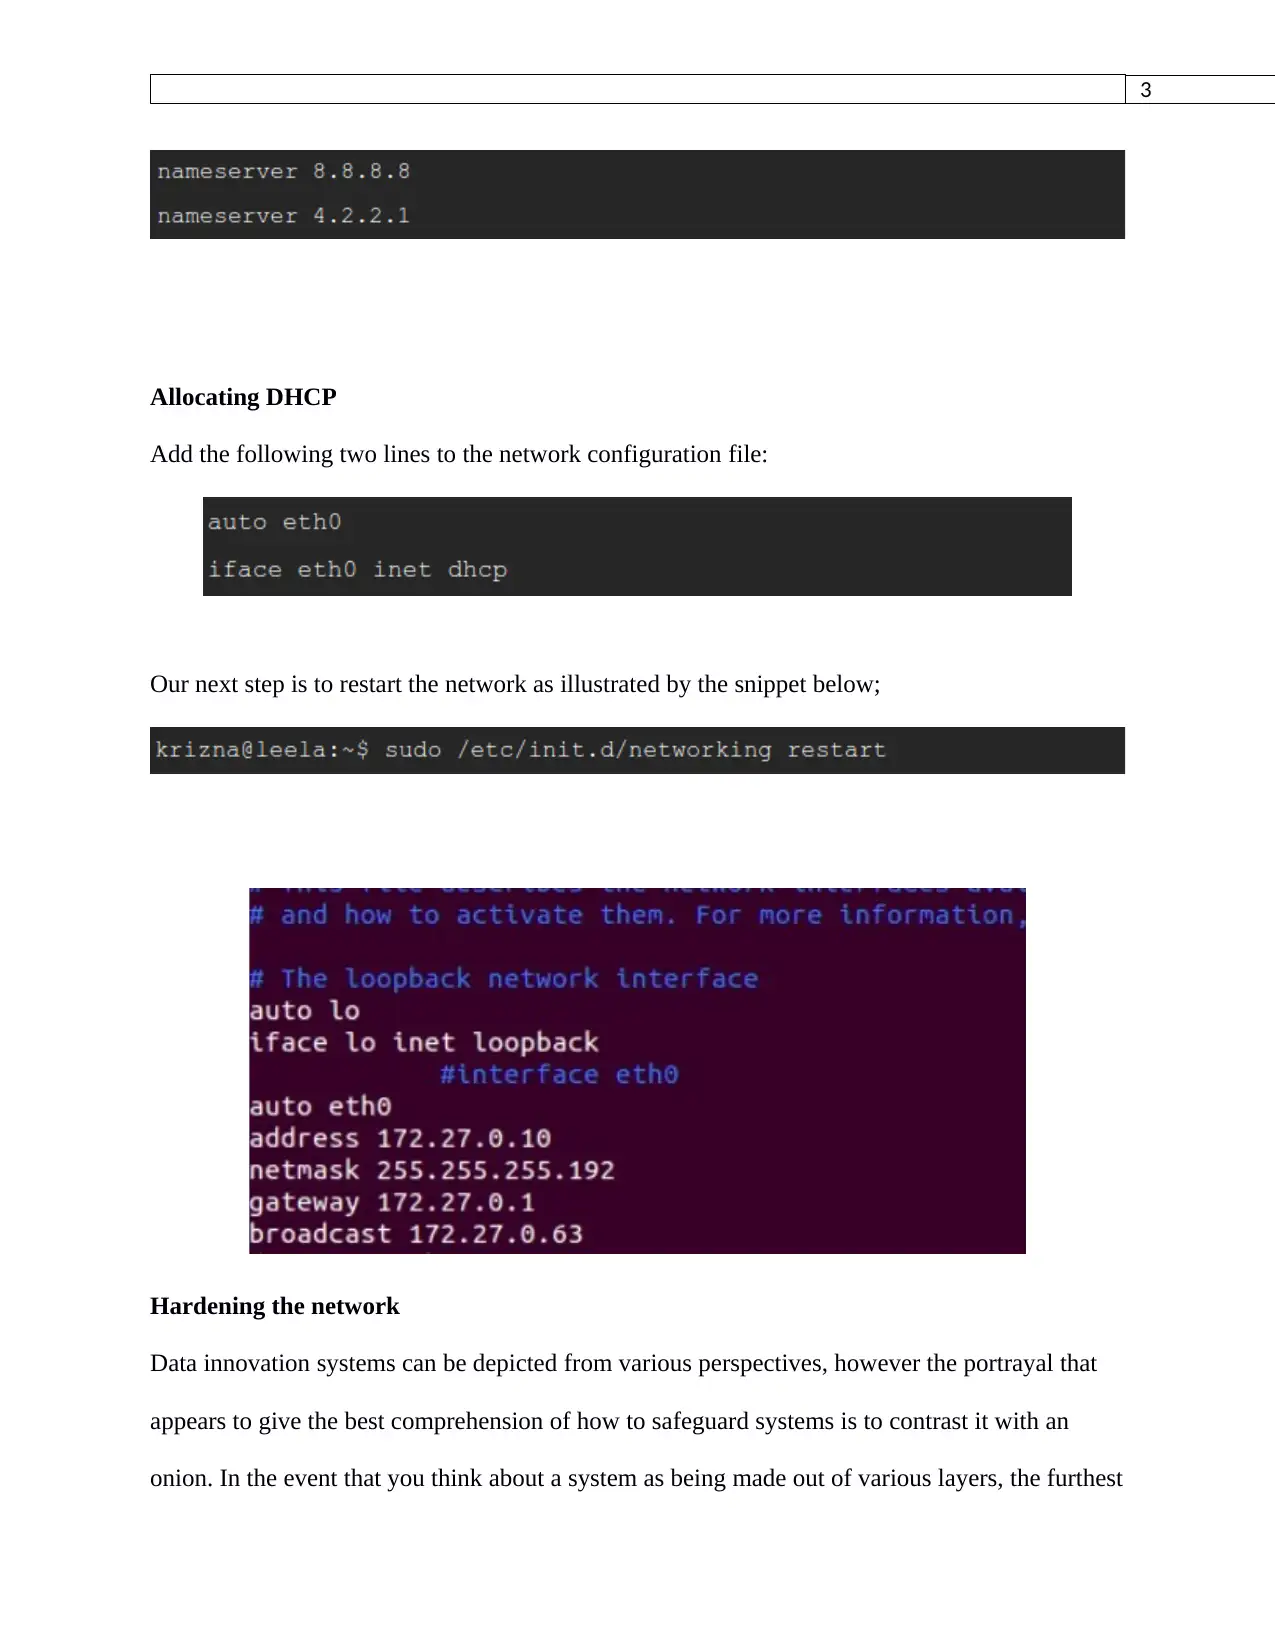
Our next step is to edit the configuration file of DNS server IP
3
Allocating DHCP
Add the following two lines to the network configuration file:
Our next step is to restart the network as illustrated by the snippet below;
Hardening the network
Data innovation systems can be depicted from various perspectives, however the portrayal that
appears to give the best comprehension of how to safeguard systems is to contrast it with an
onion. In the event that you think about a system as being made out of various layers, the furthest
⊘ This is a preview!⊘
Do you want full access?
Subscribe today to unlock all pages.

Trusted by 1+ million students worldwide
4
layer is the part that you contact, the limit among it and the world. As you strip back the layers,
you draw nearer to the significant "center." In system terms, the center frequently speaks to our
most profitable information and applications. Each layer of the system gives an alternate degree
of usefulness and requires its very own remarkable arrangement of answers for satisfactorily
secure the data navigating it between the center and the limit.
Techniques of hardening a network
Here are some of the hardening techniques in a network;
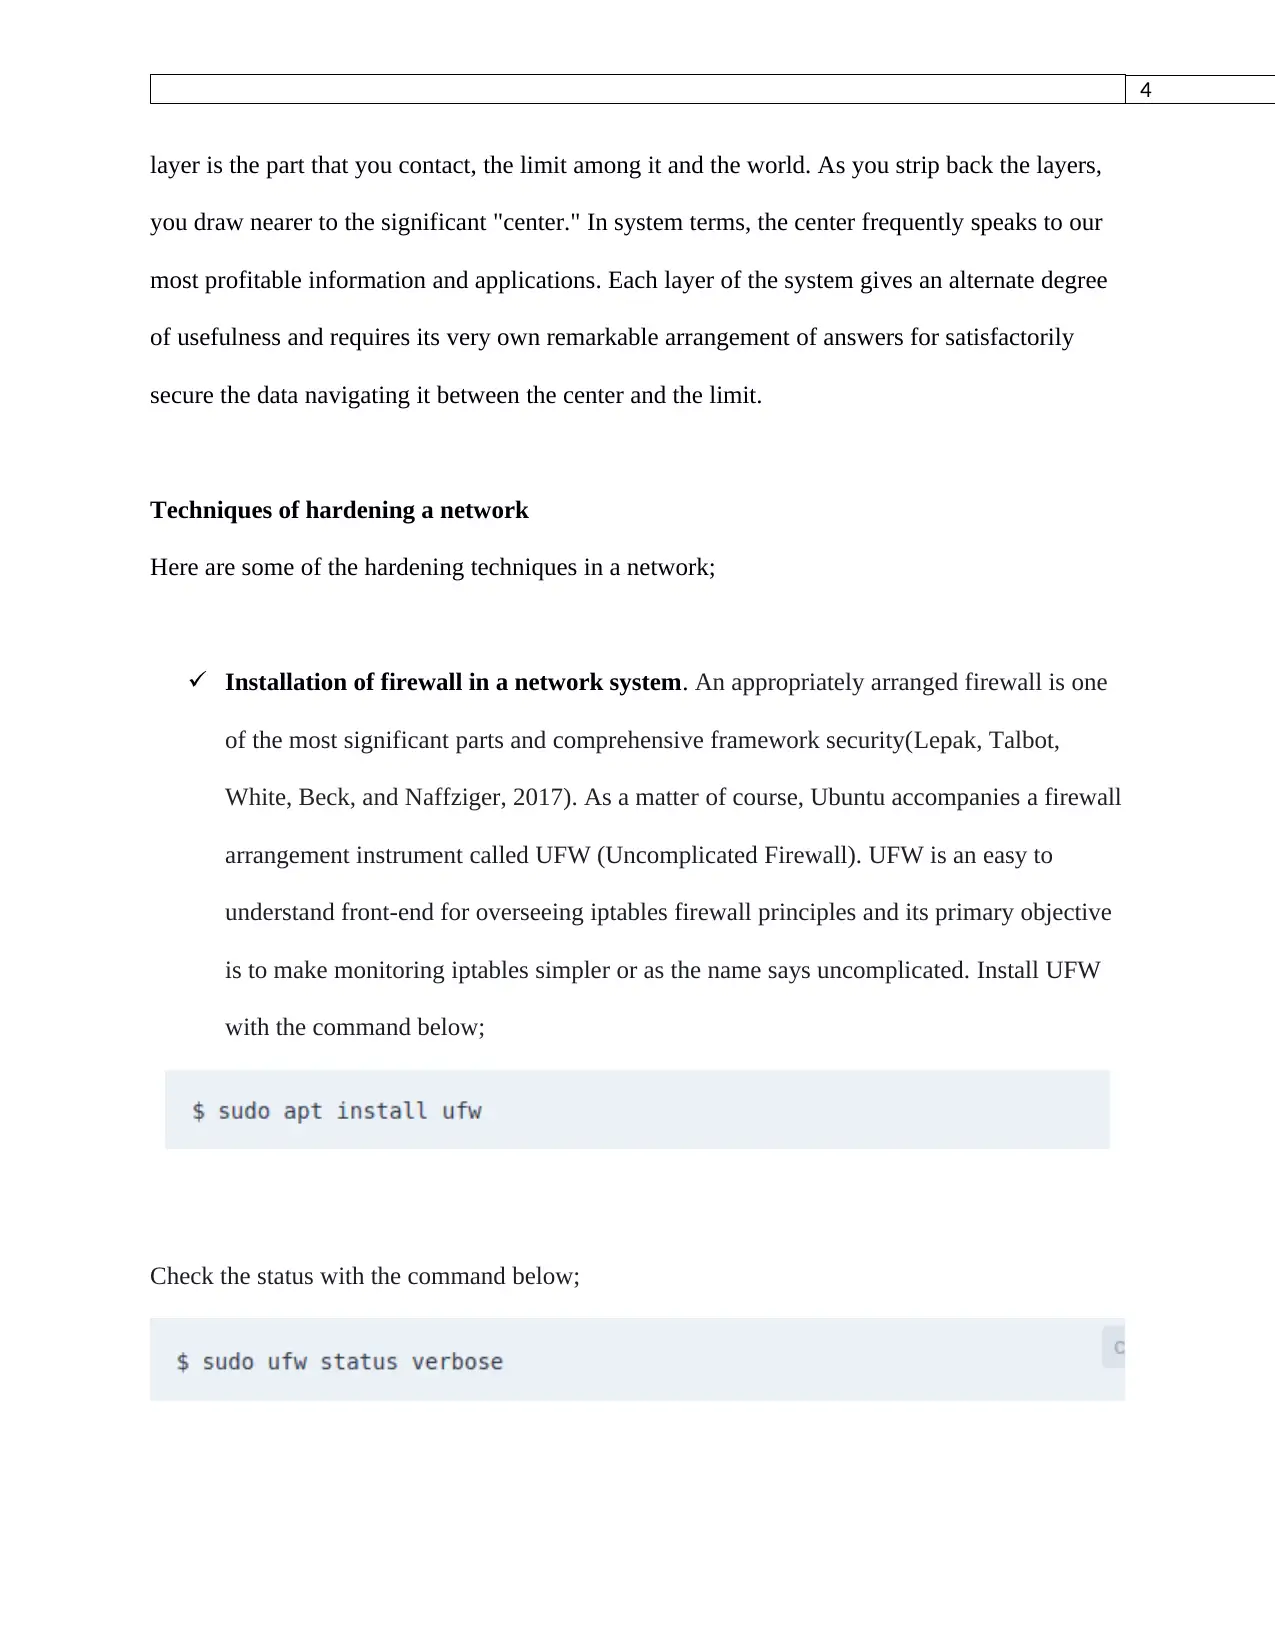
Installation of firewall in a network system. An appropriately arranged firewall is one
of the most significant parts and comprehensive framework security(Lepak, Talbot,
White, Beck, and Naffziger, 2017). As a matter of course, Ubuntu accompanies a firewall
arrangement instrument called UFW (Uncomplicated Firewall). UFW is an easy to
understand front-end for overseeing iptables firewall principles and its primary objective
is to make monitoring iptables simpler or as the name says uncomplicated. Install UFW
with the command below;
Check the status with the command below;
Paraphrase This Document
Need a fresh take? Get an instant paraphrase of this document with our AI Paraphraser
5
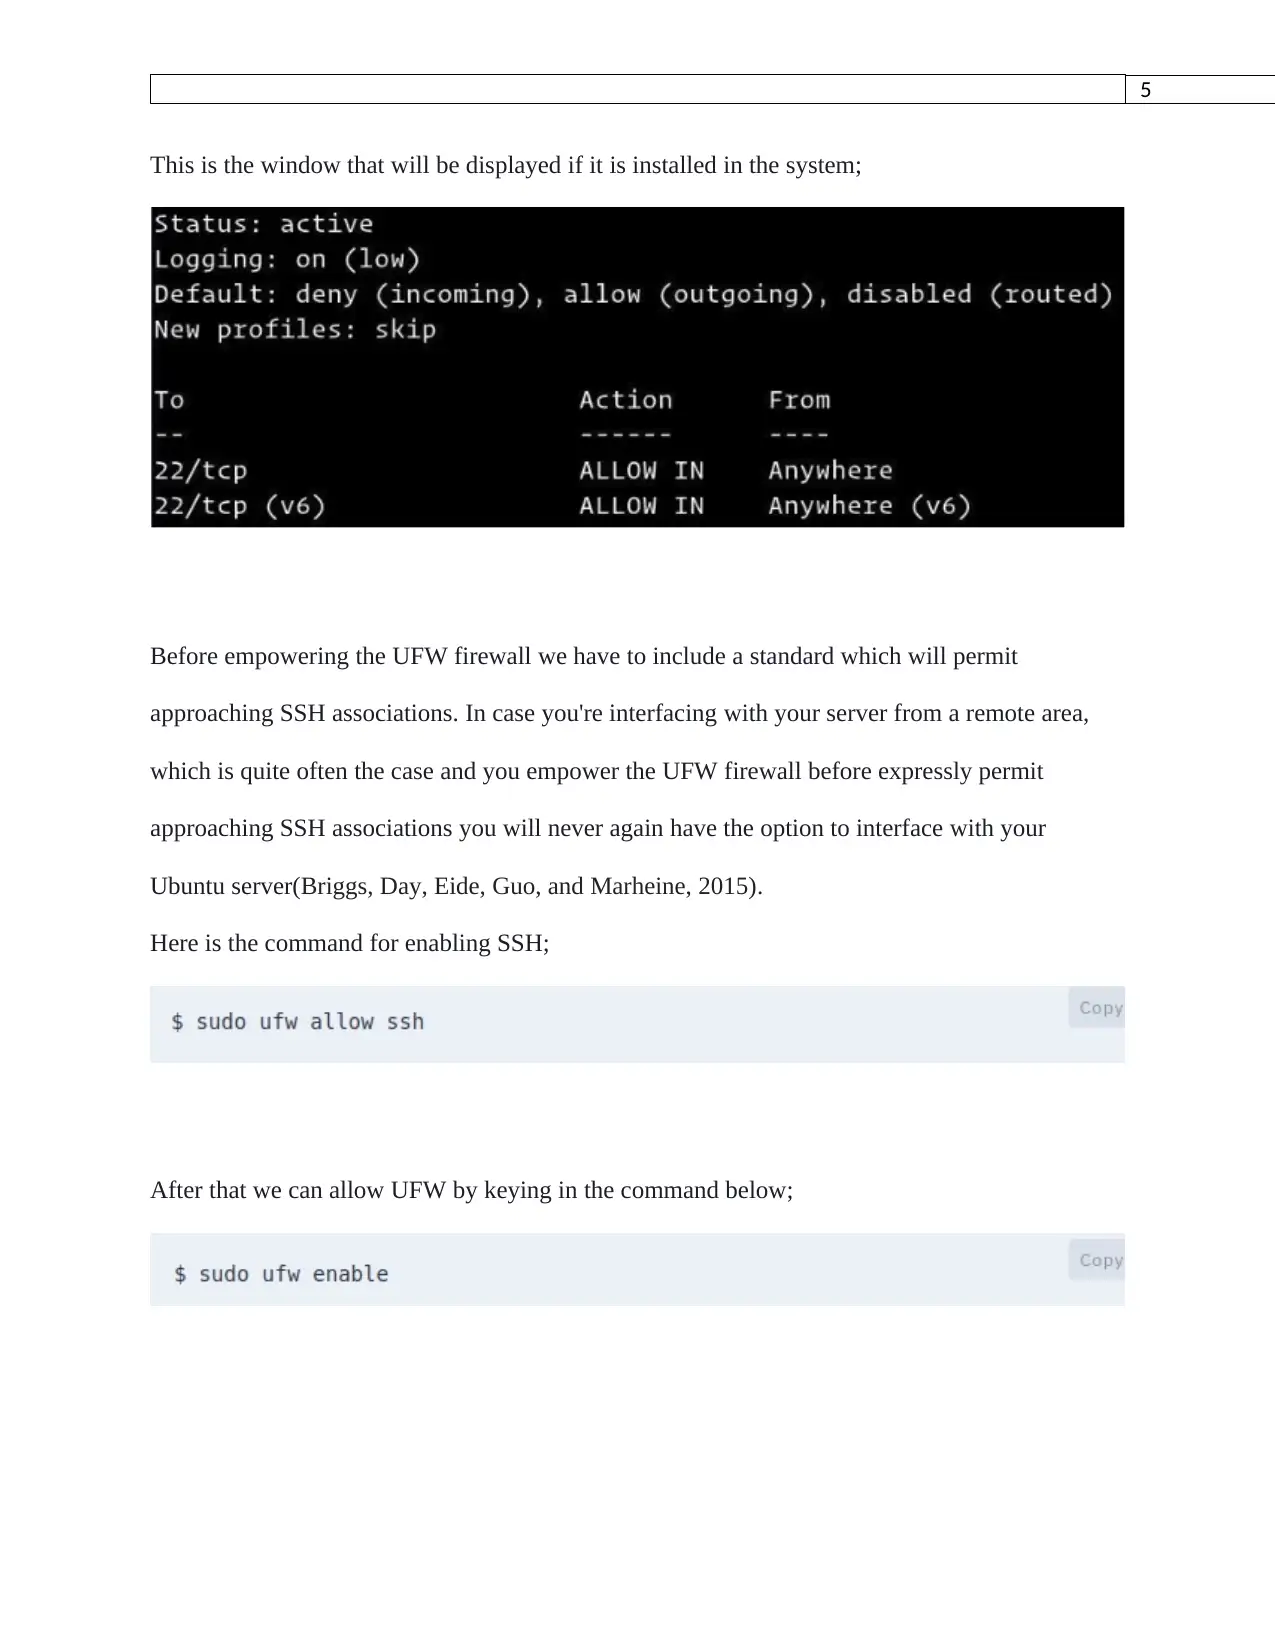
This is the window that will be displayed if it is installed in the system;
Before empowering the UFW firewall we have to include a standard which will permit
approaching SSH associations. In case you're interfacing with your server from a remote area,
which is quite often the case and you empower the UFW firewall before expressly permit
approaching SSH associations you will never again have the option to interface with your
Ubuntu server(Briggs, Day, Eide, Guo, and Marheine, 2015).
Here is the command for enabling SSH;
After that we can allow UFW by keying in the command below;
6
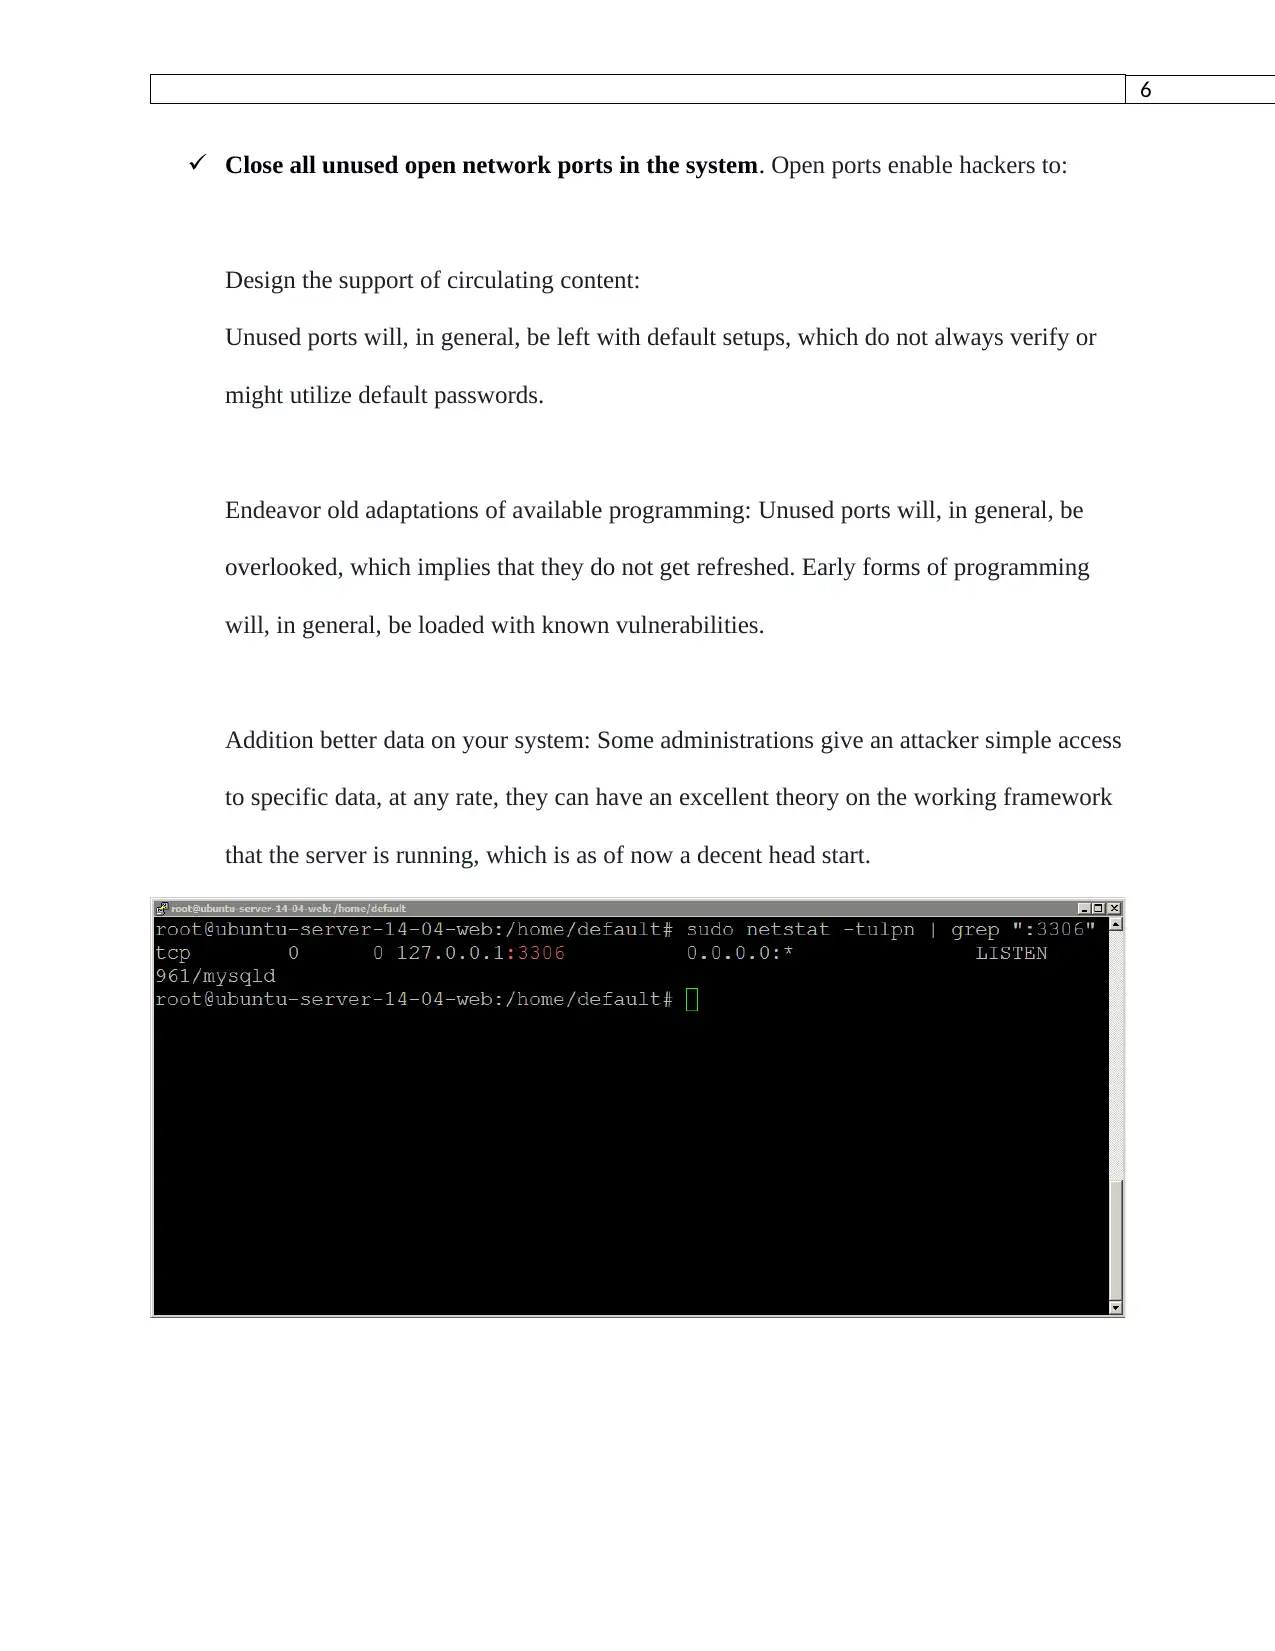
Close all unused open network ports in the system. Open ports enable hackers to:
Design the support of circulating content:
Unused ports will, in general, be left with default setups, which do not always verify or
might utilize default passwords.
Endeavor old adaptations of available programming: Unused ports will, in general, be
overlooked, which implies that they do not get refreshed. Early forms of programming
will, in general, be loaded with known vulnerabilities.
Addition better data on your system: Some administrations give an attacker simple access
to specific data, at any rate, they can have an excellent theory on the working framework
that the server is running, which is as of now a decent head start.
⊘ This is a preview!⊘
Do you want full access?
Subscribe today to unlock all pages.

Trusted by 1+ million students worldwide
7
Use clock synchronization.
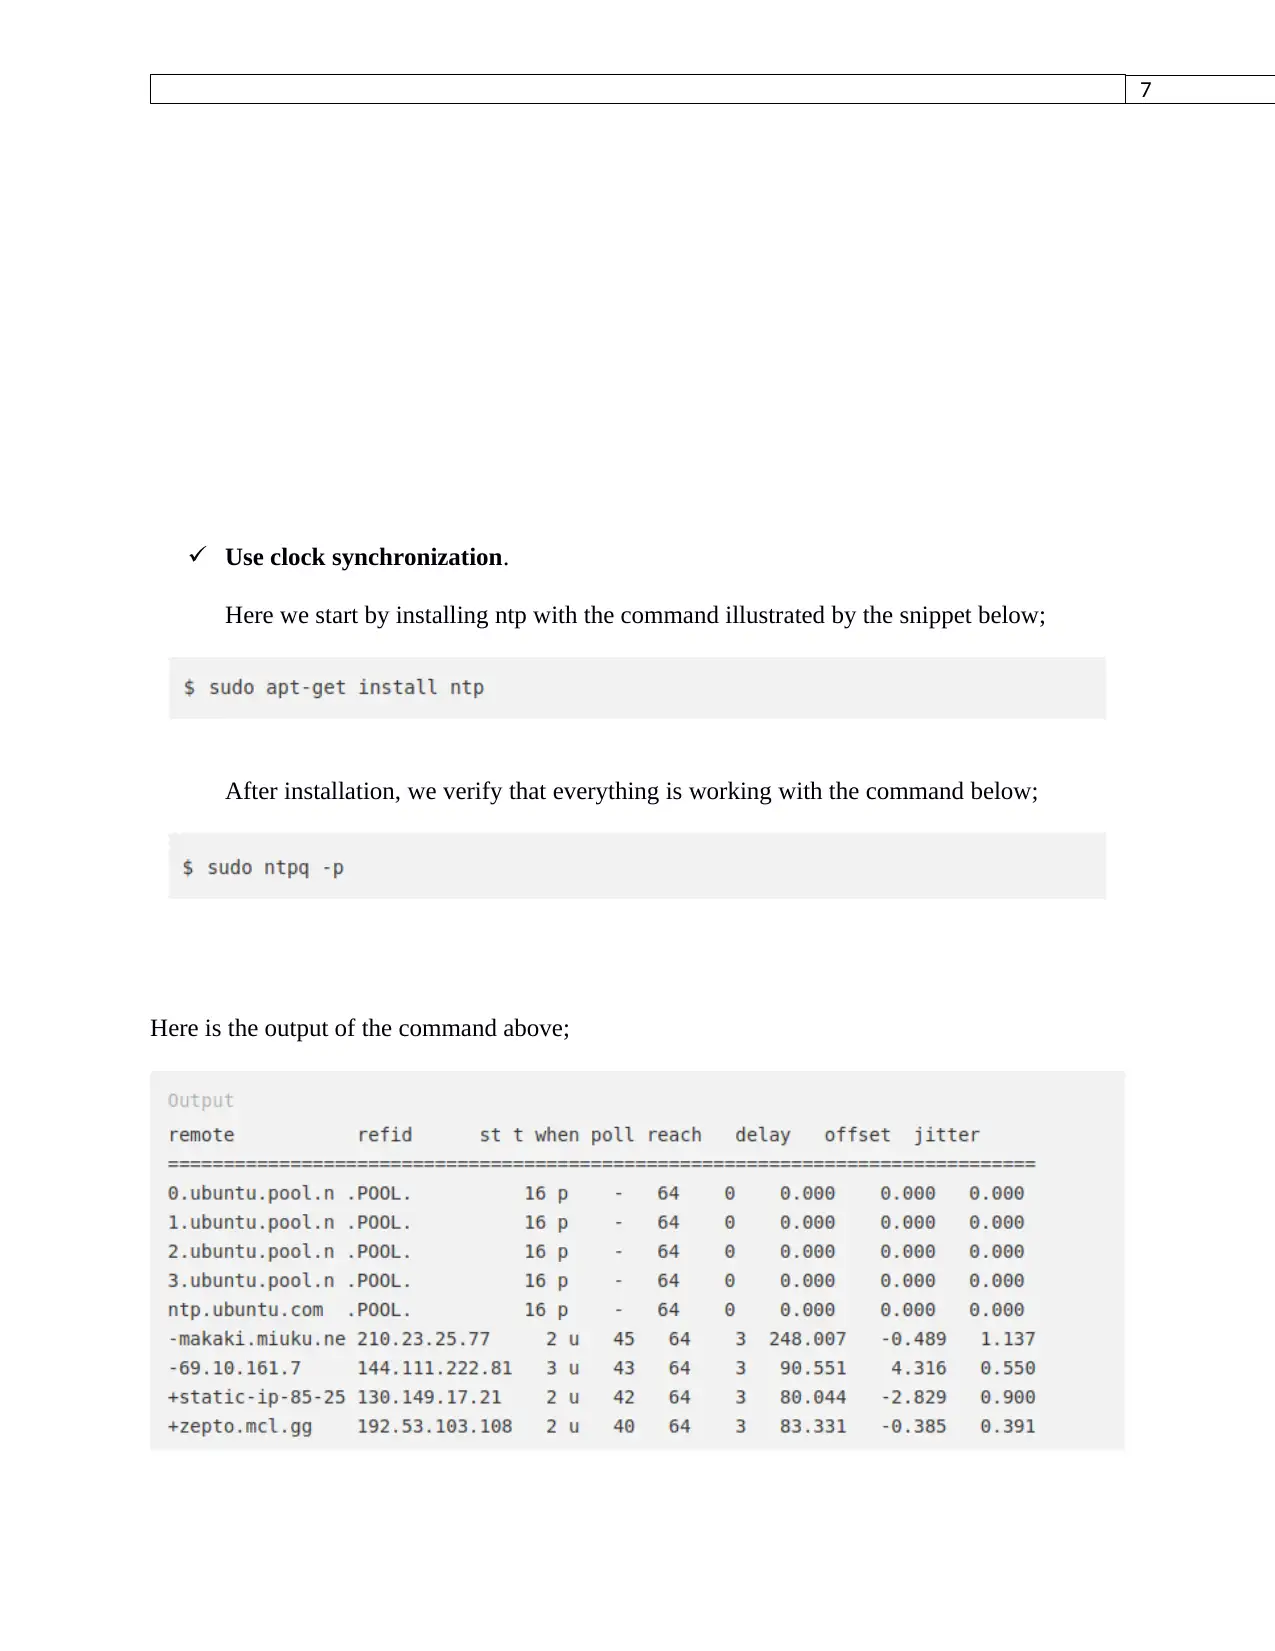
Here we start by installing ntp with the command illustrated by the snippet below;
After installation, we verify that everything is working with the command below;
Here is the output of the command above;
Use clock synchronization.
Here we start by installing ntp with the command illustrated by the snippet below;
After installation, we verify that everything is working with the command below;
Here is the output of the command above;
Paraphrase This Document
Need a fresh take? Get an instant paraphrase of this document with our AI Paraphraser
8
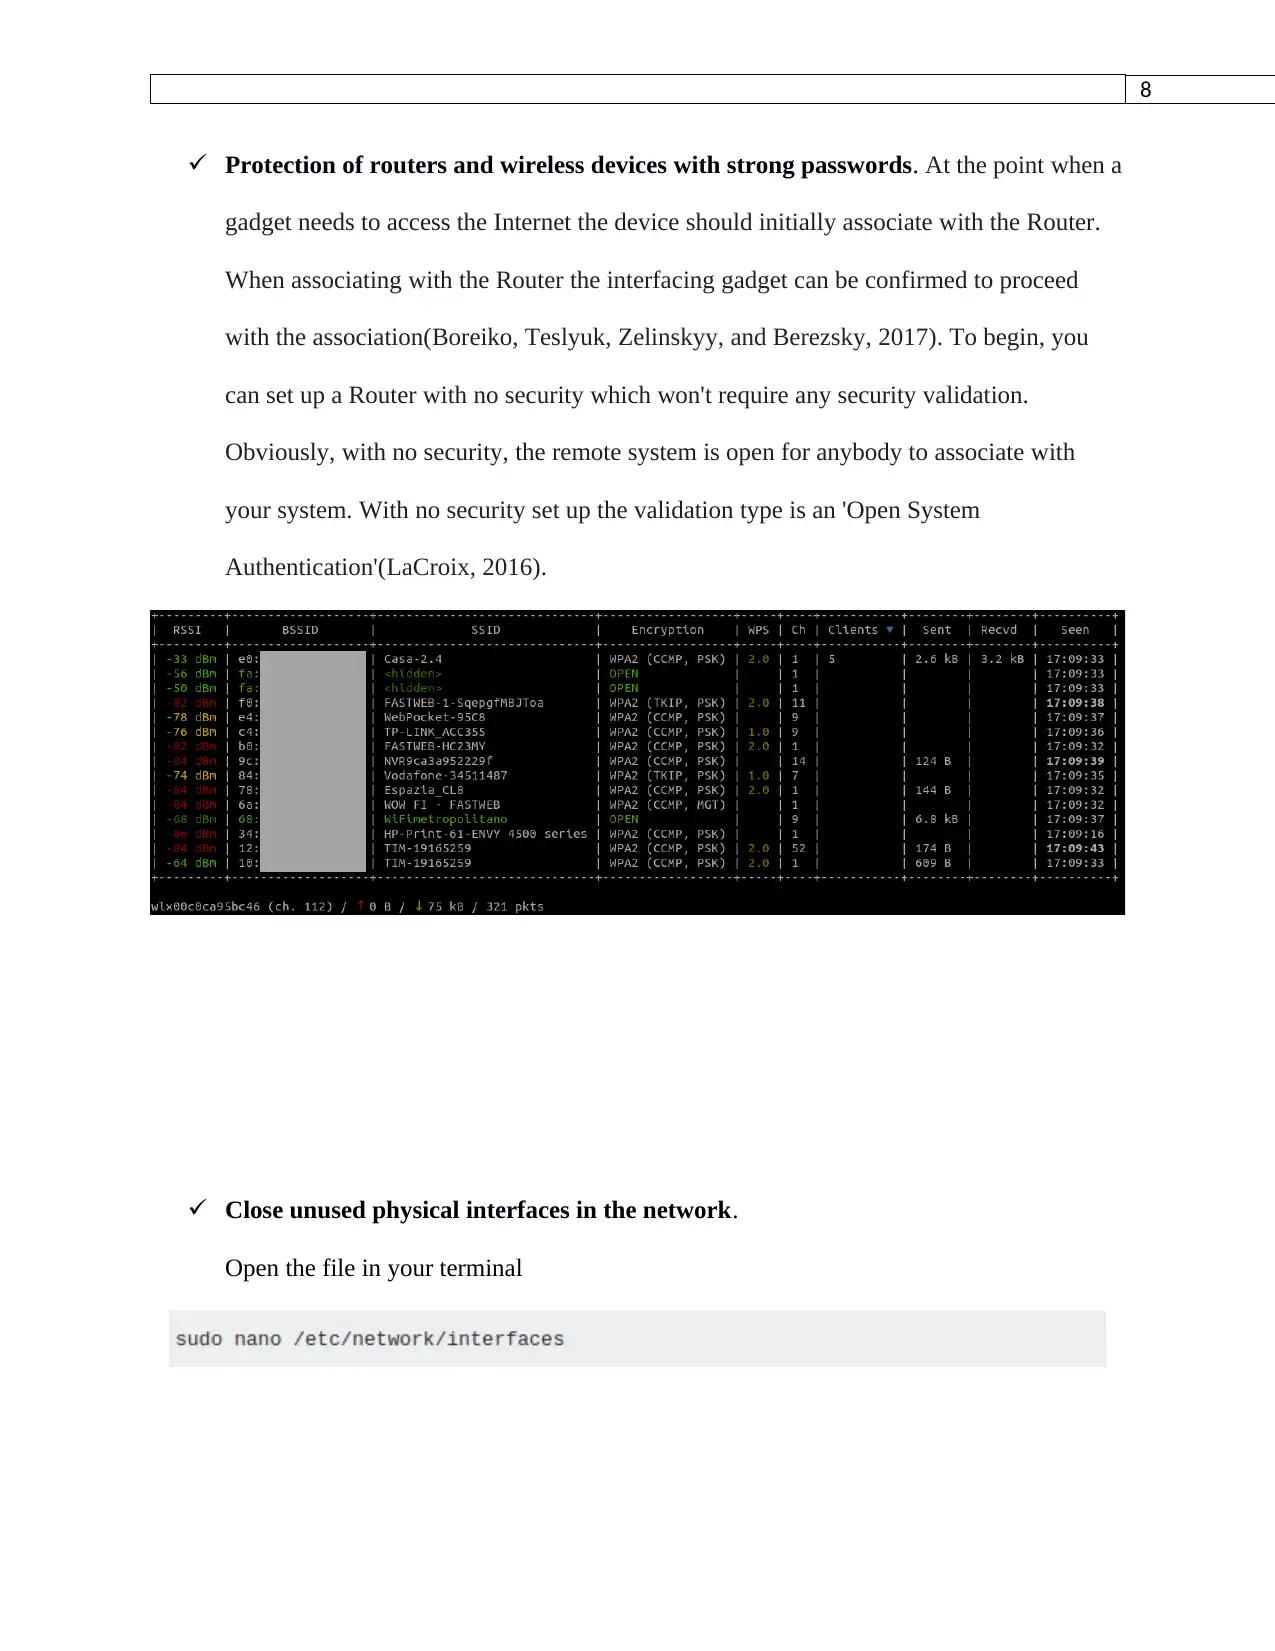
Protection of routers and wireless devices with strong passwords. At the point when a
gadget needs to access the Internet the device should initially associate with the Router.
When associating with the Router the interfacing gadget can be confirmed to proceed
with the association(Boreiko, Teslyuk, Zelinskyy, and Berezsky, 2017). To begin, you
can set up a Router with no security which won't require any security validation.
Obviously, with no security, the remote system is open for anybody to associate with
your system. With no security set up the validation type is an 'Open System
Authentication'(LaCroix, 2016).
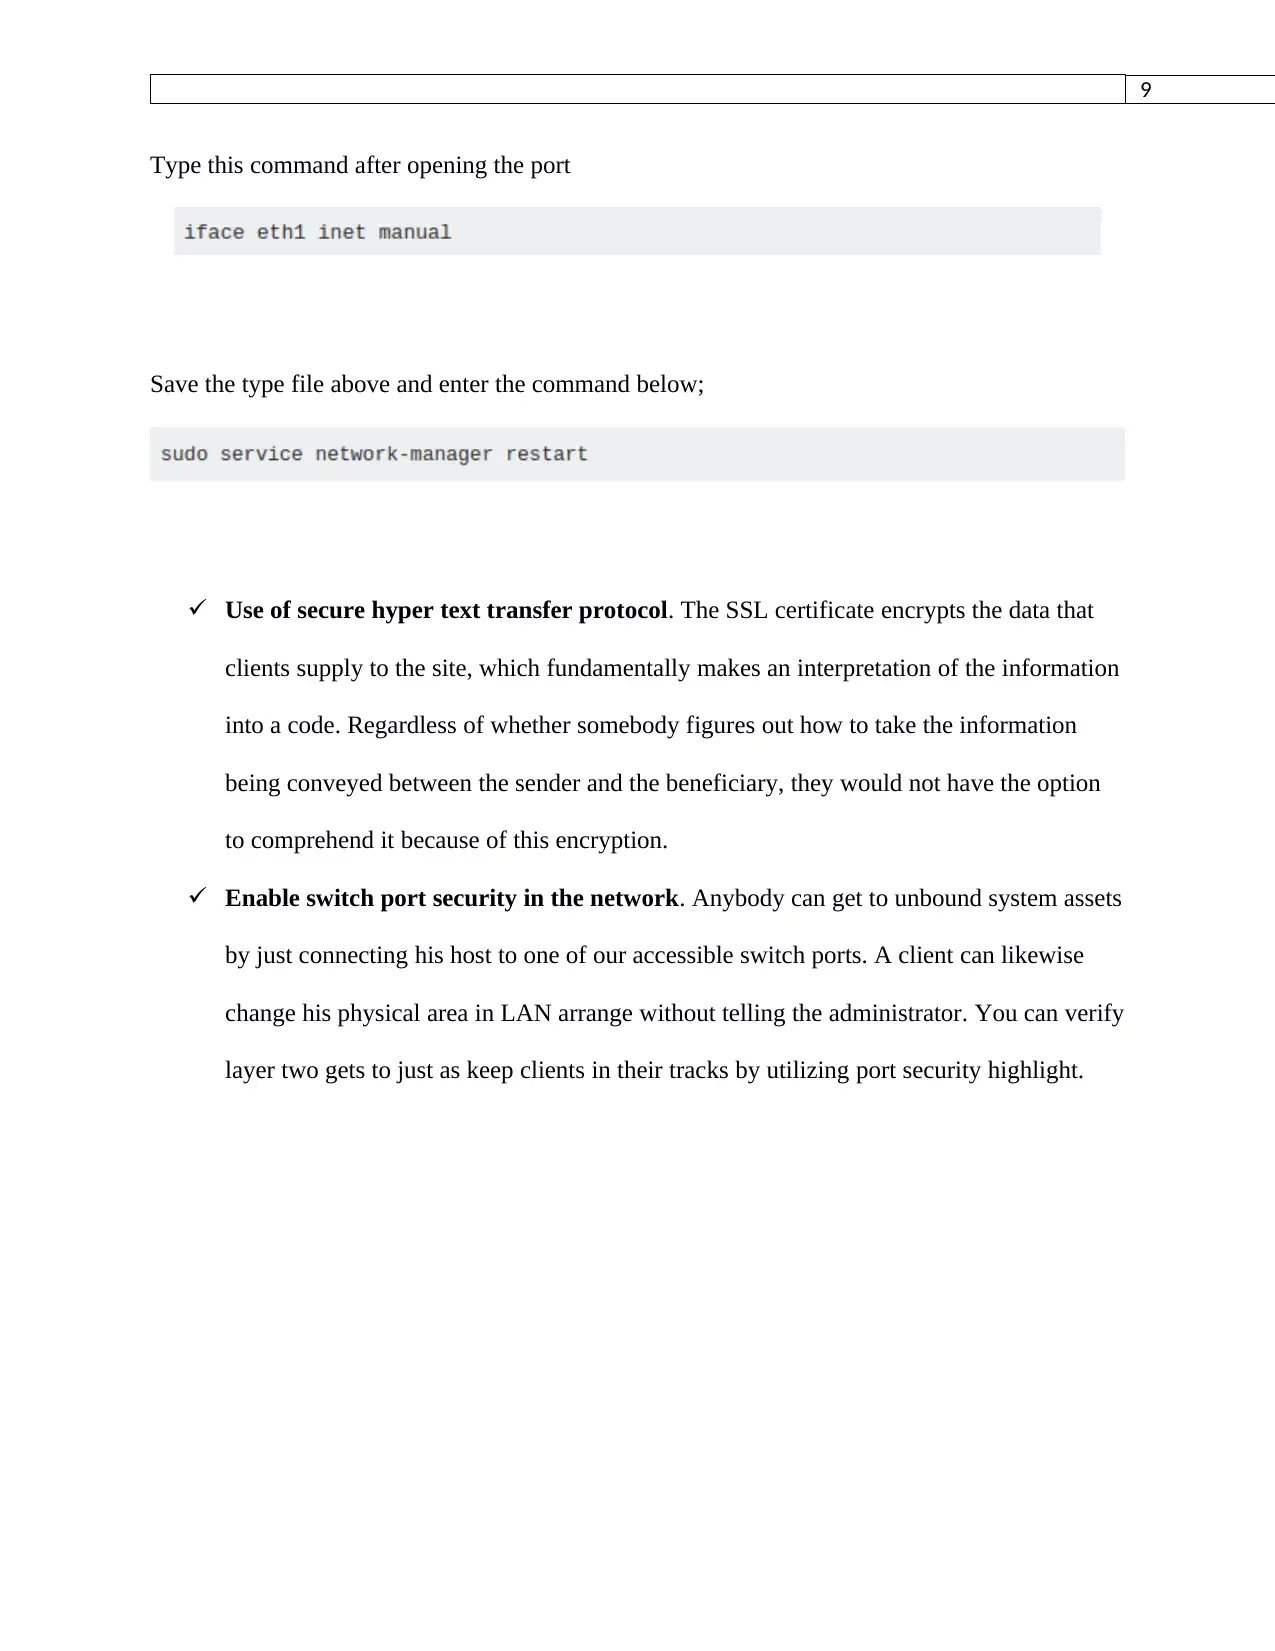
Close unused physical interfaces in the network.
Open the file in your terminal
9
Type this command after opening the port
Save the type file above and enter the command below;
Use of secure hyper text transfer protocol. The SSL certificate encrypts the data that
clients supply to the site, which fundamentally makes an interpretation of the information
into a code. Regardless of whether somebody figures out how to take the information
being conveyed between the sender and the beneficiary, they would not have the option
to comprehend it because of this encryption.
Enable switch port security in the network. Anybody can get to unbound system assets
by just connecting his host to one of our accessible switch ports. A client can likewise
change his physical area in LAN arrange without telling the administrator. You can verify
layer two gets to just as keep clients in their tracks by utilizing port security highlight.
⊘ This is a preview!⊘
Do you want full access?
Subscribe today to unlock all pages.

Trusted by 1+ million students worldwide
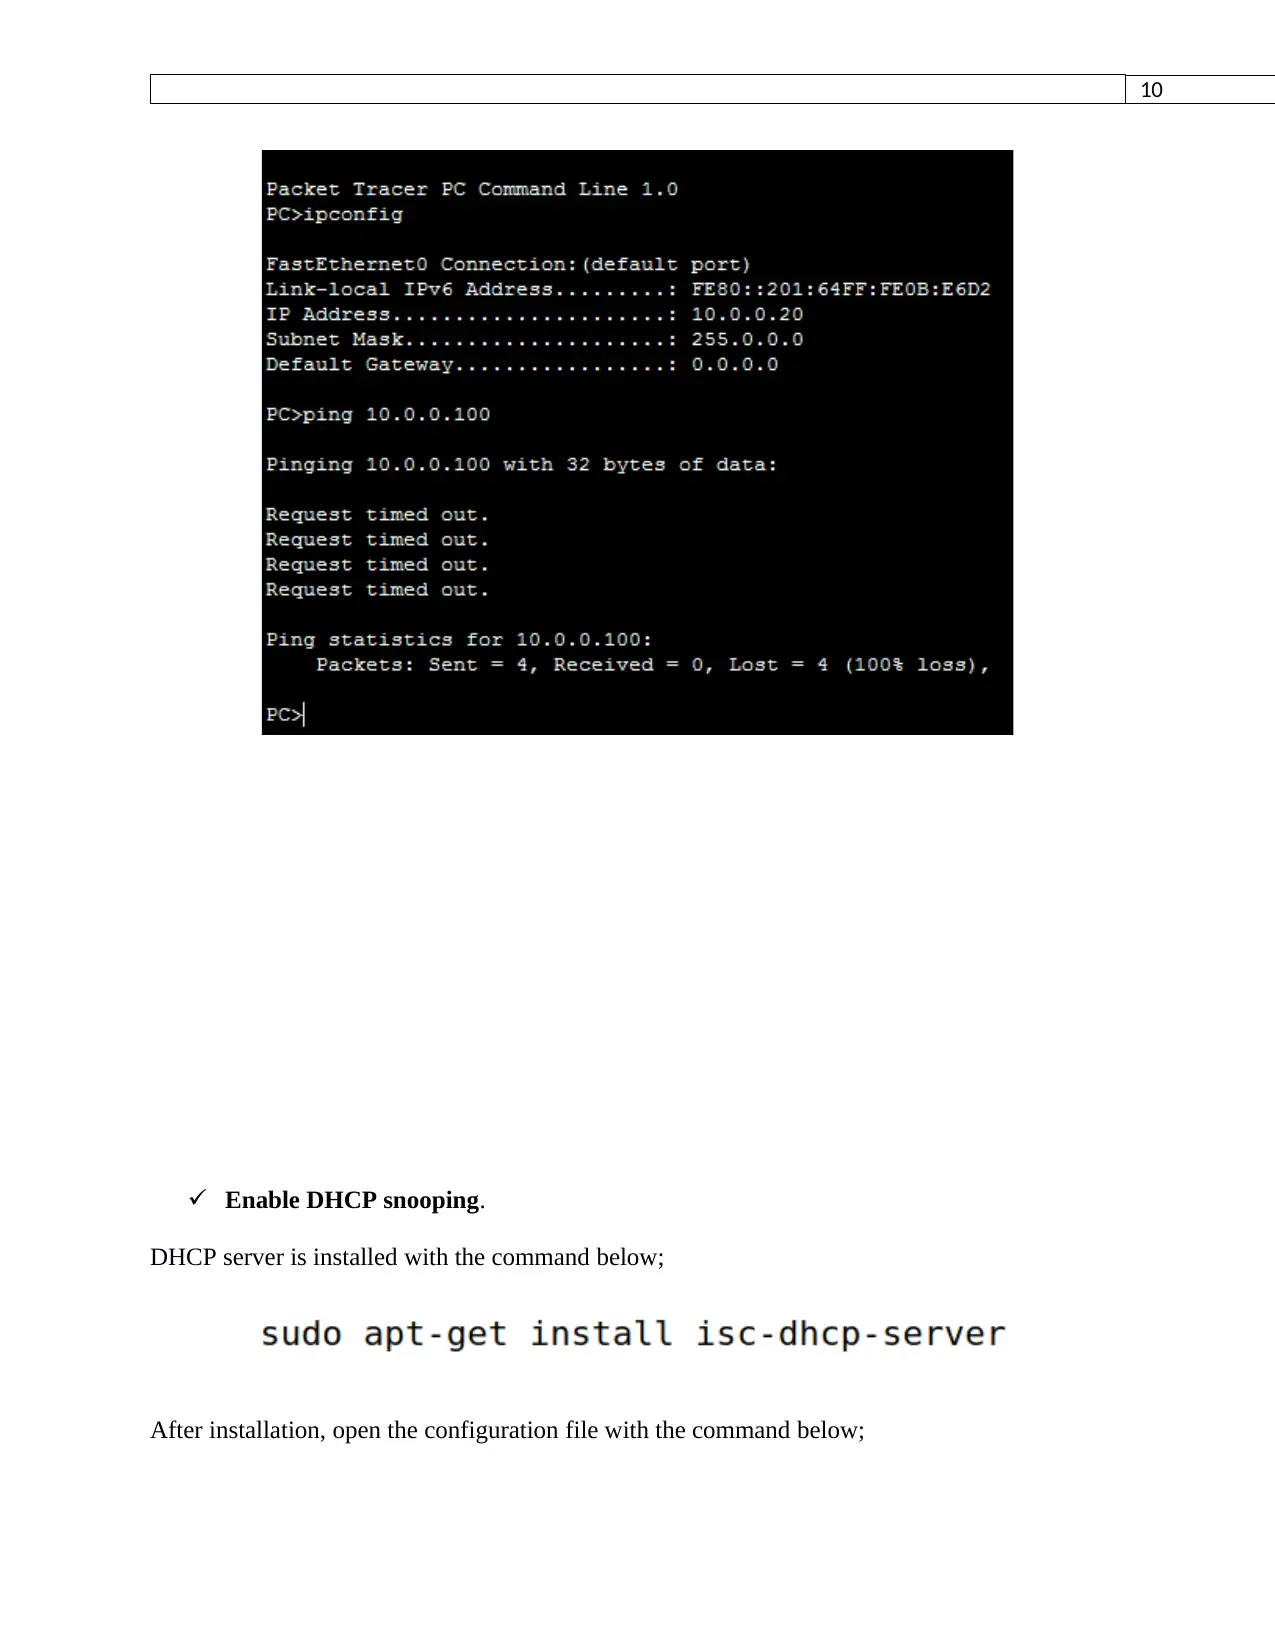
10
Enable DHCP snooping.
DHCP server is installed with the command below;
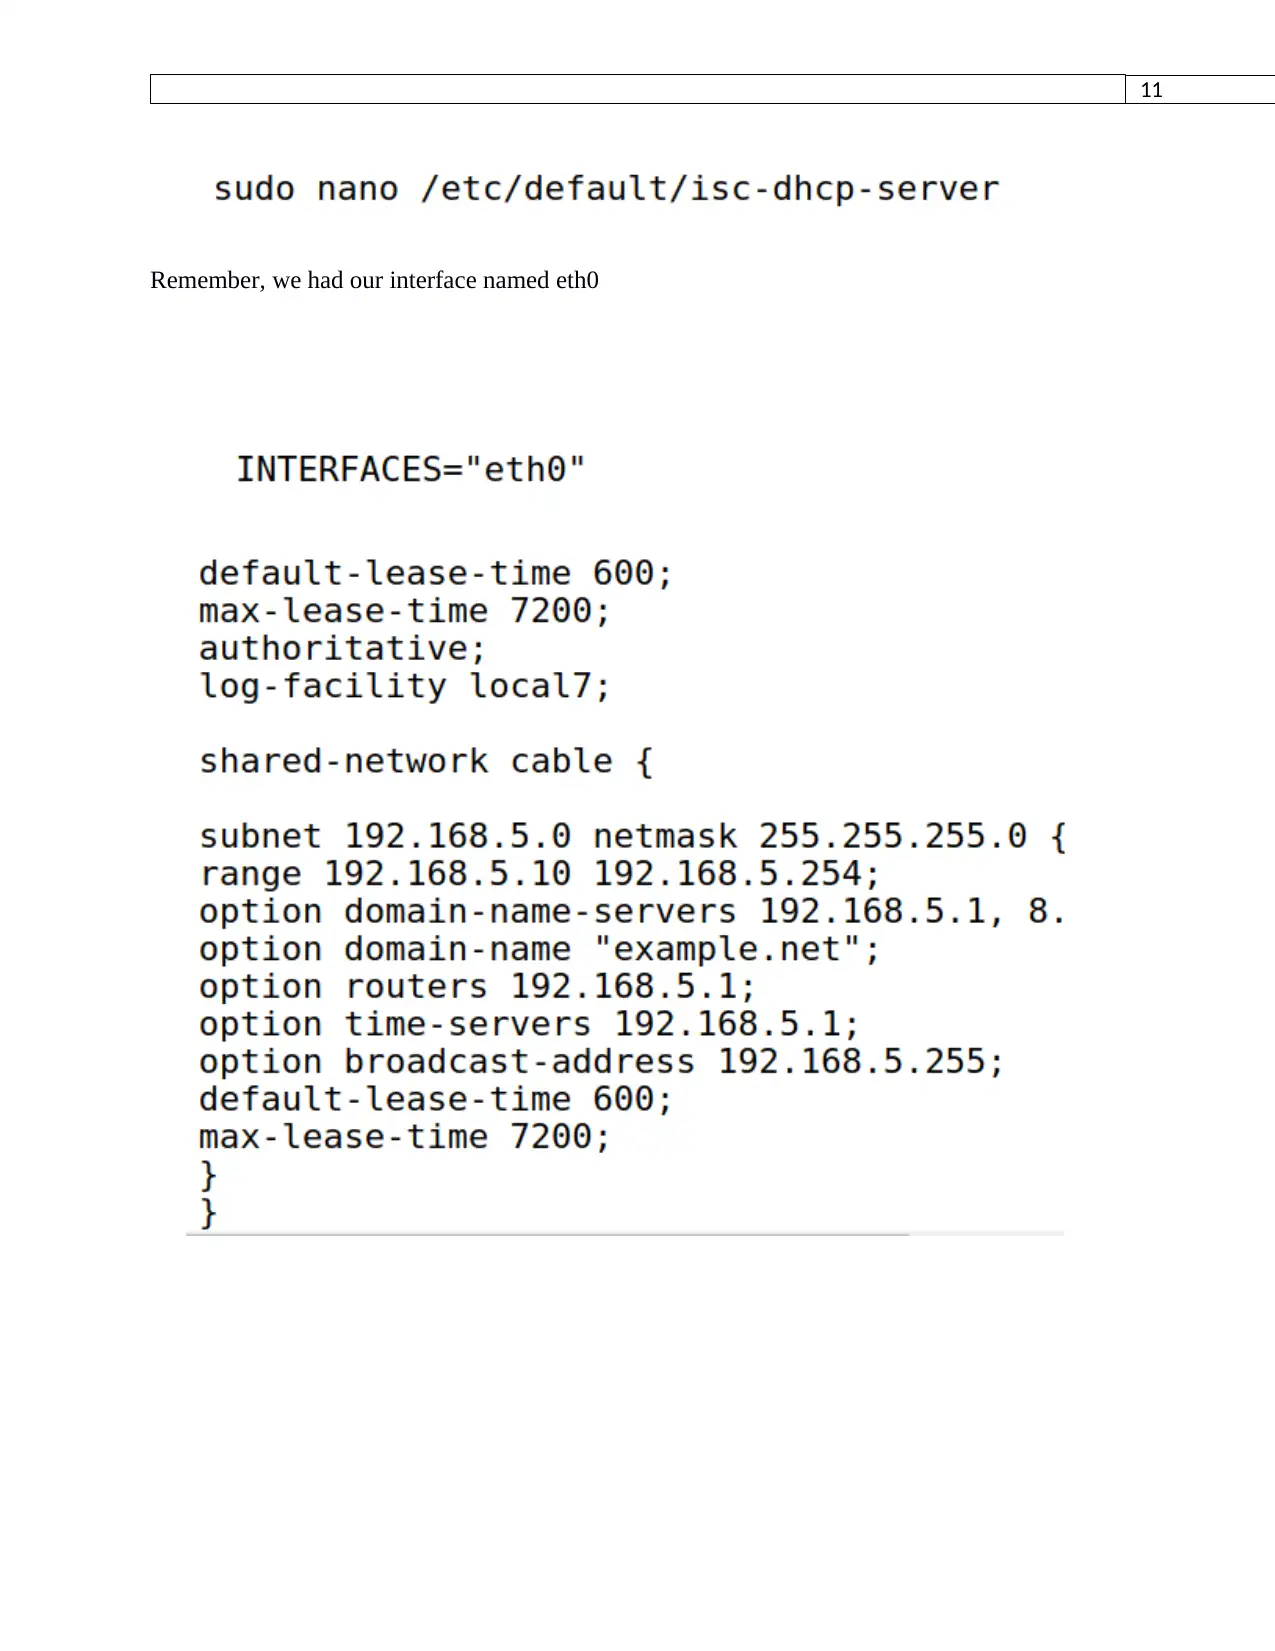
After installation, open the configuration file with the command below;
Enable DHCP snooping.
DHCP server is installed with the command below;
After installation, open the configuration file with the command below;
Paraphrase This Document
Need a fresh take? Get an instant paraphrase of this document with our AI Paraphraser
11
Remember, we had our interface named eth0
Remember, we had our interface named eth0
12
References
Lepak, K., Talbot, G., White, S., Beck, N. and Naffziger, S., 2017. The next generation amd
enterprise server product architecture. IEEE Hot Chips, 29.
References
Lepak, K., Talbot, G., White, S., Beck, N. and Naffziger, S., 2017. The next generation amd
enterprise server product architecture. IEEE Hot Chips, 29.
⊘ This is a preview!⊘
Do you want full access?
Subscribe today to unlock all pages.

Trusted by 1+ million students worldwide
1 out of 12
Related Documents
Your All-in-One AI-Powered Toolkit for Academic Success.
+13062052269
info@desklib.com
Available 24*7 on WhatsApp / Email
![[object Object]](/_next/static/media/star-bottom.7253800d.svg)
Unlock your academic potential
Copyright © 2020–2026 A2Z Services. All Rights Reserved. Developed and managed by ZUCOL.


