NIT5160 Project: Scalable Website with Backend Database Solution

Verified

Added on  2024/06/04

|12
|896
|458
Project
AI Summary
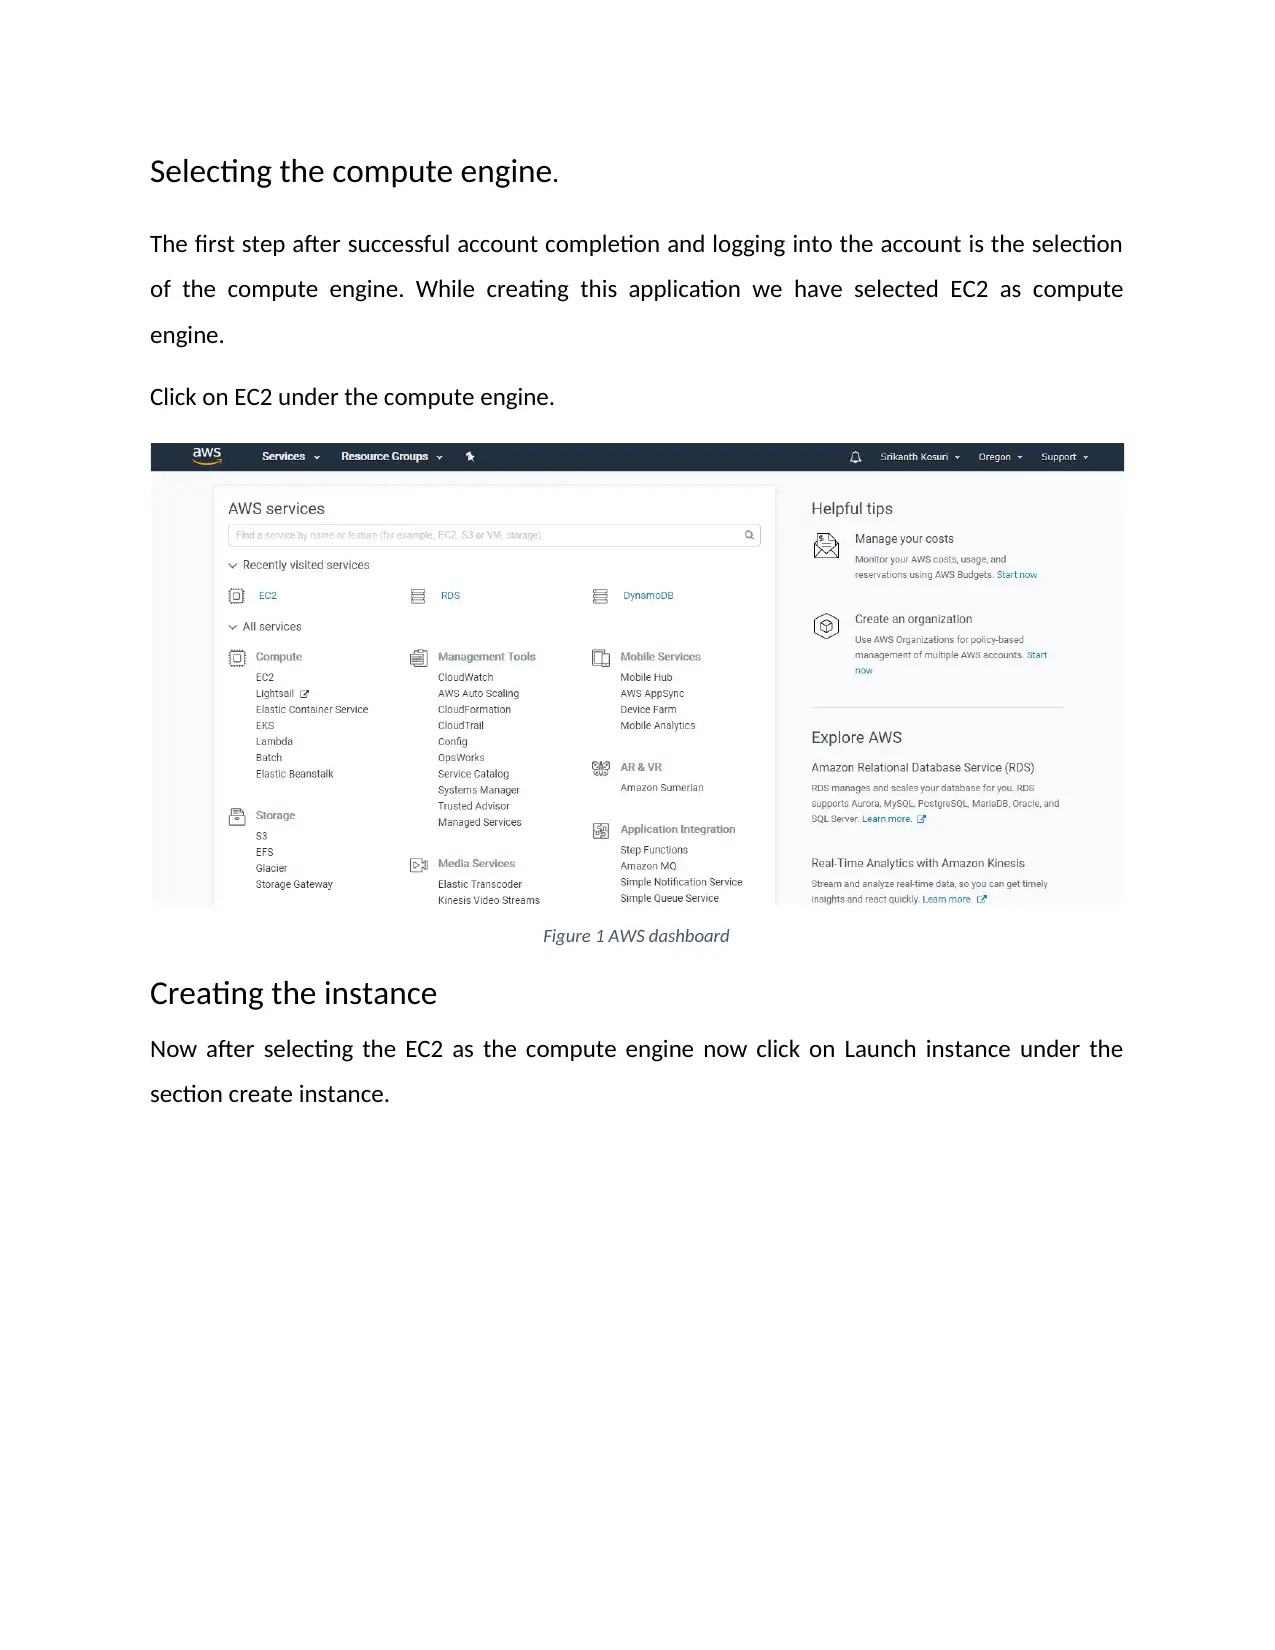
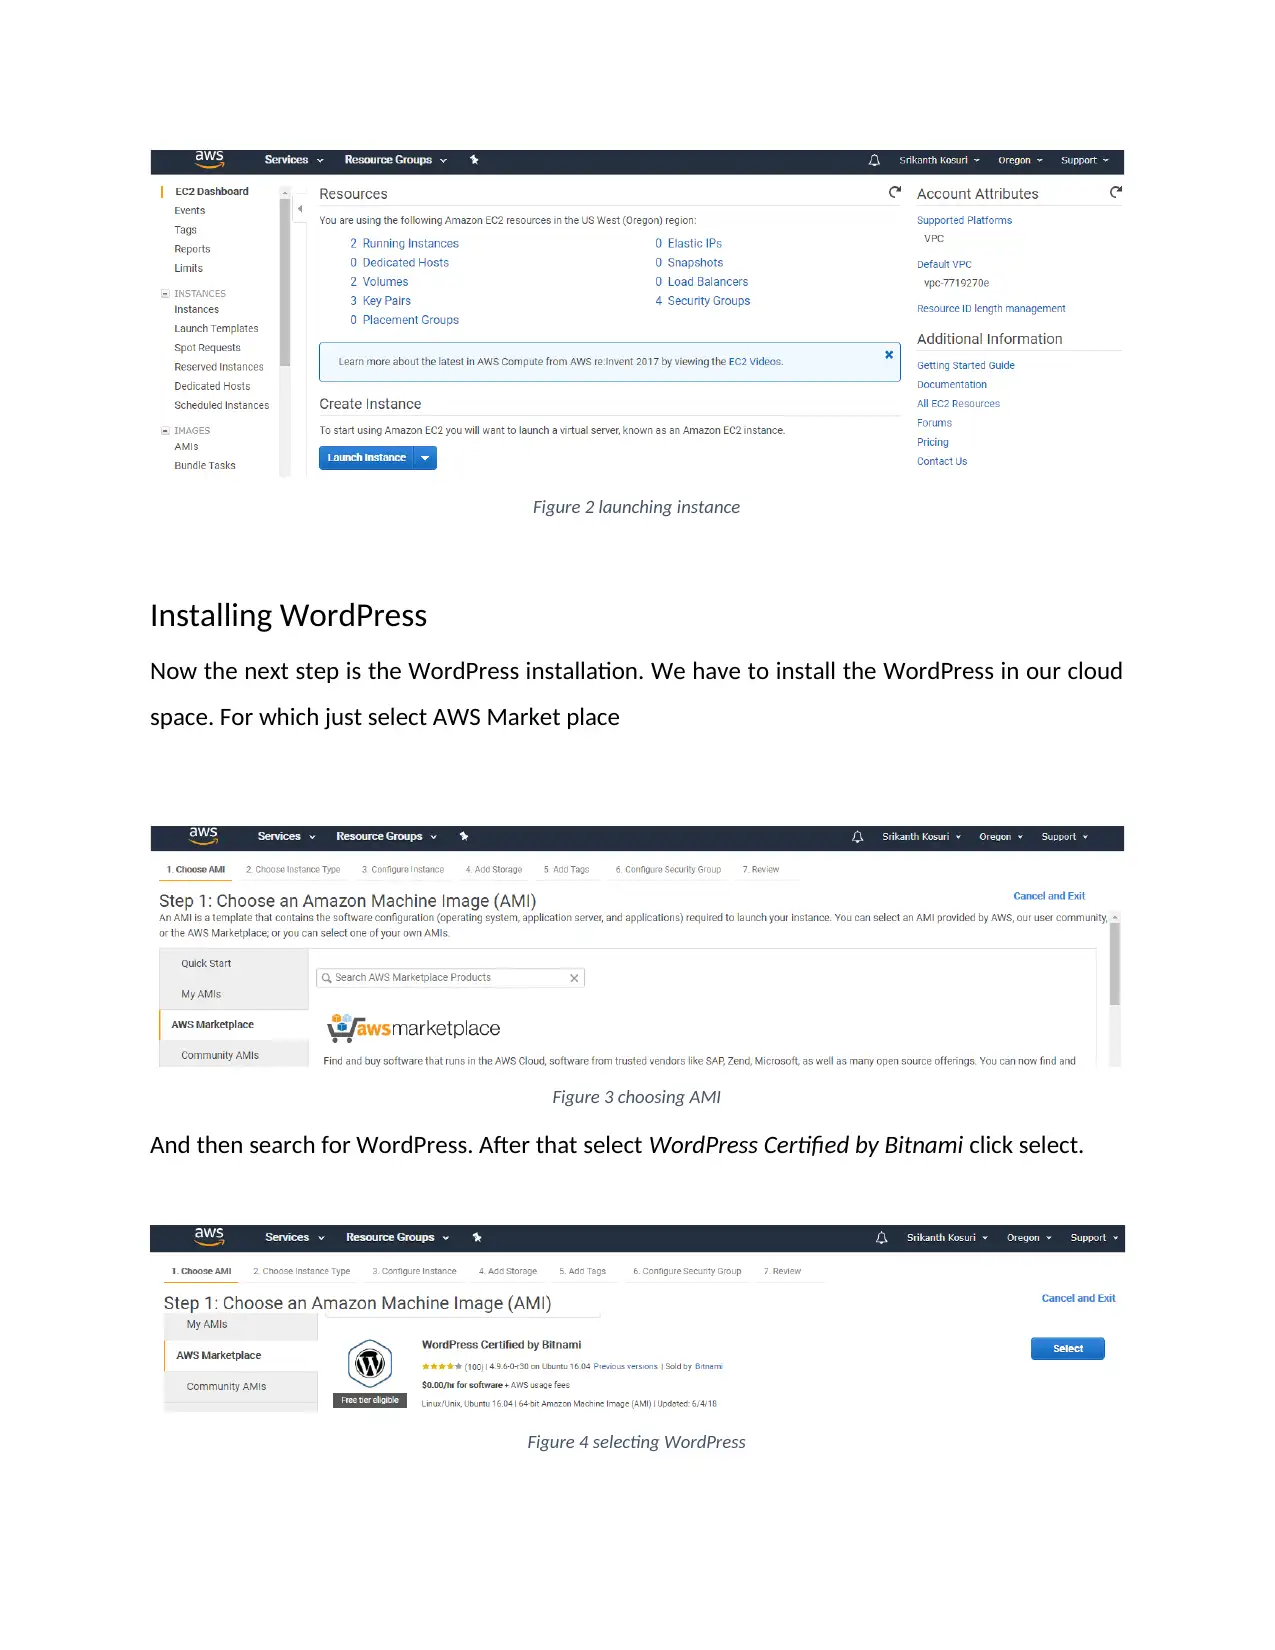
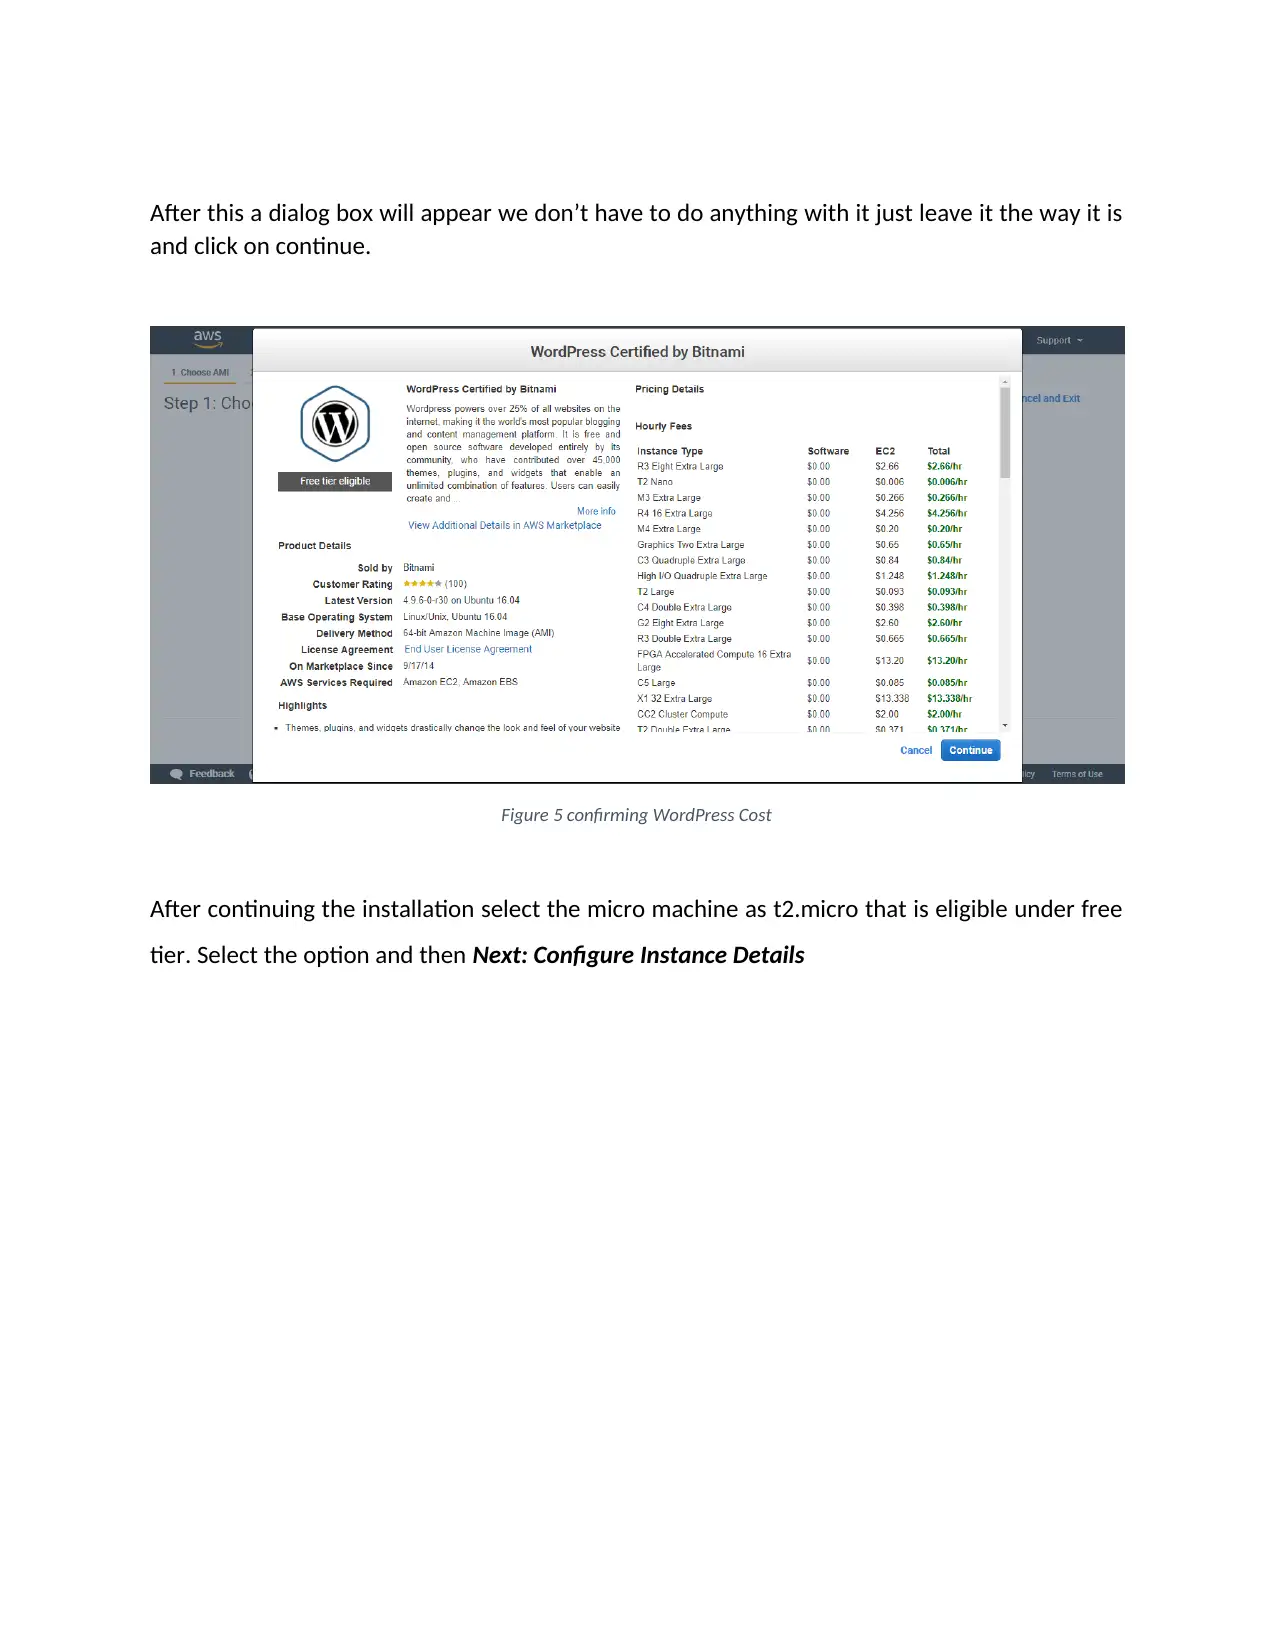
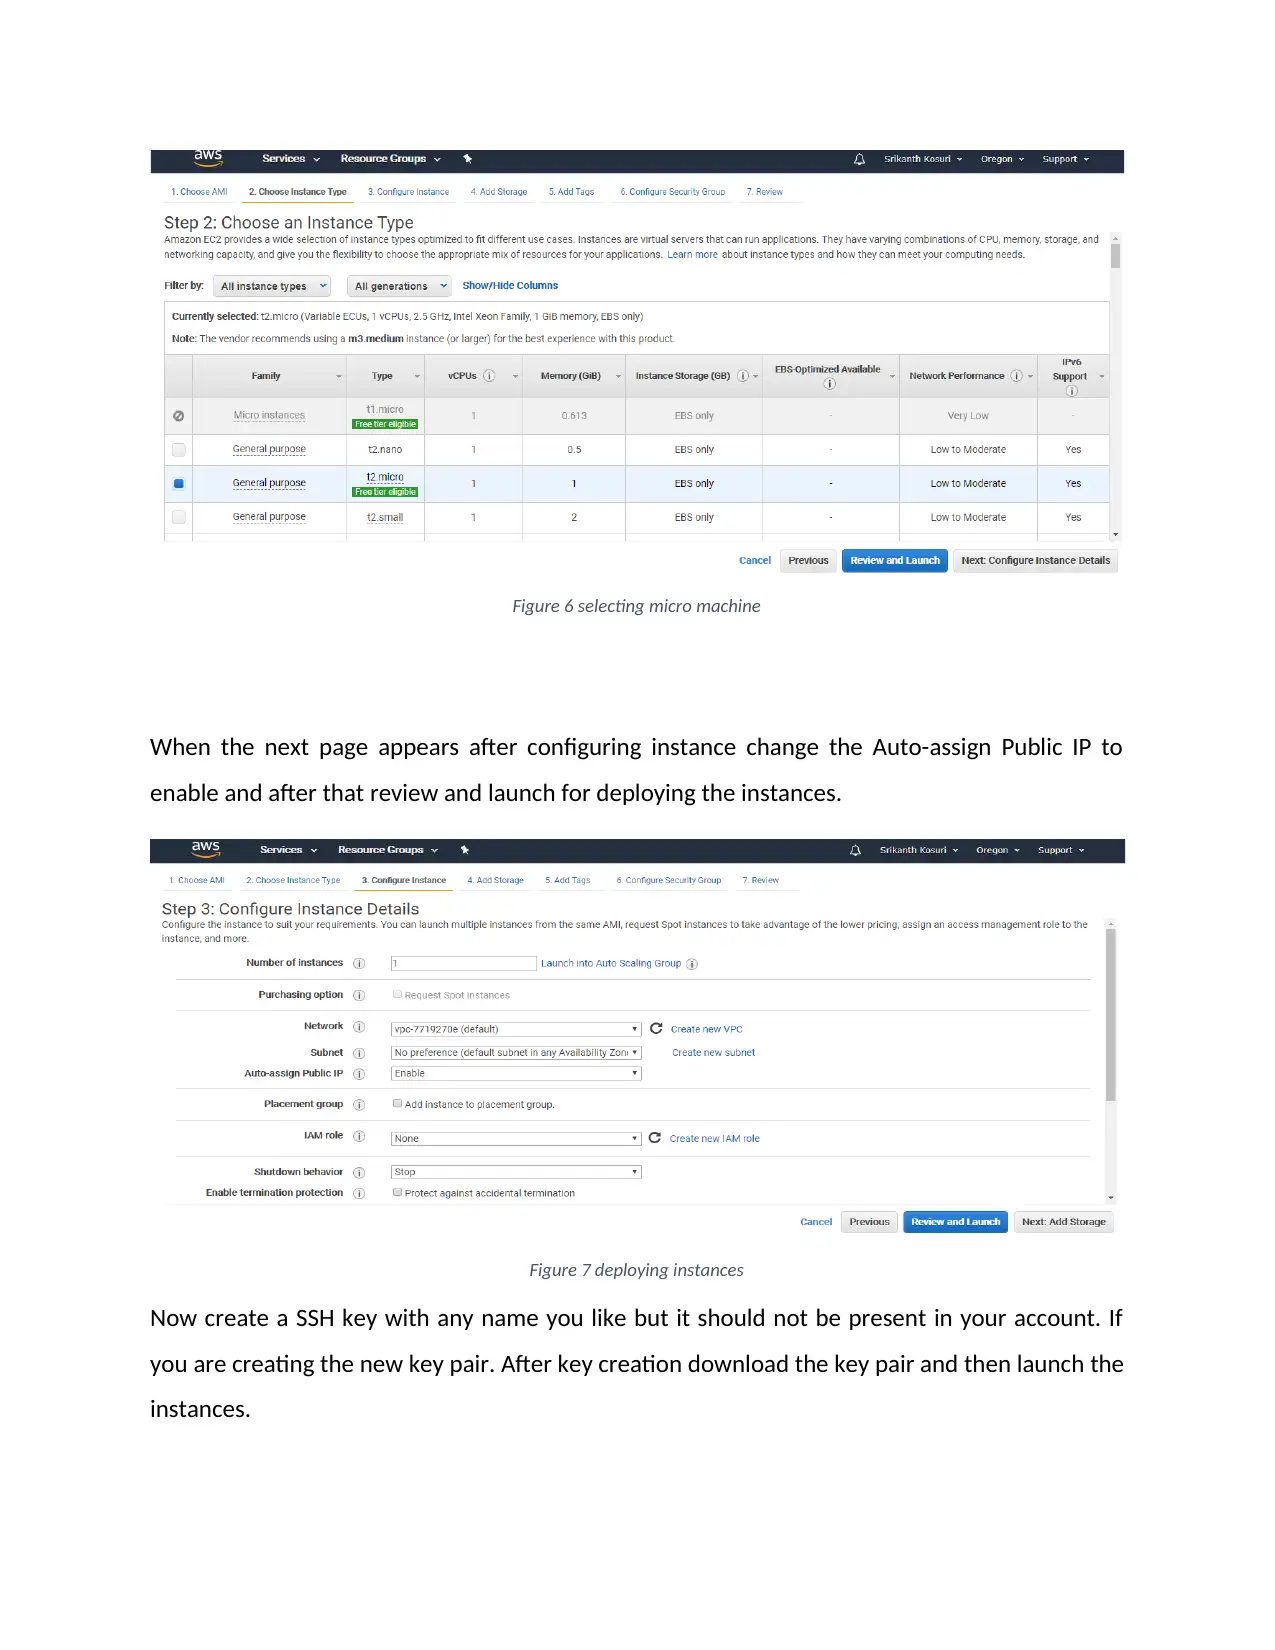
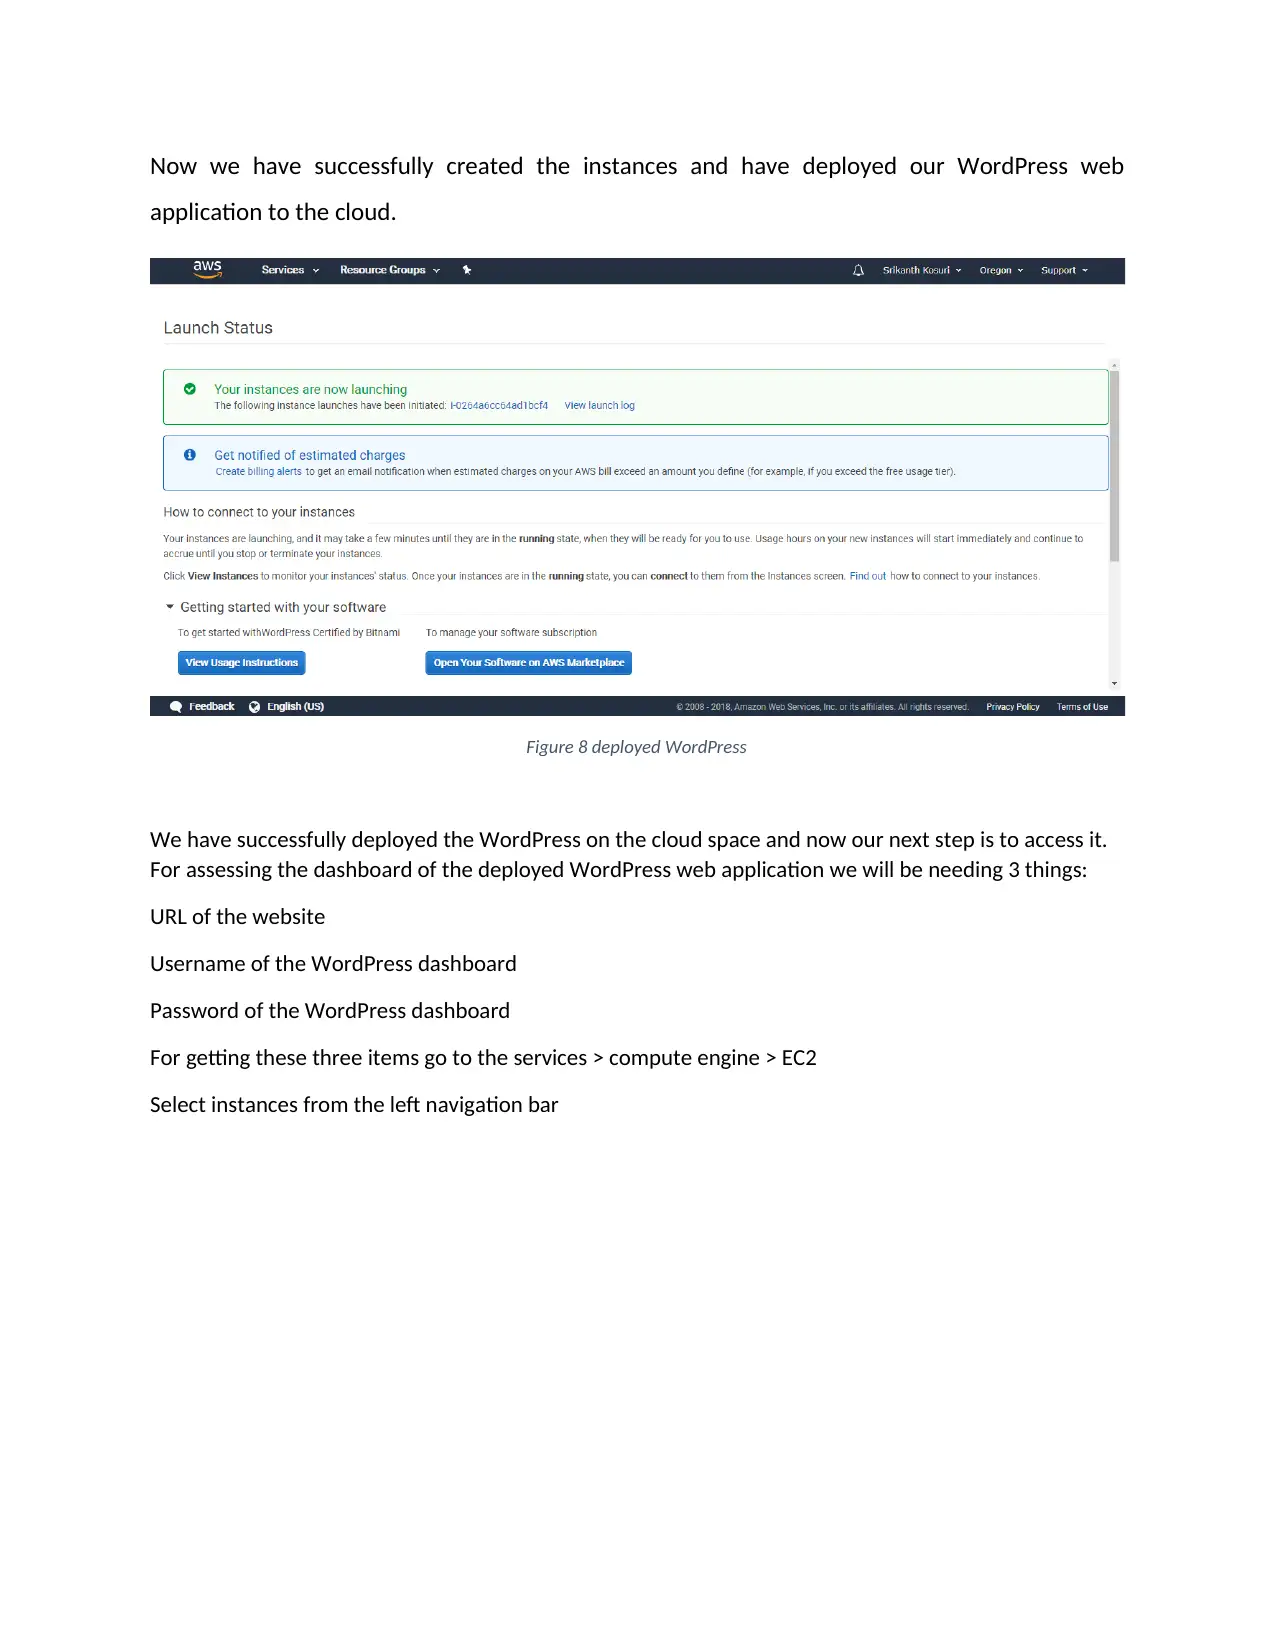
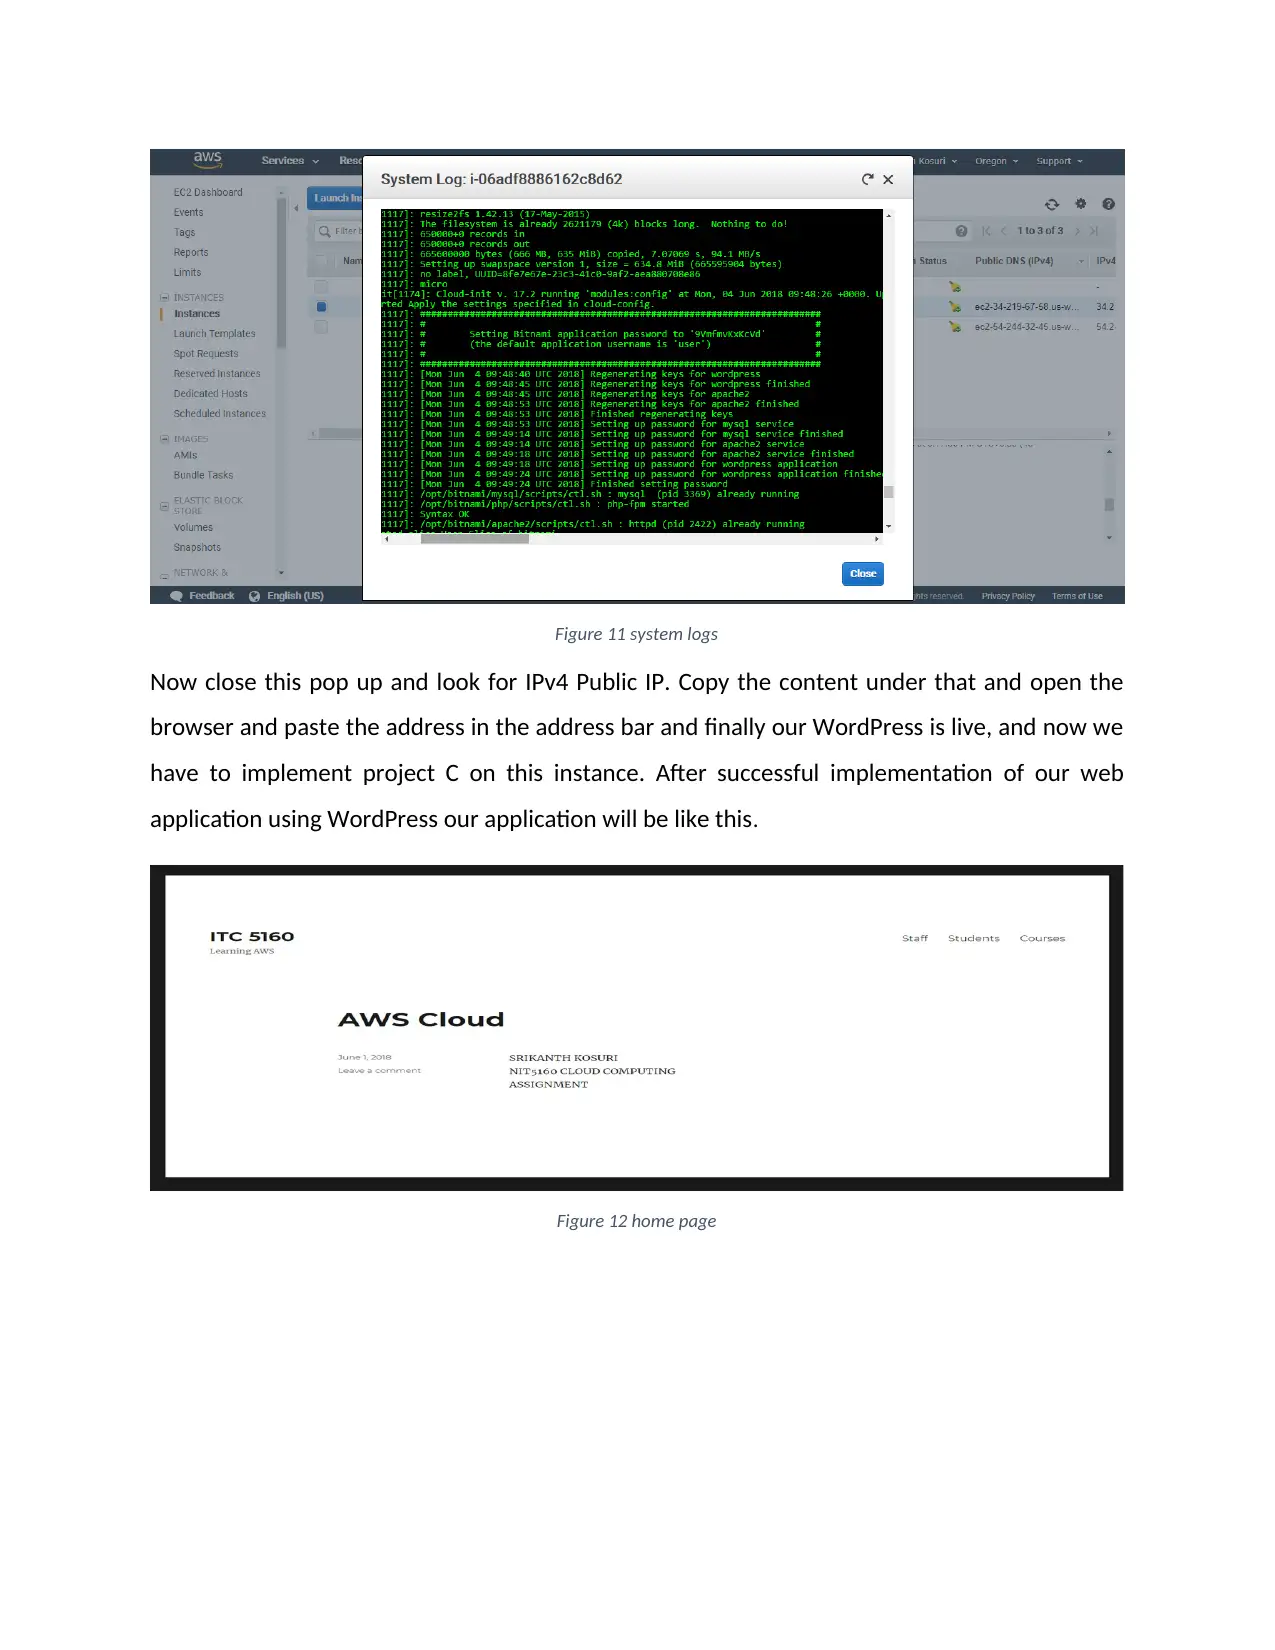
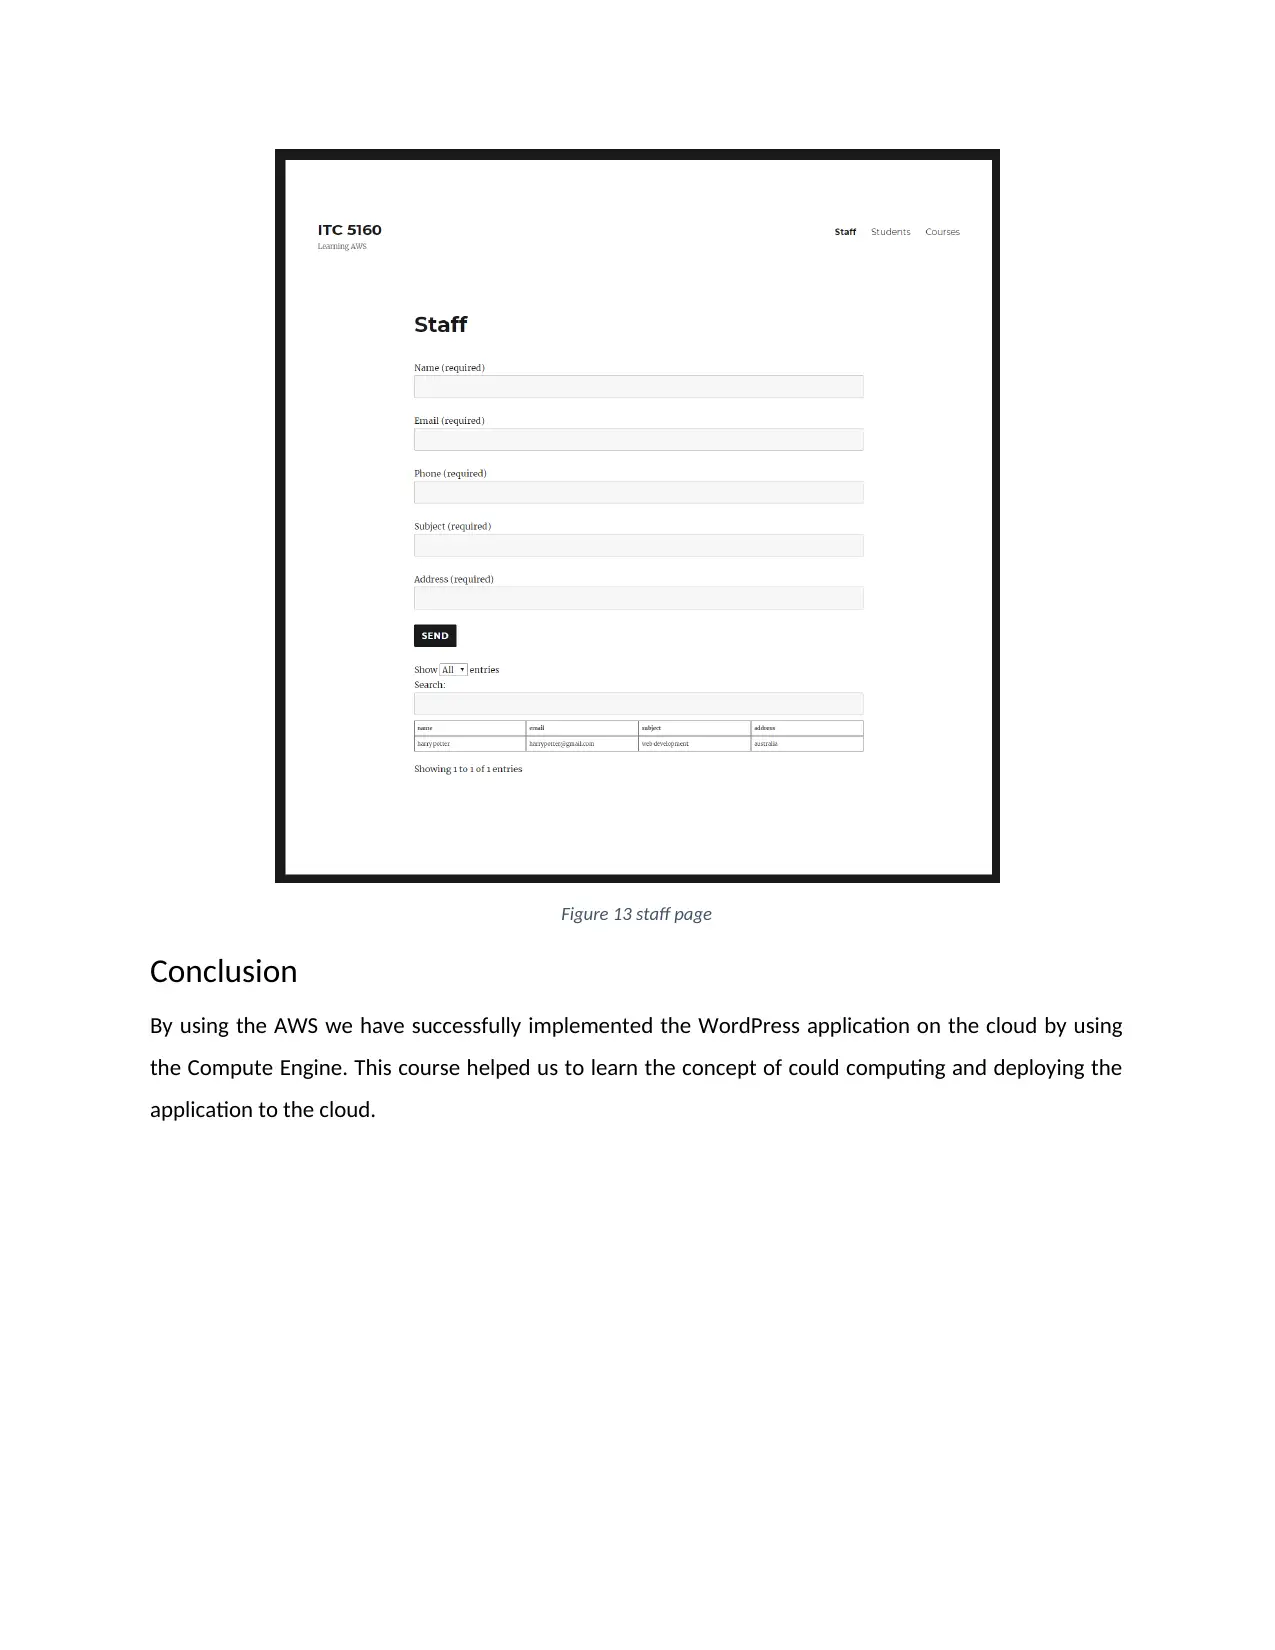
This project focuses on building a scalable website with a dynamic database and a stable backend, utilizing WordPress as the engine for development. The website comprises four pages: a homepage providing student information, a student page, a course page, and a staff page. The latter three pages allow users to input data via forms, which is then displayed in tabular database tables with search functionality. The deployment of the WordPress application on AWS is detailed, including selecting EC2 as the compute engine, creating instances, and installing WordPress. The project outlines the steps to access the WordPress dashboard by retrieving the URL, username, and password from the system logs. The final application allows users to add and view staff, courses, and students, demonstrating a practical implementation of cloud computing concepts learned throughout the course.
Document Page
BUILD A SCALABLE WEBSITE WITH
BACKENDDATABASEBACKEND.
NIT5160
0
tabler-icon-diamond-filled.svg

Paraphrase This Document

Need a fresh take? Get an instant paraphrase of this document with our AI Paraphraser
Document Page
Contents
Introduction.................................................................................................................................................2
Steps for deploying the WordPress application on the AWS.......................................................................3
Selecting the compute engine.....................................................................................................................4
Creating the instance...................................................................................................................................4
Installing WordPress....................................................................................................................................5
Conclusion.................................................................................................................................................11
List of Figures
Figure 1 AWS dashboard.............................................................................................................................4
Figure 2 launching instance.........................................................................................................................4
Figure 3 choosing AMI.................................................................................................................................5
Figure 4 selecting WordPress......................................................................................................................5
Figure 5 confirming WordPress Cost...........................................................................................................6
Figure 6 selecting micro machine................................................................................................................6
Figure 7 deploying instances.......................................................................................................................7
Figure 8 deployed WordPress......................................................................................................................7
Figure 9 compute engine dashboard...........................................................................................................8
Figure 10 steps for getting system logs.......................................................................................................9
Figure 11 system logs..................................................................................................................................9
Figure 12 home page.................................................................................................................................10
Figure 13 staff page...................................................................................................................................10
Document Page
Introduction
The topic chosen by me from the given project topics is the Project C “to build the website with
the dynamic database and a stable backend”. Here in this project we have used the WordPress
engine to complete our website. This website have 4 pages at all. First one is the home page
with the information about the student. i.e. me. While other pages are student page which
takes the student data from the form and display it in the tabular database table with the
search option. Another pages with the same features are the course page and the staff page.
Any user can add staff, course and student. They can also view these entry on the particular
pages.
Application link: http://34.219.67.58/
AWS Cloud Credentials
Email: srikanth.kosuri@students.vu.edu.au
Password: $r!@1992
Document Page
Steps for deploying the WordPress application on the AWS.
Step 1: Selecting the Compute Engine
Step 2: Creating the instance.
Step 3: Installing WordPress.
Step 4: Getting username and password for WordPress Dashboard.
For deploying the WordPress application safely and securely on the AWS we have to follow the
following steps. After the successful implementation of WordPress then we have to create the
application which will require the knowledge for developing the web application on the
WordPress Platform.
tabler-icon-diamond-filled.svg

Paraphrase This Document

Need a fresh take? Get an instant paraphrase of this document with our AI Paraphraser
Document Page
Selecting the compute engine.
The first step after successful account completion and logging into the account is the selection
of the compute engine. While creating this application we have selected EC2 as compute
engine.
Click on EC2 under the compute engine.
Figure 1 AWS dashboard
Creating the instance
Now after selecting the EC2 as the compute engine now click on Launch instance under the
section create instance.
Document Page
Figure 2 launching instance
Installing WordPress
Now the next step is the WordPress installation. We have to install the WordPress in our cloud
space. For which just select AWS Market place
Figure 3 choosing AMI
And then search for WordPress. After that select WordPress Certified by Bitnami click select.
Figure 4 selecting WordPress
Document Page
After this a dialog box will appear we don’t have to do anything with it just leave it the way it is
and click on continue.
Figure 5 confirming WordPress Cost
After continuing the installation select the micro machine as t2.micro that is eligible under free
tier. Select the option and then Next: Configure Instance Details
tabler-icon-diamond-filled.svg

Paraphrase This Document

Need a fresh take? Get an instant paraphrase of this document with our AI Paraphraser
Document Page
Figure 6 selecting micro machine
When the next page appears after configuring instance change the Auto-assign Public IP to
enable and after that review and launch for deploying the instances.
Figure 7 deploying instances
Now create a SSH key with any name you like but it should not be present in your account. If
you are creating the new key pair. After key creation download the key pair and then launch the
instances.
Document Page
Now we have successfully created the instances and have deployed our WordPress web
application to the cloud.
Figure 8 deployed WordPress
We have successfully deployed the WordPress on the cloud space and now our next step is to access it.
For assessing the dashboard of the deployed WordPress web application we will be needing 3 things:
URL of the website
Username of the WordPress dashboard
Password of the WordPress dashboard
For getting these three items go to the services > compute engine > EC2
Select instances from the left navigation bar
Document Page
Figure 9 compute engine dashboard
Now right click on your instances and the select instance setting and go to get system logs and
from there we will be getting the username and the password for the admin panel of
WordPress.
Figure 10 steps for getting system logs
tabler-icon-diamond-filled.svg

Paraphrase This Document

Need a fresh take? Get an instant paraphrase of this document with our AI Paraphraser
Document Page
Figure 11 system logs
Now close this pop up and look for IPv4 Public IP. Copy the content under that and open the
browser and paste the address in the address bar and finally our WordPress is live, and now we
have to implement project C on this instance. After successful implementation of our web
application using WordPress our application will be like this.
Figure 12 home page
Document Page
Figure 13 staff page
Conclusion
By using the AWS we have successfully implemented the WordPress application on the cloud by using
the Compute Engine. This course helped us to learn the concept of could computing and deploying the
application to the cloud.
chevron_up_icon
1 out of 12
circle_padding
hide_on_mobile
zoom_out_icon
[object Object]