Technical Communication Report: Detailed Guide to Changing a RAV4 Tire
VerifiedAdded on  2021/10/11
|15
|1710
|187
Report
AI Summary
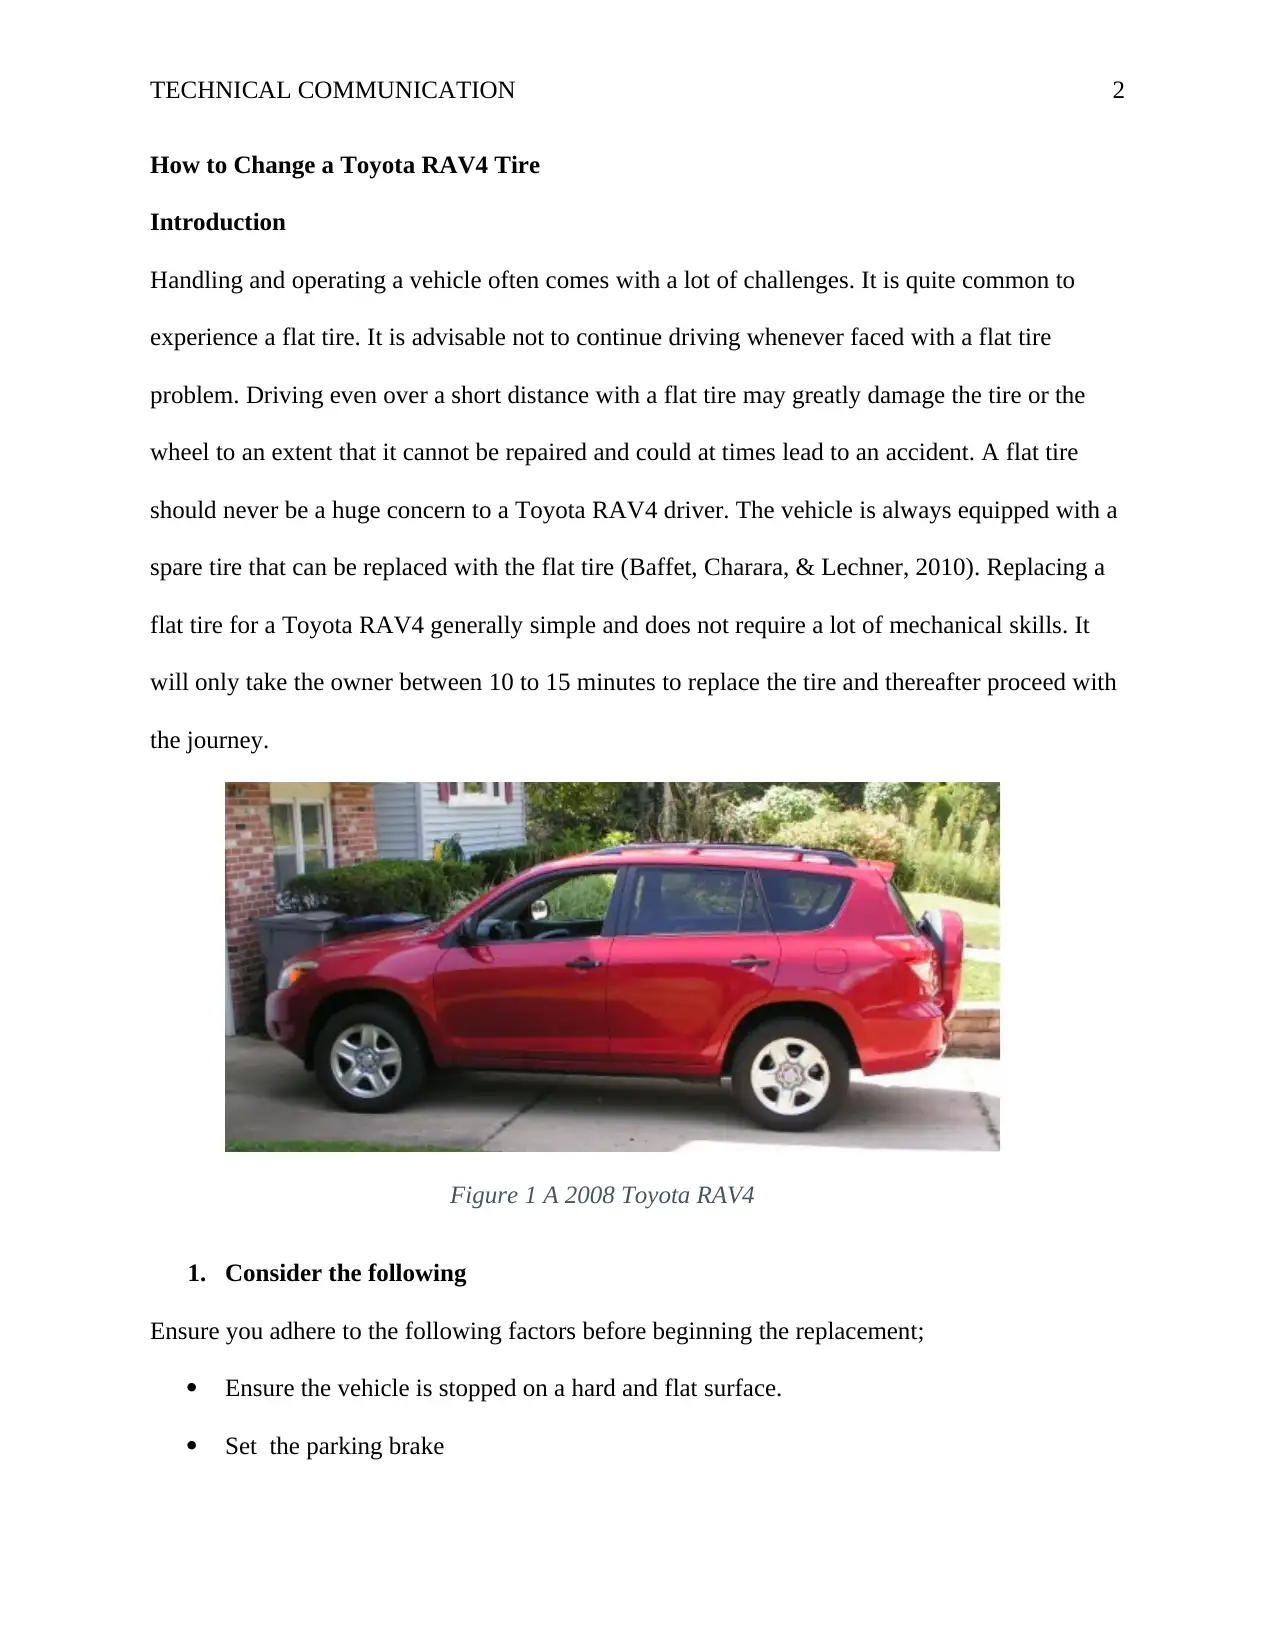
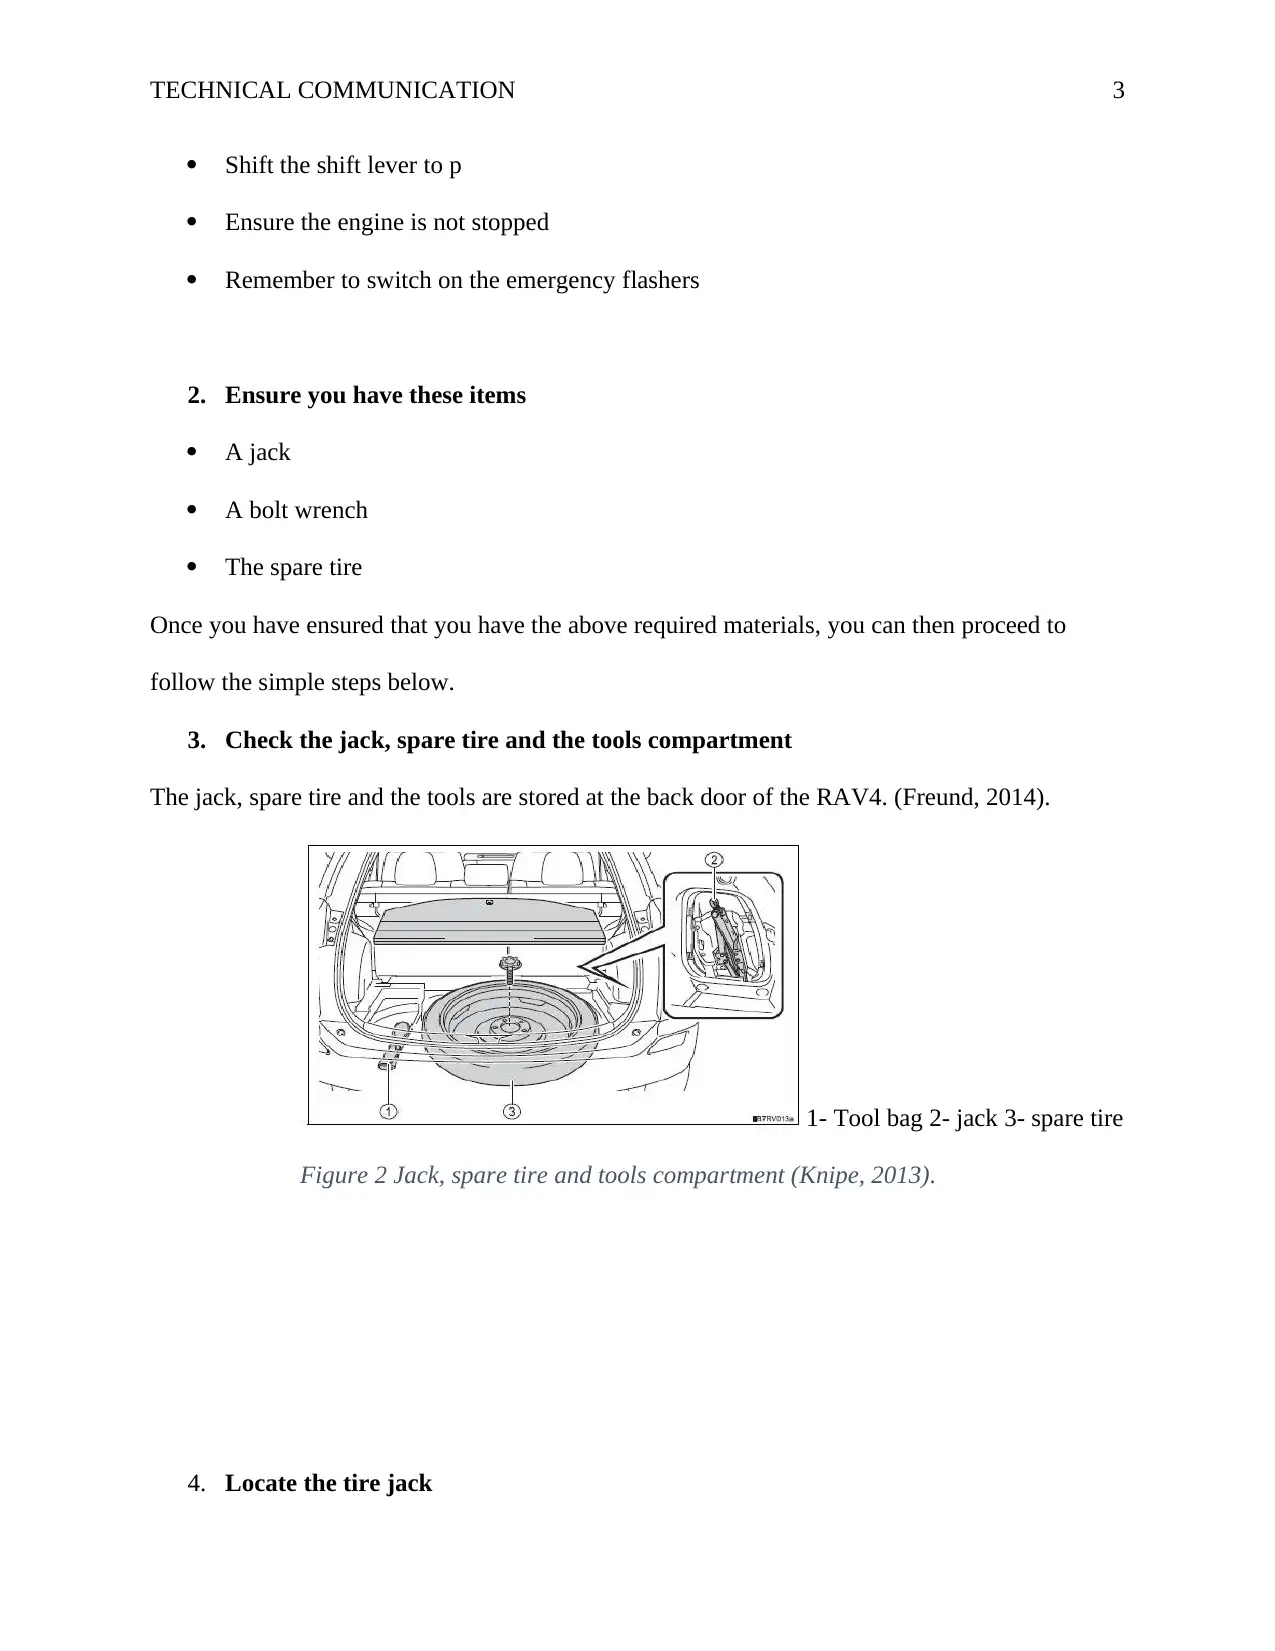
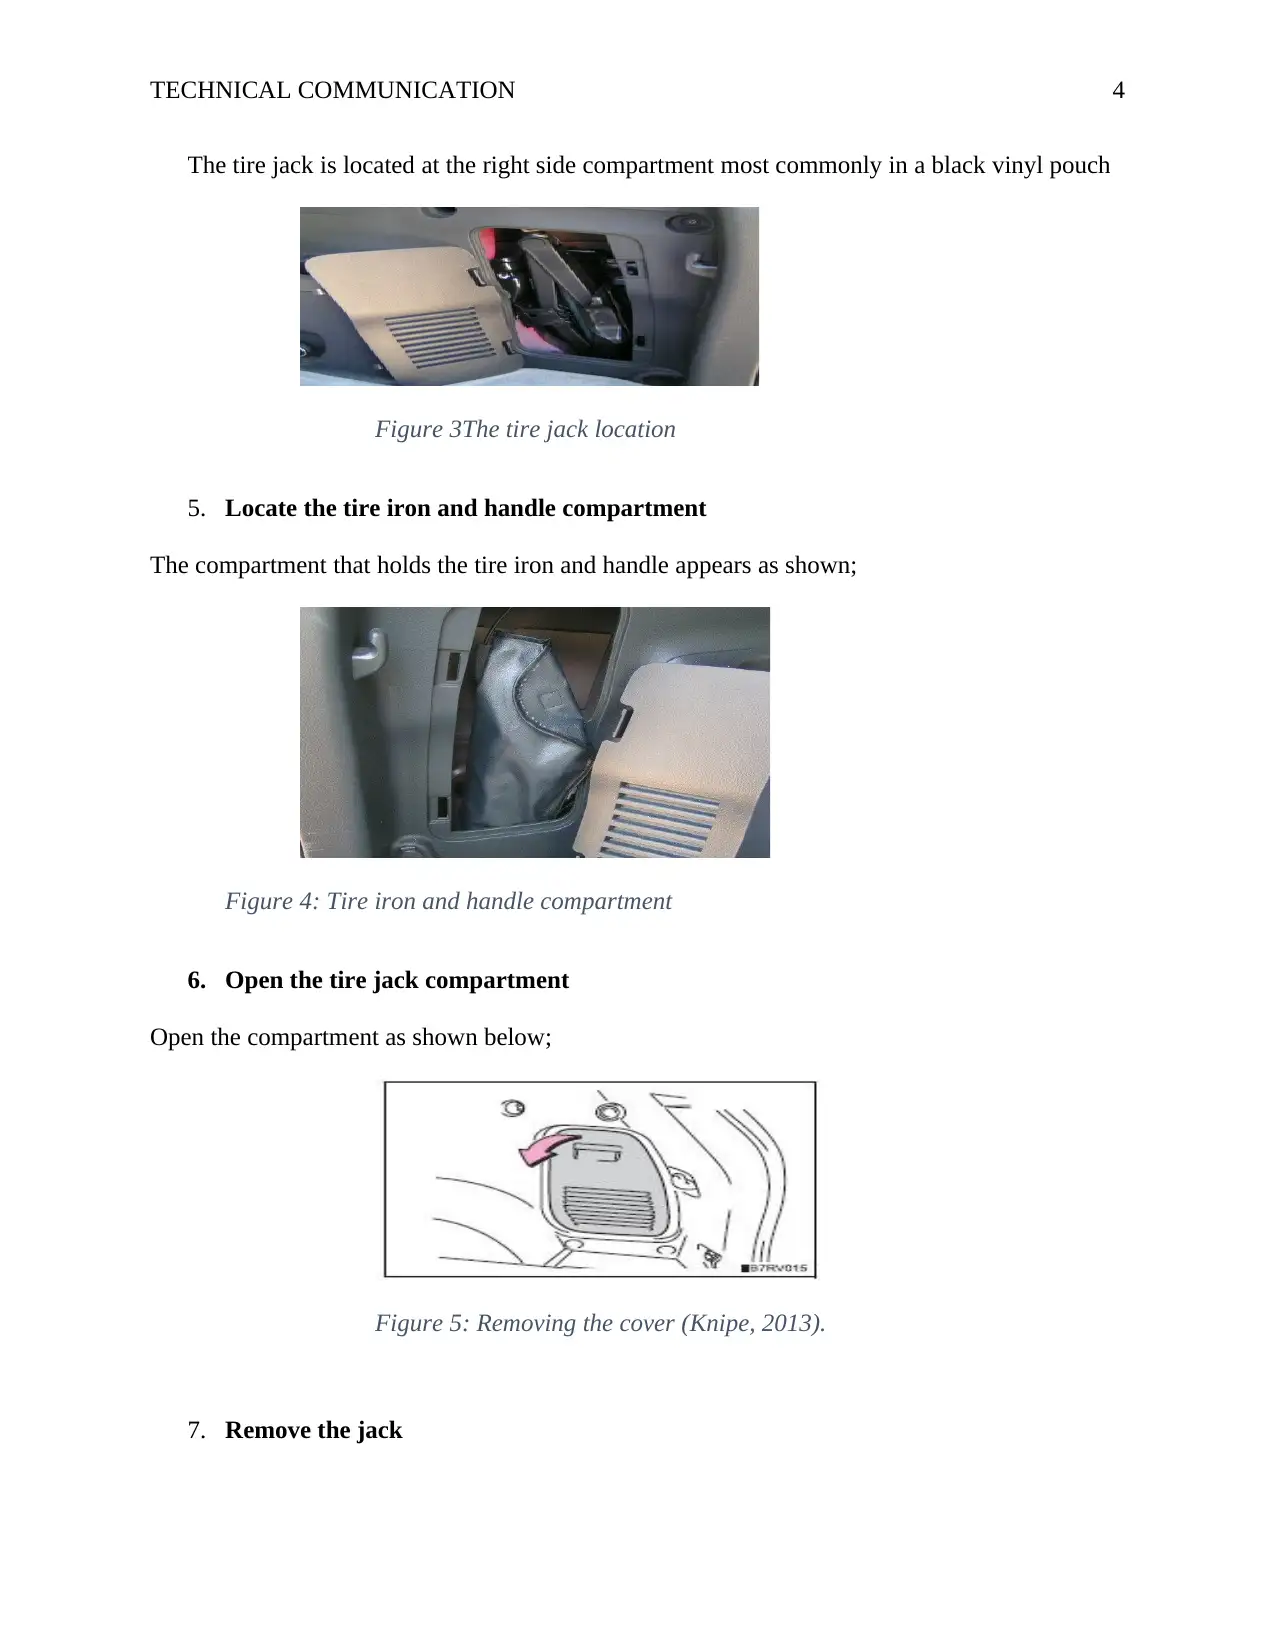
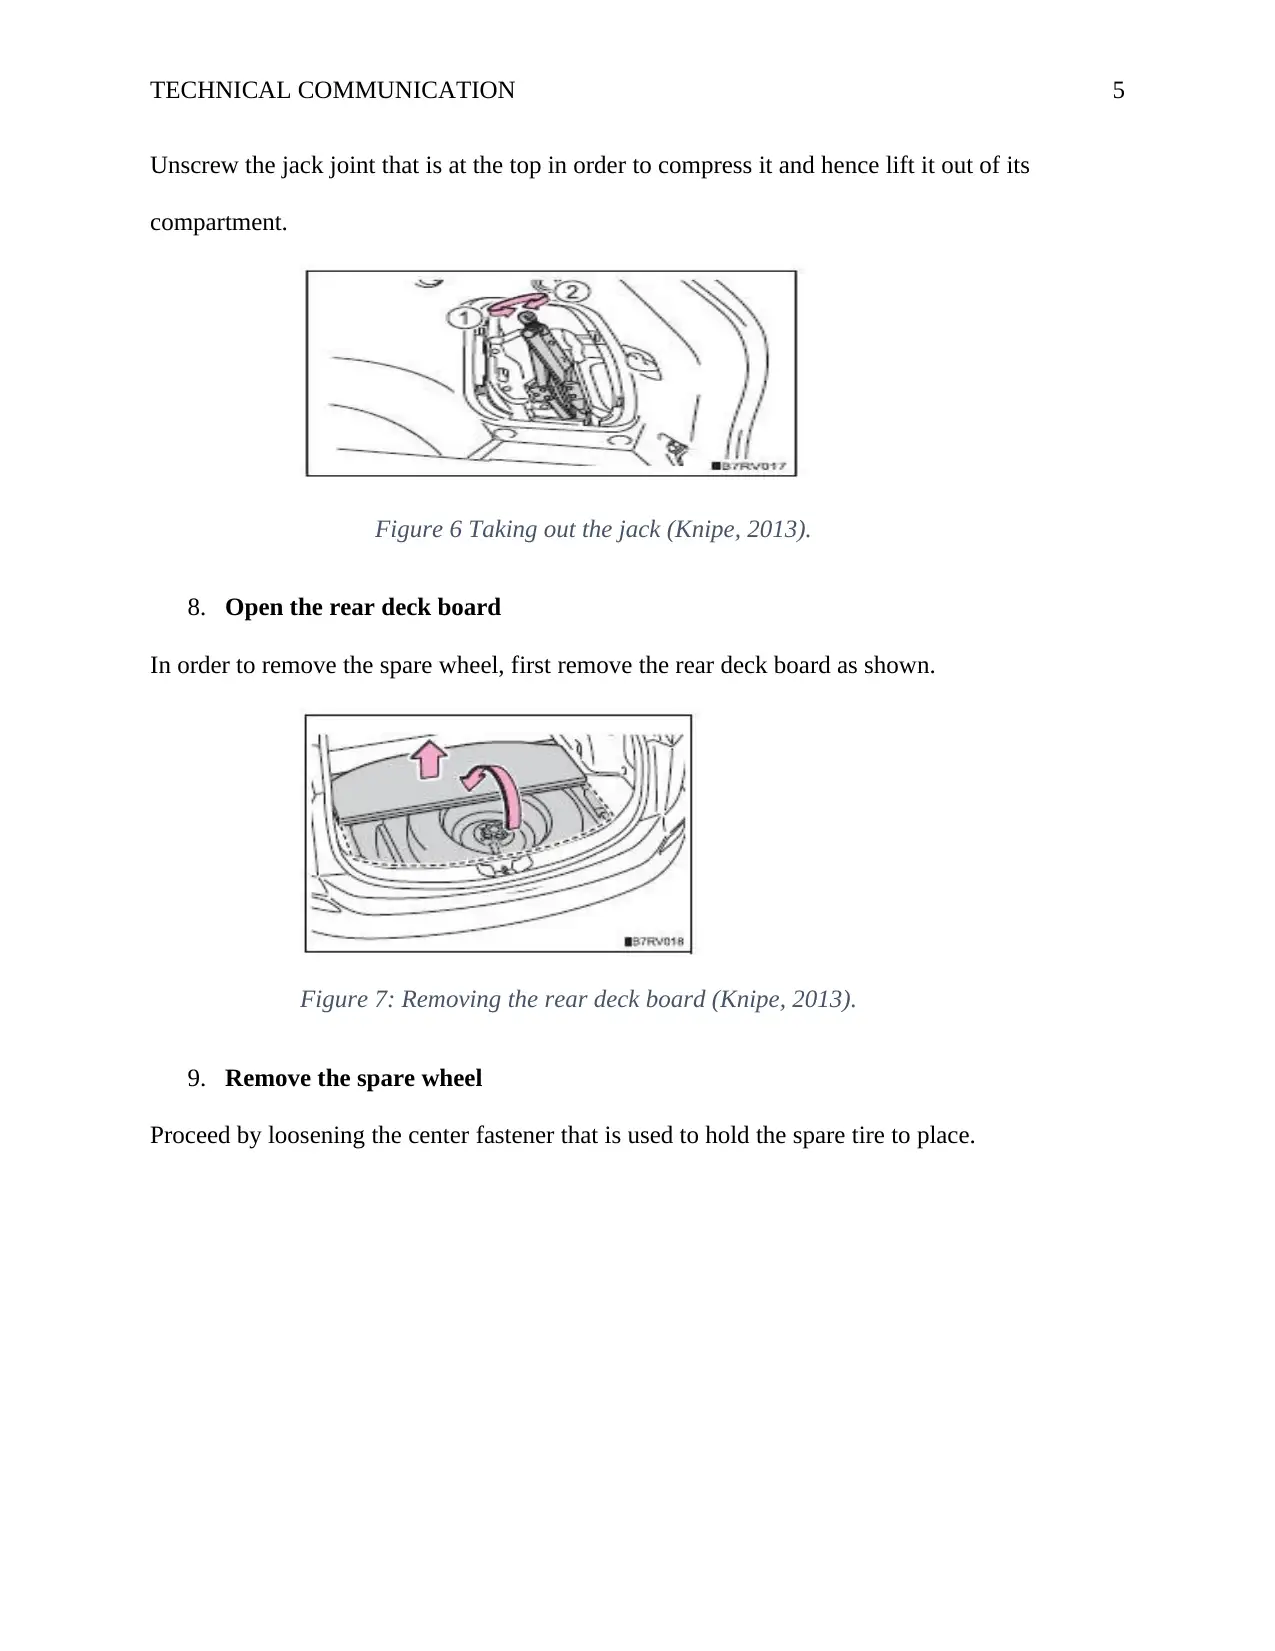
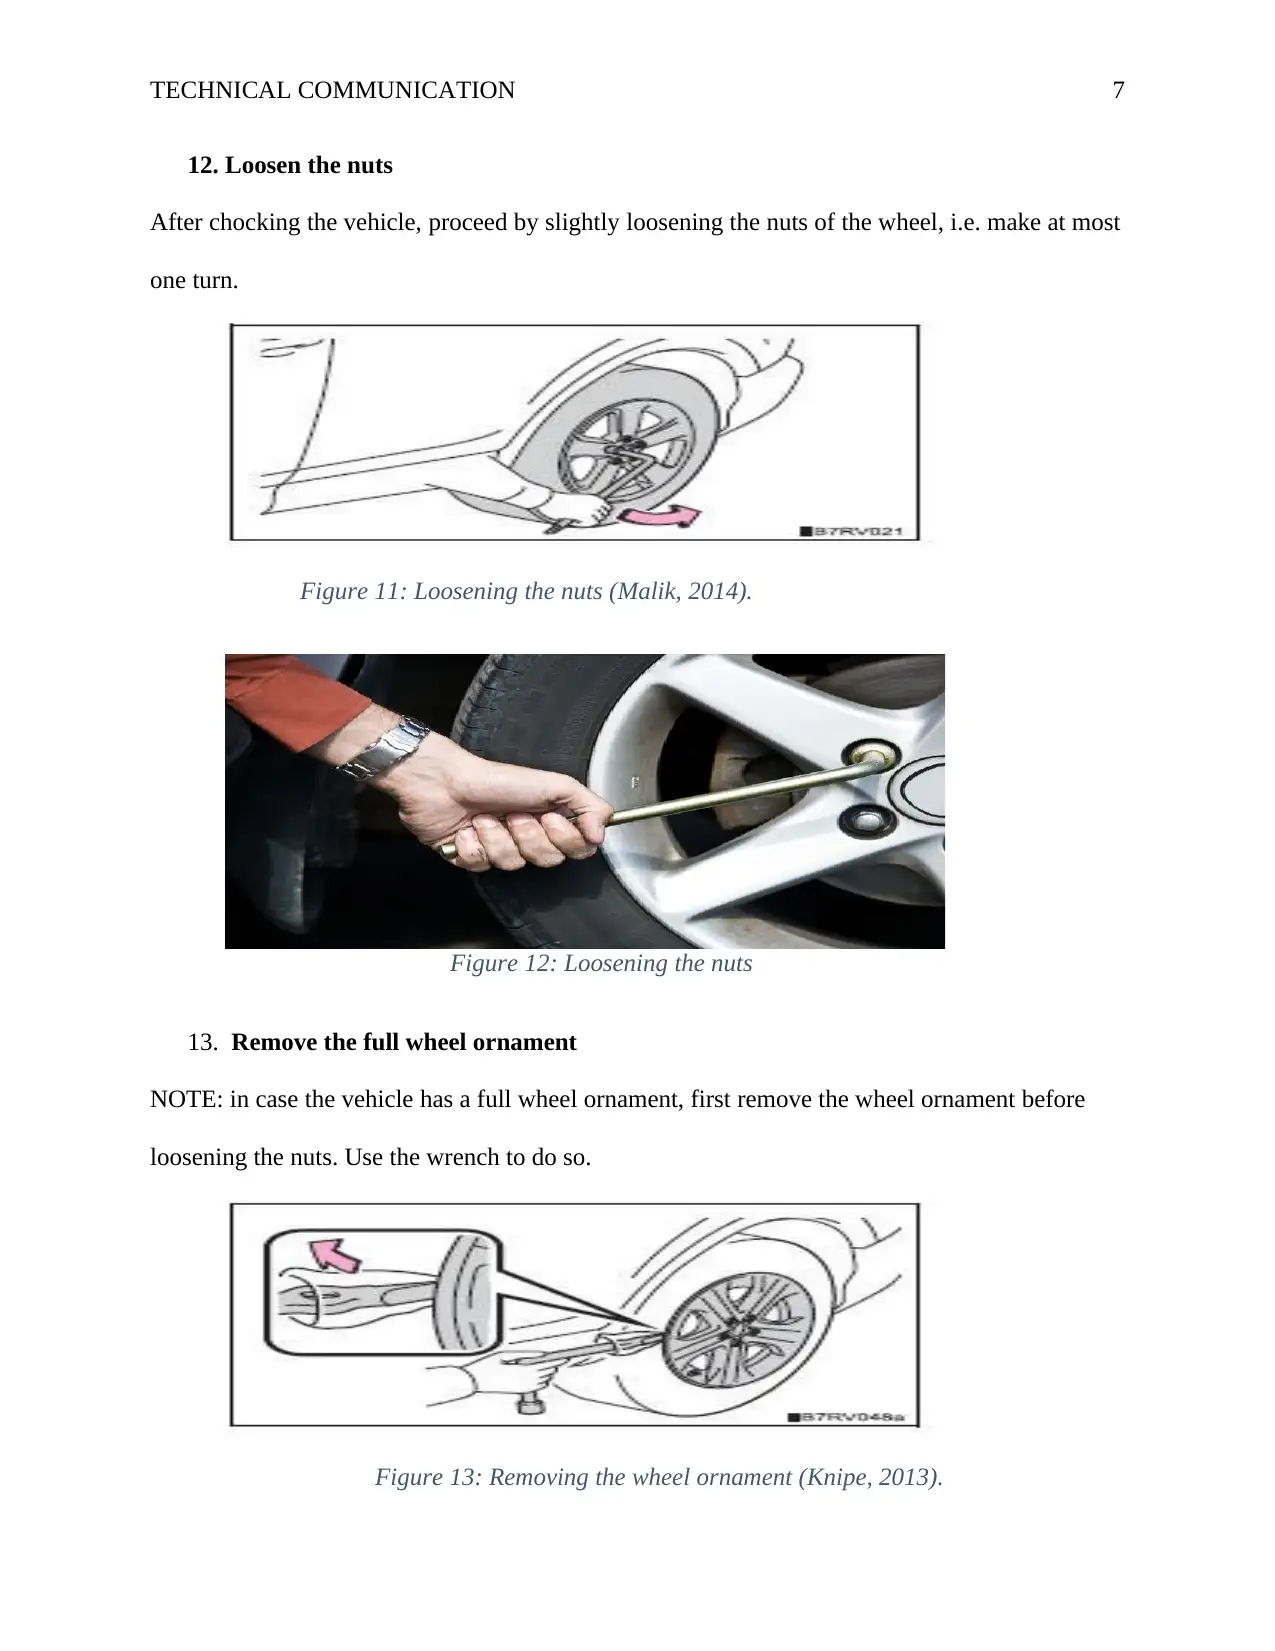
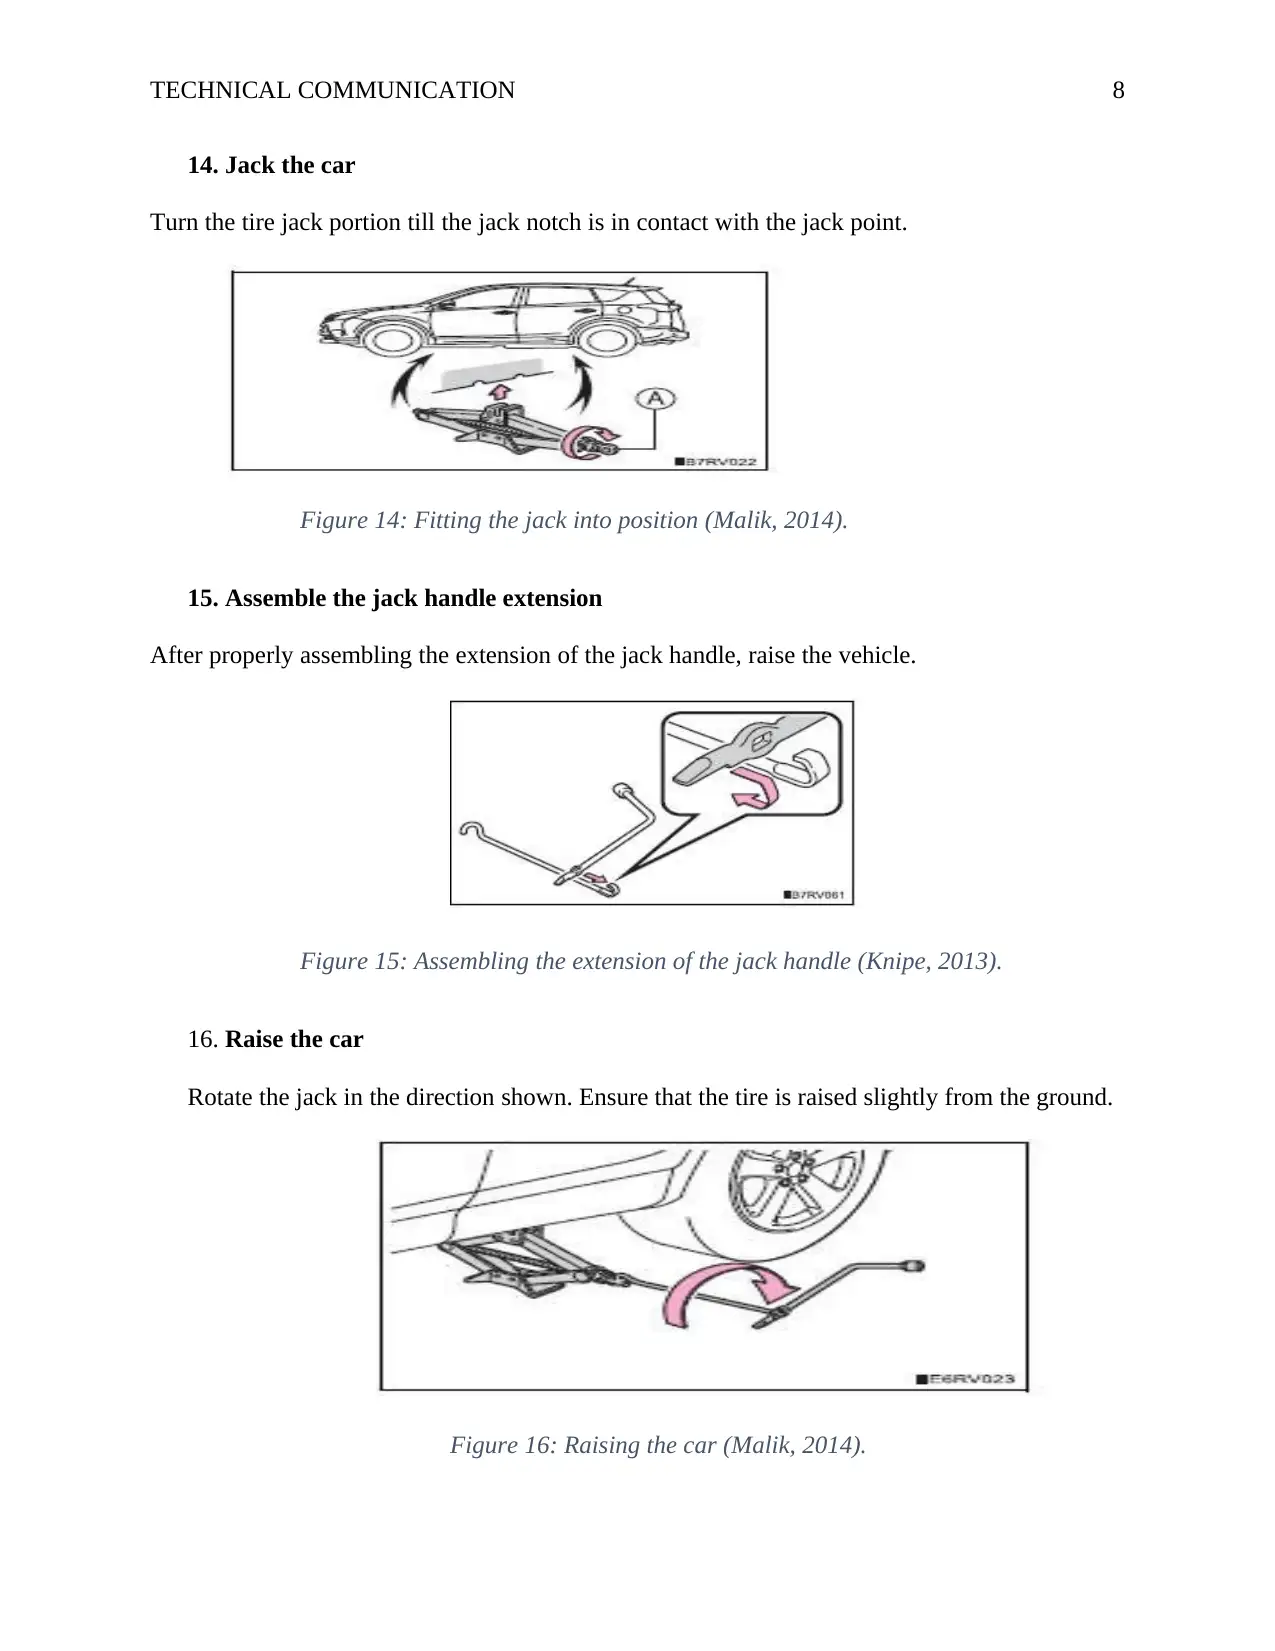
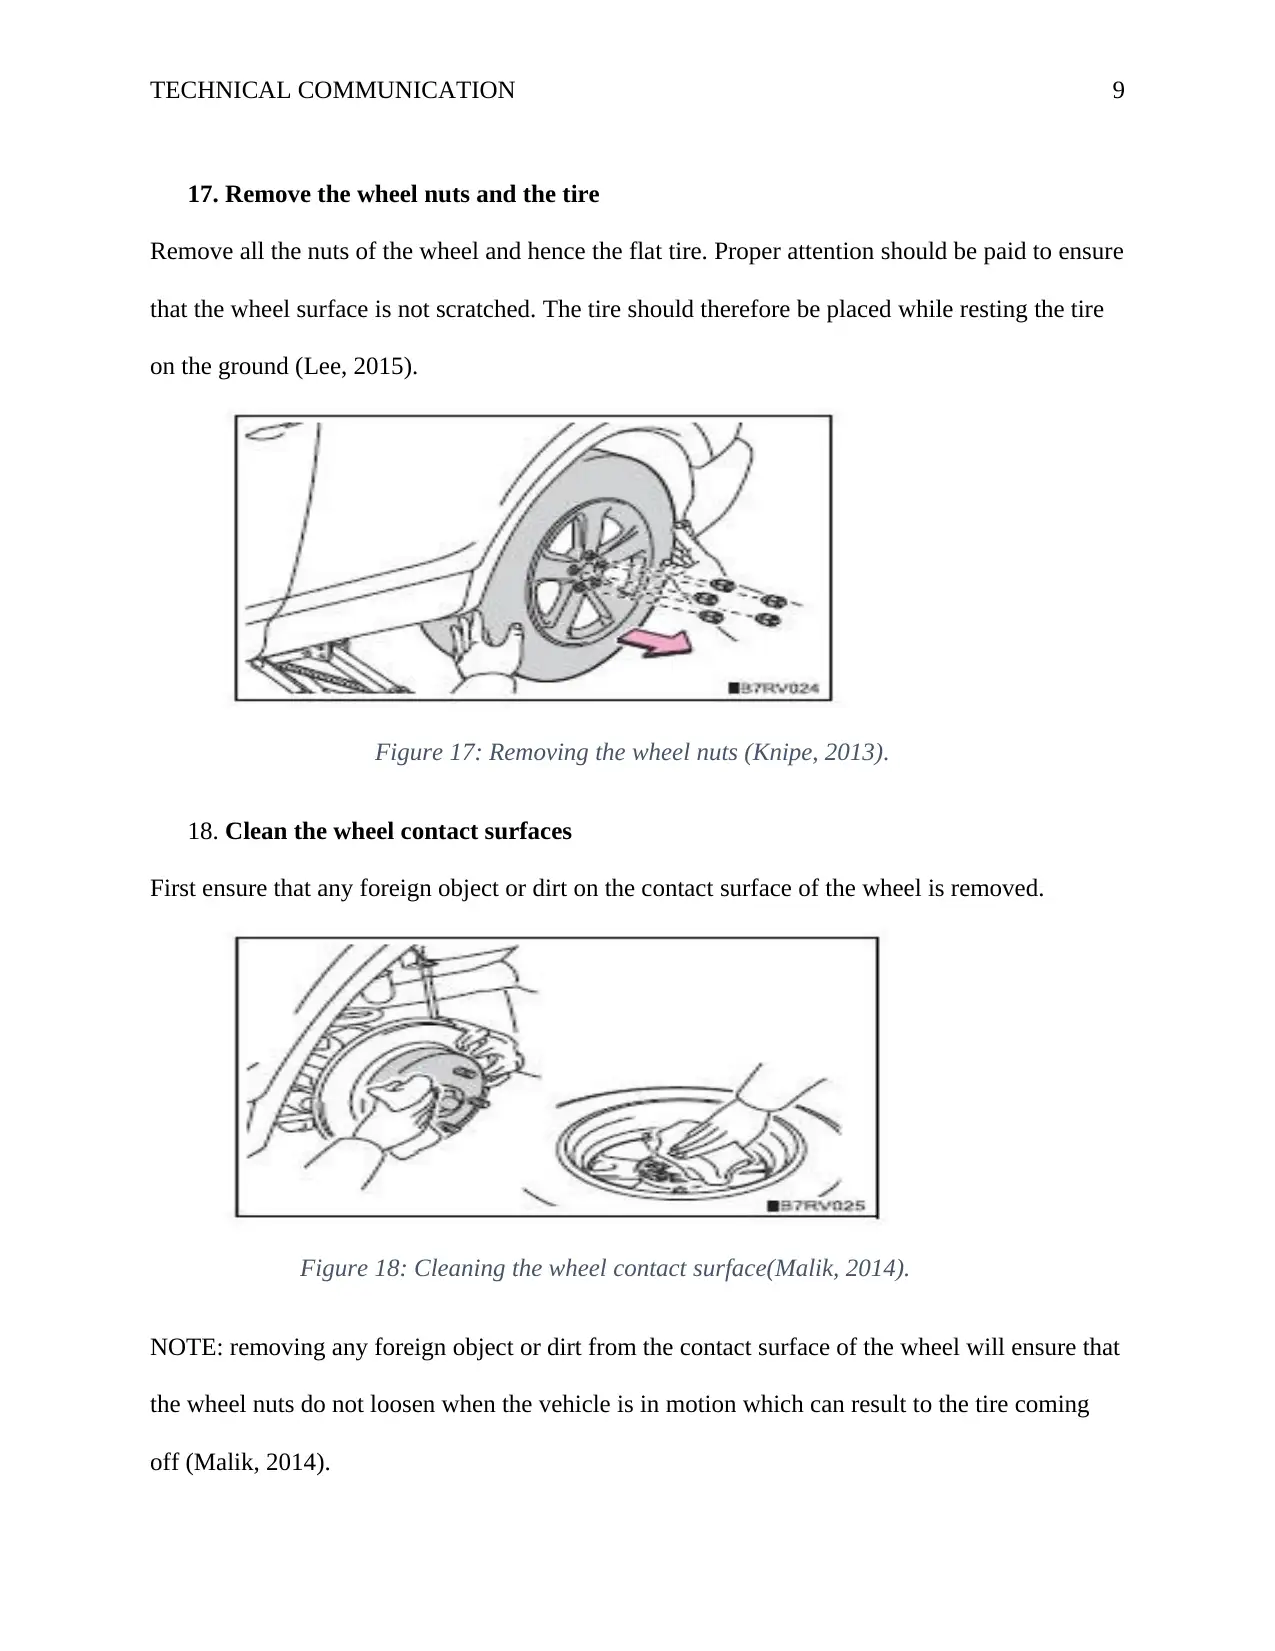
This technical communication report provides a comprehensive guide on how to change a flat tire on a Toyota RAV4. The report begins with an introduction emphasizing the importance of replacing a flat tire for safety and vehicle preservation. It outlines the necessary preparation steps, including ensuring the vehicle is on a flat surface, setting the parking brake, and gathering the required tools: a jack, bolt wrench, and spare tire. The core of the report details the step-by-step process, from locating the tools to loosening the wheel nuts, jacking up the car, removing the flat tire, installing the spare, and tightening the nuts. Diagrams and images accompany each step, providing visual clarity. The report also includes important safety precautions, such as chocking the tires and cleaning wheel contact surfaces. Finally, the report concludes with instructions on stowing the flat tire and storing the tools. The report is well-structured and suitable for anyone needing to replace a flat tire on a Toyota RAV4. This report is available on Desklib, which provides students with access to past papers and solved assignments.

Running head: TECHNICAL COMMUNICATION 1
TECHNICAL COMMUNICATION
Name of Student
Institution Affiliation
TECHNICAL COMMUNICATION
Name of Student
Institution Affiliation
Paraphrase This Document
Need a fresh take? Get an instant paraphrase of this document with our AI Paraphraser

TECHNICAL COMMUNICATION 2
How to Change a Toyota RAV4 Tire
Introduction
Handling and operating a vehicle often comes with a lot of challenges. It is quite common to
experience a flat tire. It is advisable not to continue driving whenever faced with a flat tire
problem. Driving even over a short distance with a flat tire may greatly damage the tire or the
wheel to an extent that it cannot be repaired and could at times lead to an accident. A flat tire
should never be a huge concern to a Toyota RAV4 driver. The vehicle is always equipped with a
spare tire that can be replaced with the flat tire (Baffet, Charara, & Lechner, 2010). Replacing a
flat tire for a Toyota RAV4 generally simple and does not require a lot of mechanical skills. It
will only take the owner between 10 to 15 minutes to replace the tire and thereafter proceed with
the journey.
Figure 1 A 2008 Toyota RAV4
1. Consider the following
Ensure you adhere to the following factors before beginning the replacement;
ï‚· Ensure the vehicle is stopped on a hard and flat surface.
ï‚· Set the parking brake

TECHNICAL COMMUNICATION 3
ï‚· Shift the shift lever to p
ï‚· Ensure the engine is not stopped
ï‚· Remember to switch on the emergency flashers
2. Ensure you have these items
ï‚· A jack
ï‚· A bolt wrench
ï‚· The spare tire
Once you have ensured that you have the above required materials, you can then proceed to
follow the simple steps below.
3. Check the jack, spare tire and the tools compartment
The jack, spare tire and the tools are stored at the back door of the RAV4. (Freund, 2014).
1- Tool bag 2- jack 3- spare tire
Figure 2 Jack, spare tire and tools compartment (Knipe, 2013).
4. Locate the tire jack
⊘ This is a preview!⊘
Do you want full access?
Subscribe today to unlock all pages.

Trusted by 1+ million students worldwide

TECHNICAL COMMUNICATION 4
The tire jack is located at the right side compartment most commonly in a black vinyl pouch
Figure 3The tire jack location
5. Locate the tire iron and handle compartment
The compartment that holds the tire iron and handle appears as shown;
Figure 4: Tire iron and handle compartment
6. Open the tire jack compartment
Open the compartment as shown below;
Figure 5: Removing the cover (Knipe, 2013).
7. Remove the jack
Paraphrase This Document
Need a fresh take? Get an instant paraphrase of this document with our AI Paraphraser

TECHNICAL COMMUNICATION 5
Unscrew the jack joint that is at the top in order to compress it and hence lift it out of its
compartment.
Figure 6 Taking out the jack (Knipe, 2013).
8. Open the rear deck board
In order to remove the spare wheel, first remove the rear deck board as shown.
Figure 7: Removing the rear deck board (Knipe, 2013).
9. Remove the spare wheel
Proceed by loosening the center fastener that is used to hold the spare tire to place.

TECHNICAL COMMUNICATION 6
Figure 8 Loosening the center fastener (Knipe, 2013).
10. Chock the tire
First begin by chocking the jack as shown in the diagram below (Fujimoto, 2016).
Figure 9: Positions of chocking the tire (Malik, 2014).
11. Chocking positions
The positions for chocking the tire are as shown below;
Flat tire Wheel Chock Positions
Front Left hand side Behind the rear right-hand side tire
Right hand side Behind the rear left-hand side tire
Rear Left hand side In front of the front right hand side tire
Right hand side In front of the front left hand side tire
Figure 10: Chocking positions (Malik, 2014).
⊘ This is a preview!⊘
Do you want full access?
Subscribe today to unlock all pages.

Trusted by 1+ million students worldwide

TECHNICAL COMMUNICATION 7
12. Loosen the nuts
After chocking the vehicle, proceed by slightly loosening the nuts of the wheel, i.e. make at most
one turn.
Figure 11: Loosening the nuts (Malik, 2014).
Figure 12: Loosening the nuts
13. Remove the full wheel ornament
NOTE: in case the vehicle has a full wheel ornament, first remove the wheel ornament before
loosening the nuts. Use the wrench to do so.
Figure 13: Removing the wheel ornament (Knipe, 2013).
Paraphrase This Document
Need a fresh take? Get an instant paraphrase of this document with our AI Paraphraser

TECHNICAL COMMUNICATION 8
14. Jack the car
Turn the tire jack portion till the jack notch is in contact with the jack point.
Figure 14: Fitting the jack into position (Malik, 2014).
15. Assemble the jack handle extension
After properly assembling the extension of the jack handle, raise the vehicle.
Figure 15: Assembling the extension of the jack handle (Knipe, 2013).
16. Raise the car
Rotate the jack in the direction shown. Ensure that the tire is raised slightly from the ground.
Figure 16: Raising the car (Malik, 2014).

TECHNICAL COMMUNICATION 9
17. Remove the wheel nuts and the tire
Remove all the nuts of the wheel and hence the flat tire. Proper attention should be paid to ensure
that the wheel surface is not scratched. The tire should therefore be placed while resting the tire
on the ground (Lee, 2015).
Figure 17: Removing the wheel nuts (Knipe, 2013).
18. Clean the wheel contact surfaces
First ensure that any foreign object or dirt on the contact surface of the wheel is removed.
Figure 18: Cleaning the wheel contact surface(Malik, 2014).
NOTE: removing any foreign object or dirt from the contact surface of the wheel will ensure that
the wheel nuts do not loosen when the vehicle is in motion which can result to the tire coming
off (Malik, 2014).
⊘ This is a preview!⊘
Do you want full access?
Subscribe today to unlock all pages.

Trusted by 1+ million students worldwide

TECHNICAL COMMUNICATION 10
19. Install the spare tire
Proceed by installing the spare tire. Each of the wheel nuts should then be tightened loosely by
hand. Each wheel should be tightened by approximately the same amount. The tightening
directions for different situations are as shown below.
20. Tightening directions
Ensure you follow the following directions when directions when replacing different cases of
spare wheel.
Figure 19: Replacing a steel wheel with a steel wheel (Knipe, 2013).
Figure 20: Replacing an aluminum wheel with a steel wheel (Knipe, 2013).
Paraphrase This Document
Need a fresh take? Get an instant paraphrase of this document with our AI Paraphraser

TECHNICAL COMMUNICATION 11
Figure 21: Replacing an aluminum wheel with a steel wheel (Knipe, 2013).
21. Lower the vehicle
Rotate the jack in an anticlockwise direction in order to lower the vehicle.
Figure 22: lowering the car (Malik, 2014).
22. Tighten the wheel nuts
Proceed by tightening the wheel nuts firmly 2 or 3 times in the below shown order. The
tightening torque should be 76 ft.*lbf. (103 n*m).
Figure 23: Tightening the wheel nuts(Malik, 2014).

TECHNICAL COMMUNICATION 12
In case the vehicle has a full wheel ornament, reinstall them.
23. Remove the center wheel ornament
Before stowing the flat tire, first ensure that the center wheel ornament is removed. This can be
done by pushing from the reverse side (Morton, 2016).
Figure 24: Removing the center wheel ornament (Knipe, 2013).
24. Stow the flat tire
Return the flat tire on the deck board and then hook the belt end that is not forked, to the hook of
the cargo on the farthest left side.
Figure 25: Hooking the belt (Knipe, 2013).
Pass the belts through the center hole from between the spokes of the wheel.
⊘ This is a preview!⊘
Do you want full access?
Subscribe today to unlock all pages.

Trusted by 1+ million students worldwide
1 out of 15

Your All-in-One AI-Powered Toolkit for Academic Success.
 +13062052269
info@desklib.com
Available 24*7 on WhatsApp / Email
Unlock your academic potential
Copyright © 2020–2025 A2Z Services. All Rights Reserved. Developed and managed by ZUCOL.