Operating Systems UG2 Coursework: Ubuntu 18.04 LTS Installation

Verified

Added on  2022/11/17

|14
|1232
|80
Homework Assignment
AI Summary
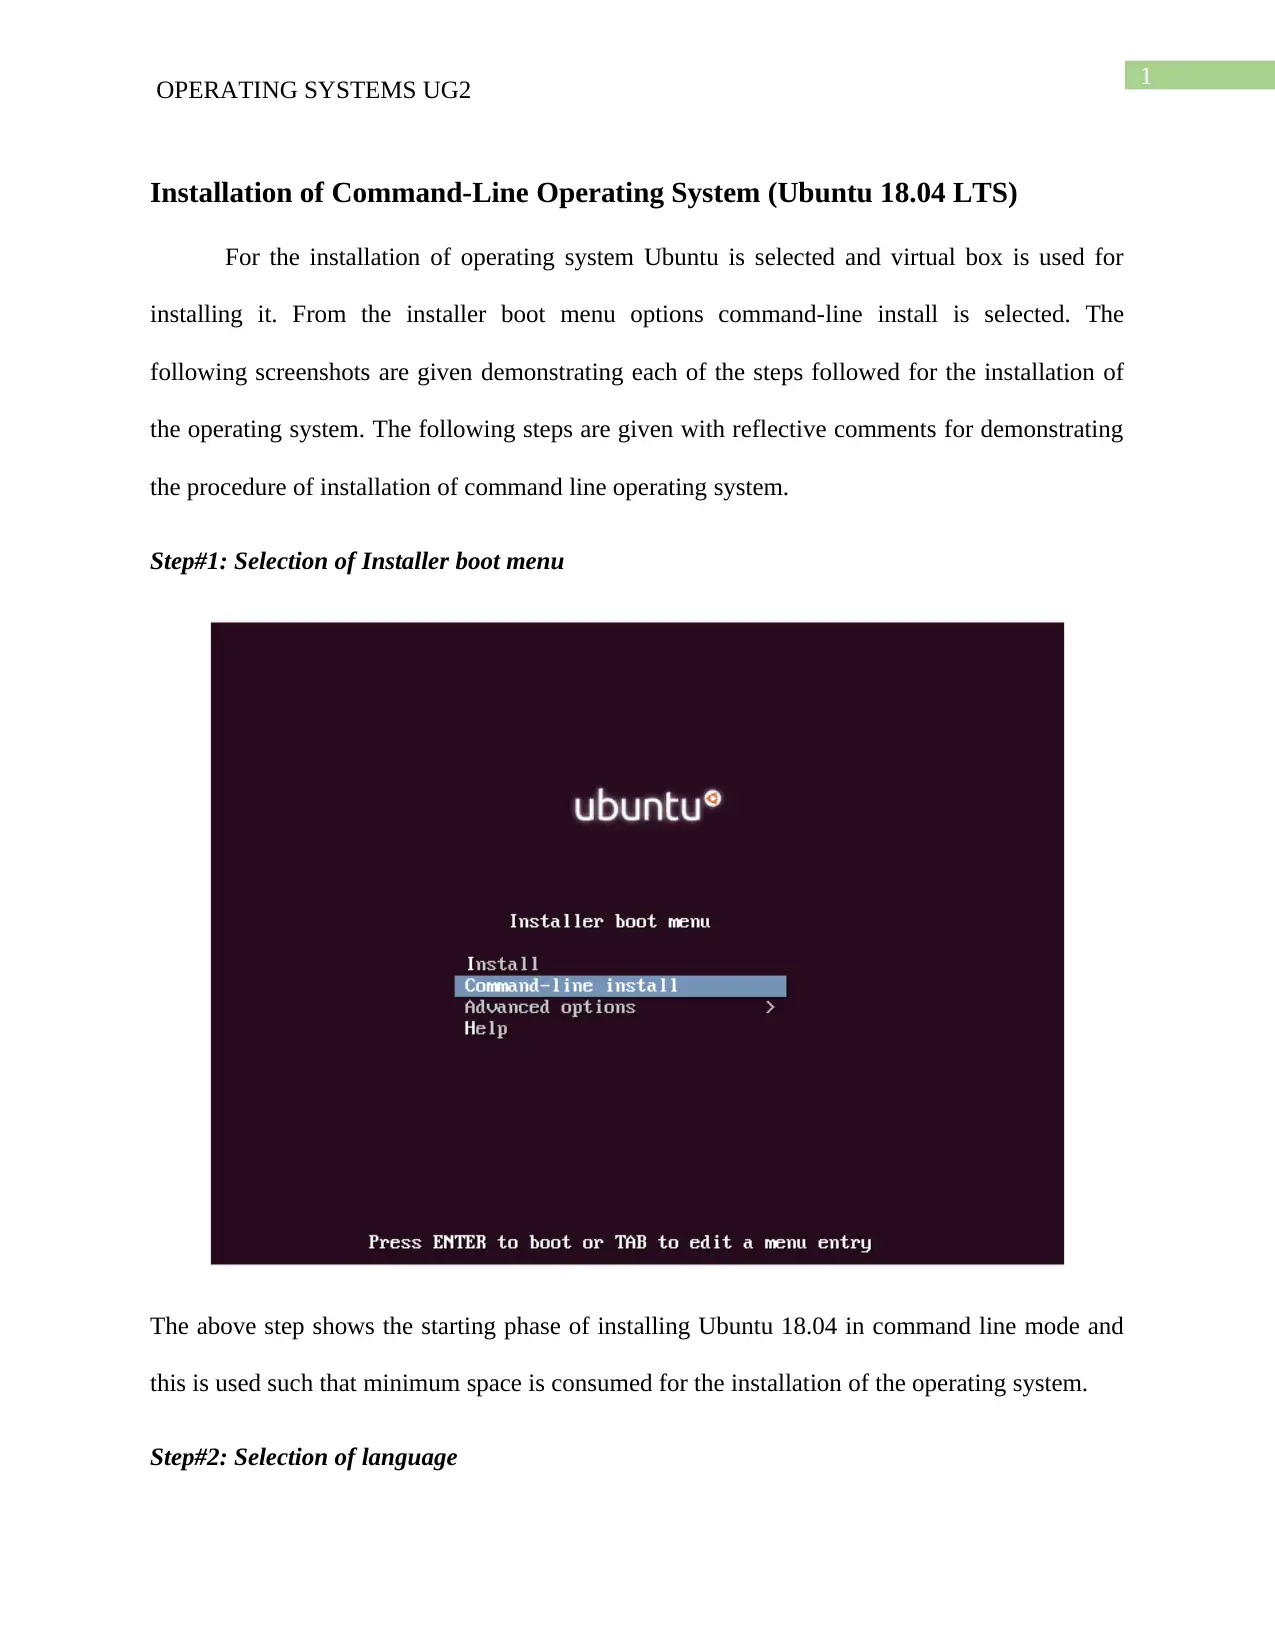
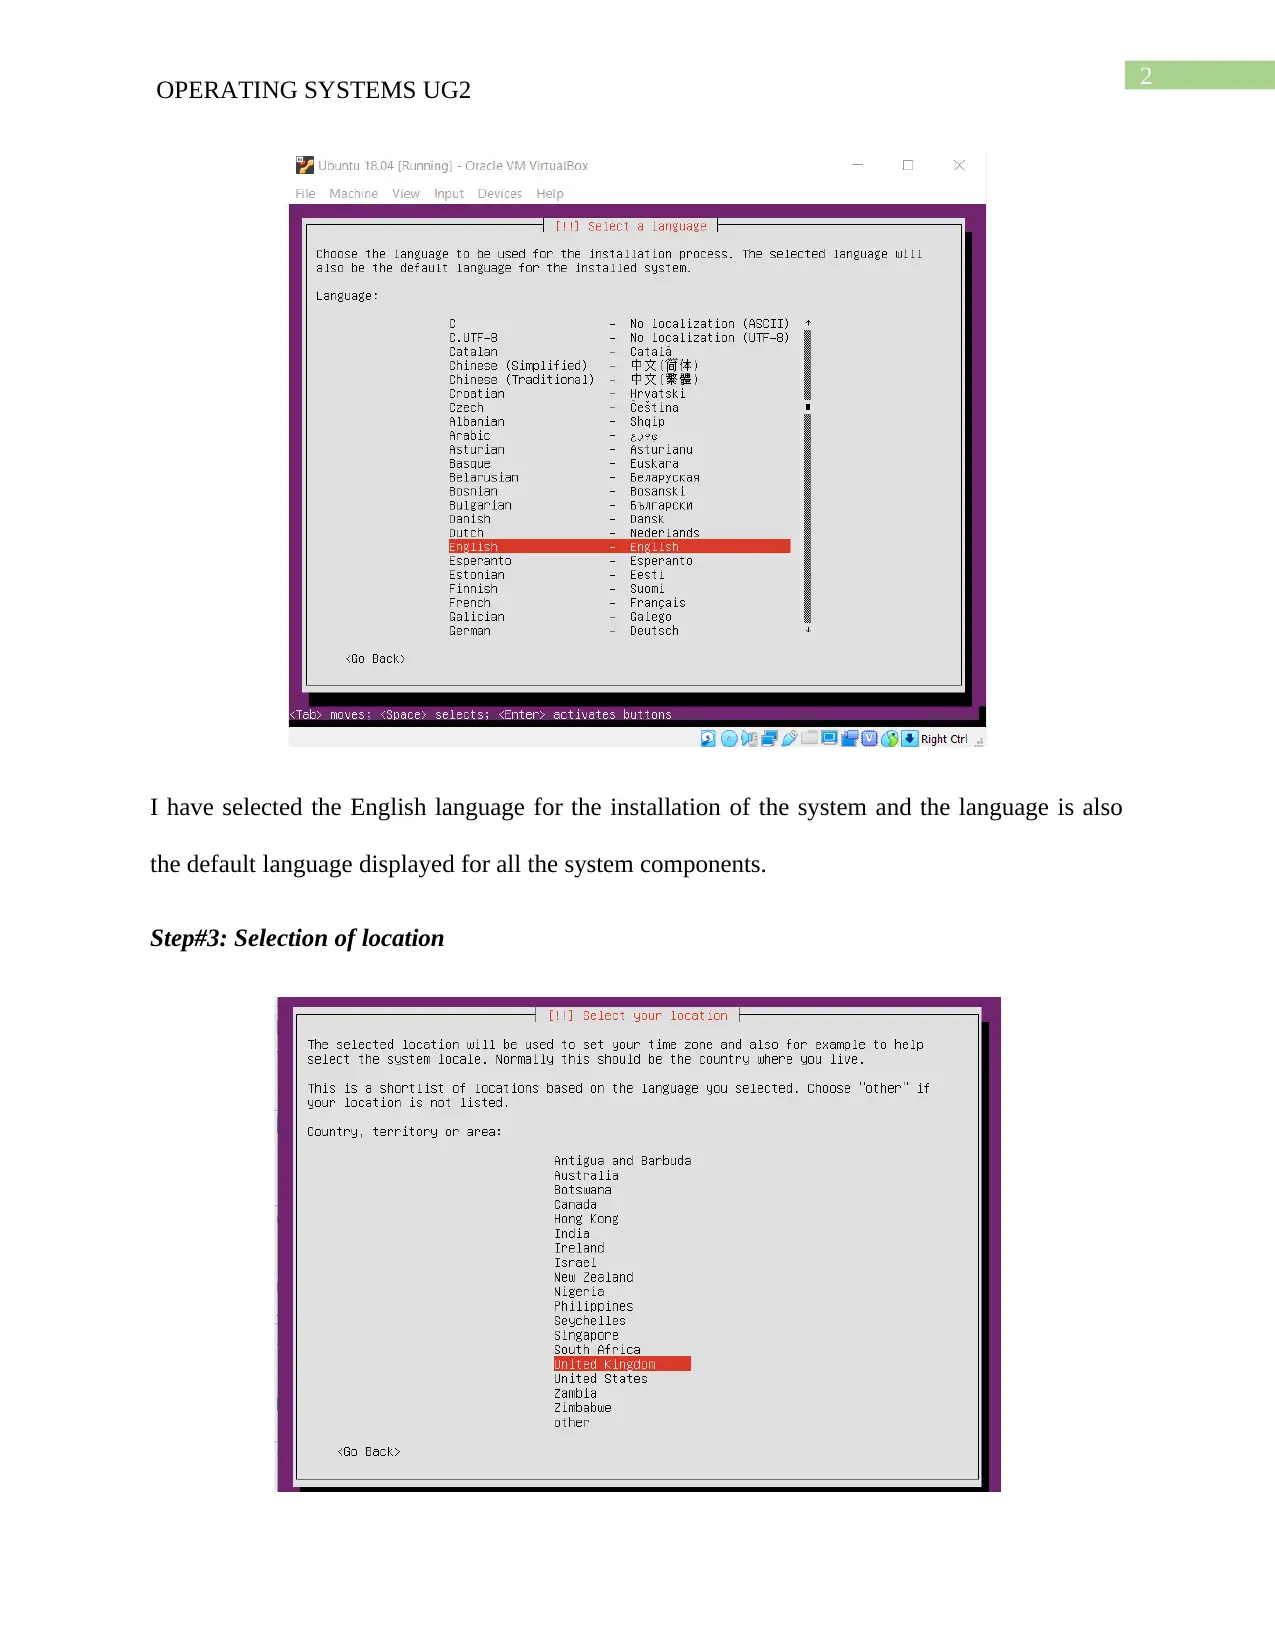
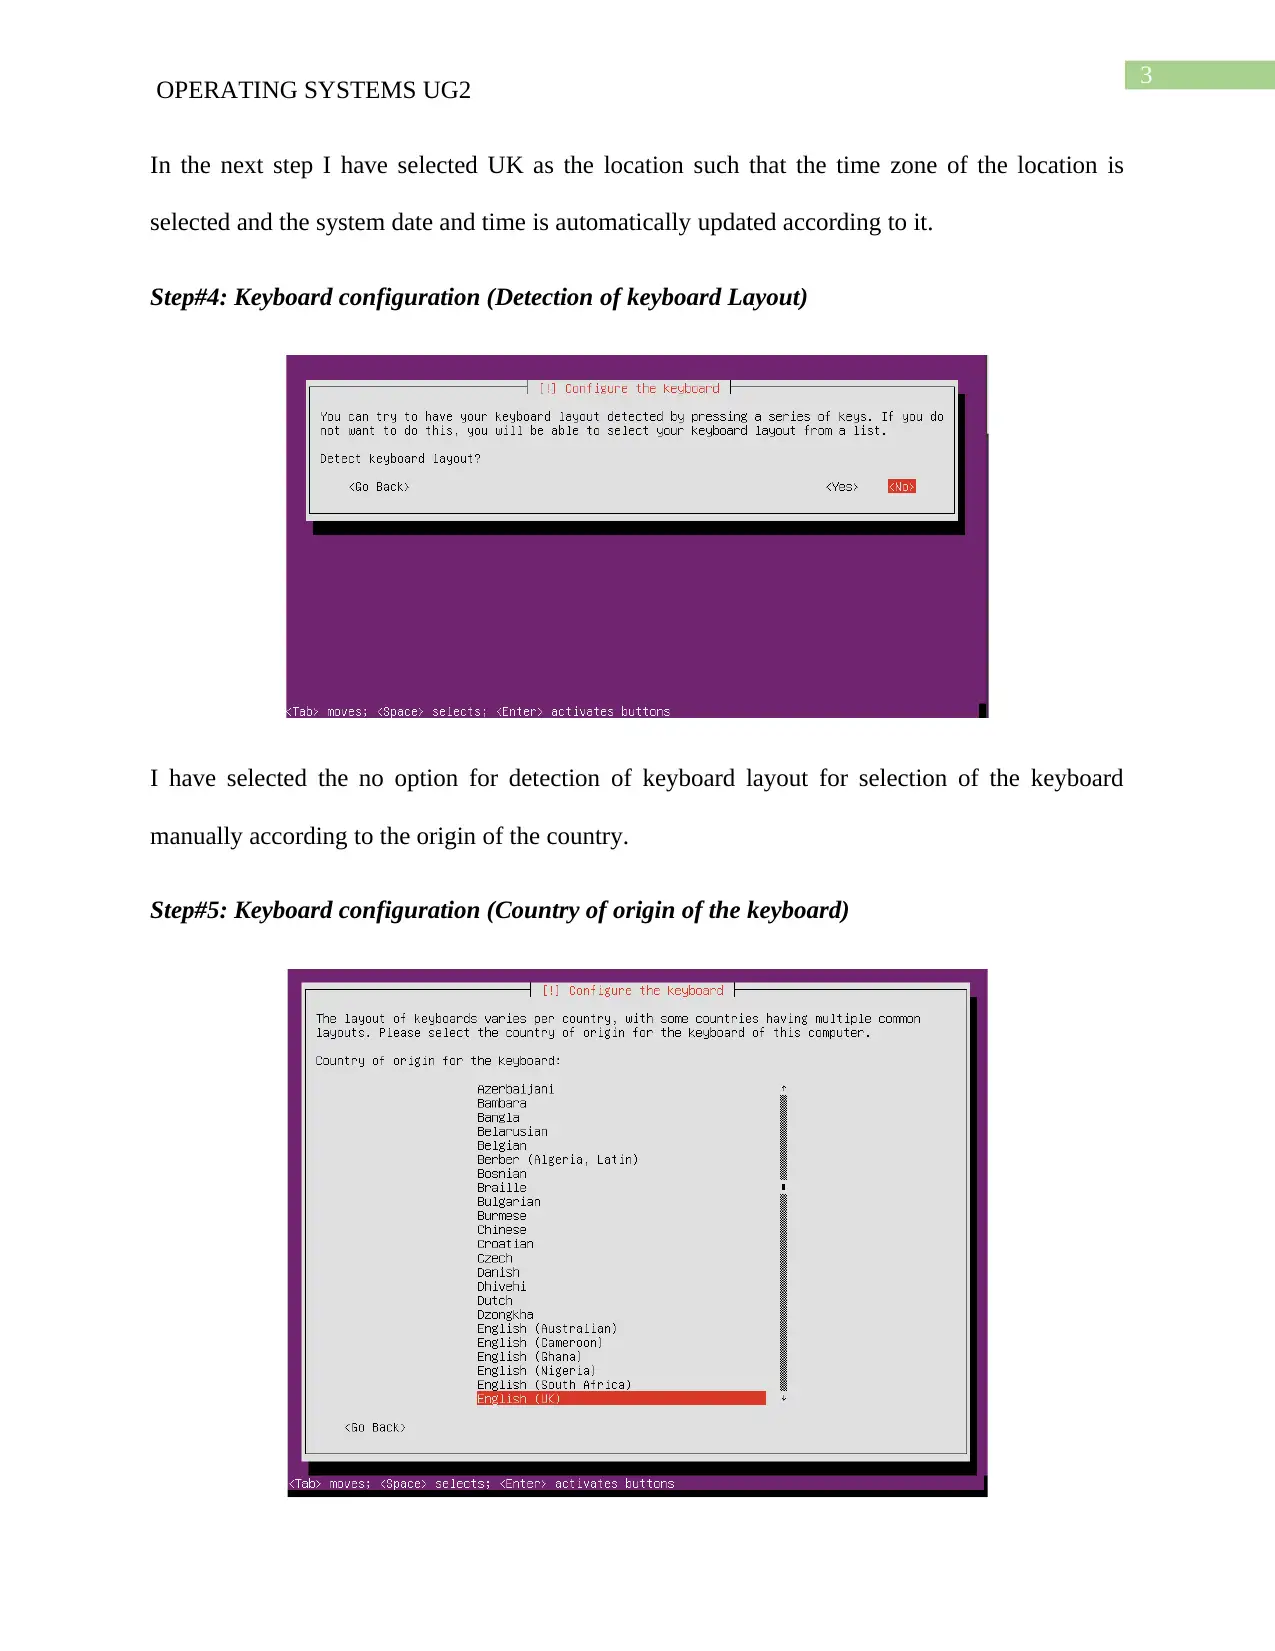
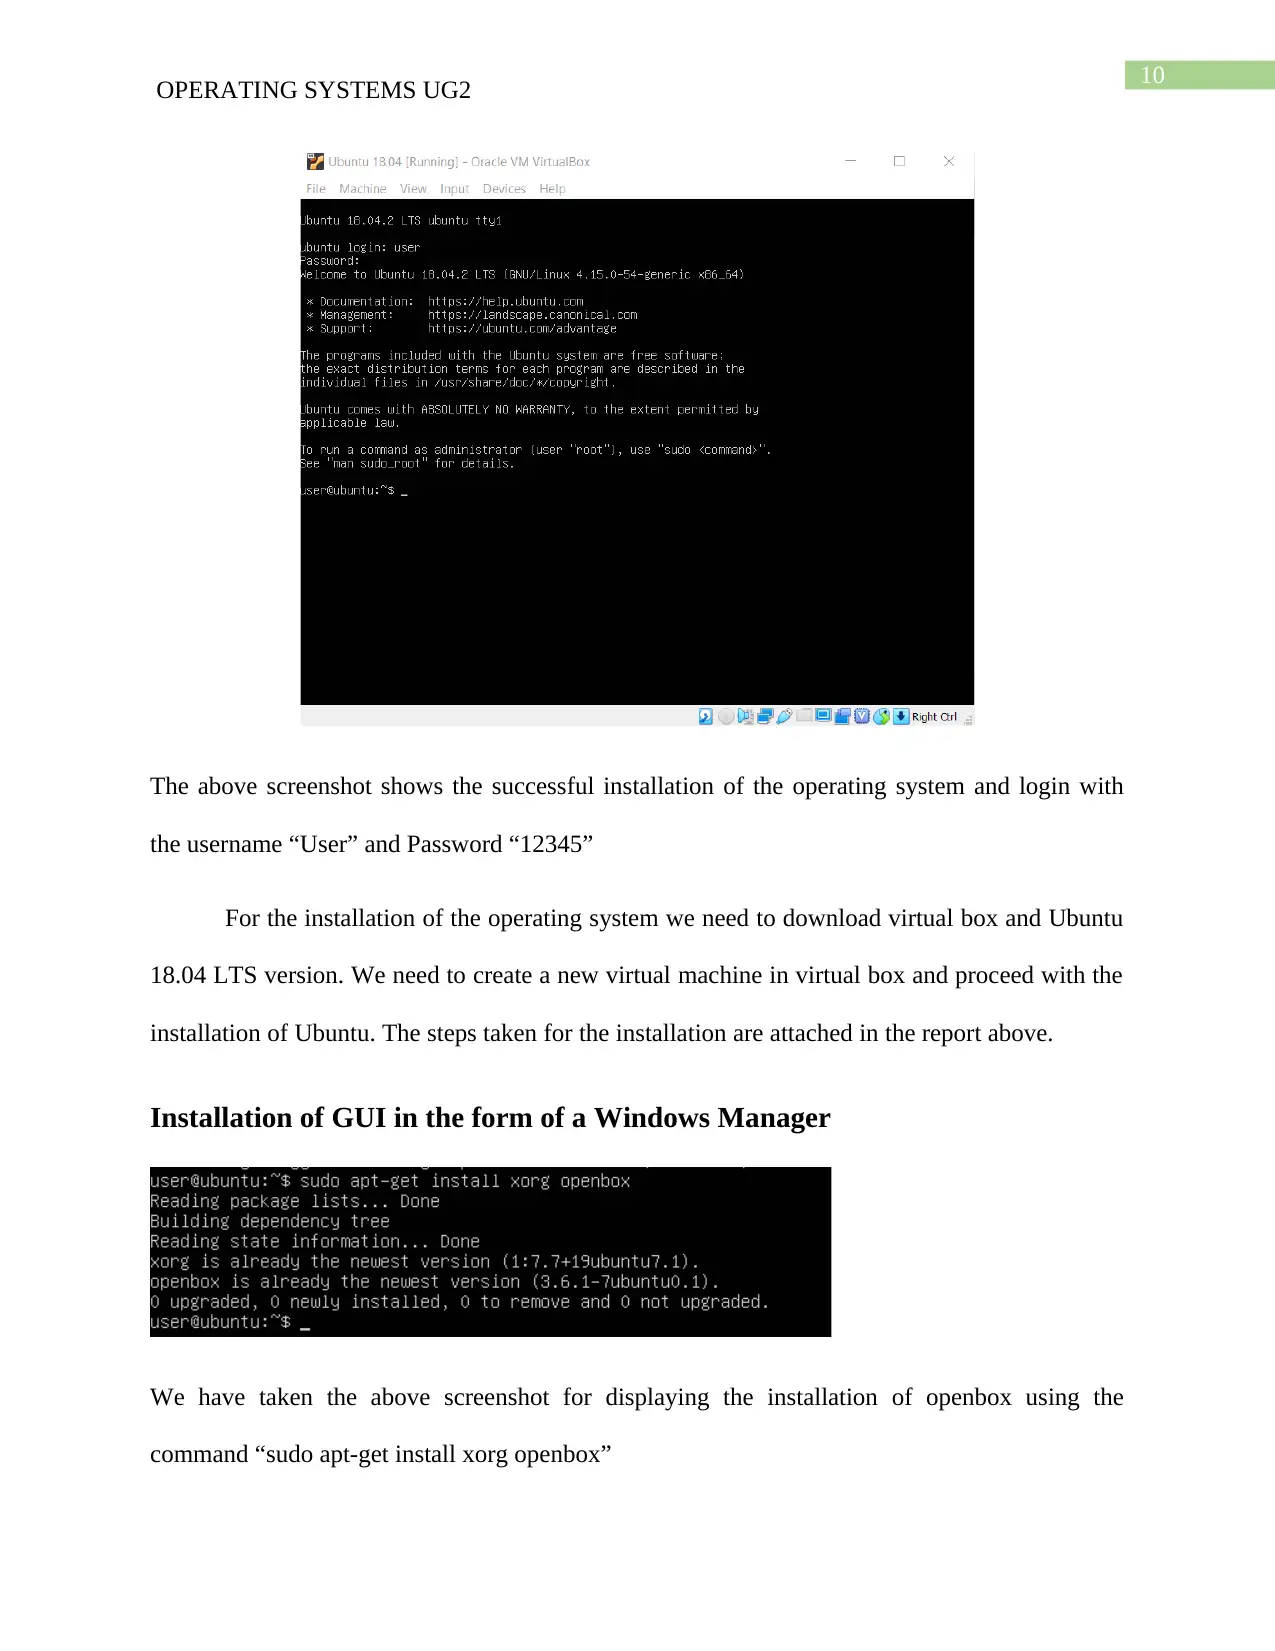
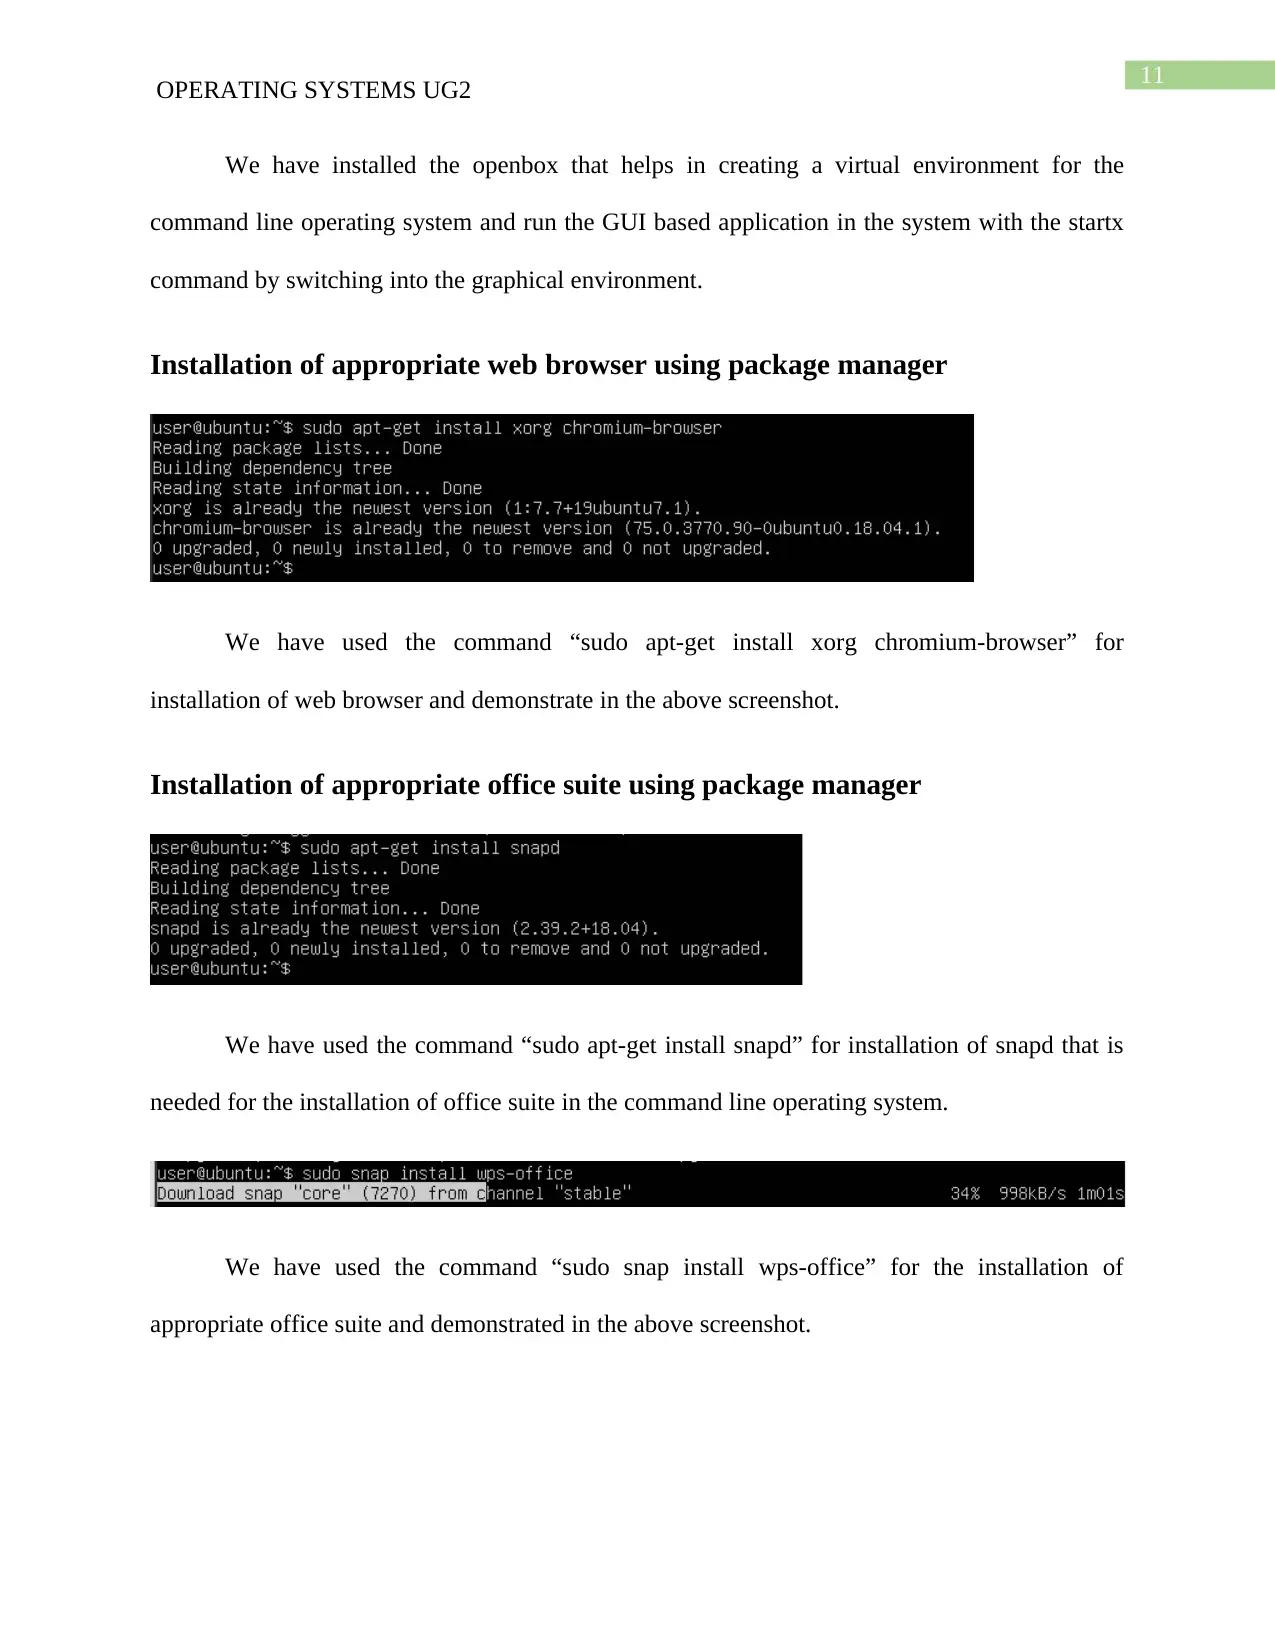
This assignment details the complete process of installing Ubuntu 18.04 LTS in command-line mode using VirtualBox. The student documents each step, from selecting the installer boot menu and language to configuring the keyboard, network, and user accounts. Screenshots illustrate the process, including setting up the hostname, selecting a mirror for Ubuntu archives, and partitioning the virtual hard drive. The assignment also covers installing a GUI environment using Openbox, a web browser (Chromium), and an office suite (WPS Office) using the package manager. Reflective comments highlight the challenges faced, such as mirror link selection, and the learning outcomes, including gaining proficiency in Linux commands and understanding virtualized environments. The assignment concludes with a bibliography of relevant resources.
Document Page
Running head: OPERATING SYSTEMS UG2
Coursework Exercise Sheet 1
Name of the Student
Name of the University
Author’s Note
tabler-icon-diamond-filled.svg

Paraphrase This Document

Need a fresh take? Get an instant paraphrase of this document with our AI Paraphraser
Document Page
1
OPERATING SYSTEMS UG2
Installation of Command-Line Operating System (Ubuntu 18.04 LTS)
For the installation of operating system Ubuntu is selected and virtual box is used for
installing it. From the installer boot menu options command-line install is selected. The
following screenshots are given demonstrating each of the steps followed for the installation of
the operating system. The following steps are given with reflective comments for demonstrating
the procedure of installation of command line operating system.
Step#1: Selection of Installer boot menu
The above step shows the starting phase of installing Ubuntu 18.04 in command line mode and
this is used such that minimum space is consumed for the installation of the operating system.
Step#2: Selection of language
Document Page
2
OPERATING SYSTEMS UG2
I have selected the English language for the installation of the system and the language is also
the default language displayed for all the system components.
Step#3: Selection of location
Document Page
3
OPERATING SYSTEMS UG2
In the next step I have selected UK as the location such that the time zone of the location is
selected and the system date and time is automatically updated according to it.
Step#4: Keyboard configuration (Detection of keyboard Layout)
I have selected the no option for detection of keyboard layout for selection of the keyboard
manually according to the origin of the country.
Step#5: Keyboard configuration (Country of origin of the keyboard)
tabler-icon-diamond-filled.svg

Paraphrase This Document

Need a fresh take? Get an instant paraphrase of this document with our AI Paraphraser
Document Page
4
OPERATING SYSTEMS UG2
I have selected the option according to the country for proceeding with the installation of the
operating system.
Step#6: Keyboard configuration (Keyboard Layout)
I have selected English (UK) for matching the keyboard layout for the machine and enabling
proper working of the keyboard.
Step#7: Network Configuration
I have selected the hostname as Ubuntu for the configuration of the network.
Document Page
5
OPERATING SYSTEMS UG2
Step#7: Selection of mirror of the Ubuntu archive (Selection of country)
I have selected country region as United Kingdom for selection of the mirror of Ubuntu archive
and downloading of updates and installation of software
Step#8: Selection of mirror of the Ubuntu archive
I have selected the second link of the Ubuntu archive for downloading of updates and installation
of software
Document Page
6
OPERATING SYSTEMS UG2
Step#9: Loading of additional component from mirror
I have selected the mirror and it analyzes the additional components that are needed to be
installed for proceeding with the installation.
Step#10: Setting up users and passwords by inputting the full name of the user
tabler-icon-diamond-filled.svg

Paraphrase This Document

Need a fresh take? Get an instant paraphrase of this document with our AI Paraphraser
Document Page
7
OPERATING SYSTEMS UG2
I have inputted user name as user for the configuration of username and creating an account in
the operating system.
Step#11: Setting username for the account
I have inputted the username as “User” for logging into the account with username “user”.
Step#12: Setting password for the new user
I have used password as “12345” as password for logging into the account created in setup of
users and password.
Document Page
8
OPERATING SYSTEMS UG2
Step#13: Inputting password for confirming the password inputted
I have to re-input the password for confirming the password as it matches with the previous ones
and I can continue with the installation process.
Step#14: Setting the partition of the virtual hard drive
I have selected Guided option for partitioning the hard disk and proceeding with the installation
of operating system.
Document Page
9
OPERATING SYSTEMS UG2
Step#15: Selection of the partition for installation of the OS
I have selected the default partition for the installation of OS in the virtual hard drive
Step#16: Installation of the OS
After the completion of the above steps the installation operating system starts.
Step#17: Login into the installed OS
tabler-icon-diamond-filled.svg

Paraphrase This Document

Need a fresh take? Get an instant paraphrase of this document with our AI Paraphraser
Document Page
10
OPERATING SYSTEMS UG2
The above screenshot shows the successful installation of the operating system and login with
the username “User” and Password “12345”
For the installation of the operating system we need to download virtual box and Ubuntu
18.04 LTS version. We need to create a new virtual machine in virtual box and proceed with the
installation of Ubuntu. The steps taken for the installation are attached in the report above.
Installation of GUI in the form of a Windows Manager
We have taken the above screenshot for displaying the installation of openbox using the
command “sudo apt-get install xorg openbox”
Document Page
11
OPERATING SYSTEMS UG2
We have installed the openbox that helps in creating a virtual environment for the
command line operating system and run the GUI based application in the system with the startx
command by switching into the graphical environment.
Installation of appropriate web browser using package manager
We have used the command “sudo apt-get install xorg chromium-browser” for
installation of web browser and demonstrate in the above screenshot.
Installation of appropriate office suite using package manager
We have used the command “sudo apt-get install snapd” for installation of snapd that is
needed for the installation of office suite in the command line operating system.
We have used the command “sudo snap install wps-office” for the installation of
appropriate office suite and demonstrated in the above screenshot.
chevron_up_icon
1 out of 14
circle_padding
hide_on_mobile
zoom_out_icon
[object Object]