Network & Security Administration: Ubuntu Dual-Boot Installation Guide
VerifiedAdded on 2020/03/02
|19
|1211
|186
Practical Assignment
AI Summary
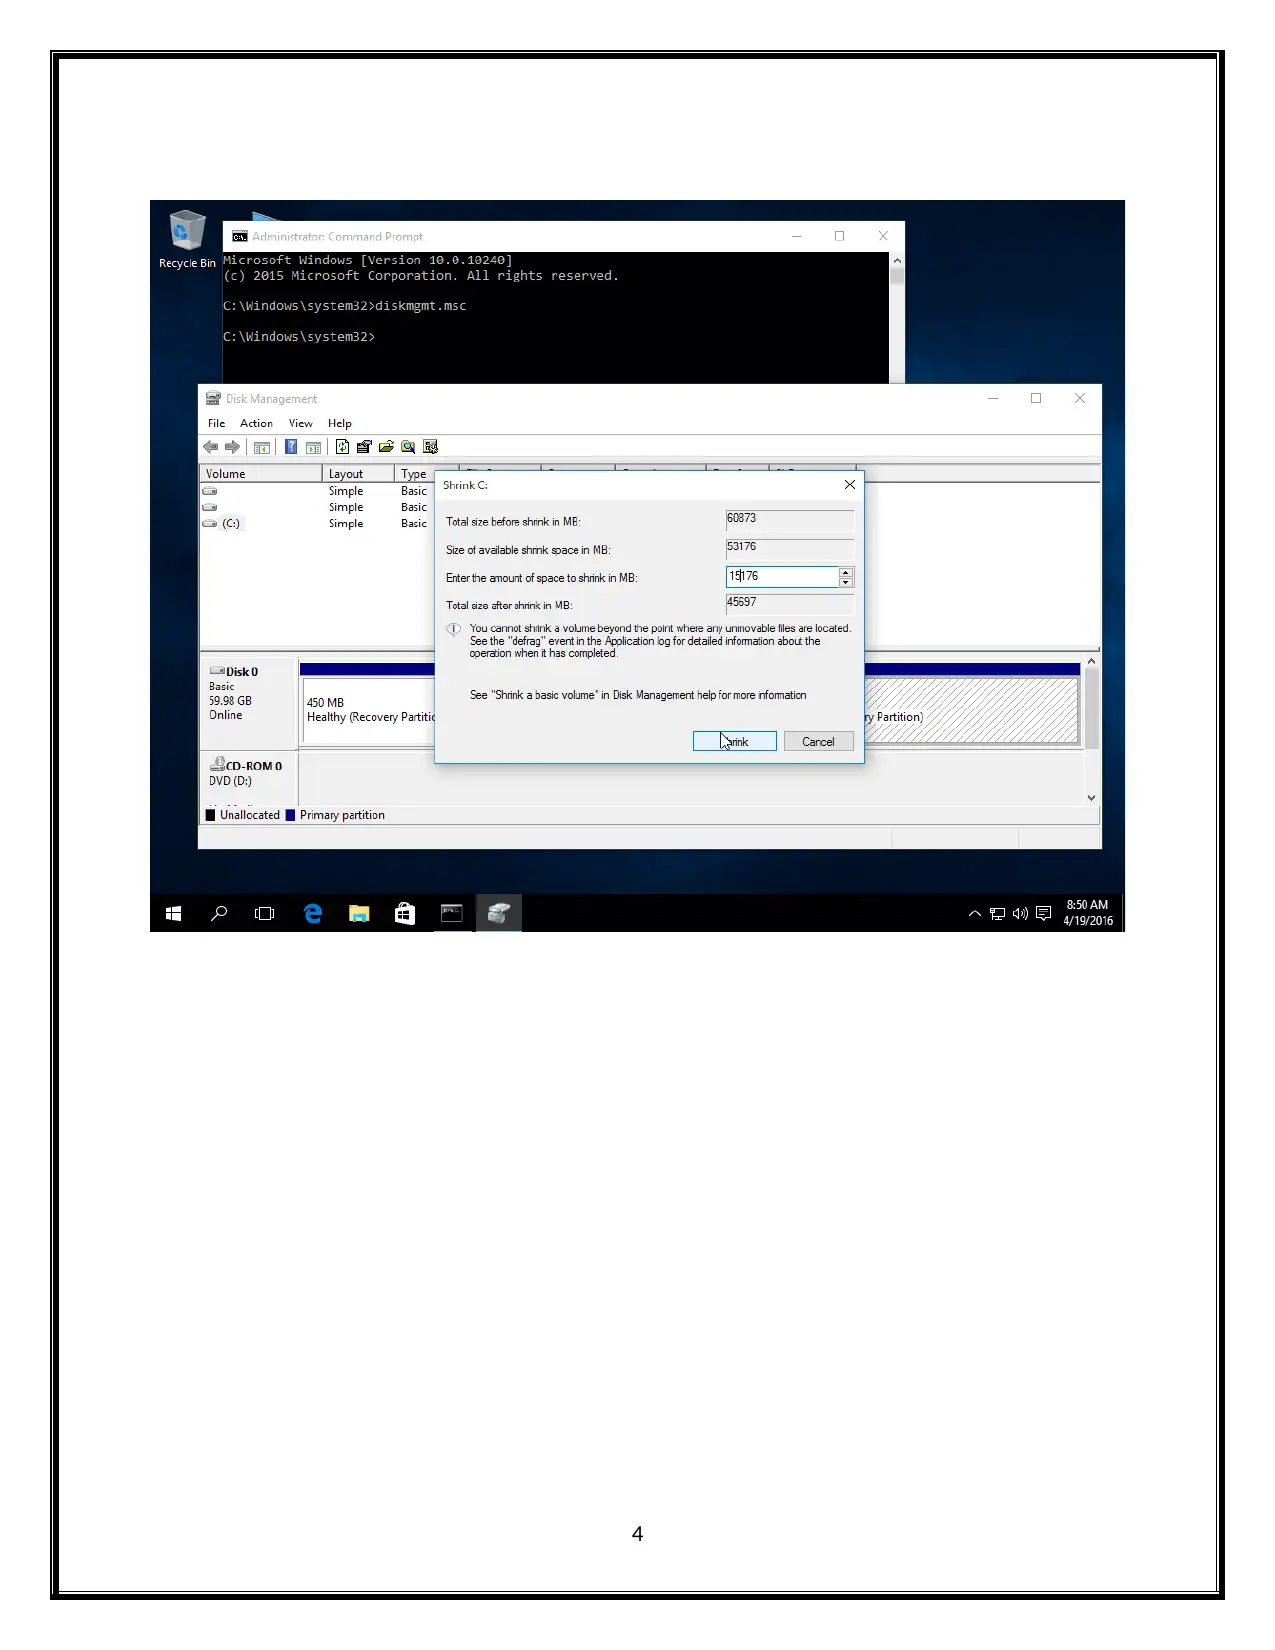
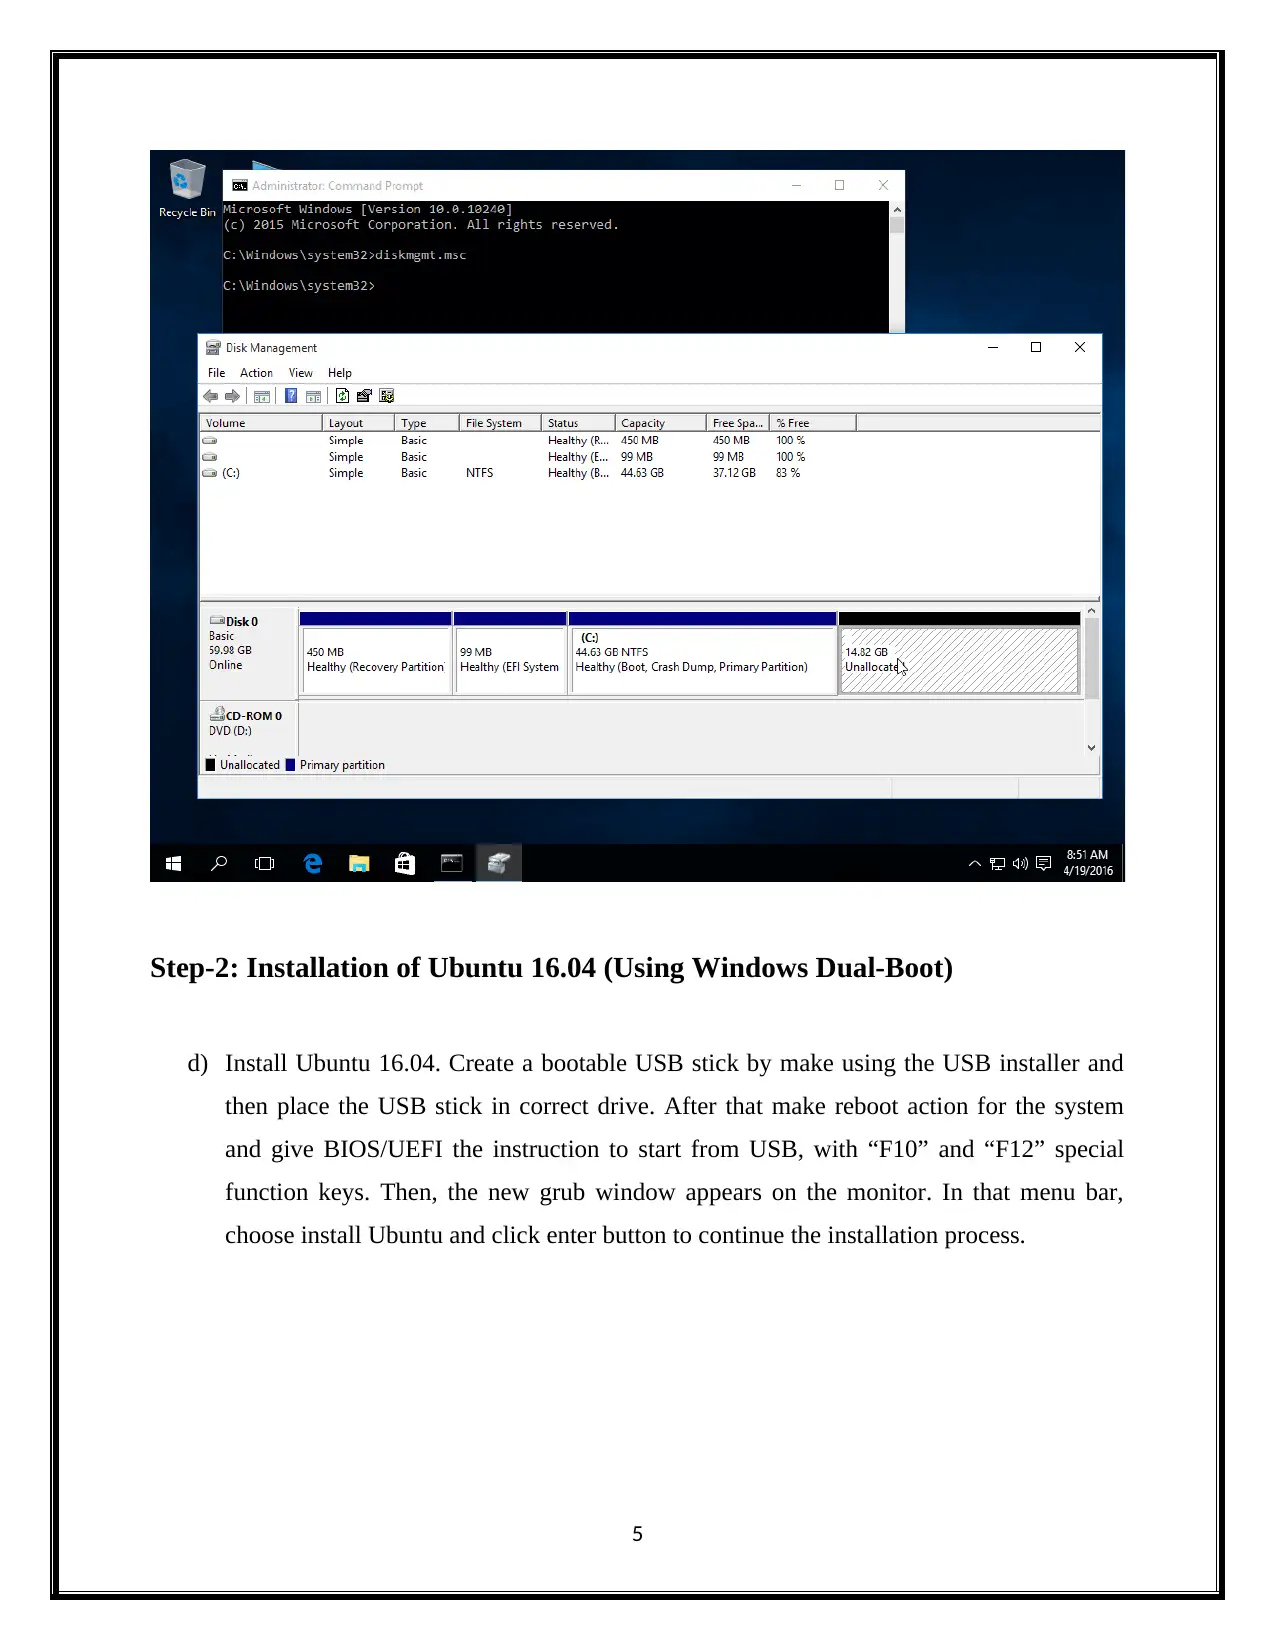
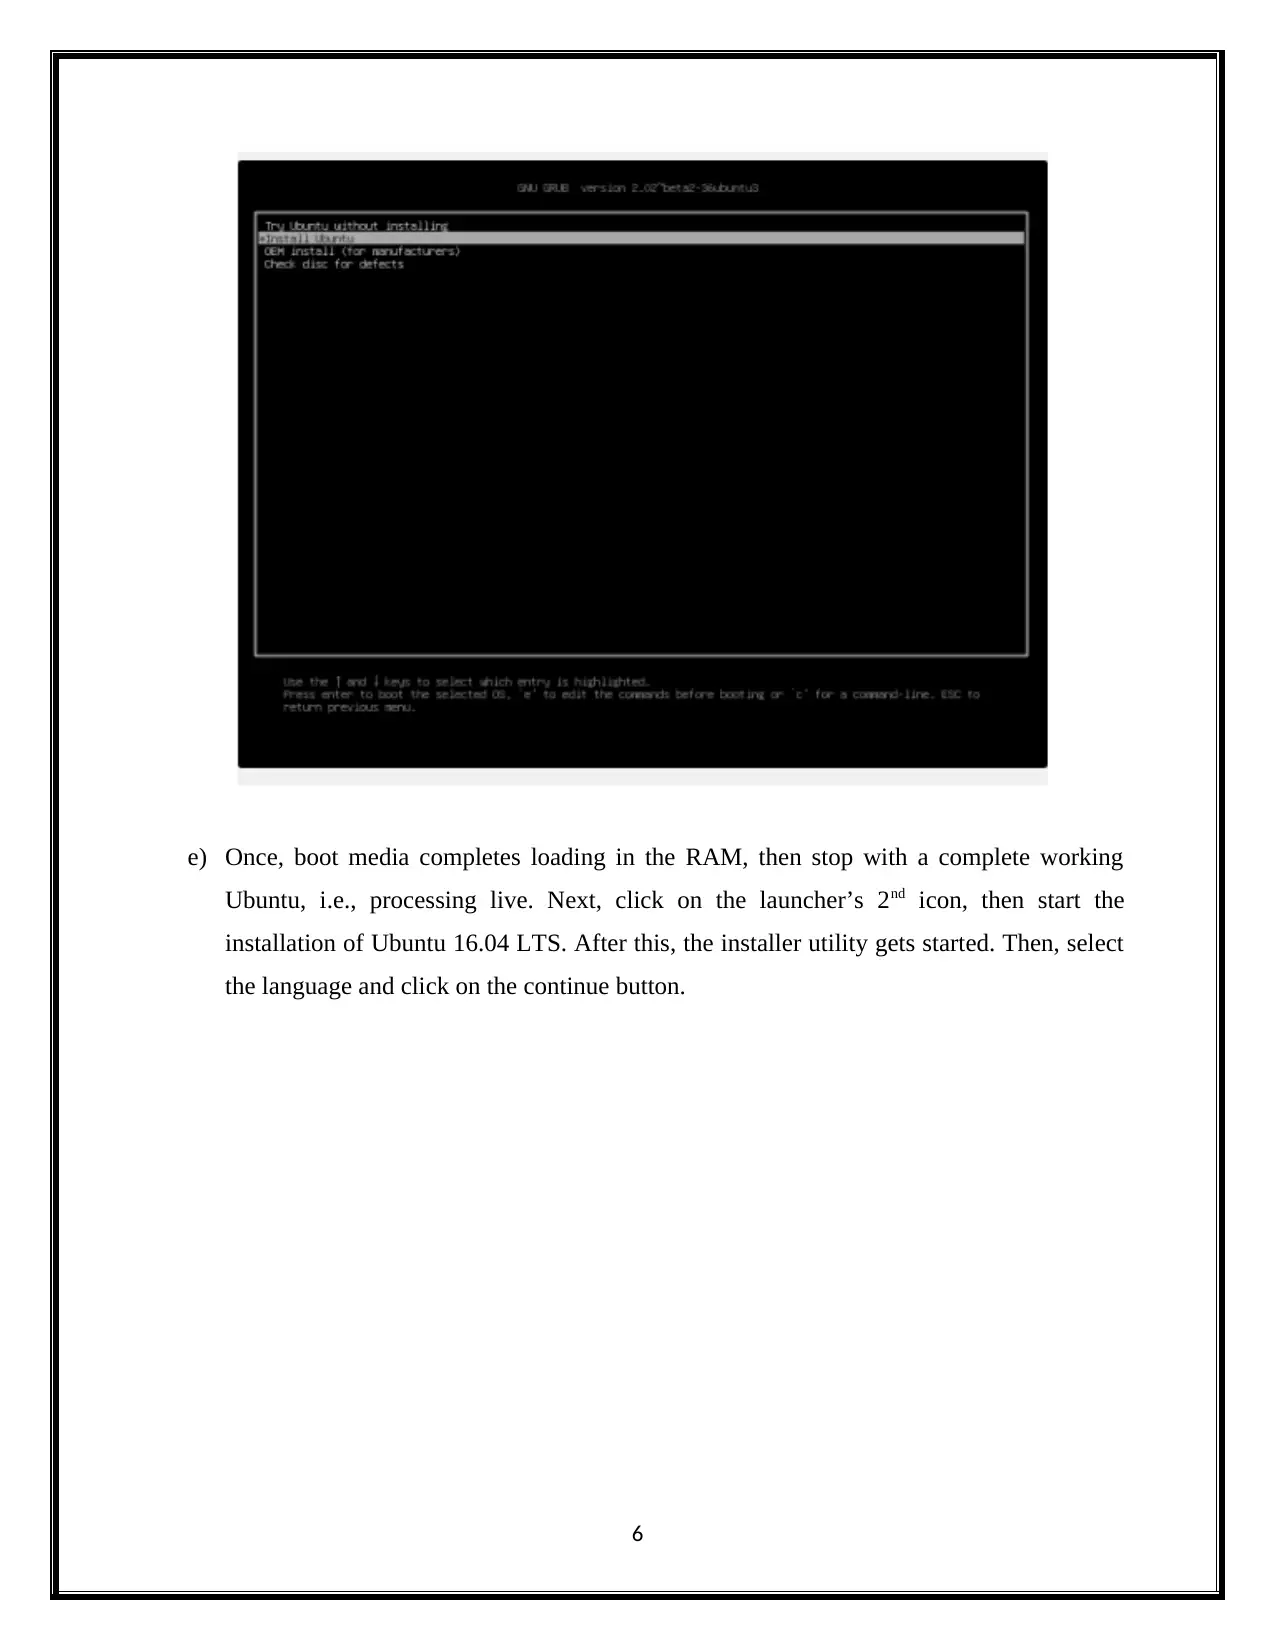
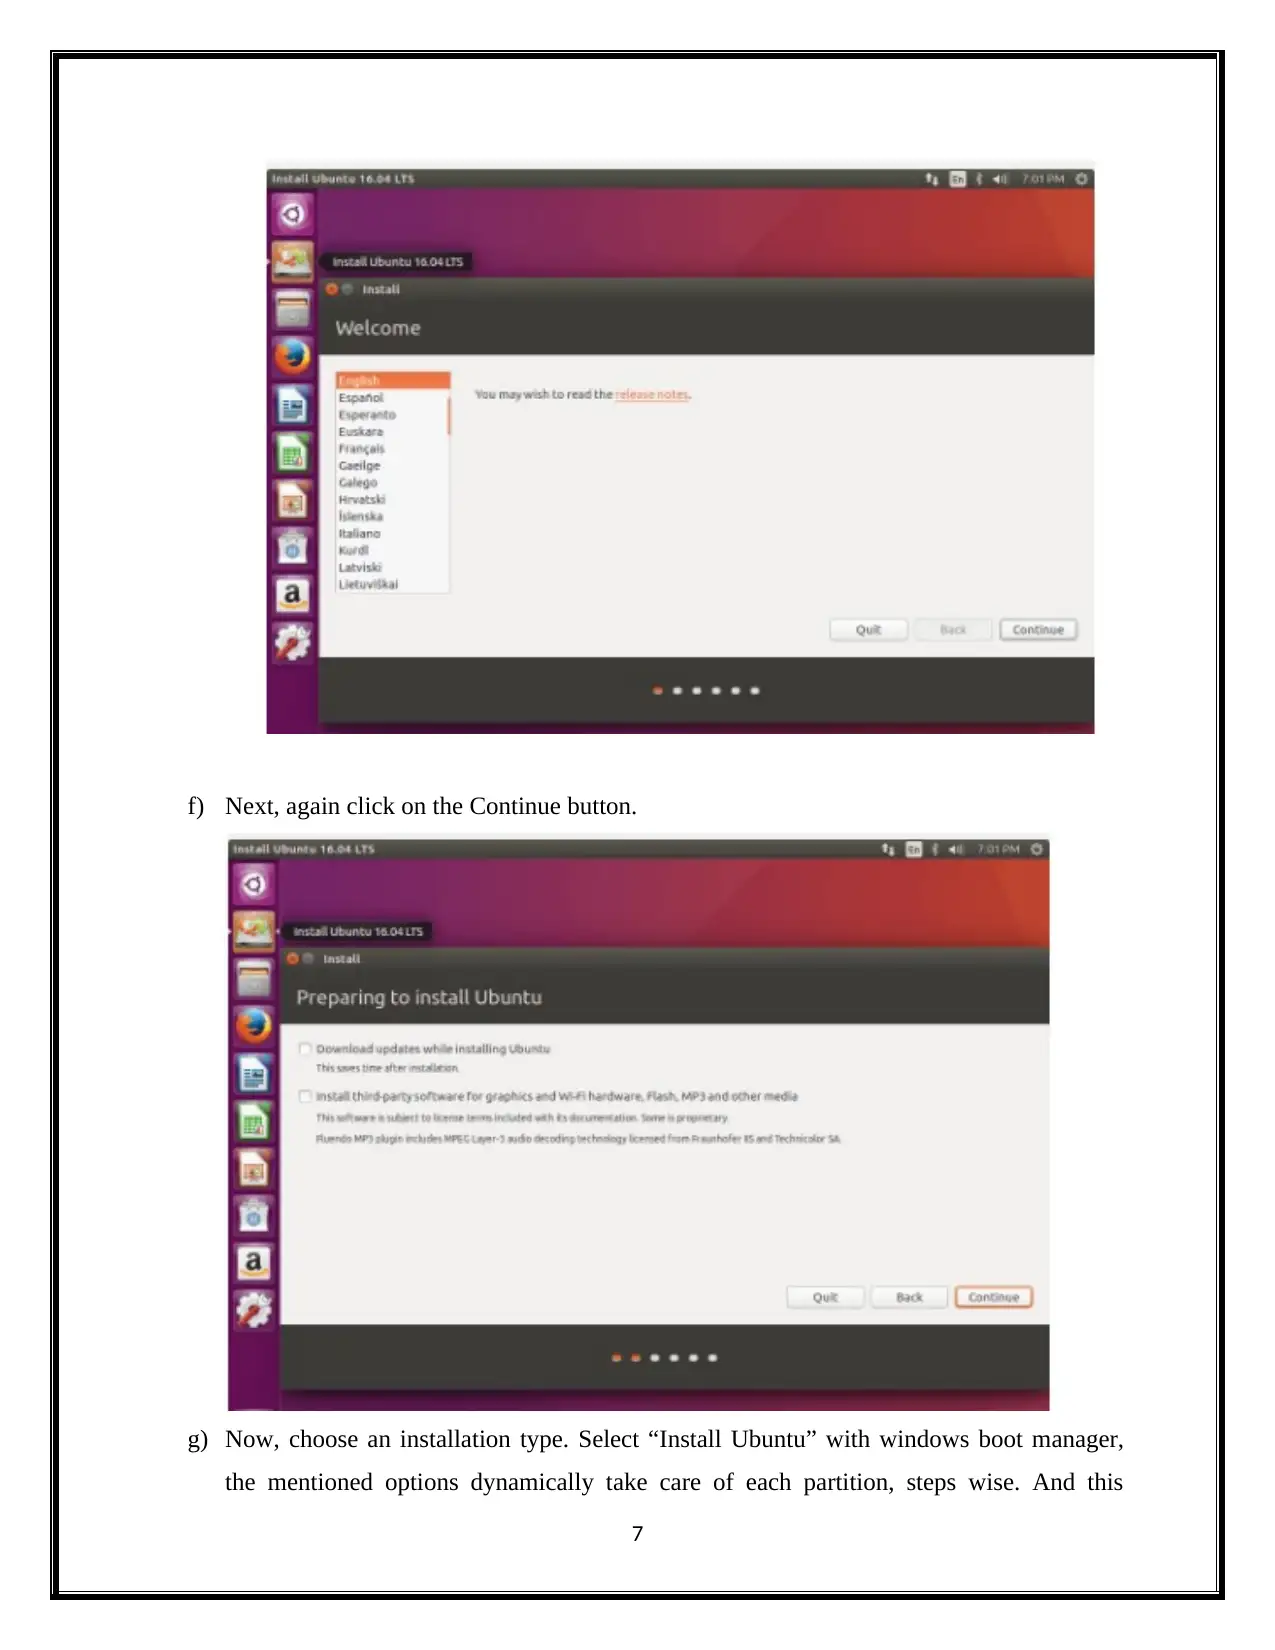
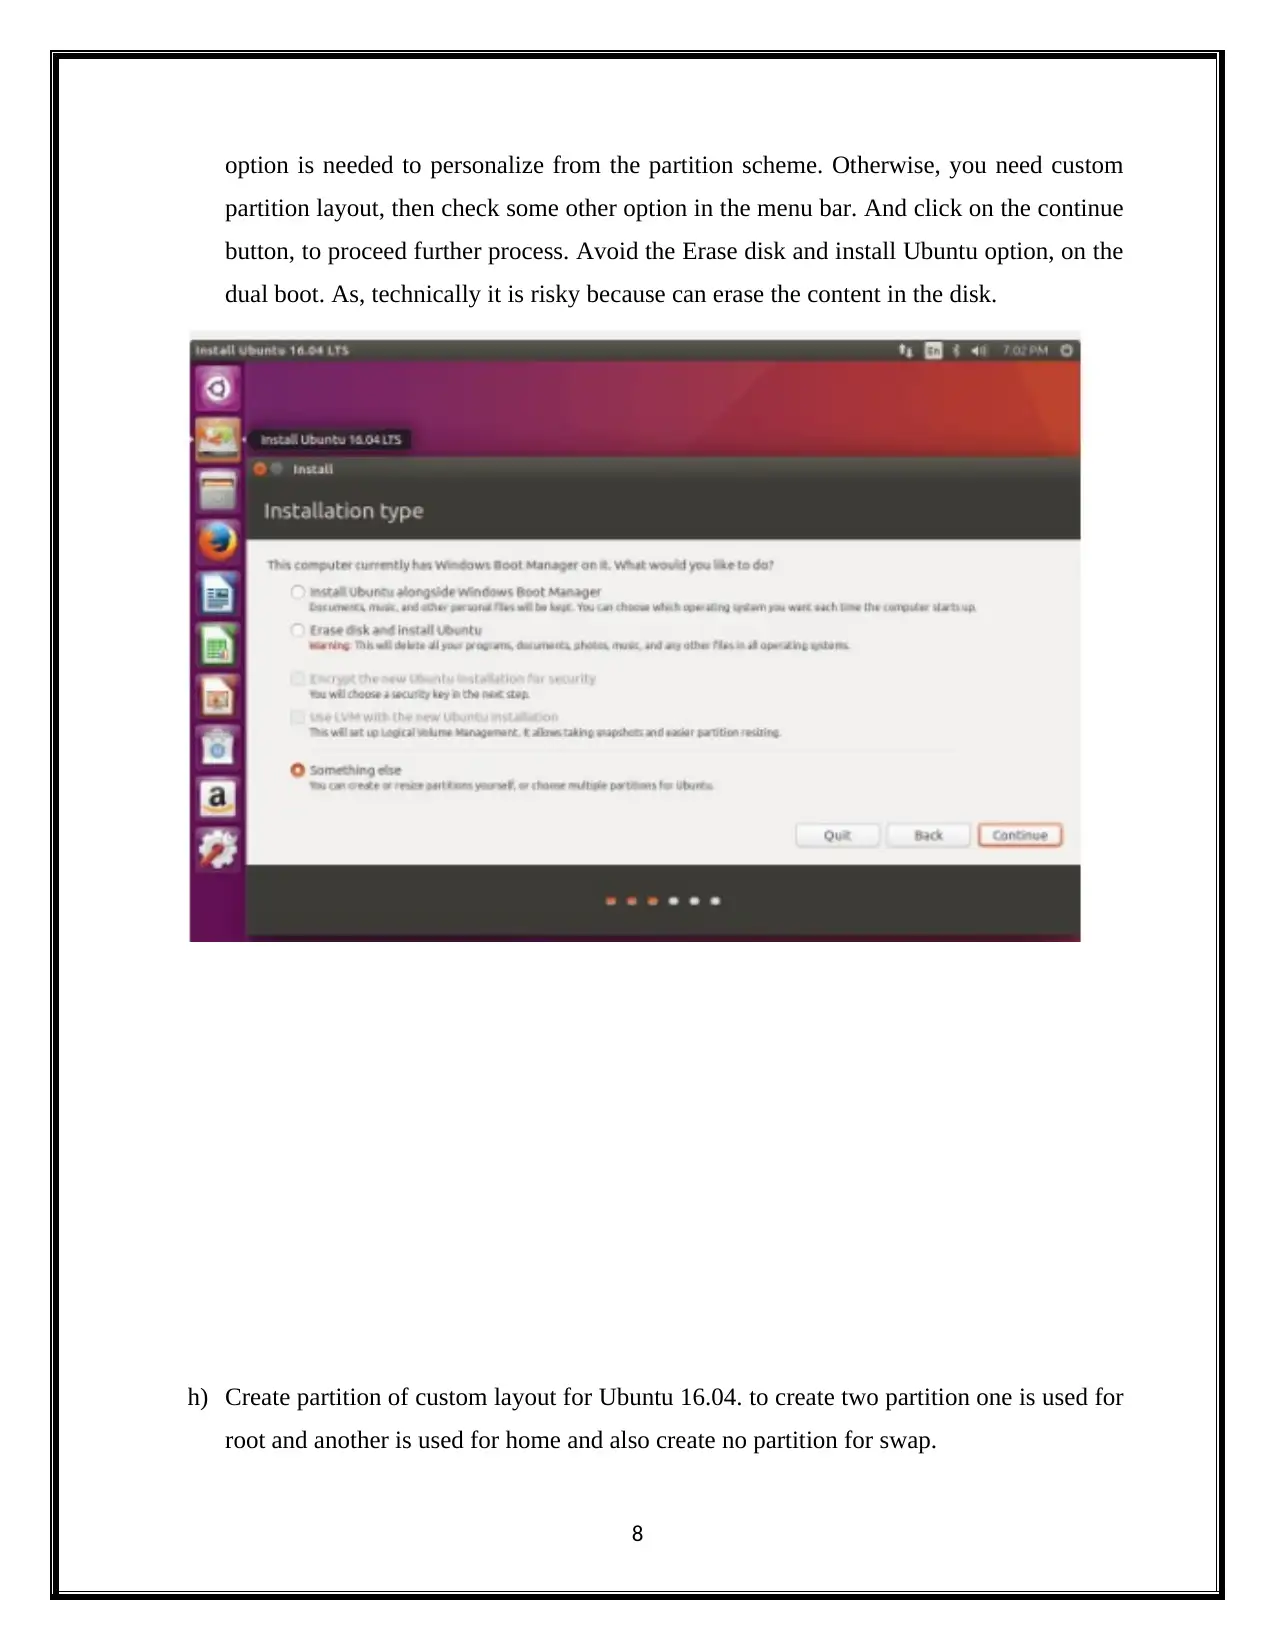
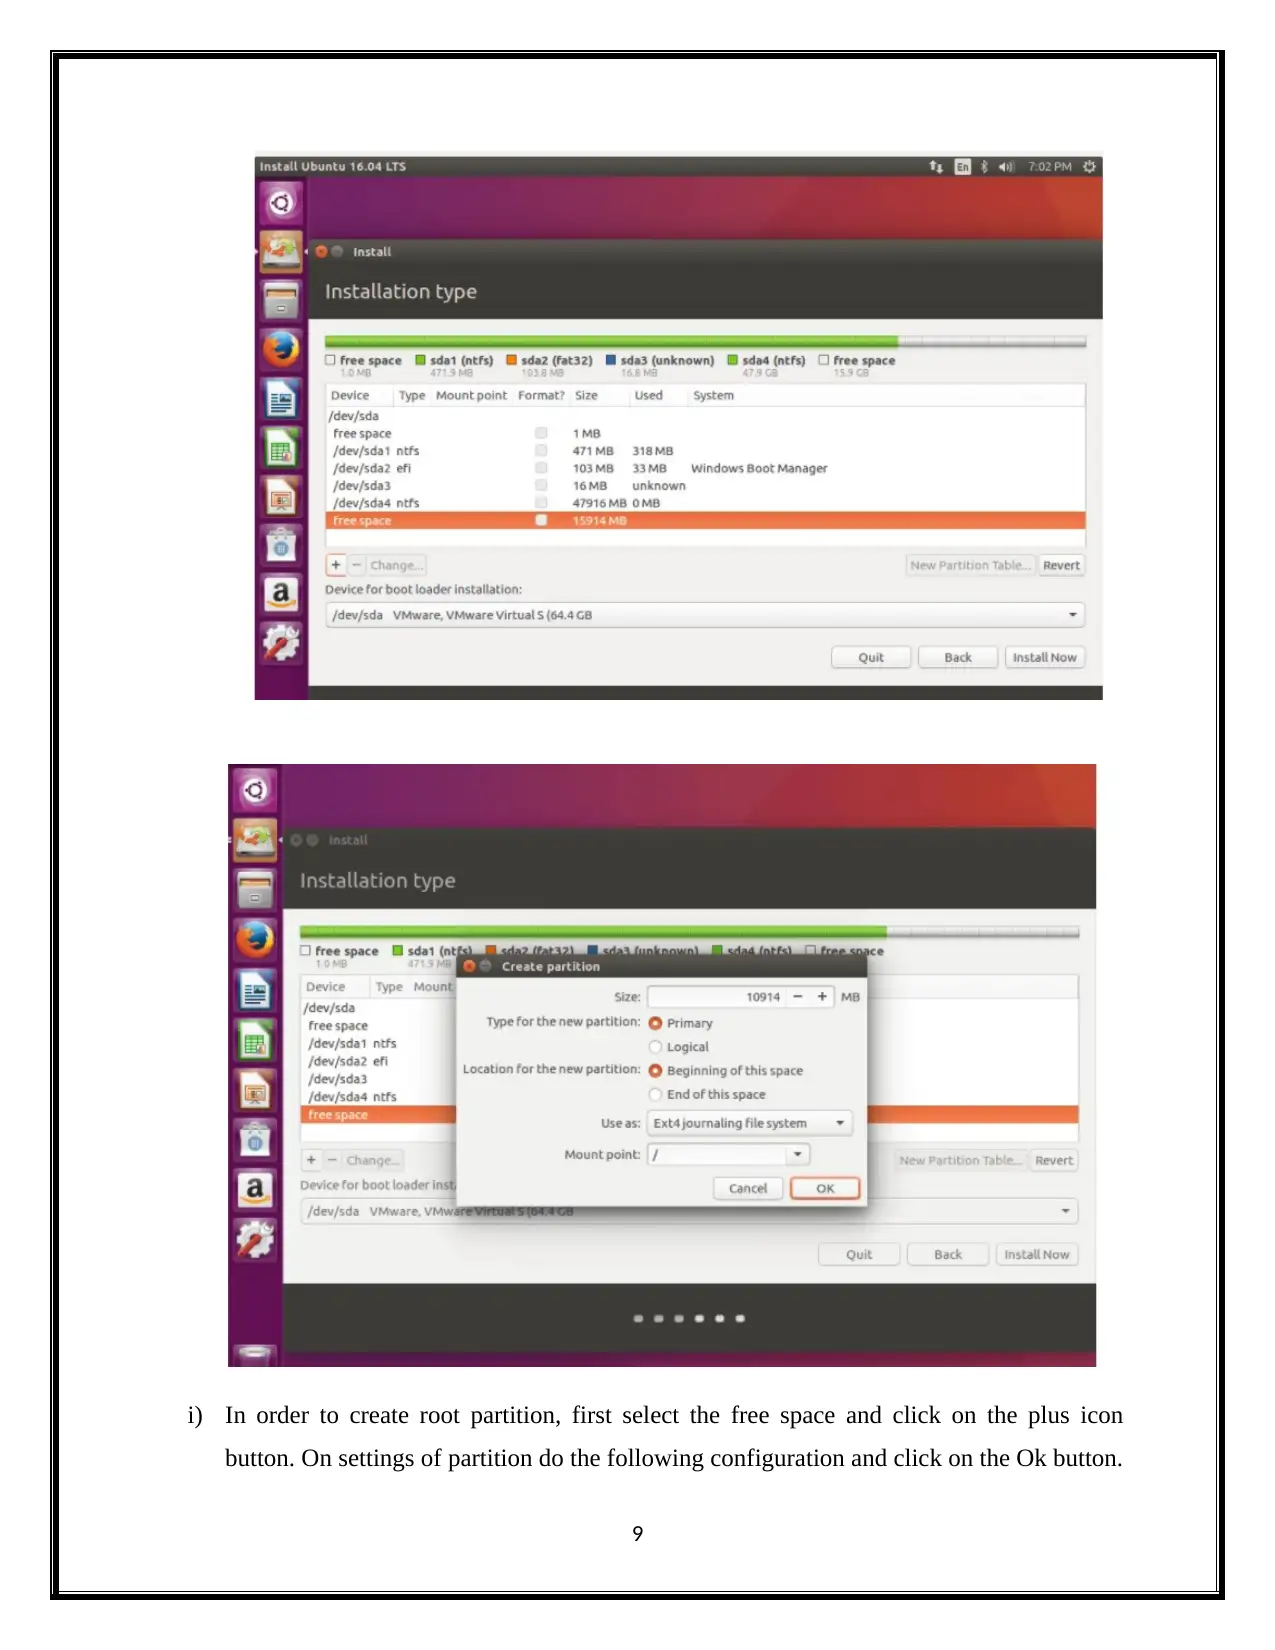
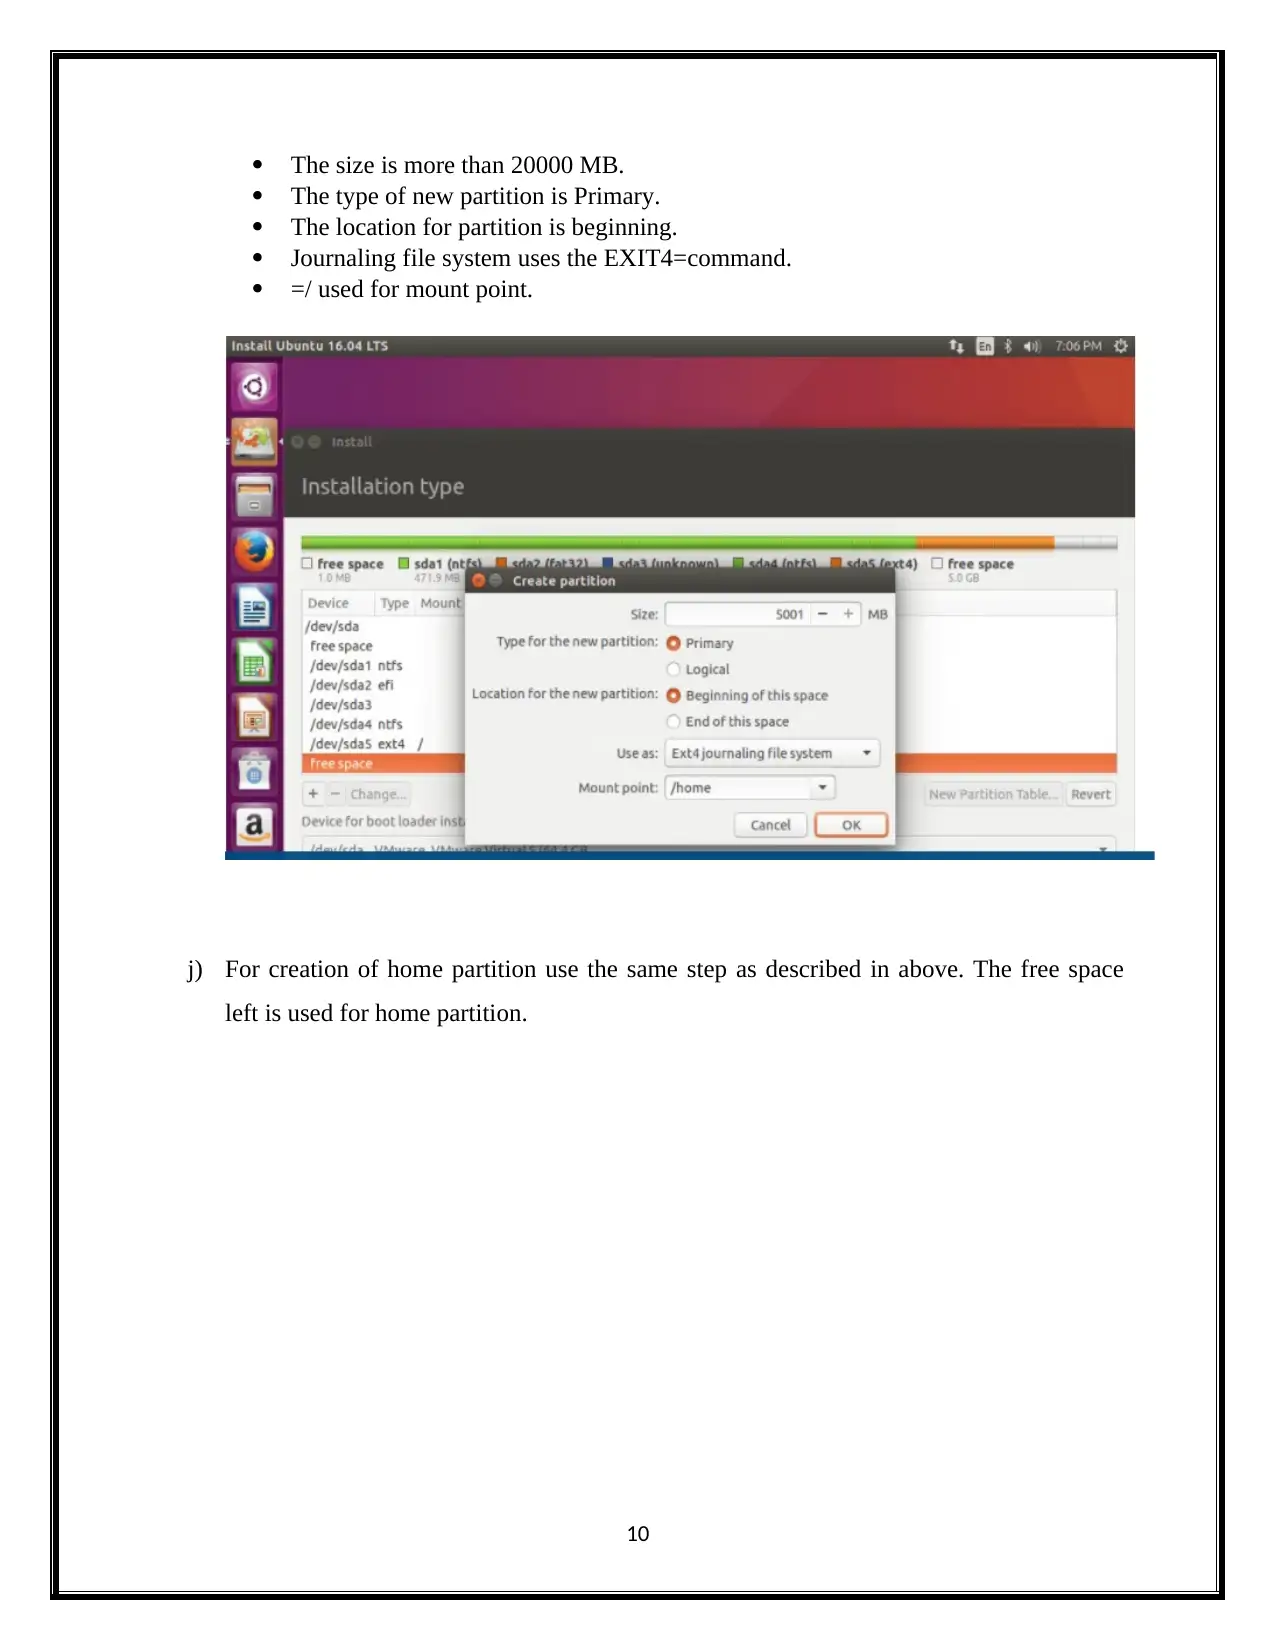
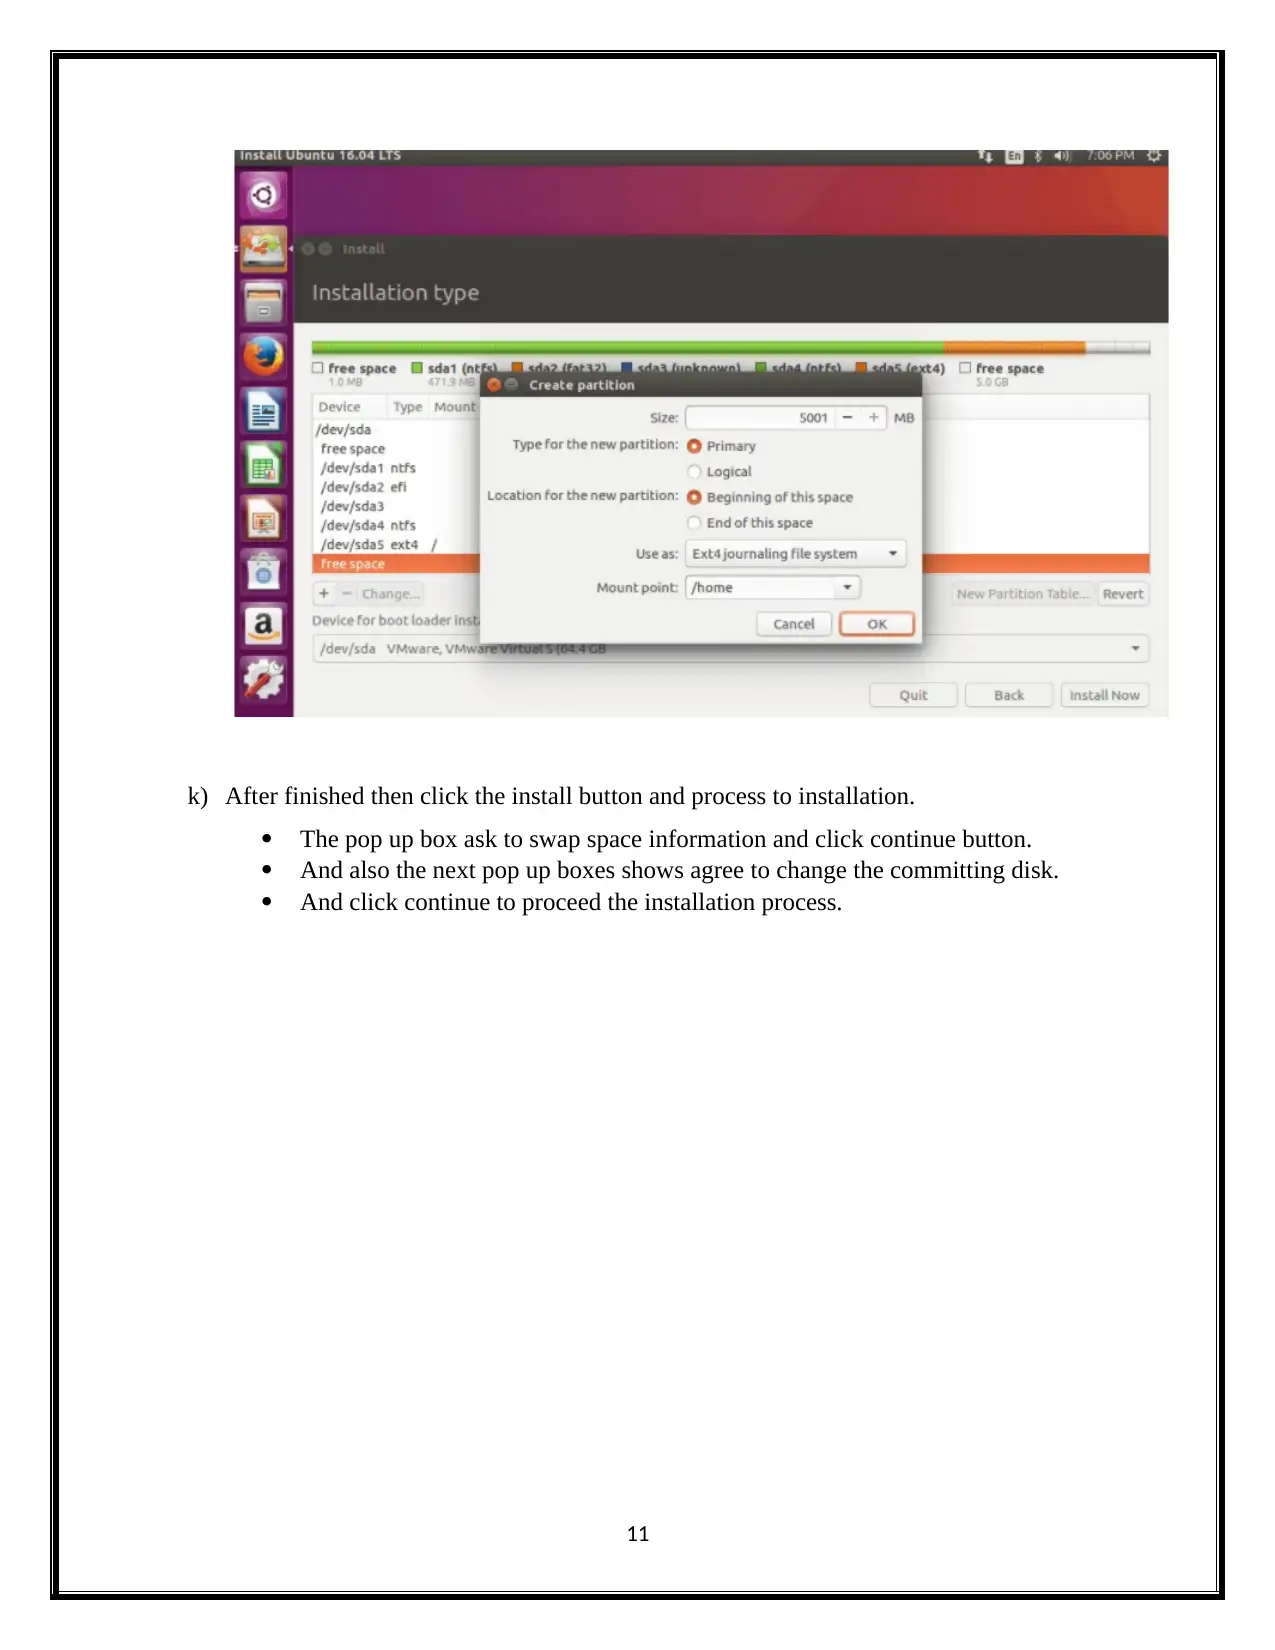
This assignment details the process of installing Ubuntu 16.04 or 16.10 alongside Windows 10 or 8 in a dual-boot configuration. It begins with pre-installation steps, including UEFI/EFI settings and disabling Secure Boot, followed by allocating free space on the hard disk using the Disk Management utility. The guide then provides a comprehensive, step-by-step installation process, from creating a bootable USB drive to selecting installation options and creating custom partitions for root and home directories. It emphasizes the importance of avoiding the "Erase disk and install Ubuntu" option in a dual-boot scenario. The assignment concludes with instructions on completing the installation, rebooting, and accessing both operating systems through the Grub menu. The document provides references to support the installation process.

Network & Security Administration
Paraphrase This Document
Need a fresh take? Get an instant paraphrase of this document with our AI Paraphraser

Installation of Ubuntu 16.10 or 16.04 in Windows 10 or 8 (in Dual-Boot)
Ubuntu 16.10 is released, which supports for 9 months i.e., till July, 2017. Whereas, Canonical
produced Ubuntu 16.04, which has a support of five years. The following section provides all the
steps that are required to install both Ubuntu 16.10 as well as Ubuntu 16.04, in the dual-boot of a
Microsoft OS, which is already installed with Windows 10. Therefore, the following steps are
based on the assumption that your systems have either Windows 8.1 or 8 (Cezar & Posts, 2017).
Note the following points (Cezar & Posts, 2017):
a) If your system hardware makes use of UEFI, in such case change it to EFI settings. Then,
ensure to disable the feature called as “Secure Boot.”
b) If there is no OS installed in the system, then make sure to complete the installation of
Microsoft Windows followed by either Ubuntu 16.04 or 16.10. In this case, while
formatting the hard disk, during the installation of Windows ensure to provide space for
the disk with minimum 20 GB. This will help for future use, i.e., to install Ubuntu.
Requirements
First, download the following (Cezar & Posts, 2017):
1) Ubuntu 16.10 Desktop
2) Ubuntu 16.04 Desktop
Step-1: Dual-Boot Preparation for the Windows System
a) Initially, allocate free space in the computer’s hard disk, if the system has made
installation on the single partition. Then login, as an administrator into windows system.
Next, on the Start Menu right click. Then, select the Command Prompt (Admin) option.
This will take you to the Windows Command Line.
1

b) Then in the command prompt, in CLI type as “diskmgmt.msc”, this will allow to open the
Disk Management utility. Next, on C: partition right click and choose the “Shrink
Volume” option. This will help in resizing the partition. The following images shows the
same steps:
2
Disk Management utility. Next, on C: partition right click and choose the “Shrink
Volume” option. This will help in resizing the partition. The following images shows the
same steps:
2
⊘ This is a preview!⊘
Do you want full access?
Subscribe today to unlock all pages.

Trusted by 1+ million students worldwide

c) Later, on the Shrink C:, make sure to enter the required space (in MB) to be shrinked. It
should have minimum 20000 MB, based on the partition size of “C:” Next, click on the
“Shrink” button. This will begin partitioning as per the user requirements.
NOTE: The following figure is just for the demonstration purpose, because the taken value
for shrinking the space is less comparatively.
After completing the resize operation, the hard drive will have new unallocated space. Keep it as
it is and next reboot the system. Rebooting will help to continue the installation of Ubuntu
16.04.
3
Paraphrase This Document
Need a fresh take? Get an instant paraphrase of this document with our AI Paraphraser

4

Step-2: Installation of Ubuntu 16.04 (Using Windows Dual-Boot)
d) Install Ubuntu 16.04. Create a bootable USB stick by make using the USB installer and
then place the USB stick in correct drive. After that make reboot action for the system
and give BIOS/UEFI the instruction to start from USB, with “F10” and “F12” special
function keys. Then, the new grub window appears on the monitor. In that menu bar,
choose install Ubuntu and click enter button to continue the installation process.
5
⊘ This is a preview!⊘
Do you want full access?
Subscribe today to unlock all pages.

Trusted by 1+ million students worldwide

e) Once, boot media completes loading in the RAM, then stop with a complete working
Ubuntu, i.e., processing live. Next, click on the launcher’s 2nd icon, then start the
installation of Ubuntu 16.04 LTS. After this, the installer utility gets started. Then, select
the language and click on the continue button.
6
Ubuntu, i.e., processing live. Next, click on the launcher’s 2nd icon, then start the
installation of Ubuntu 16.04 LTS. After this, the installer utility gets started. Then, select
the language and click on the continue button.
6
Paraphrase This Document
Need a fresh take? Get an instant paraphrase of this document with our AI Paraphraser

f) Next, again click on the Continue button.
g) Now, choose an installation type. Select “Install Ubuntu” with windows boot manager,
the mentioned options dynamically take care of each partition, steps wise. And this
7
g) Now, choose an installation type. Select “Install Ubuntu” with windows boot manager,
the mentioned options dynamically take care of each partition, steps wise. And this
7

option is needed to personalize from the partition scheme. Otherwise, you need custom
partition layout, then check some other option in the menu bar. And click on the continue
button, to proceed further process. Avoid the Erase disk and install Ubuntu option, on the
dual boot. As, technically it is risky because can erase the content in the disk.
h) Create partition of custom layout for Ubuntu 16.04. to create two partition one is used for
root and another is used for home and also create no partition for swap.
8
⊘ This is a preview!⊘
Do you want full access?
Subscribe today to unlock all pages.

Trusted by 1+ million students worldwide

i) In order to create root partition, first select the free space and click on the plus icon
button. On settings of partition do the following configuration and click on the Ok button.
9
button. On settings of partition do the following configuration and click on the Ok button.
9
Paraphrase This Document
Need a fresh take? Get an instant paraphrase of this document with our AI Paraphraser

The size is more than 20000 MB.
The type of new partition is Primary.
The location for partition is beginning.
Journaling file system uses the EXIT4=command.
=/ used for mount point.
j) For creation of home partition use the same step as described in above. The free space
left is used for home partition.
10
The type of new partition is Primary.
The location for partition is beginning.
Journaling file system uses the EXIT4=command.
=/ used for mount point.
j) For creation of home partition use the same step as described in above. The free space
left is used for home partition.
10

k) After finished then click the install button and process to installation.
The pop up box ask to swap space information and click continue button.
And also the next pop up boxes shows agree to change the committing disk.
And click continue to proceed the installation process.
11
The pop up box ask to swap space information and click continue button.
And also the next pop up boxes shows agree to change the committing disk.
And click continue to proceed the installation process.
11
⊘ This is a preview!⊘
Do you want full access?
Subscribe today to unlock all pages.

Trusted by 1+ million students worldwide
1 out of 19
Related Documents
Your All-in-One AI-Powered Toolkit for Academic Success.
+13062052269
info@desklib.com
Available 24*7 on WhatsApp / Email
Unlock your academic potential
Copyright © 2020–2025 A2Z Services. All Rights Reserved. Developed and managed by ZUCOL.


