Multimedia Project: Website Design and Introductory Video Creation
VerifiedAdded on 2024/04/26
|21
|1550
|359
Project
AI Summary
This multimedia project showcases the creation of a website and a video using various multimedia design methodologies. Stage 1 details the process of creating a video using Windows Movie Maker, including steps for adding titles, trimming video and audio, adding transitions, and ensuring synchronization and clarity. Stage 2 focuses on designing a website consisting of five web pages, utilizing HTML and CSS for styling and layout. The website includes a homepage with student details, pages for 'Likes' and 'Dislikes' with integrated images, a short embedded video, and a hobby page. The project emphasizes consistency in design and includes test cases to ensure functionality and integrity. The conclusion highlights the successful implementation of HTML, CSS, and Windows Movie Maker, demonstrating website creation and video editing skills. Desklib provides students access to similar projects and study resources.
Assignment 2- Introduction to Multimedia
Student Name
Student ID
Course Code
Student Name
Student ID
Course Code
Paraphrase This Document
Need a fresh take? Get an instant paraphrase of this document with our AI Paraphraser
Table of Contents
Project Overview...................................................................................................................................4
STAGE-1...............................................................................................................................................4
Test Cases..............................................................................................................................................8
STAGE-2...............................................................................................................................................9
Conclusion...........................................................................................................................................20
References...........................................................................................................................................21
List of Figures
Figure 1: Test case-1.............................................................................................................................7
Figure 2: Test Case-2.............................................................................................................................8
Figure 3: Test Case-3.............................................................................................................................8
Figure 4: Code1 of Index page............................................................................................................10
Figure 5: Code2 for index page...........................................................................................................10
Figure 6: Code3 for index page...........................................................................................................11
Figure 7: Output for Homepage...........................................................................................................11
Figure 8: Code1 for like page..............................................................................................................12
Figure 9: Code2 for likes page.............................................................................................................12
Figure 10: Code3 for likes page...........................................................................................................13
Figure 11: Code4 for likes page...........................................................................................................13
Figure 12: Output for Likes page.........................................................................................................14
Figure 13: Things I like page...............................................................................................................14
Figure 14: Code1 for dislike page........................................................................................................15
Figure 15: Code2 for dislike page........................................................................................................15
Figure 16: Code3 for dislike page........................................................................................................16
Figure 17: Code4 for dislike page........................................................................................................16
Figure 18: Things I don't like page......................................................................................................16
Figure 19: Code1 for short video.........................................................................................................17
Figure 20: Code2 for short video.........................................................................................................17
Figure 21: Code3 for short video.........................................................................................................18
Figure 22: Code1 for hobby page........................................................................................................18
Figure 23: Code2 for hobby page........................................................................................................19
Figure 24: Code 3 for hobby page.......................................................................................................19
⊘ This is a preview!⊘
Do you want full access?
Subscribe today to unlock all pages.

Trusted by 1+ million students worldwide
Project Overview
Multimedia design is the creative way to represent forms of information. Most of the
interactive applications like website use multimedia design to integrate different forms of
media. Illustrations, animations and advanced imaging are all a part of the multimedia design.
This assignment will describe the website creation steps and the multimedia design
methodologies that can be used to create a video. An appropriate software tool like Windows
Movie make will going to be used to create short animations. The report consists of two
stages; in stage-1, the procedure to design video will be discussed. Stage-2 will describe the
website that will be designed to represent student’s details.
STAGE-1
In this stage, I have a created a video that will display the registration number. Requirements
for designing video are-
Title screen that should display student number, student name course code and full
name of lecturer
Duration for the display of each element on the screen should be same
Required details have to displayed in single only
Spoken digits have to be used when the registration number will be displayed on the
screen
The digits and sound has to be clear and accurate
Credits should also be displayed on the screen of video listing all the contributors of
the assignment
Use movie maker to create this video
Save the created video file in the mp4 format
Steps followed to create the video-
Step-1 I have downloaded windows movie maker from filehippo.com
Paraphrase This Document
Need a fresh take? Get an instant paraphrase of this document with our AI Paraphraser
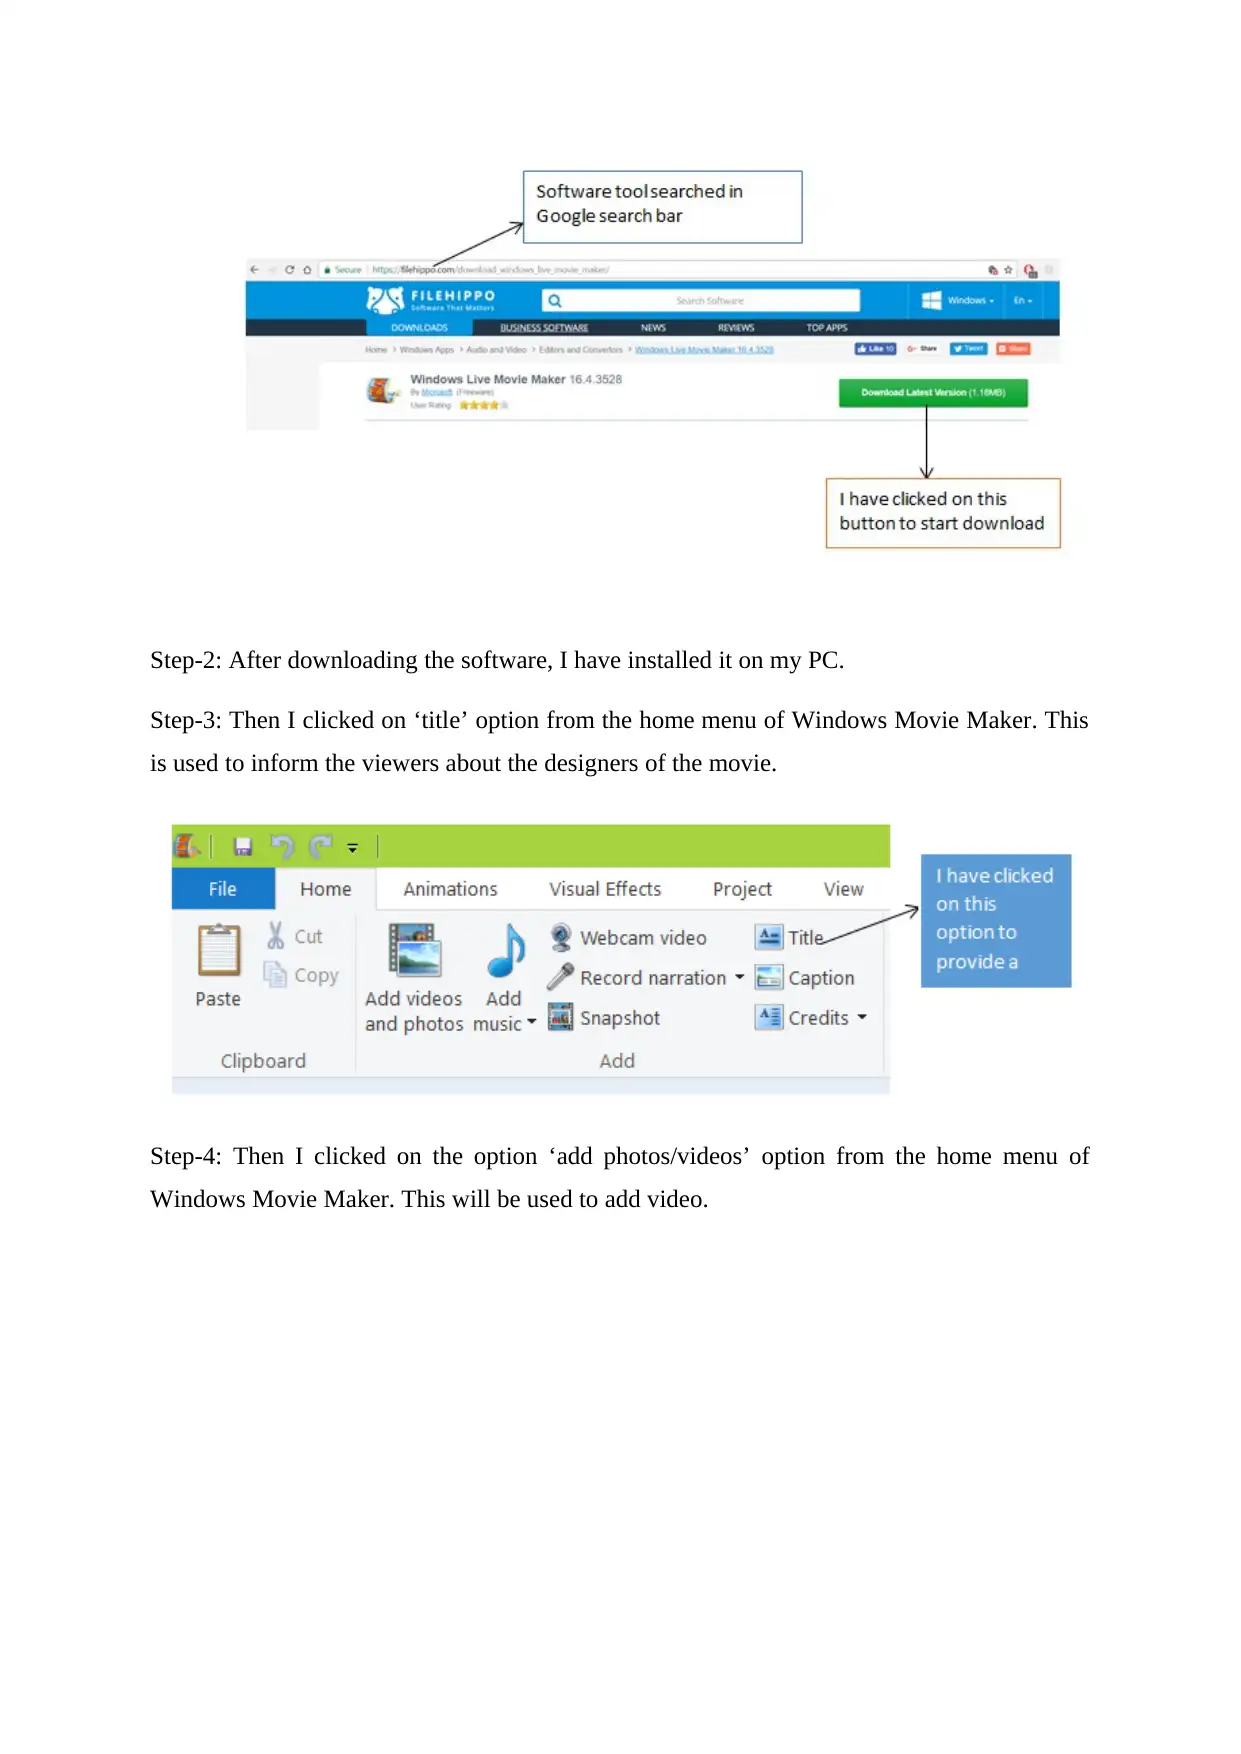
Step-2: After downloading the software, I have installed it on my PC.
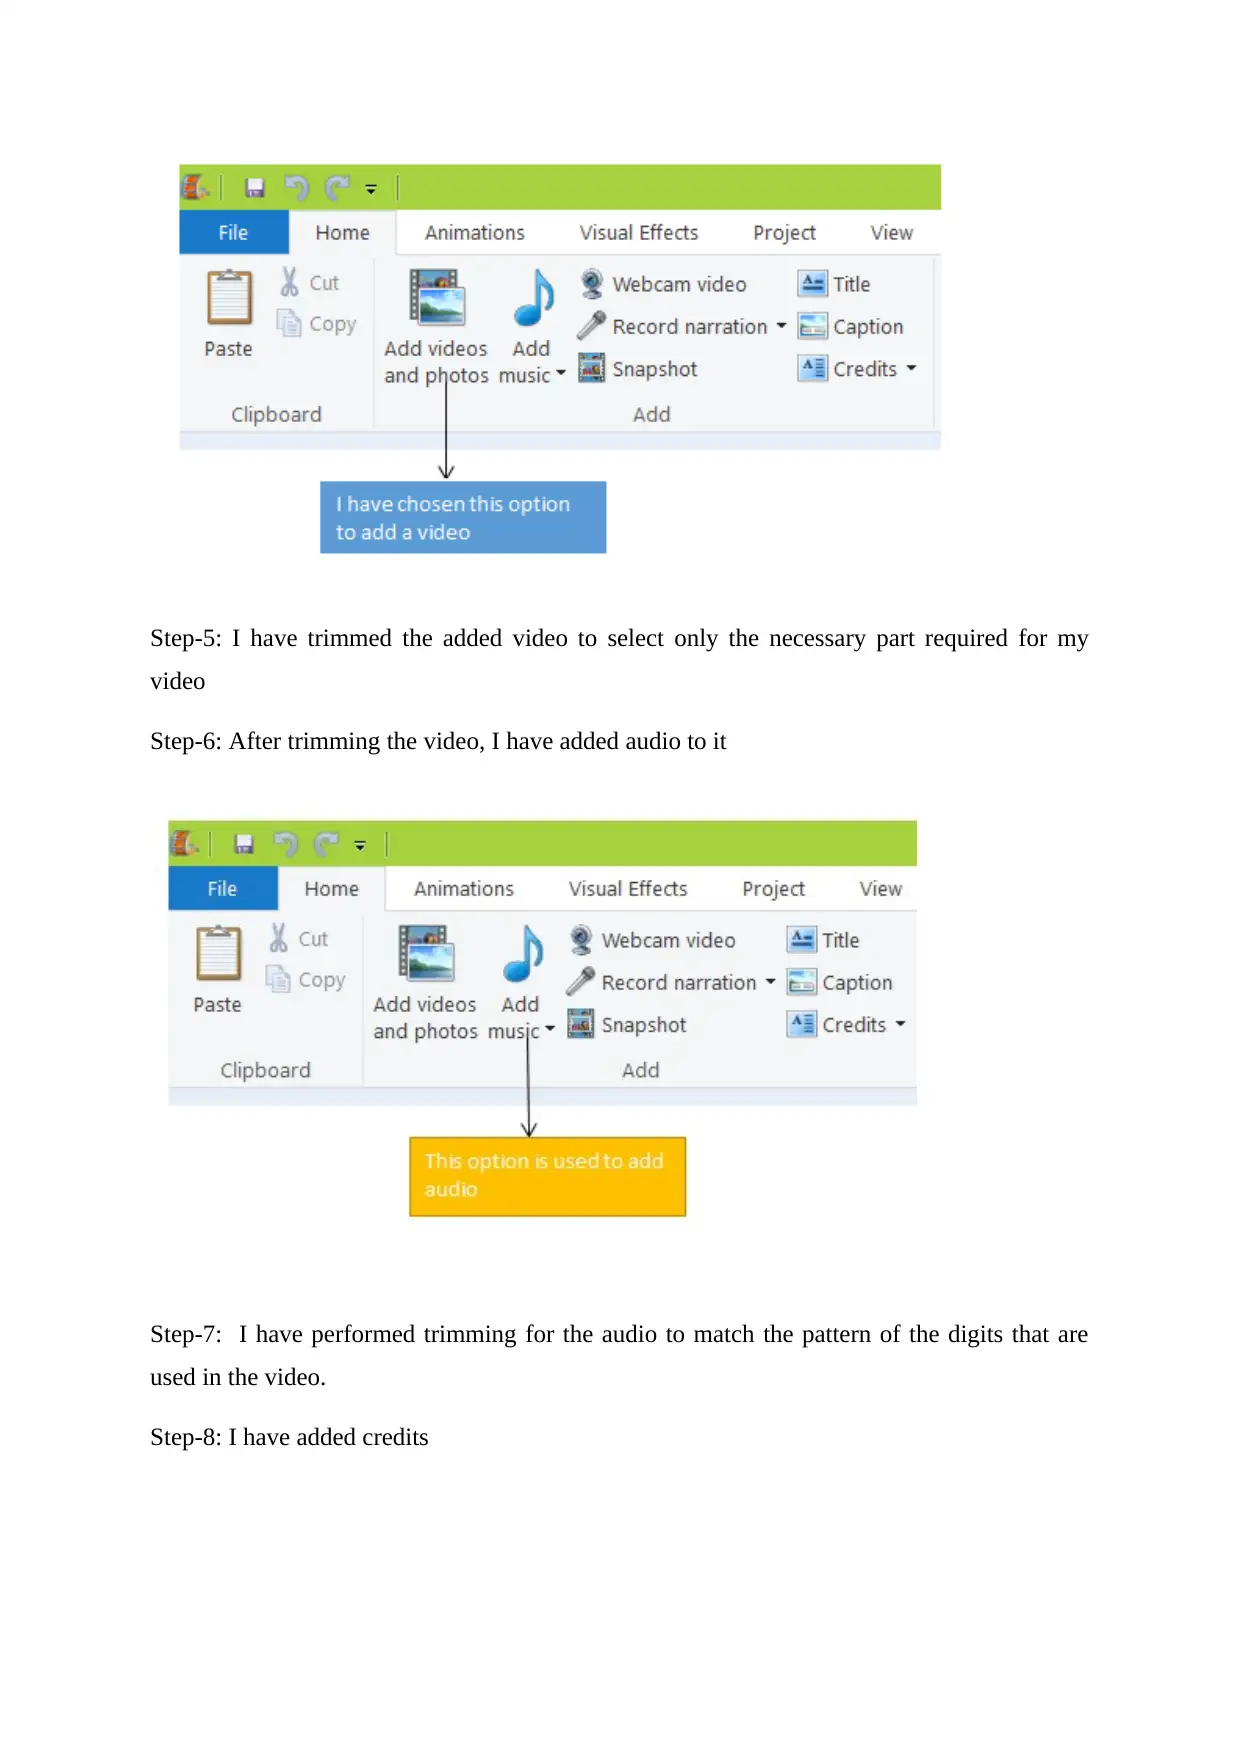
Step-3: Then I clicked on ‘title’ option from the home menu of Windows Movie Maker. This
is used to inform the viewers about the designers of the movie.
Step-4: Then I clicked on the option ‘add photos/videos’ option from the home menu of
Windows Movie Maker. This will be used to add video.
Step-3: Then I clicked on ‘title’ option from the home menu of Windows Movie Maker. This
is used to inform the viewers about the designers of the movie.
Step-4: Then I clicked on the option ‘add photos/videos’ option from the home menu of
Windows Movie Maker. This will be used to add video.
Step-5: I have trimmed the added video to select only the necessary part required for my
video
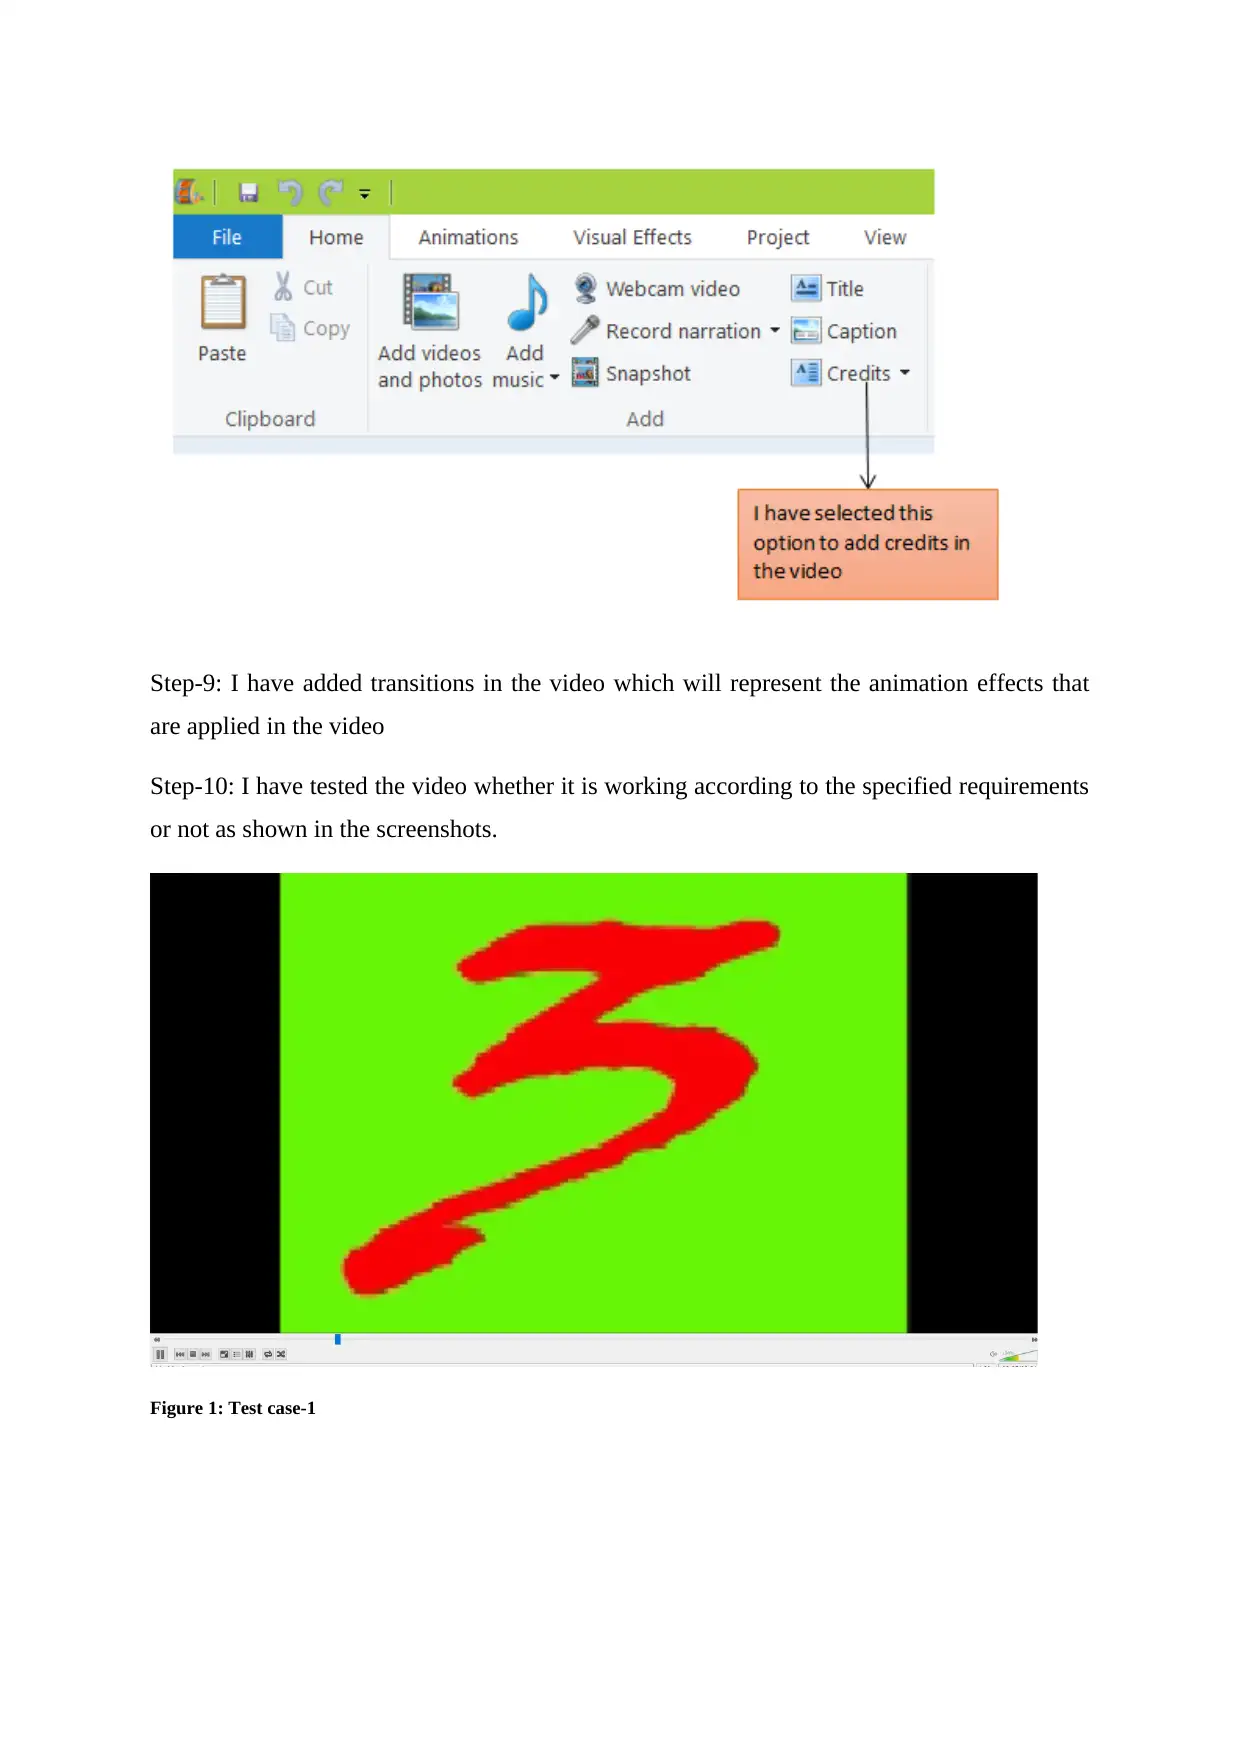
Step-6: After trimming the video, I have added audio to it
Step-7: I have performed trimming for the audio to match the pattern of the digits that are
used in the video.
Step-8: I have added credits
video
Step-6: After trimming the video, I have added audio to it
Step-7: I have performed trimming for the audio to match the pattern of the digits that are
used in the video.
Step-8: I have added credits
⊘ This is a preview!⊘
Do you want full access?
Subscribe today to unlock all pages.

Trusted by 1+ million students worldwide
Step-9: I have added transitions in the video which will represent the animation effects that
are applied in the video
Step-10: I have tested the video whether it is working according to the specified requirements
or not as shown in the screenshots.
Figure 1: Test case-1
are applied in the video
Step-10: I have tested the video whether it is working according to the specified requirements
or not as shown in the screenshots.
Figure 1: Test case-1
Paraphrase This Document
Need a fresh take? Get an instant paraphrase of this document with our AI Paraphraser
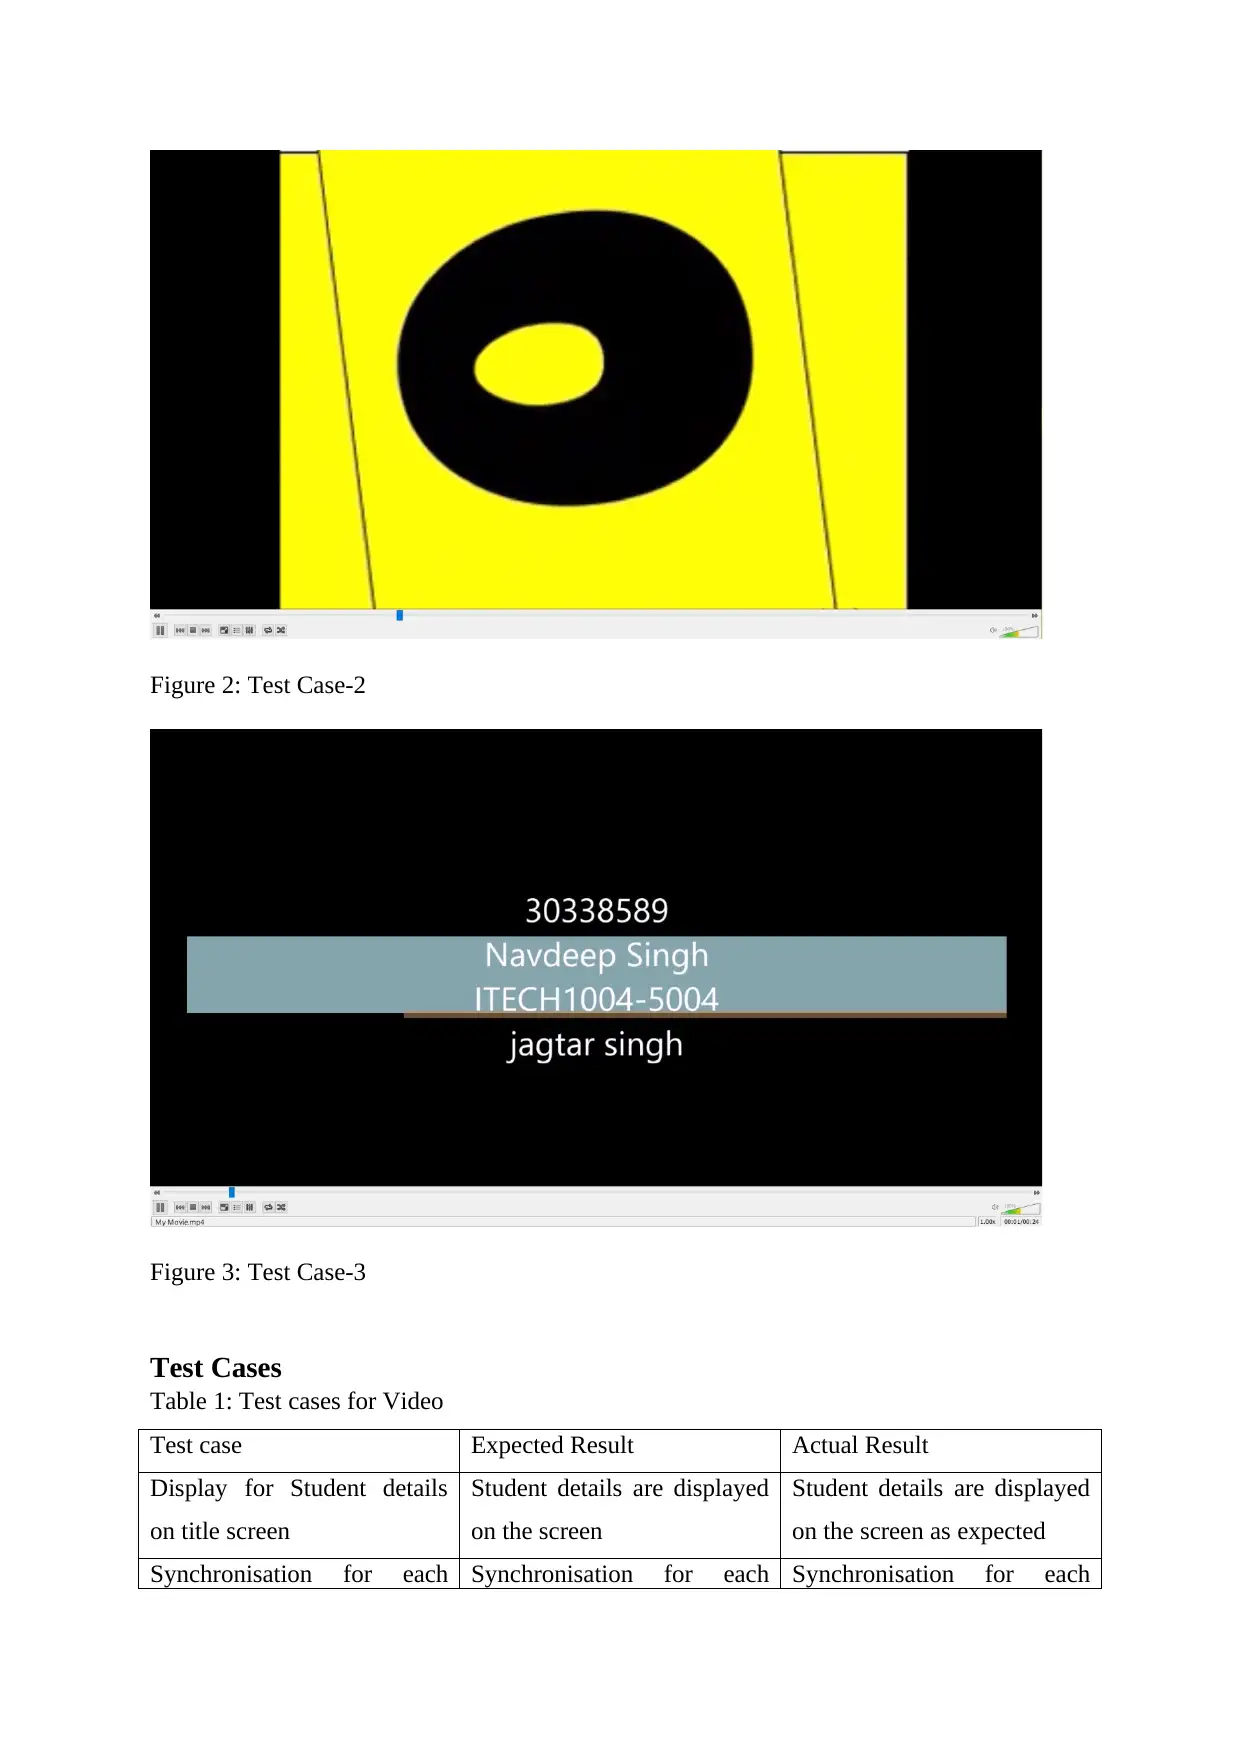
Figure 2: Test Case-2
Figure 3: Test Case-3
Test Cases
Table 1: Test cases for Video
Test case Expected Result Actual Result
Display for Student details
on title screen
Student details are displayed
on the screen
Student details are displayed
on the screen as expected
Synchronisation for each Synchronisation for each Synchronisation for each
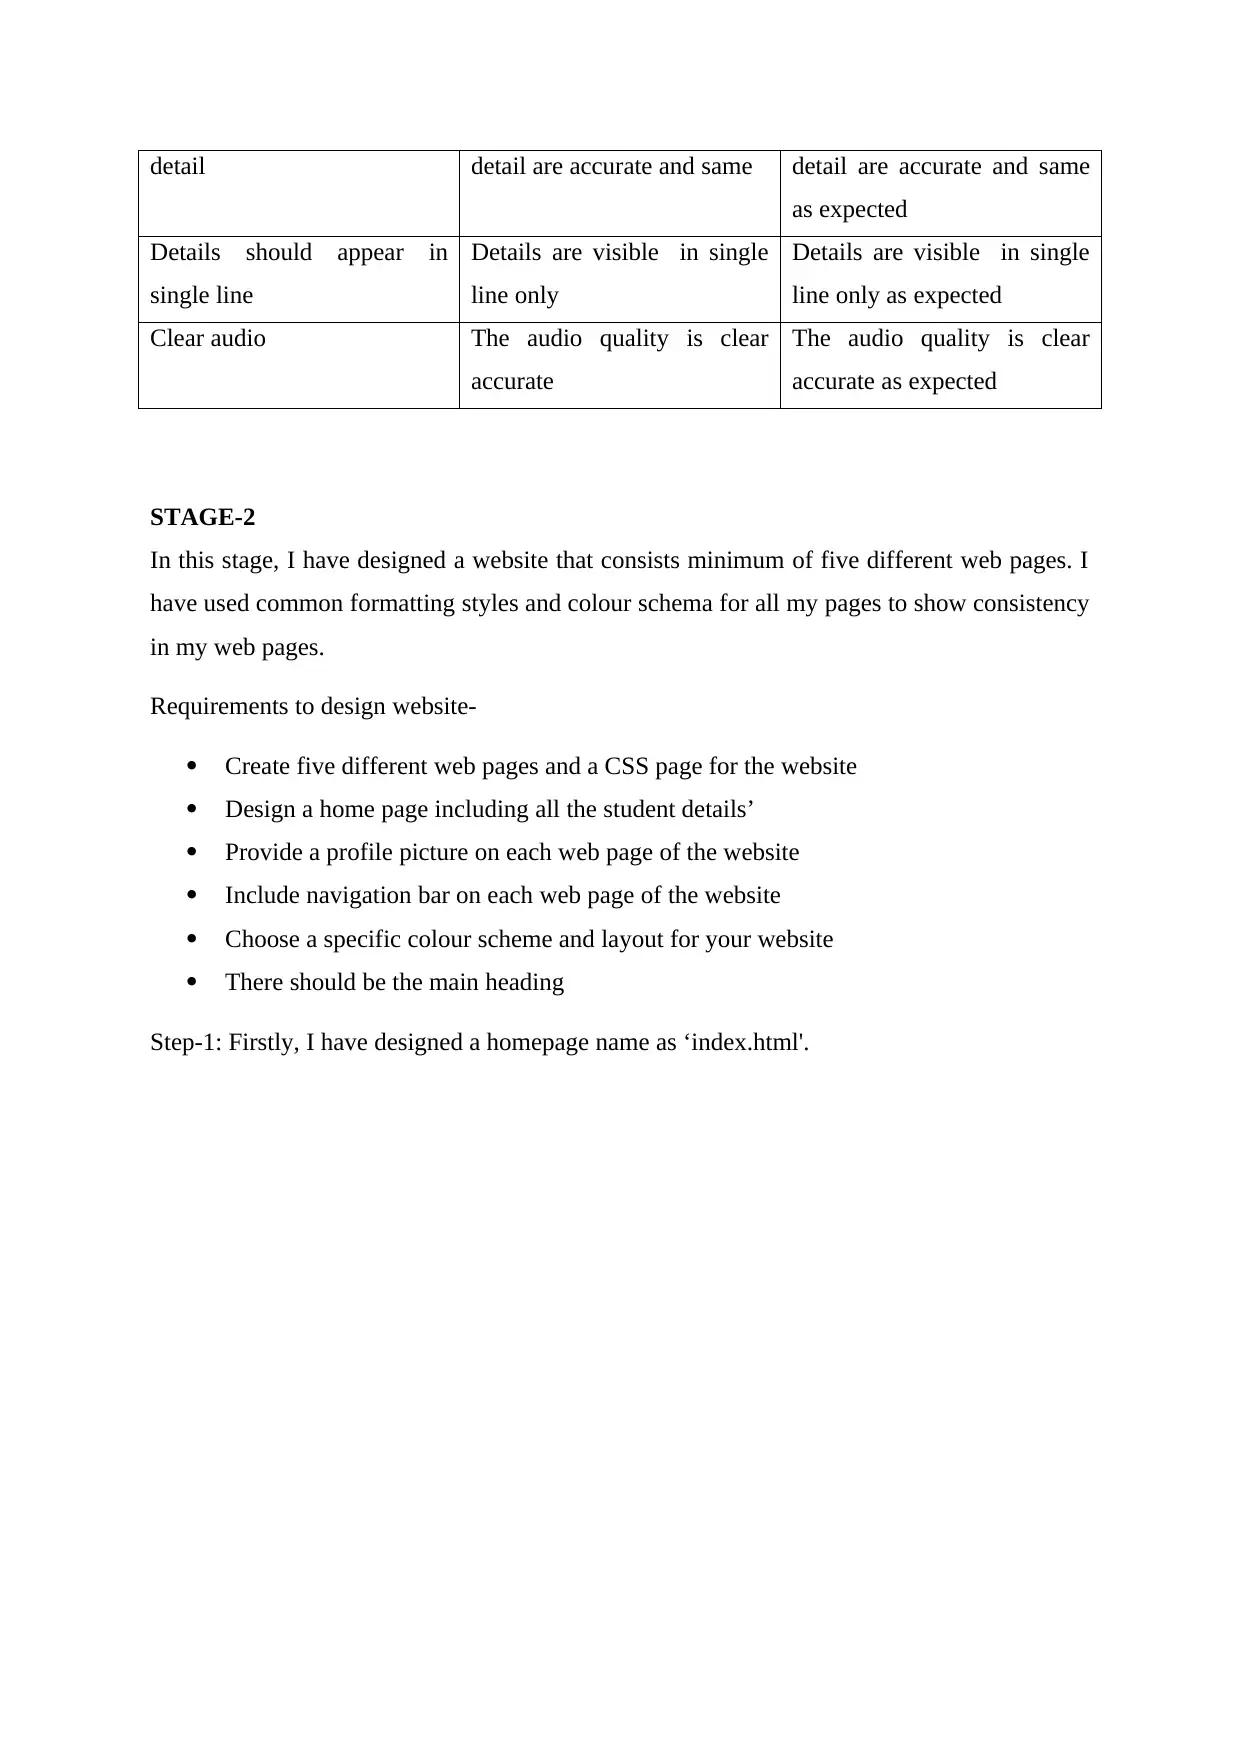
detail detail are accurate and same detail are accurate and same
as expected
Details should appear in
single line
Details are visible in single
line only
Details are visible in single
line only as expected
Clear audio The audio quality is clear
accurate
The audio quality is clear
accurate as expected
STAGE-2
In this stage, I have designed a website that consists minimum of five different web pages. I
have used common formatting styles and colour schema for all my pages to show consistency
in my web pages.
Requirements to design website-
Create five different web pages and a CSS page for the website
Design a home page including all the student details’
Provide a profile picture on each web page of the website
Include navigation bar on each web page of the website
Choose a specific colour scheme and layout for your website
There should be the main heading
Step-1: Firstly, I have designed a homepage name as ‘index.html'.
⊘ This is a preview!⊘
Do you want full access?
Subscribe today to unlock all pages.

Trusted by 1+ million students worldwide
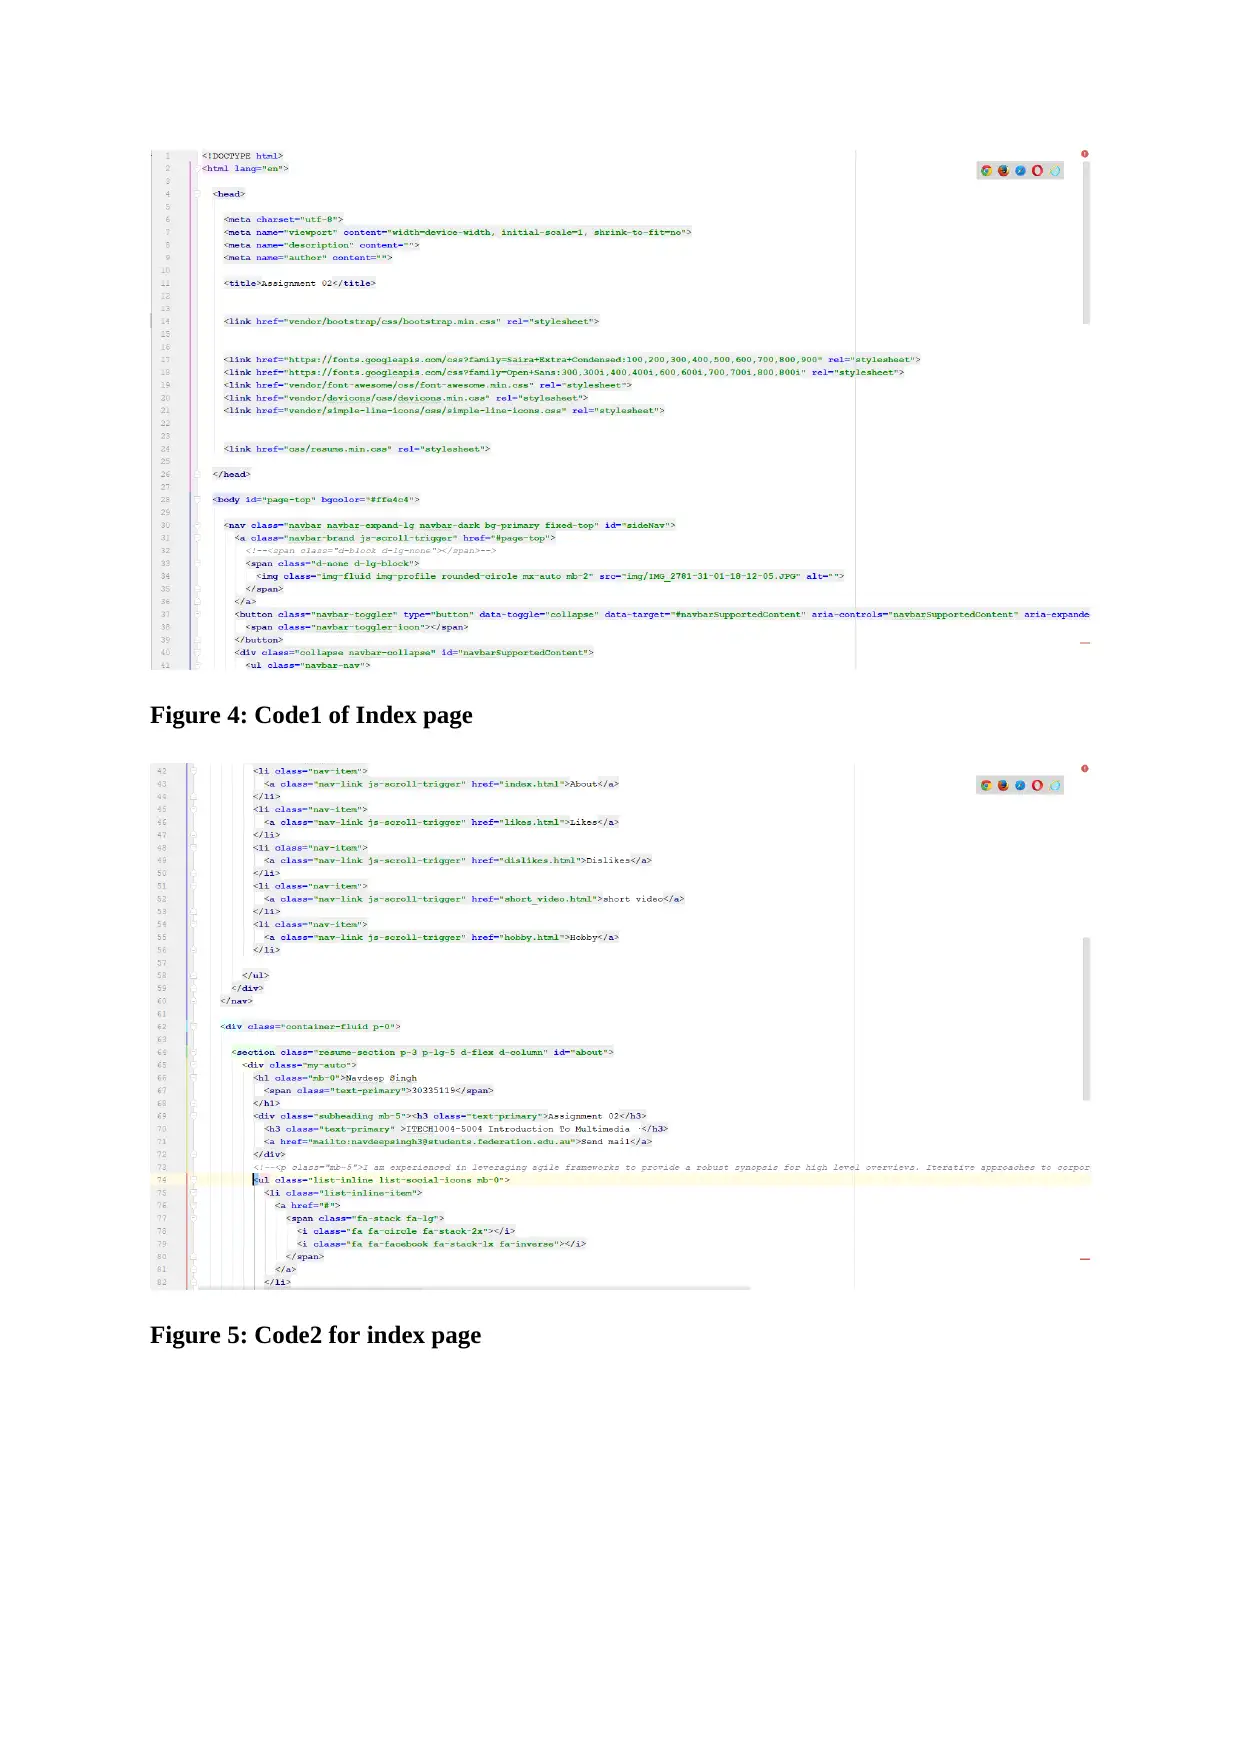
Figure 4: Code1 of Index page
Figure 5: Code2 for index page
Figure 5: Code2 for index page
Paraphrase This Document
Need a fresh take? Get an instant paraphrase of this document with our AI Paraphraser
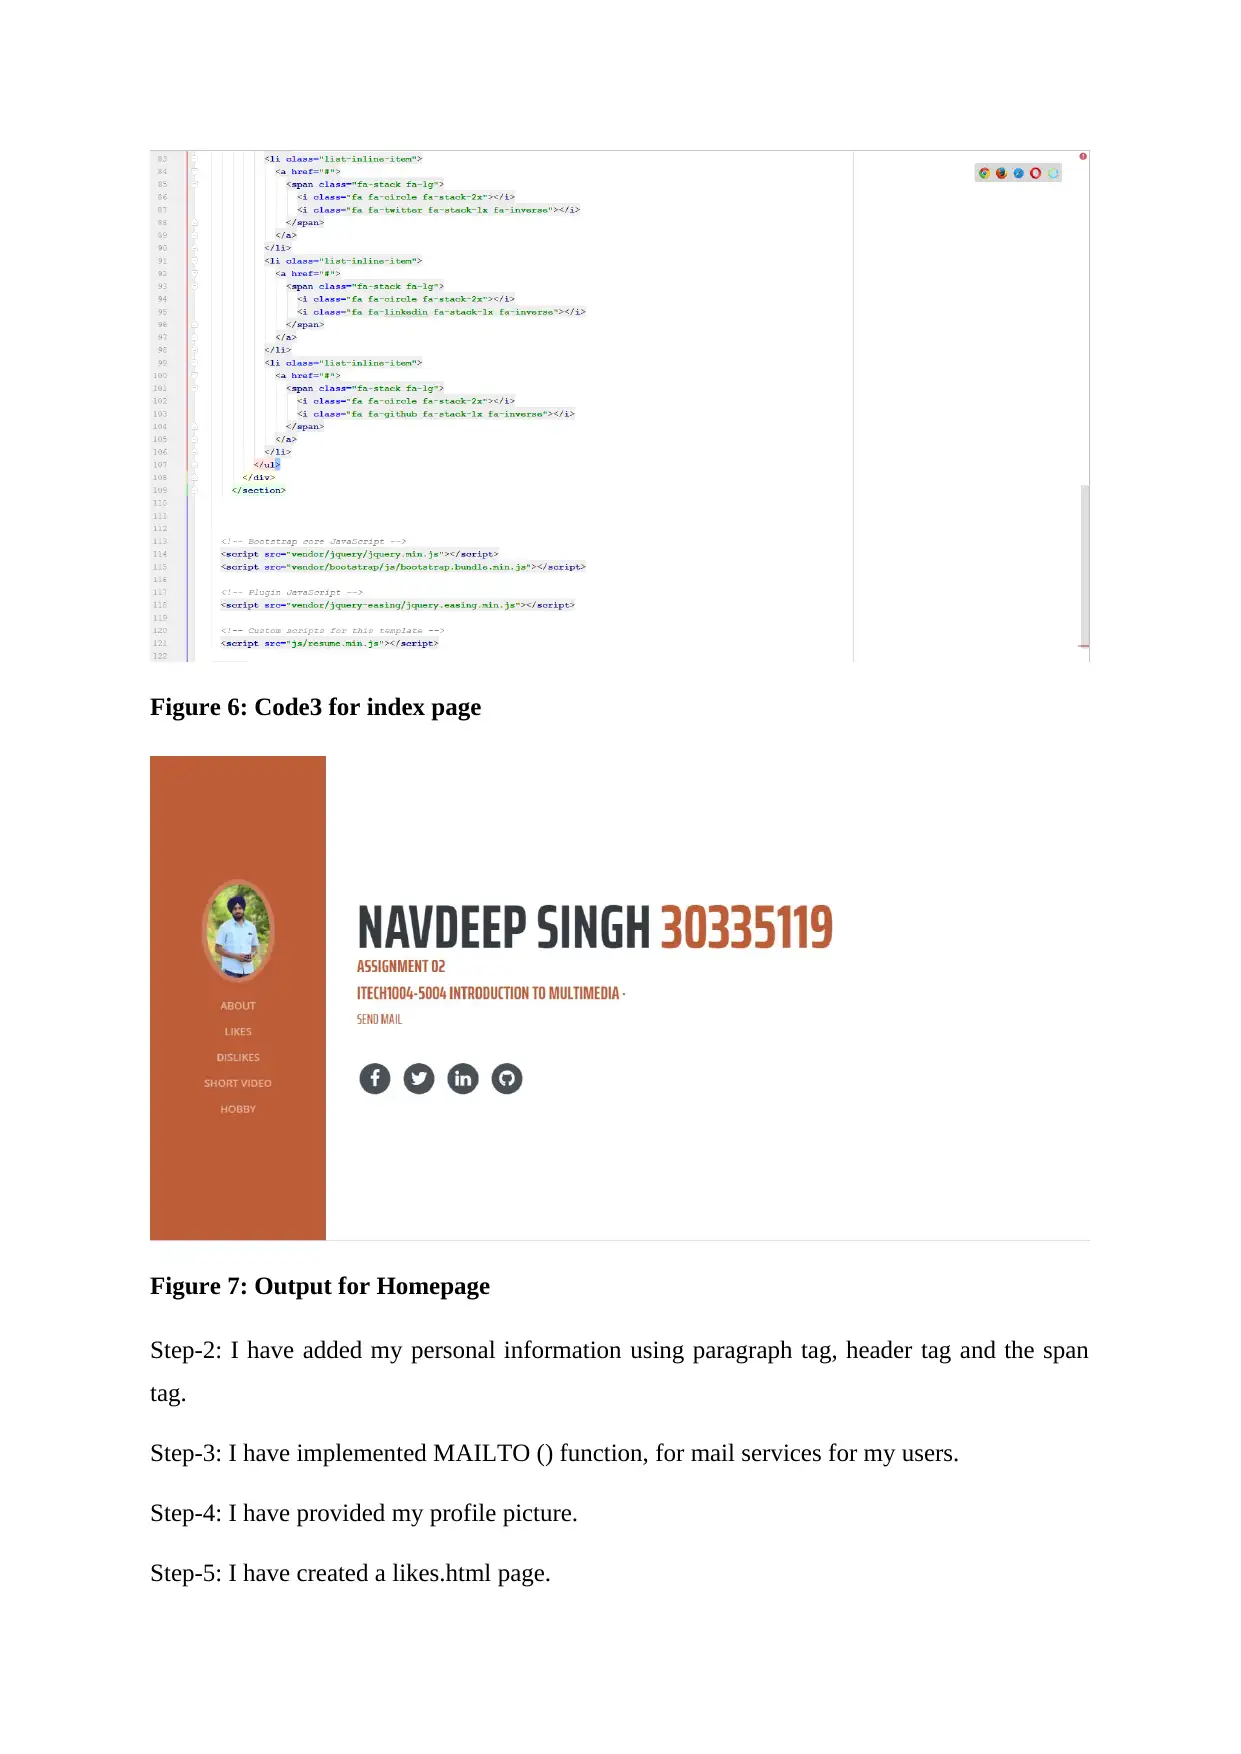
Figure 6: Code3 for index page
Figure 7: Output for Homepage
Step-2: I have added my personal information using paragraph tag, header tag and the span
tag.
Step-3: I have implemented MAILTO () function, for mail services for my users.
Step-4: I have provided my profile picture.
Step-5: I have created a likes.html page.
Figure 7: Output for Homepage
Step-2: I have added my personal information using paragraph tag, header tag and the span
tag.
Step-3: I have implemented MAILTO () function, for mail services for my users.
Step-4: I have provided my profile picture.
Step-5: I have created a likes.html page.
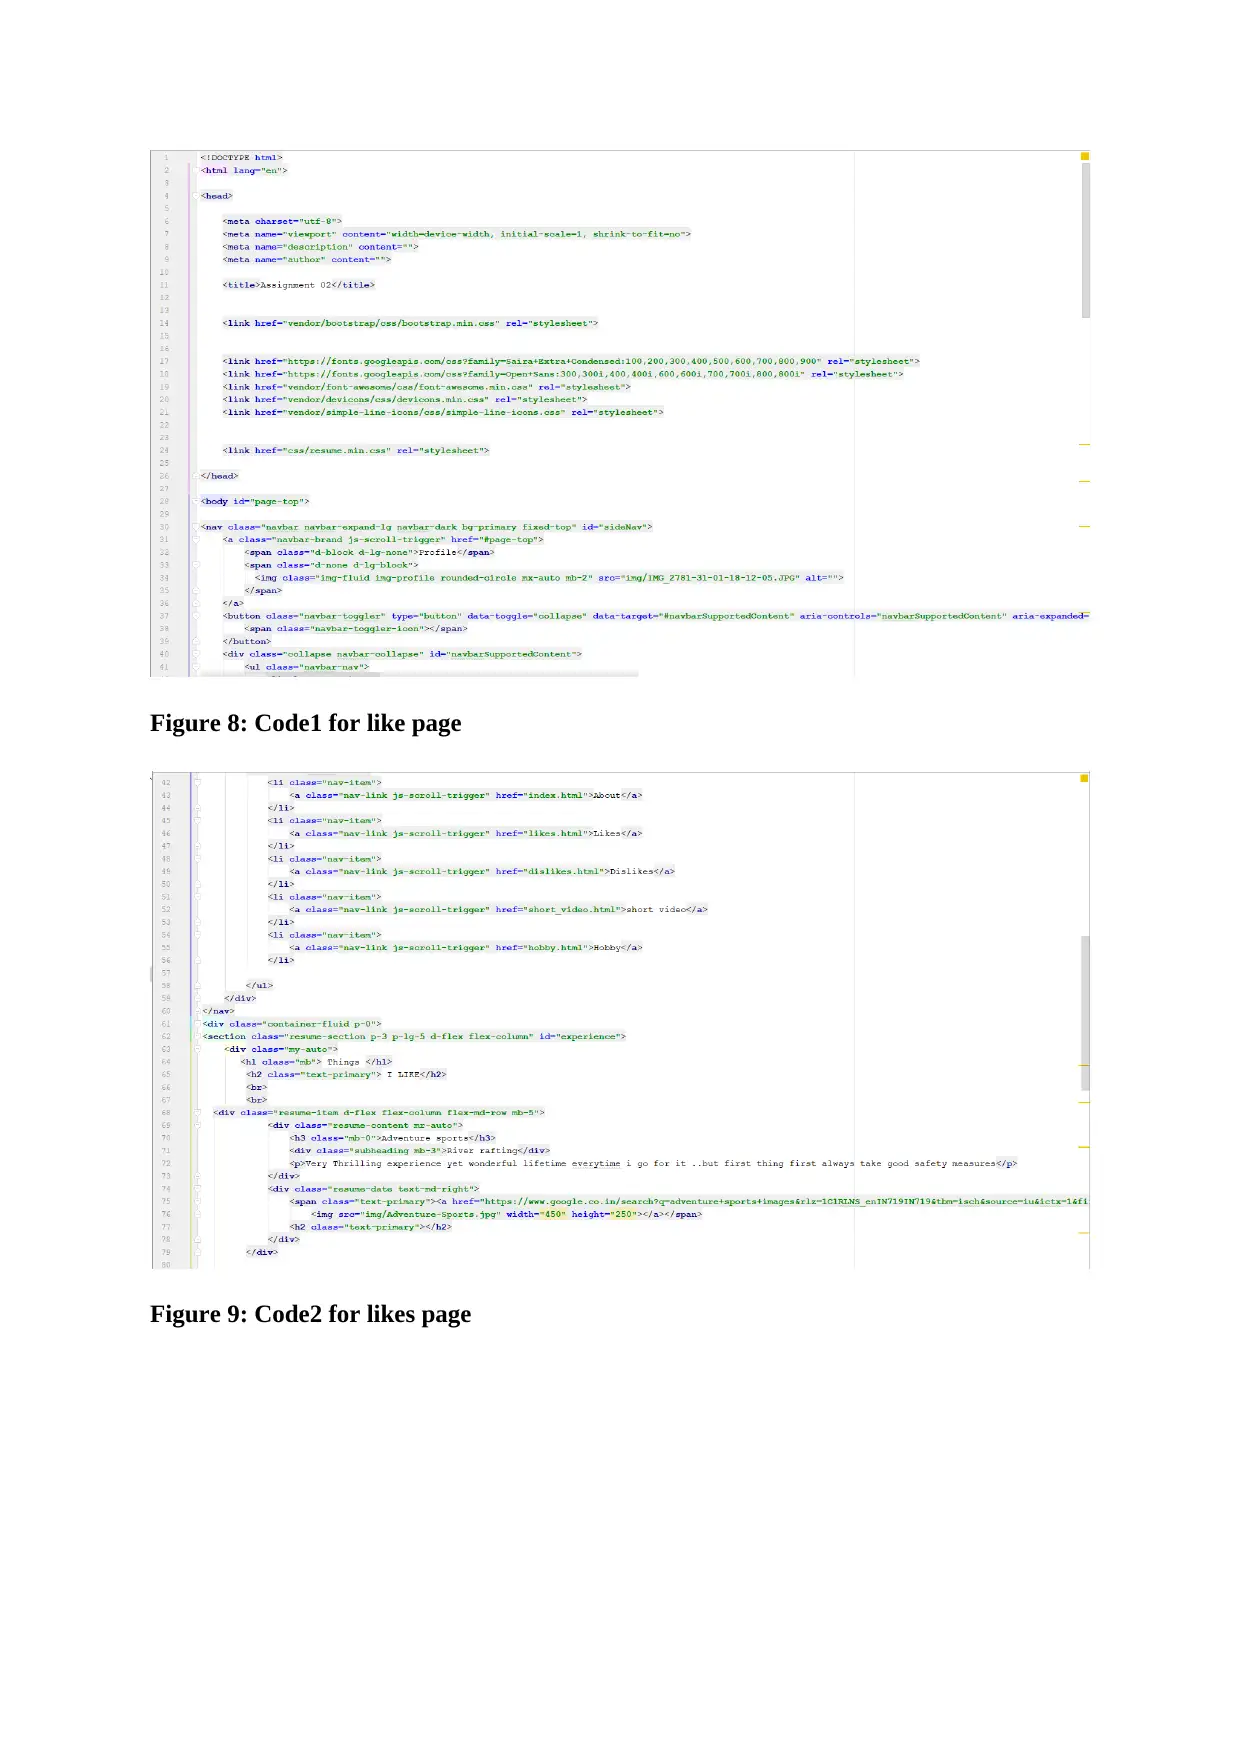
Figure 8: Code1 for like page
Figure 9: Code2 for likes page
Figure 9: Code2 for likes page
⊘ This is a preview!⊘
Do you want full access?
Subscribe today to unlock all pages.

Trusted by 1+ million students worldwide
1 out of 21
Related Documents
Your All-in-One AI-Powered Toolkit for Academic Success.
+13062052269
info@desklib.com
Available 24*7 on WhatsApp / Email
![[object Object]](/_next/static/media/star-bottom.7253800d.svg)
Unlock your academic potential
Copyright © 2020–2026 A2Z Services. All Rights Reserved. Developed and managed by ZUCOL.

