Assignment On Two Virtual Machine
VerifiedAdded on 2022/10/01
|27
|1850
|17
Assignment
AI Summary
Contribute Materials
Your contribution can guide someone’s learning journey. Share your
documents today.

linux 1
LINUX
My Name
Course Title
Professor name
Date
LINUX
My Name
Course Title
Professor name
Date
Secure Best Marks with AI Grader
Need help grading? Try our AI Grader for instant feedback on your assignments.
linux 2
Introduction
In this assignment, the two virtual machines used are from the ubuntu server 2018 and the
centOS7 platforms which were used to answer the different parts of the questions. The following
are the step by step procedures to finish different tasks;
Part 1: DNS and SSH server
To configure configure a fully functional DNS server in ubuntu, we used the bind module (PR
Newswire, 2014)
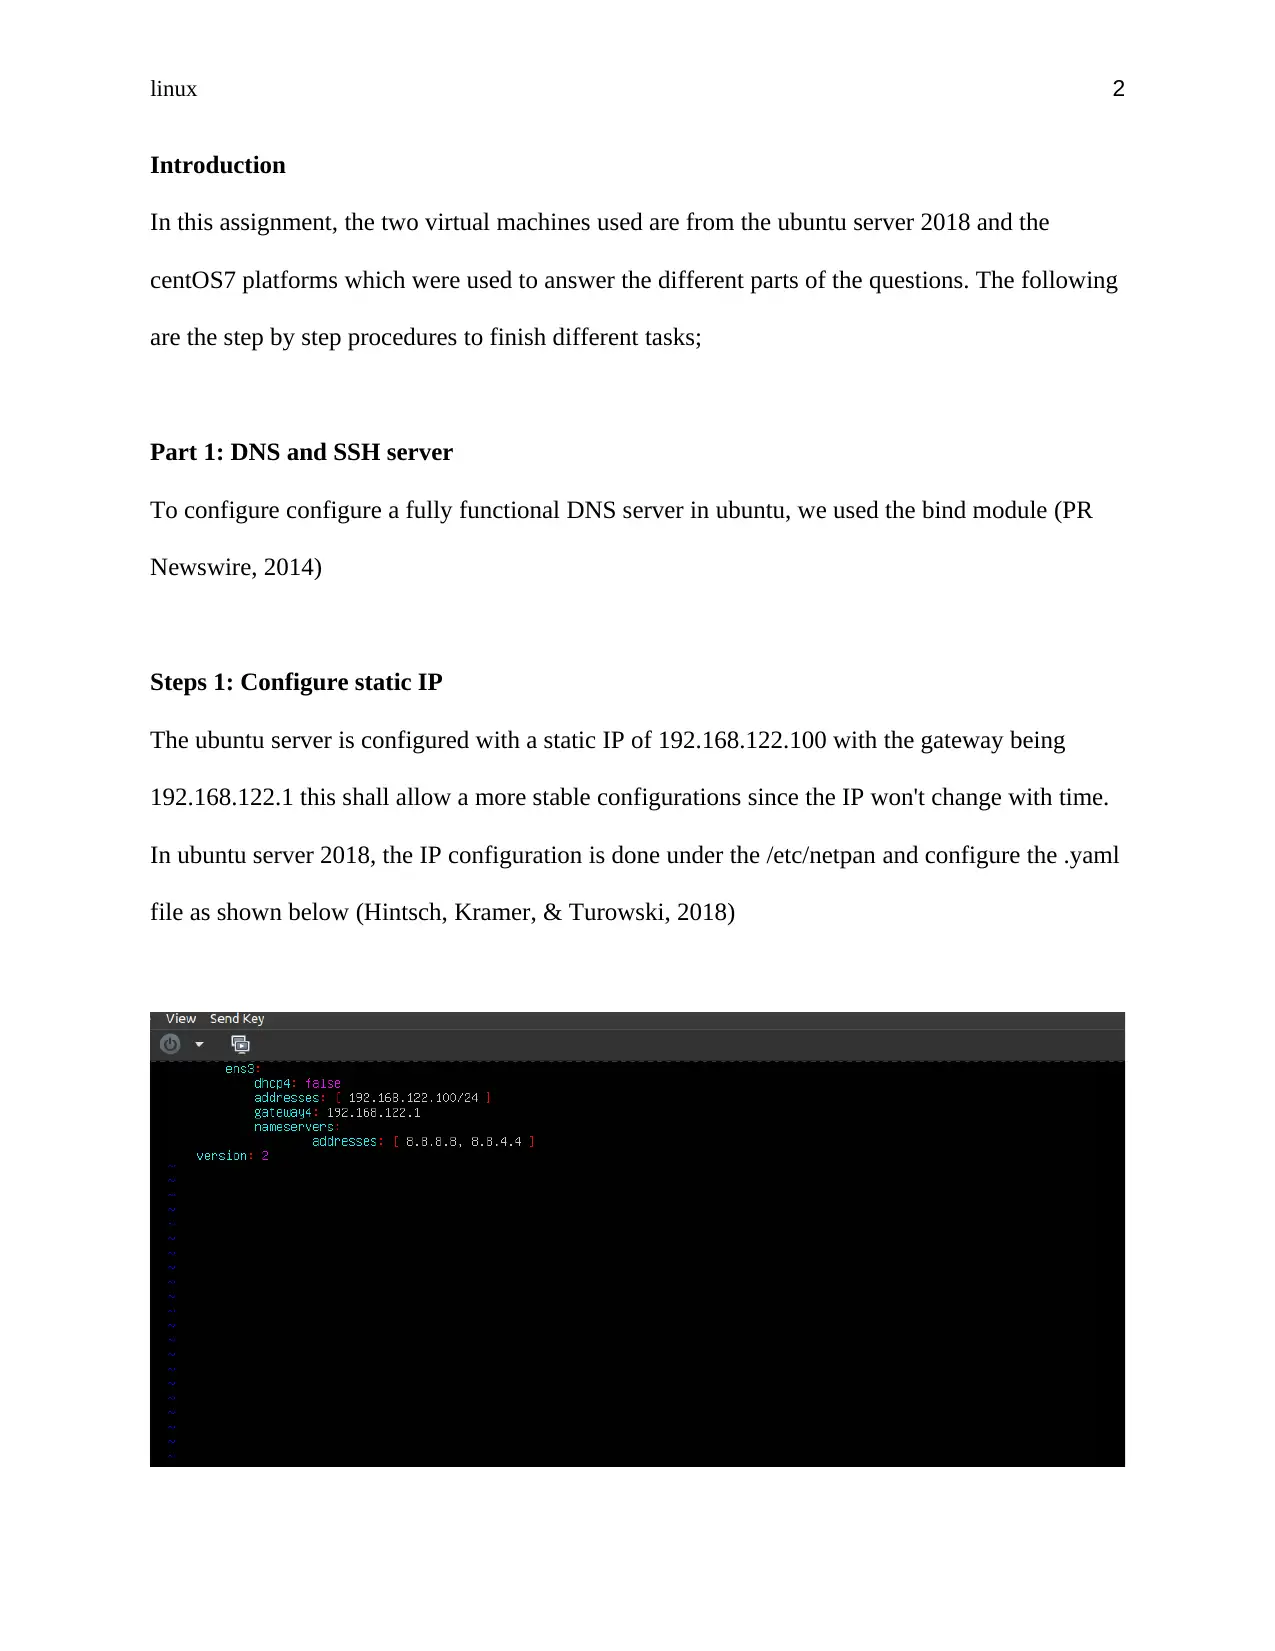
Steps 1: Configure static IP
The ubuntu server is configured with a static IP of 192.168.122.100 with the gateway being
192.168.122.1 this shall allow a more stable configurations since the IP won't change with time.
In ubuntu server 2018, the IP configuration is done under the /etc/netpan and configure the .yaml
file as shown below (Hintsch, Kramer, & Turowski, 2018)
Introduction
In this assignment, the two virtual machines used are from the ubuntu server 2018 and the
centOS7 platforms which were used to answer the different parts of the questions. The following
are the step by step procedures to finish different tasks;
Part 1: DNS and SSH server
To configure configure a fully functional DNS server in ubuntu, we used the bind module (PR
Newswire, 2014)
Steps 1: Configure static IP
The ubuntu server is configured with a static IP of 192.168.122.100 with the gateway being
192.168.122.1 this shall allow a more stable configurations since the IP won't change with time.
In ubuntu server 2018, the IP configuration is done under the /etc/netpan and configure the .yaml
file as shown below (Hintsch, Kramer, & Turowski, 2018)
linux 3
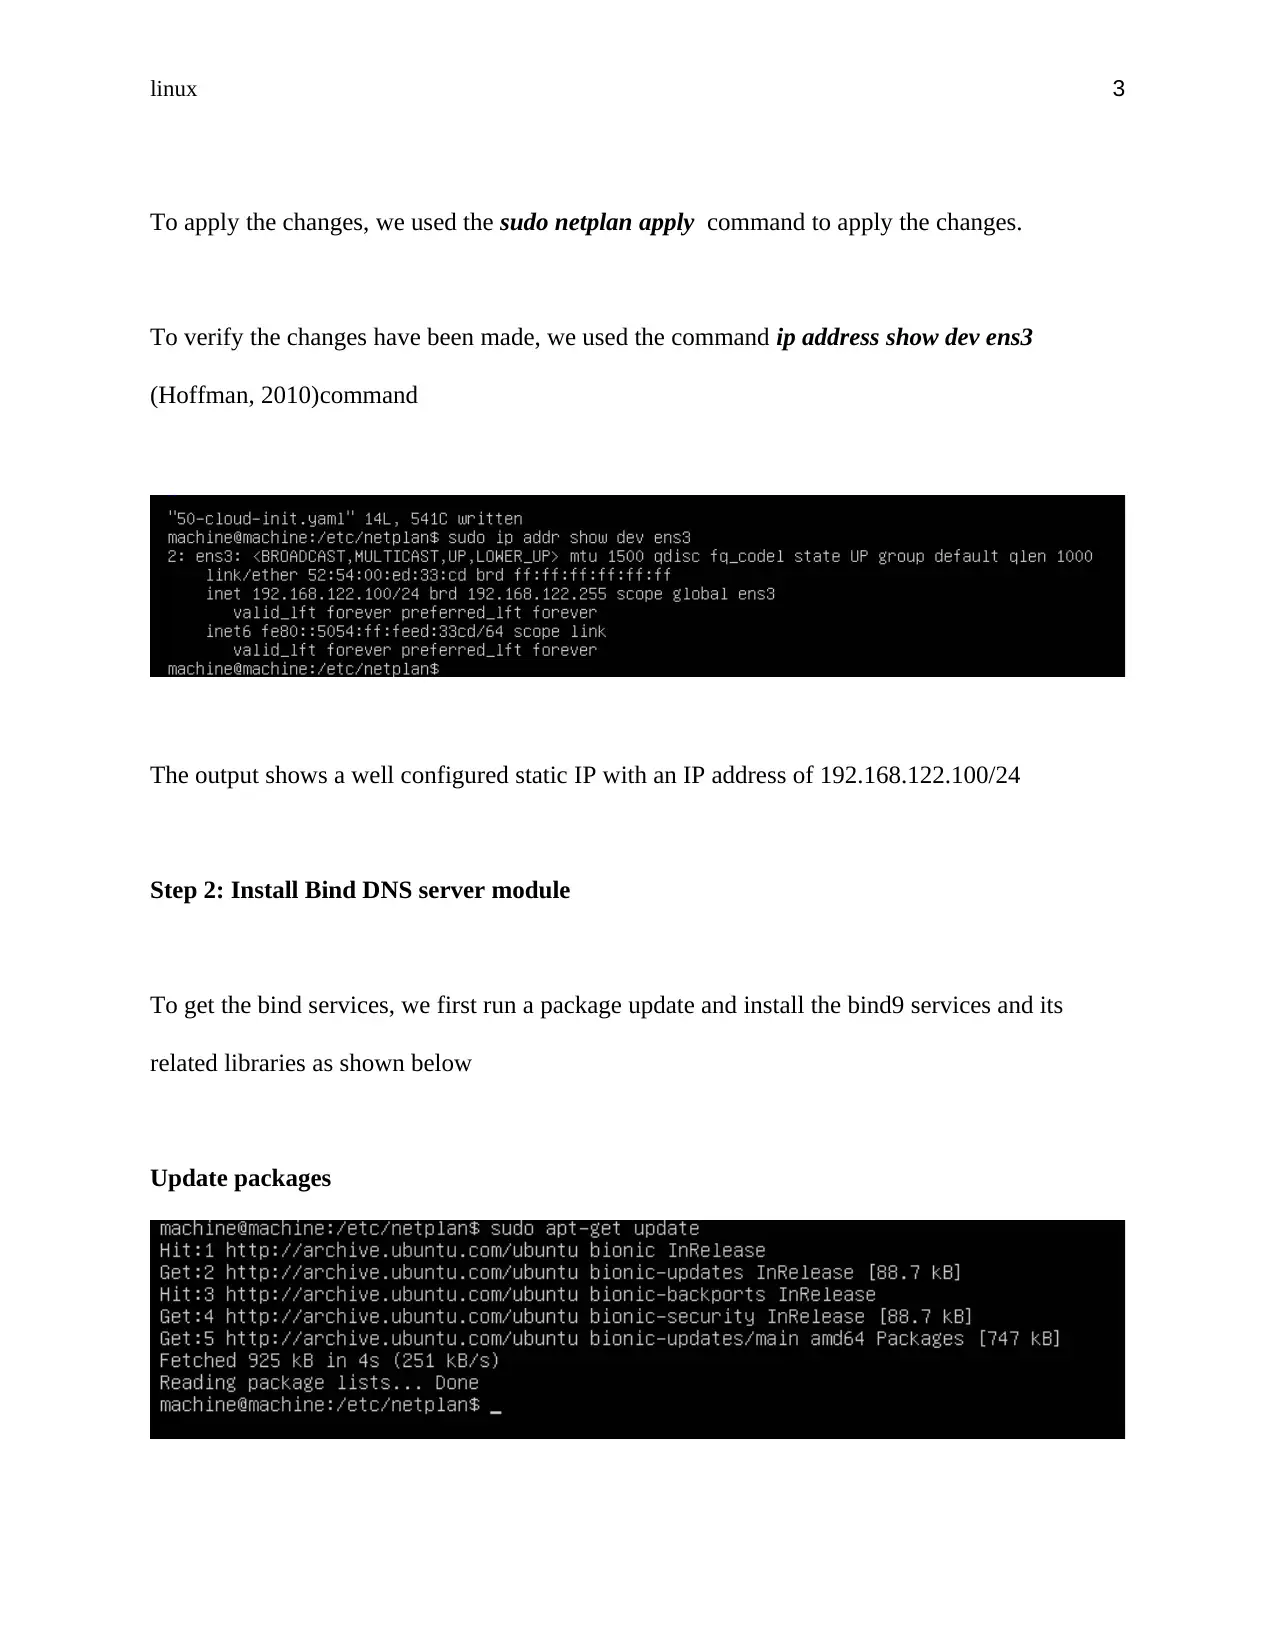
To apply the changes, we used the sudo netplan apply command to apply the changes.
To verify the changes have been made, we used the command ip address show dev ens3
(Hoffman, 2010)command
The output shows a well configured static IP with an IP address of 192.168.122.100/24
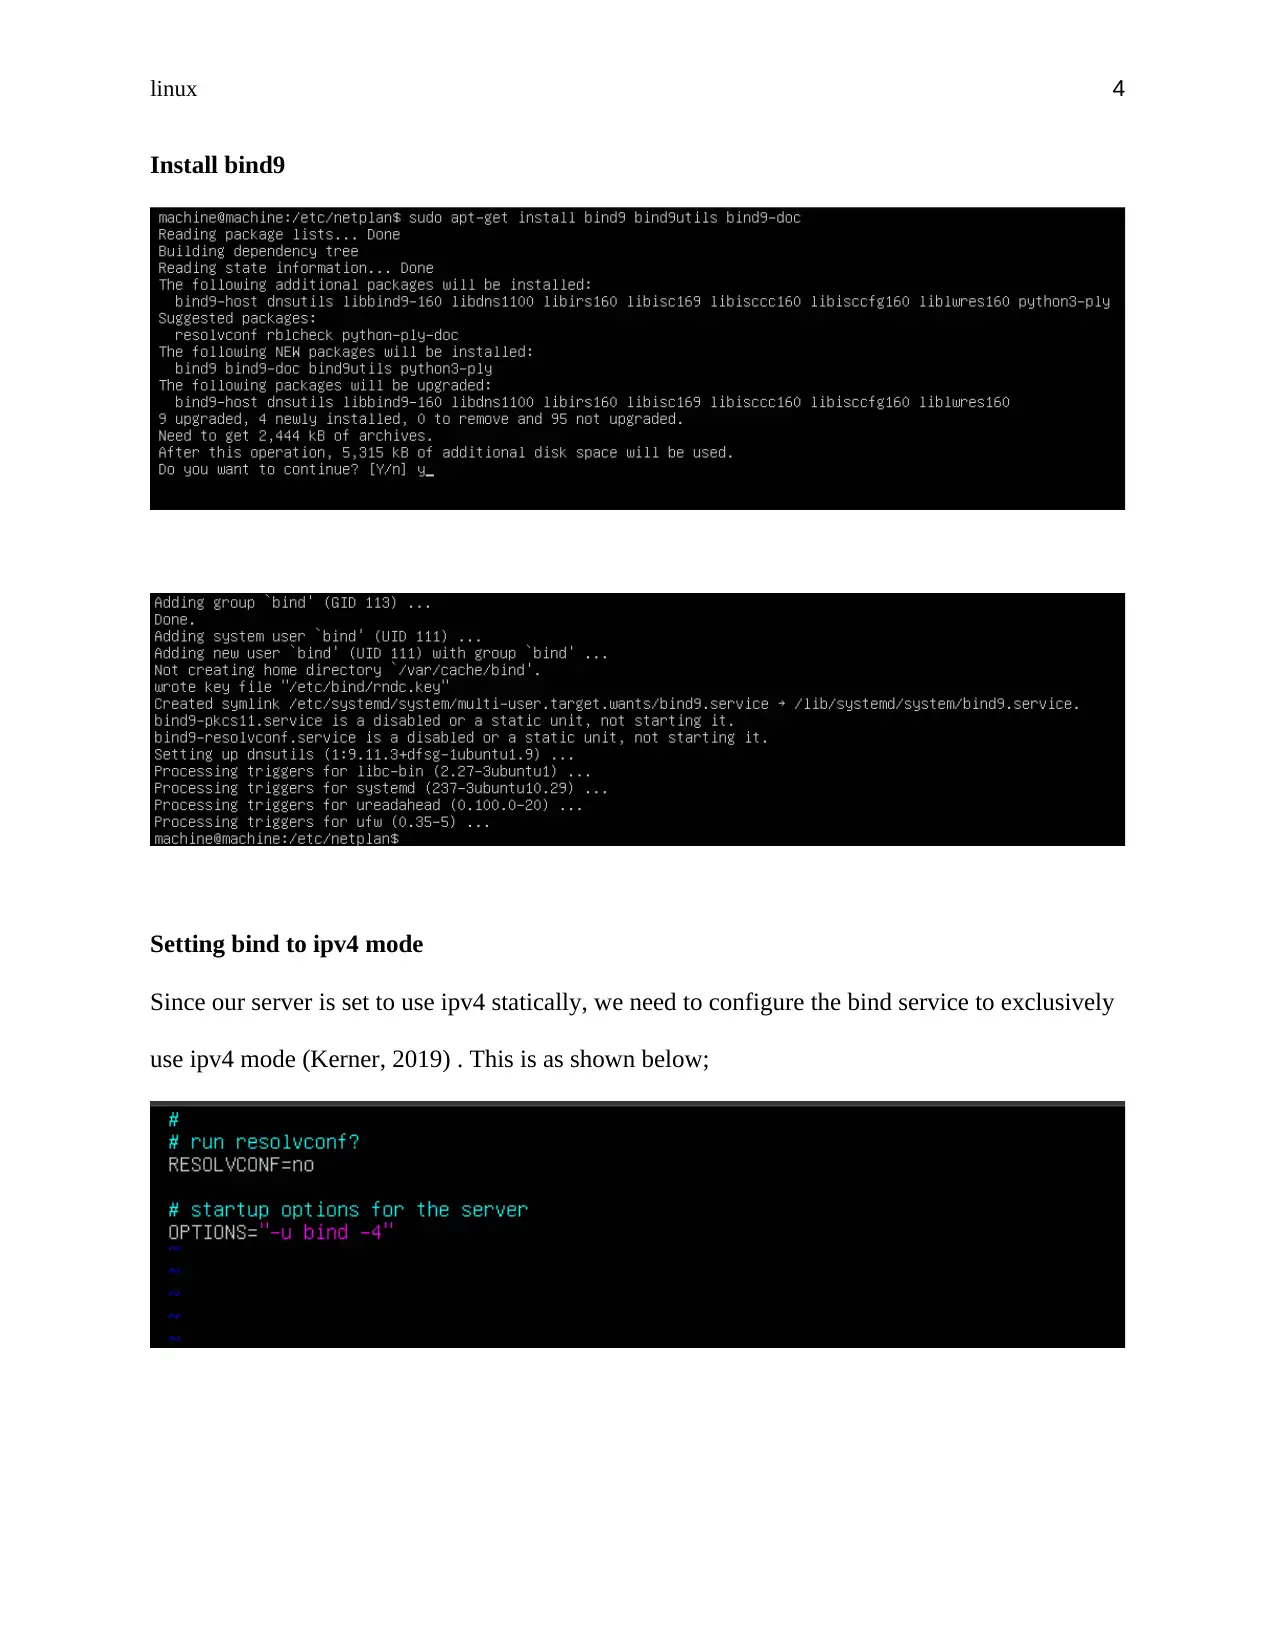
Step 2: Install Bind DNS server module
To get the bind services, we first run a package update and install the bind9 services and its
related libraries as shown below
Update packages
To apply the changes, we used the sudo netplan apply command to apply the changes.
To verify the changes have been made, we used the command ip address show dev ens3
(Hoffman, 2010)command
The output shows a well configured static IP with an IP address of 192.168.122.100/24
Step 2: Install Bind DNS server module
To get the bind services, we first run a package update and install the bind9 services and its
related libraries as shown below
Update packages
linux 4
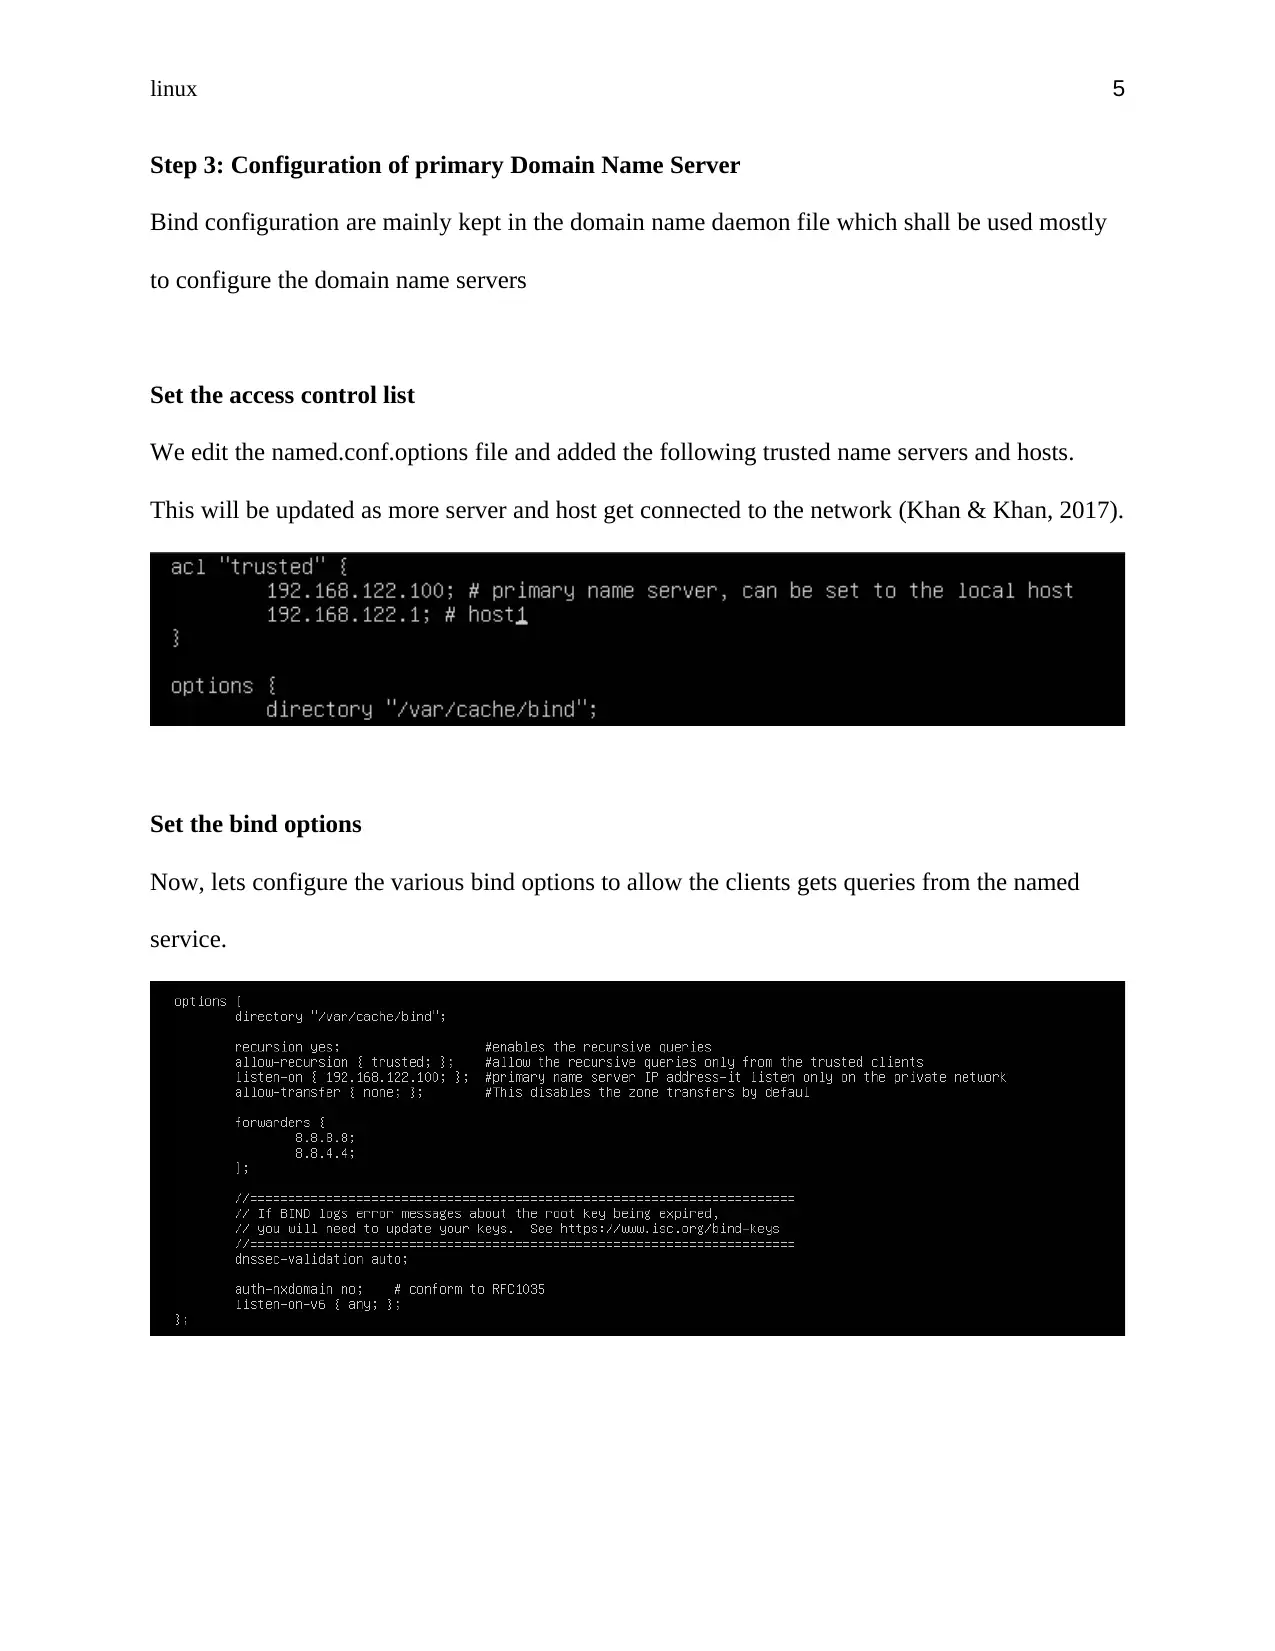
Install bind9
Setting bind to ipv4 mode
Since our server is set to use ipv4 statically, we need to configure the bind service to exclusively
use ipv4 mode (Kerner, 2019) . This is as shown below;
Install bind9
Setting bind to ipv4 mode
Since our server is set to use ipv4 statically, we need to configure the bind service to exclusively
use ipv4 mode (Kerner, 2019) . This is as shown below;
Secure Best Marks with AI Grader
Need help grading? Try our AI Grader for instant feedback on your assignments.
linux 5
Step 3: Configuration of primary Domain Name Server
Bind configuration are mainly kept in the domain name daemon file which shall be used mostly
to configure the domain name servers
Set the access control list
We edit the named.conf.options file and added the following trusted name servers and hosts.
This will be updated as more server and host get connected to the network (Khan & Khan, 2017).
Set the bind options
Now, lets configure the various bind options to allow the clients gets queries from the named
service.
linux 6
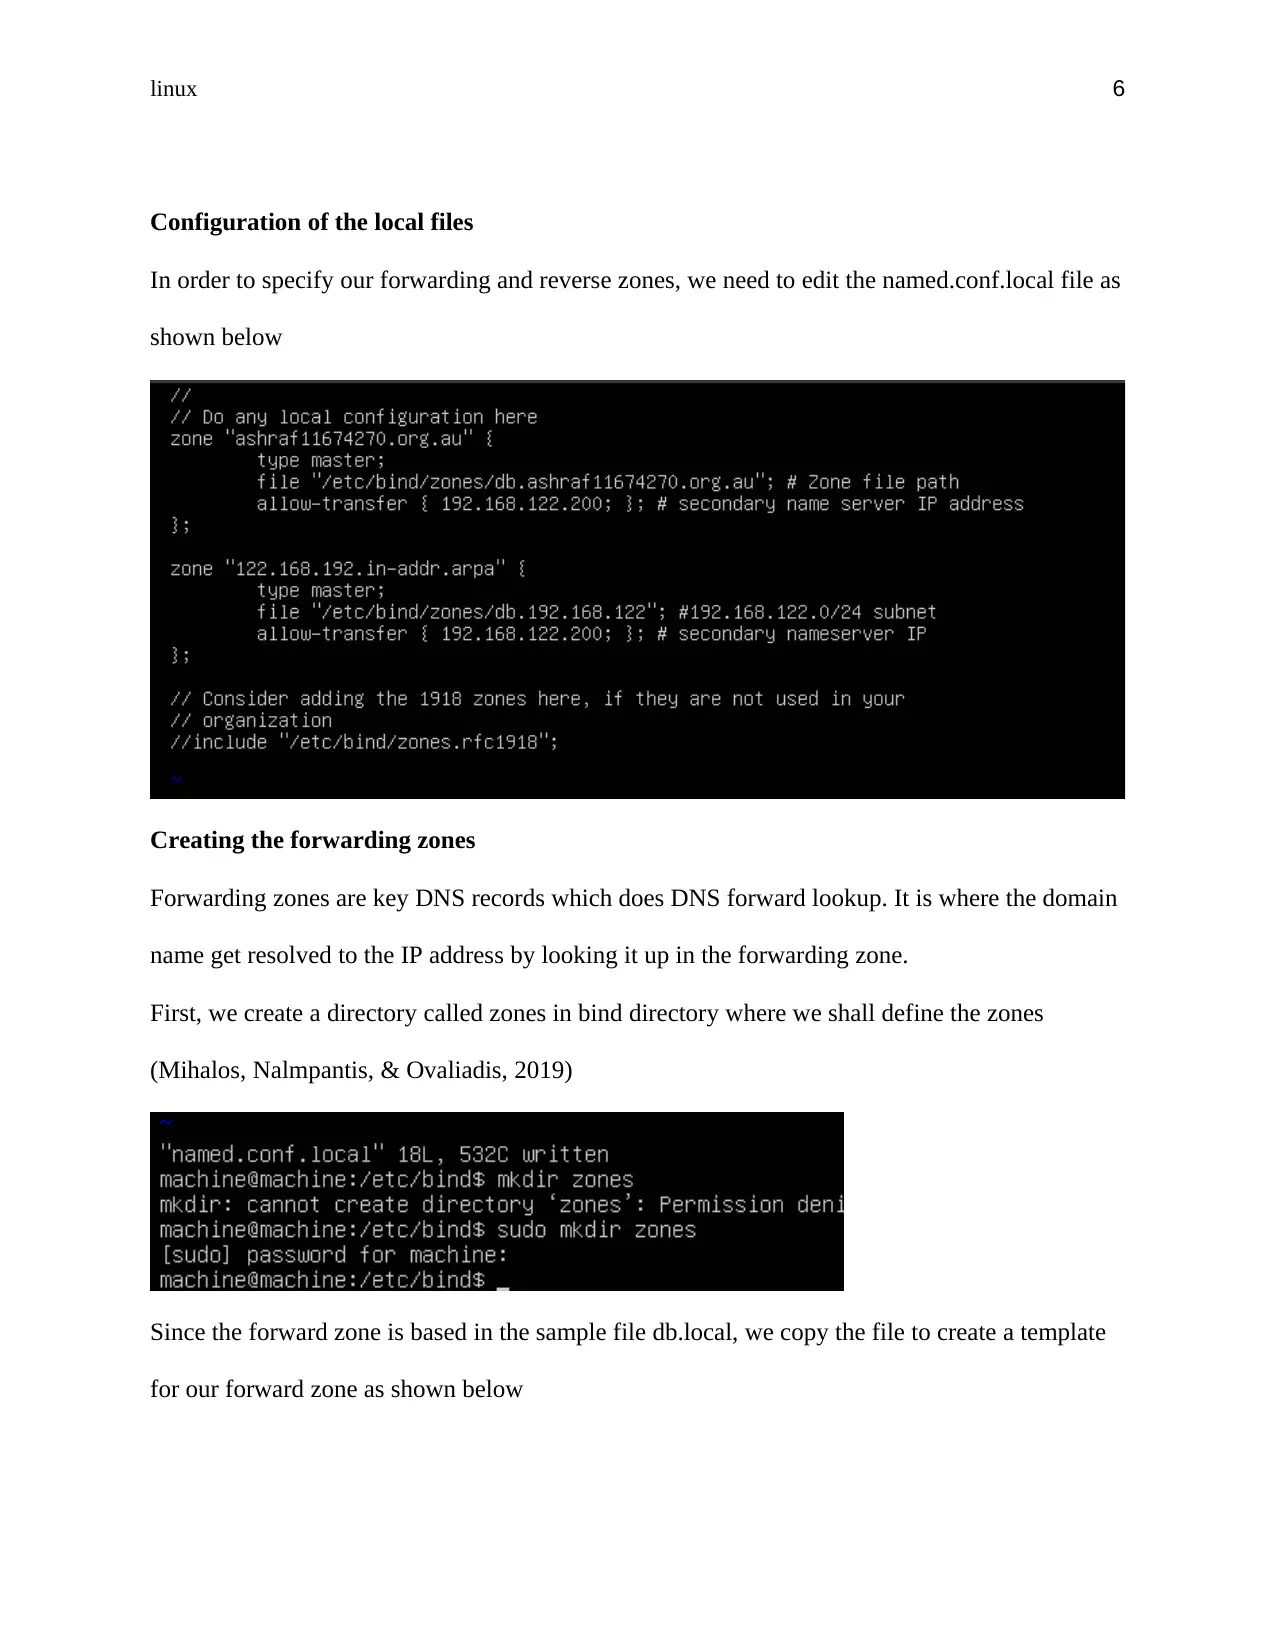
Configuration of the local files
In order to specify our forwarding and reverse zones, we need to edit the named.conf.local file as
shown below
Creating the forwarding zones
Forwarding zones are key DNS records which does DNS forward lookup. It is where the domain
name get resolved to the IP address by looking it up in the forwarding zone.
First, we create a directory called zones in bind directory where we shall define the zones
(Mihalos, Nalmpantis, & Ovaliadis, 2019)
Since the forward zone is based in the sample file db.local, we copy the file to create a template
for our forward zone as shown below
linux 7
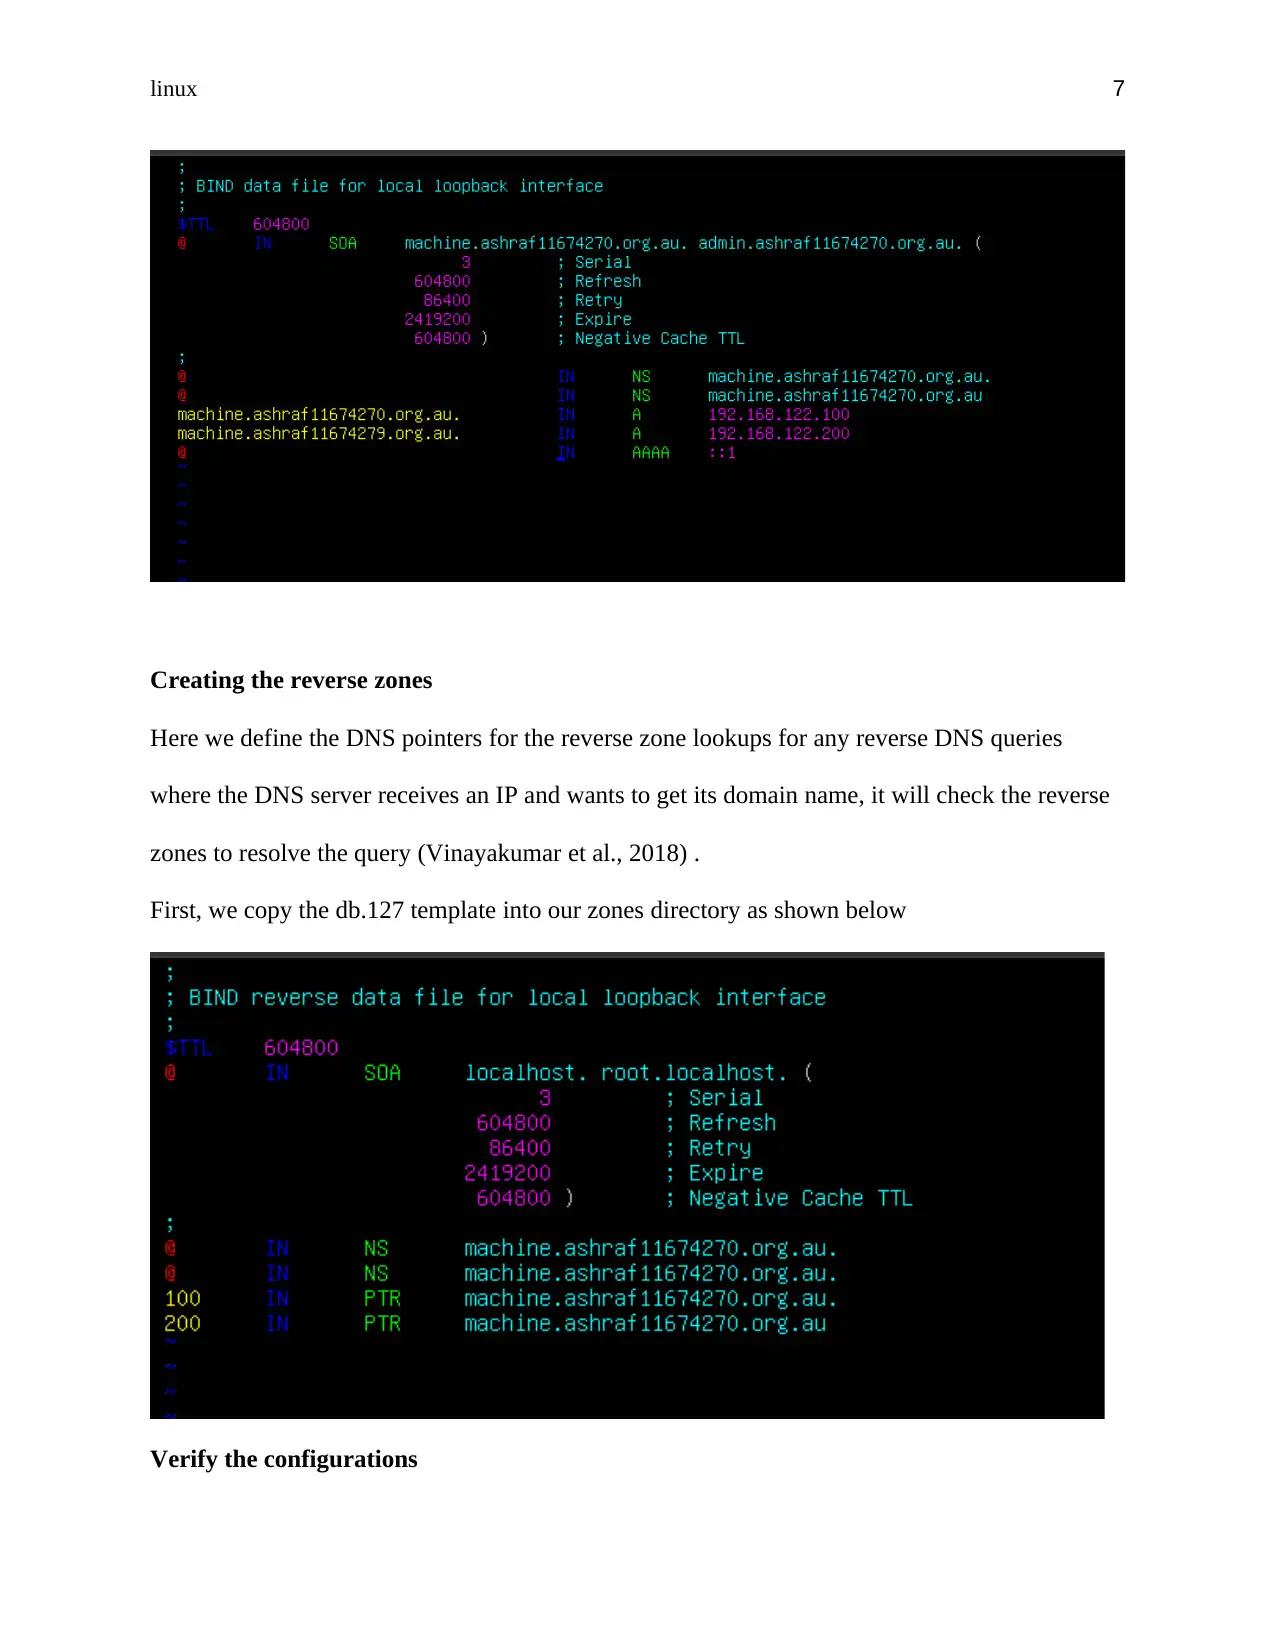
Creating the reverse zones
Here we define the DNS pointers for the reverse zone lookups for any reverse DNS queries
where the DNS server receives an IP and wants to get its domain name, it will check the reverse
zones to resolve the query (Vinayakumar et al., 2018) .
First, we copy the db.127 template into our zones directory as shown below
Verify the configurations
Paraphrase This Document
Need a fresh take? Get an instant paraphrase of this document with our AI Paraphraser
linux 8
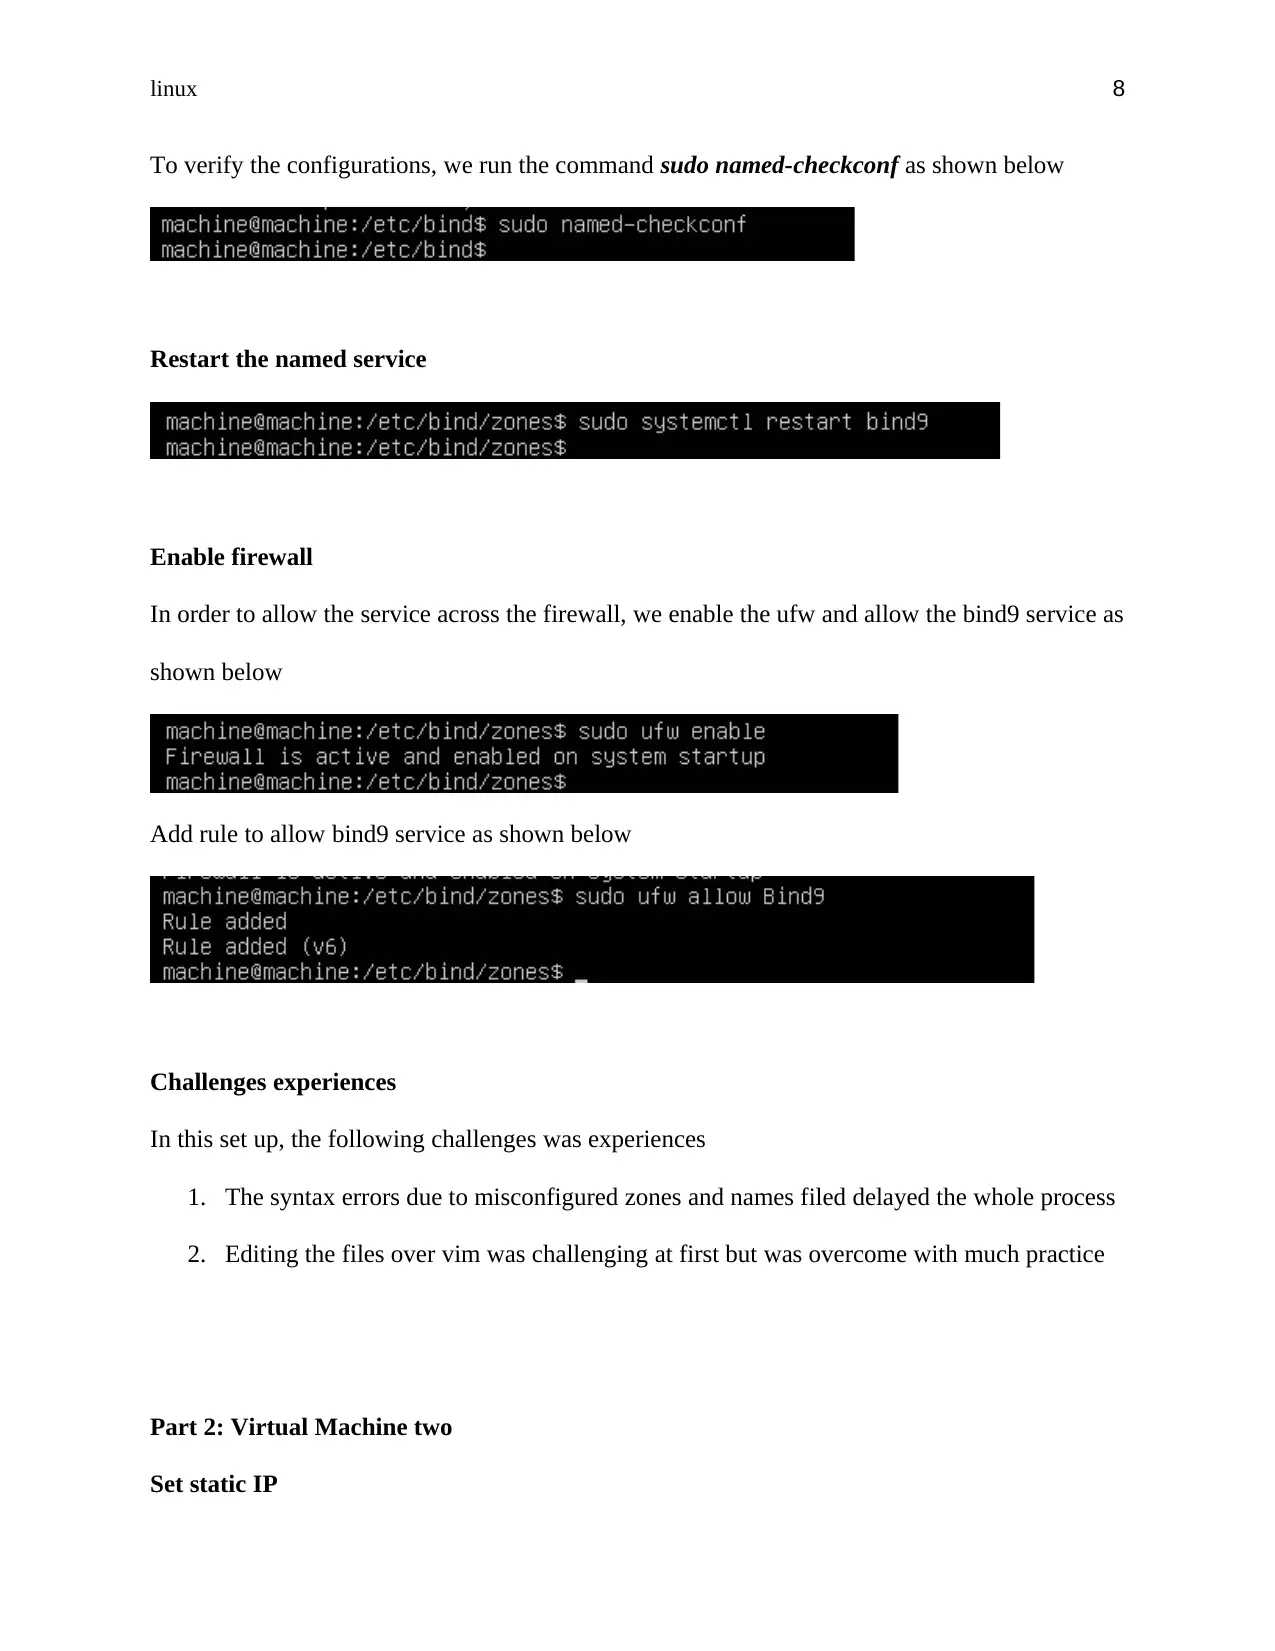
To verify the configurations, we run the command sudo named-checkconf as shown below
Restart the named service
Enable firewall
In order to allow the service across the firewall, we enable the ufw and allow the bind9 service as
shown below
Add rule to allow bind9 service as shown below
Challenges experiences
In this set up, the following challenges was experiences
1. The syntax errors due to misconfigured zones and names filed delayed the whole process
2. Editing the files over vim was challenging at first but was overcome with much practice
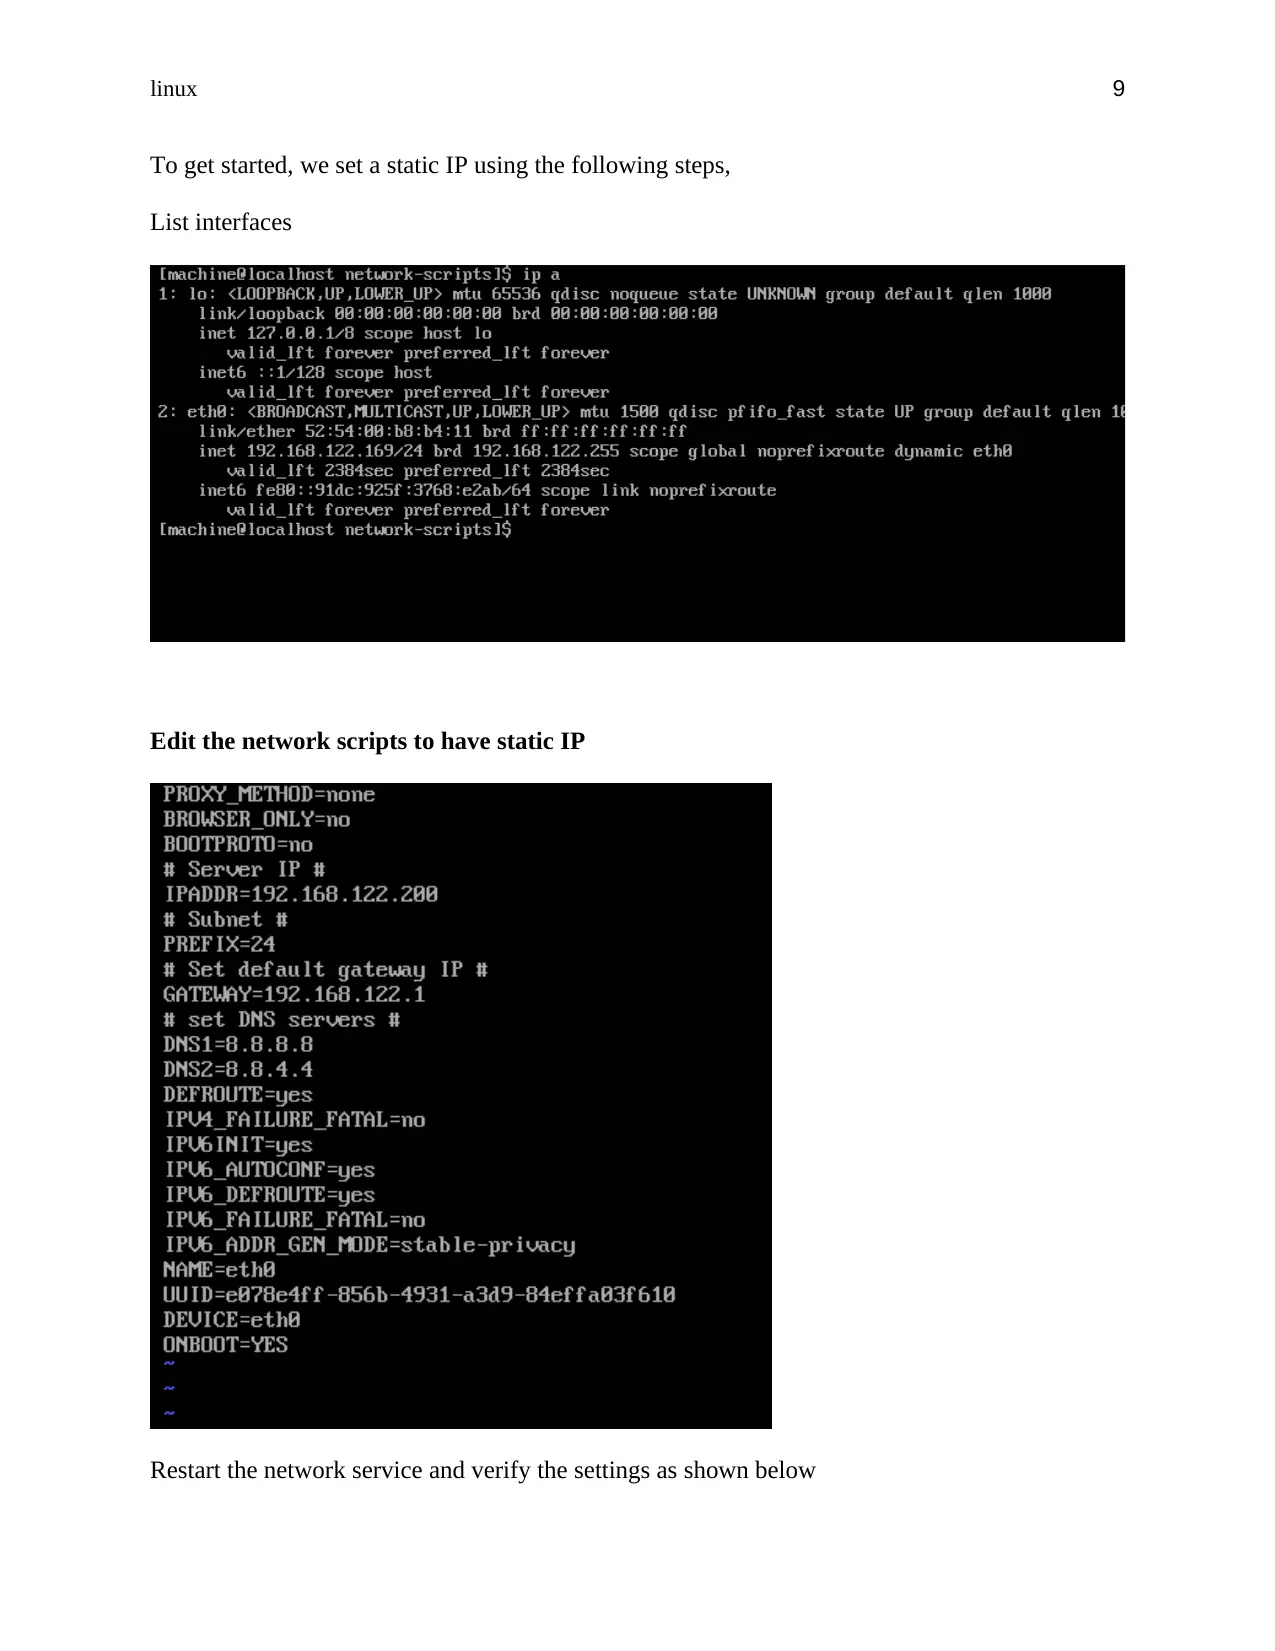
Part 2: Virtual Machine two
Set static IP
To verify the configurations, we run the command sudo named-checkconf as shown below
Restart the named service
Enable firewall
In order to allow the service across the firewall, we enable the ufw and allow the bind9 service as
shown below
Add rule to allow bind9 service as shown below
Challenges experiences
In this set up, the following challenges was experiences
1. The syntax errors due to misconfigured zones and names filed delayed the whole process
2. Editing the files over vim was challenging at first but was overcome with much practice
Part 2: Virtual Machine two
Set static IP
linux 9
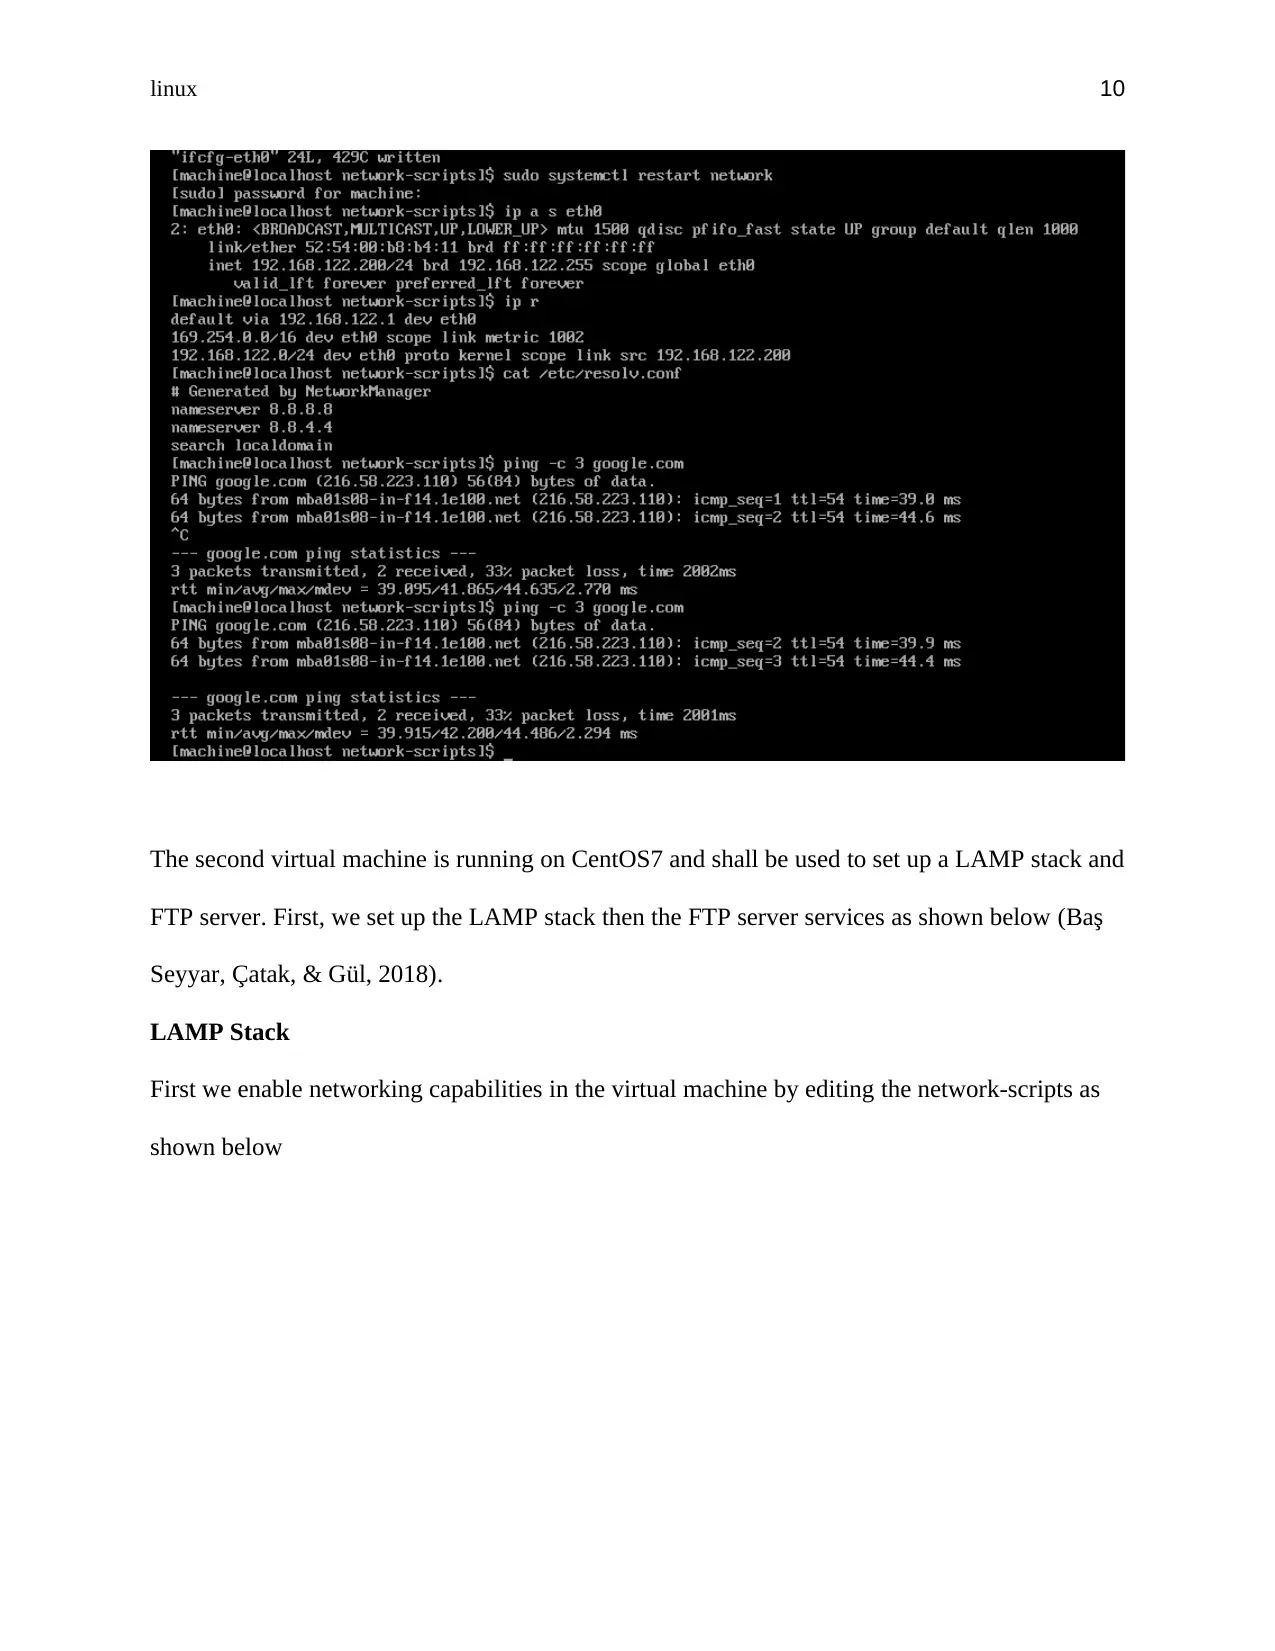
To get started, we set a static IP using the following steps,
List interfaces
Edit the network scripts to have static IP
Restart the network service and verify the settings as shown below
To get started, we set a static IP using the following steps,
List interfaces
Edit the network scripts to have static IP
Restart the network service and verify the settings as shown below
linux 10
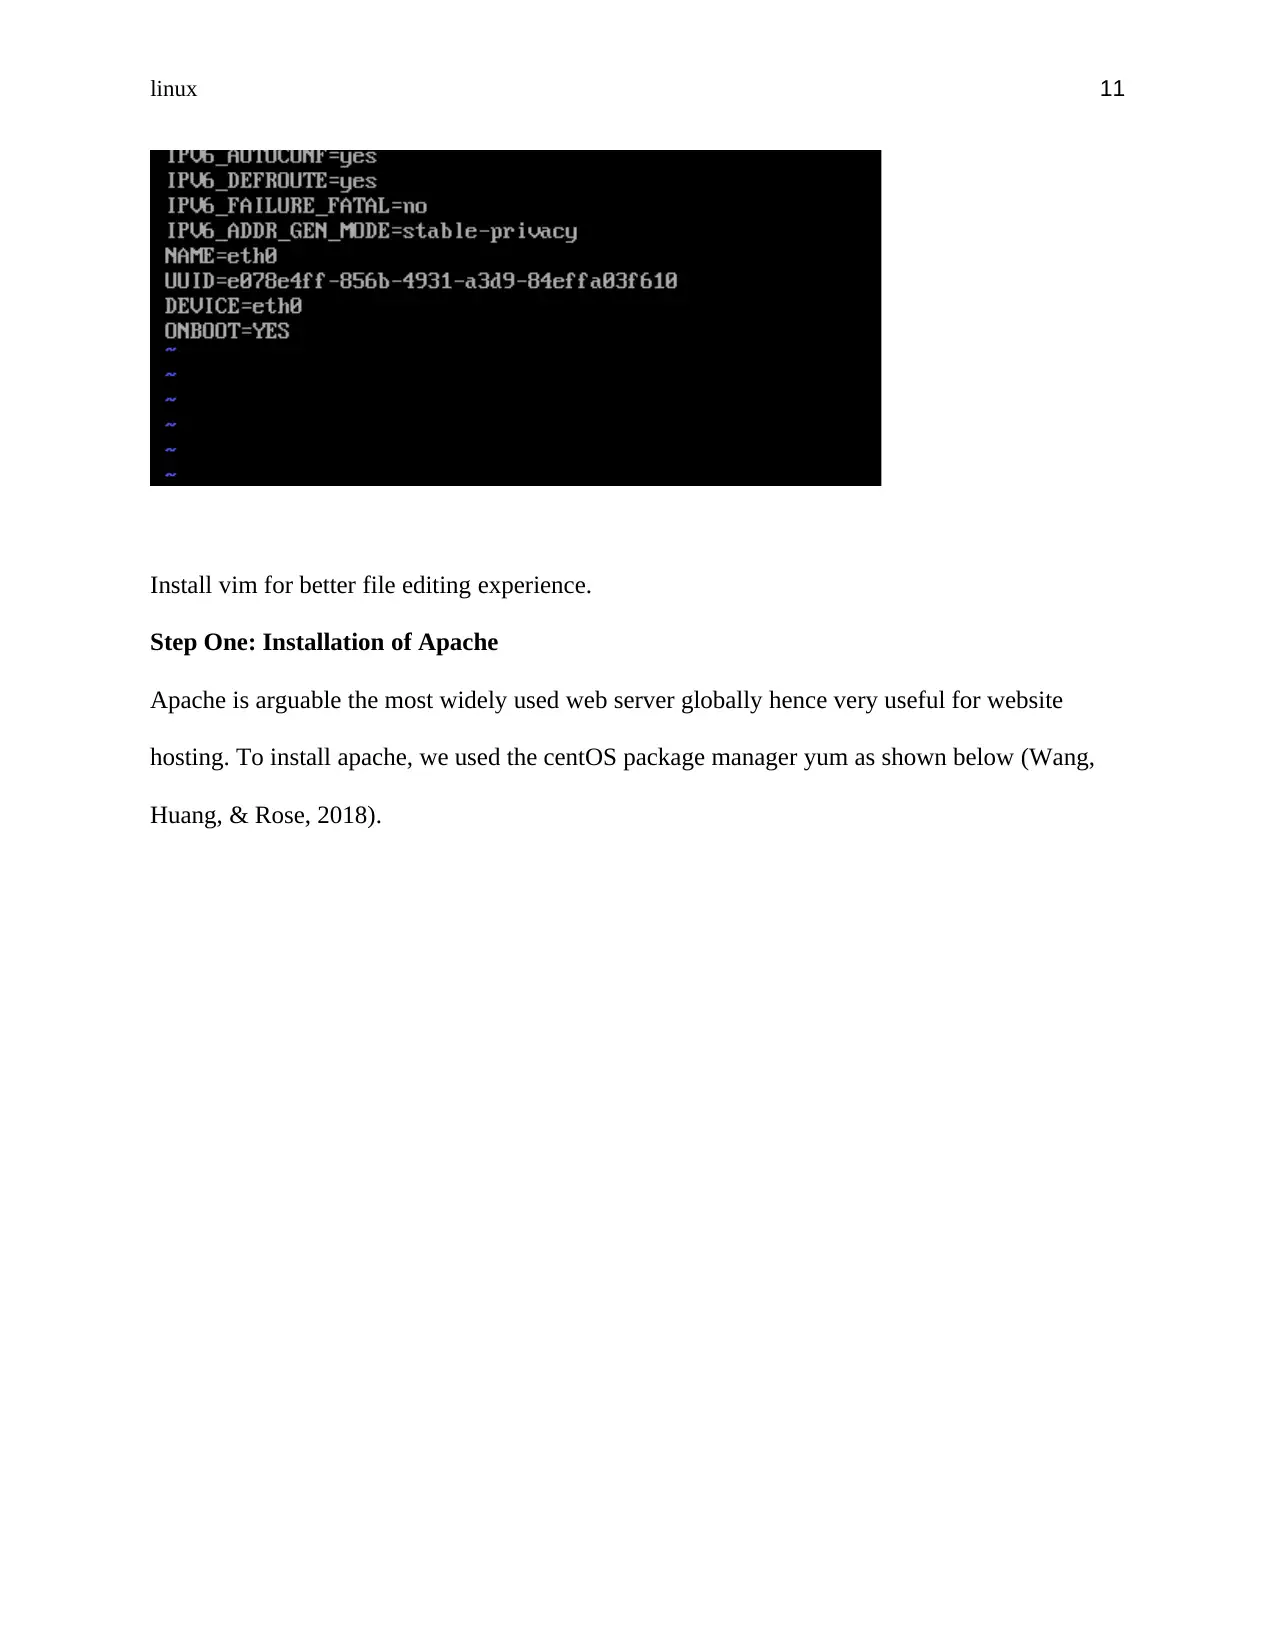
The second virtual machine is running on CentOS7 and shall be used to set up a LAMP stack and
FTP server. First, we set up the LAMP stack then the FTP server services as shown below (Baş
Seyyar, Çatak, & Gül, 2018).
LAMP Stack
First we enable networking capabilities in the virtual machine by editing the network-scripts as
shown below
Secure Best Marks with AI Grader
Need help grading? Try our AI Grader for instant feedback on your assignments.
linux 11
Install vim for better file editing experience.
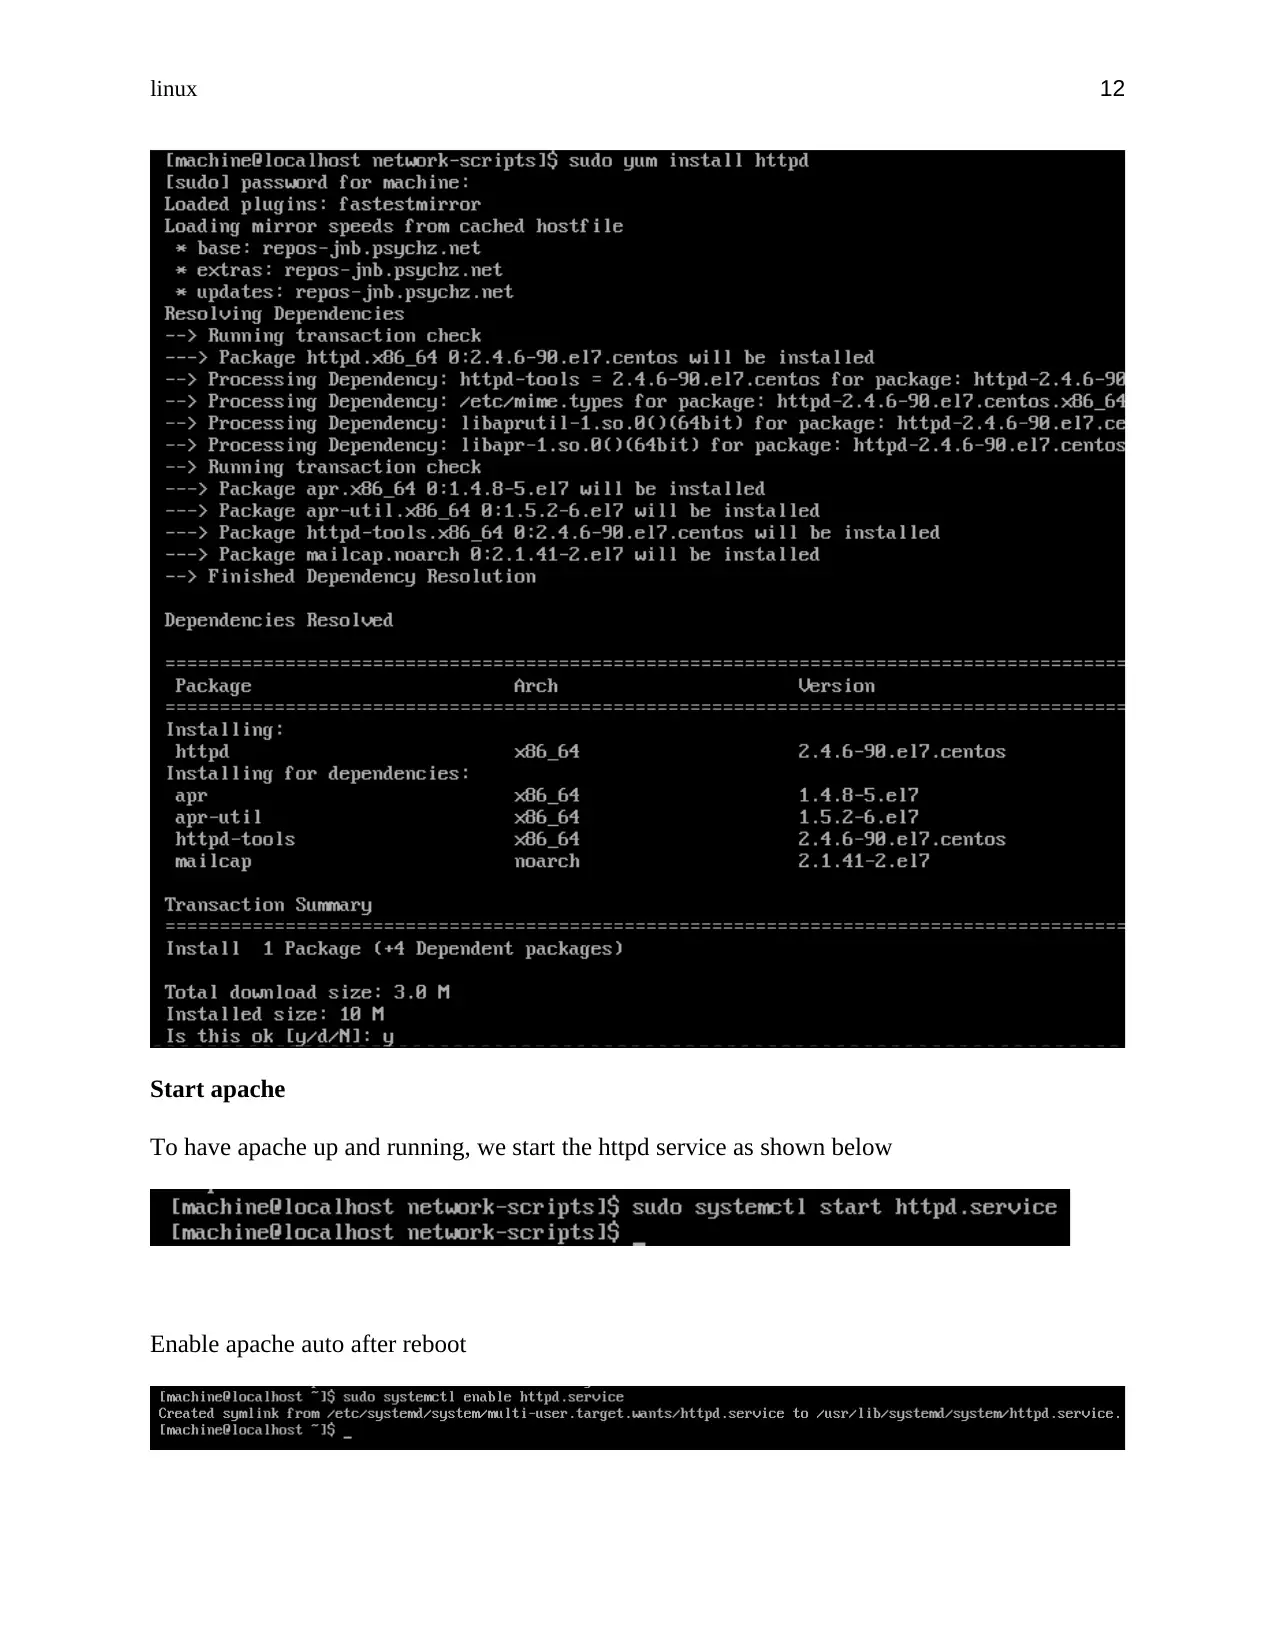
Step One: Installation of Apache
Apache is arguable the most widely used web server globally hence very useful for website
hosting. To install apache, we used the centOS package manager yum as shown below (Wang,
Huang, & Rose, 2018).
Install vim for better file editing experience.
Step One: Installation of Apache
Apache is arguable the most widely used web server globally hence very useful for website
hosting. To install apache, we used the centOS package manager yum as shown below (Wang,
Huang, & Rose, 2018).
linux 12
Start apache
To have apache up and running, we start the httpd service as shown below
Enable apache auto after reboot
Start apache
To have apache up and running, we start the httpd service as shown below
Enable apache auto after reboot

linux 13
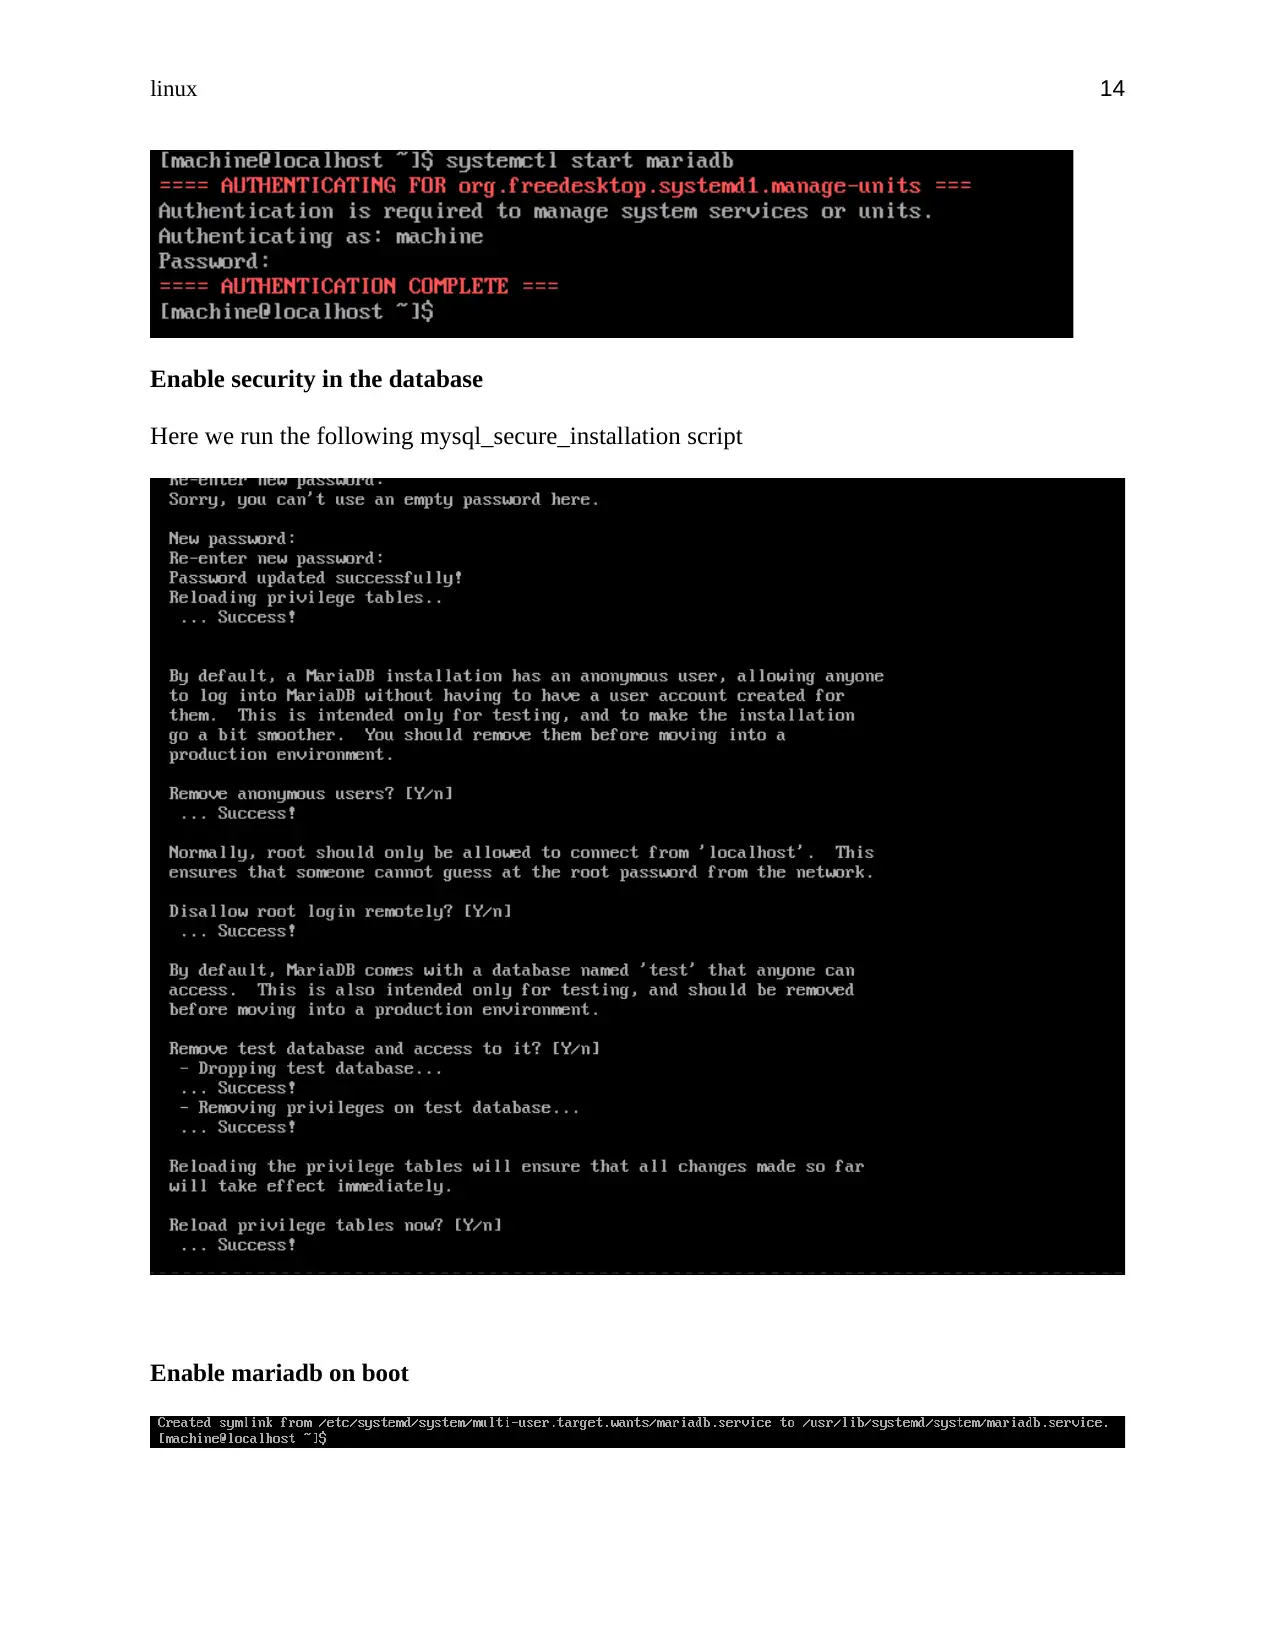
Step 2: Installation of MySQL(MariaDB)
MariadDB is a drop in replacement for mysql in the LAMP stack. We use yum package manager
to effortless install MariaDB as shown below
Start Mariadb
Step 2: Installation of MySQL(MariaDB)
MariadDB is a drop in replacement for mysql in the LAMP stack. We use yum package manager
to effortless install MariaDB as shown below
Start Mariadb
Paraphrase This Document
Need a fresh take? Get an instant paraphrase of this document with our AI Paraphraser
linux 14
Enable security in the database
Here we run the following mysql_secure_installation script
Enable mariadb on boot
Enable security in the database
Here we run the following mysql_secure_installation script
Enable mariadb on boot
linux 15
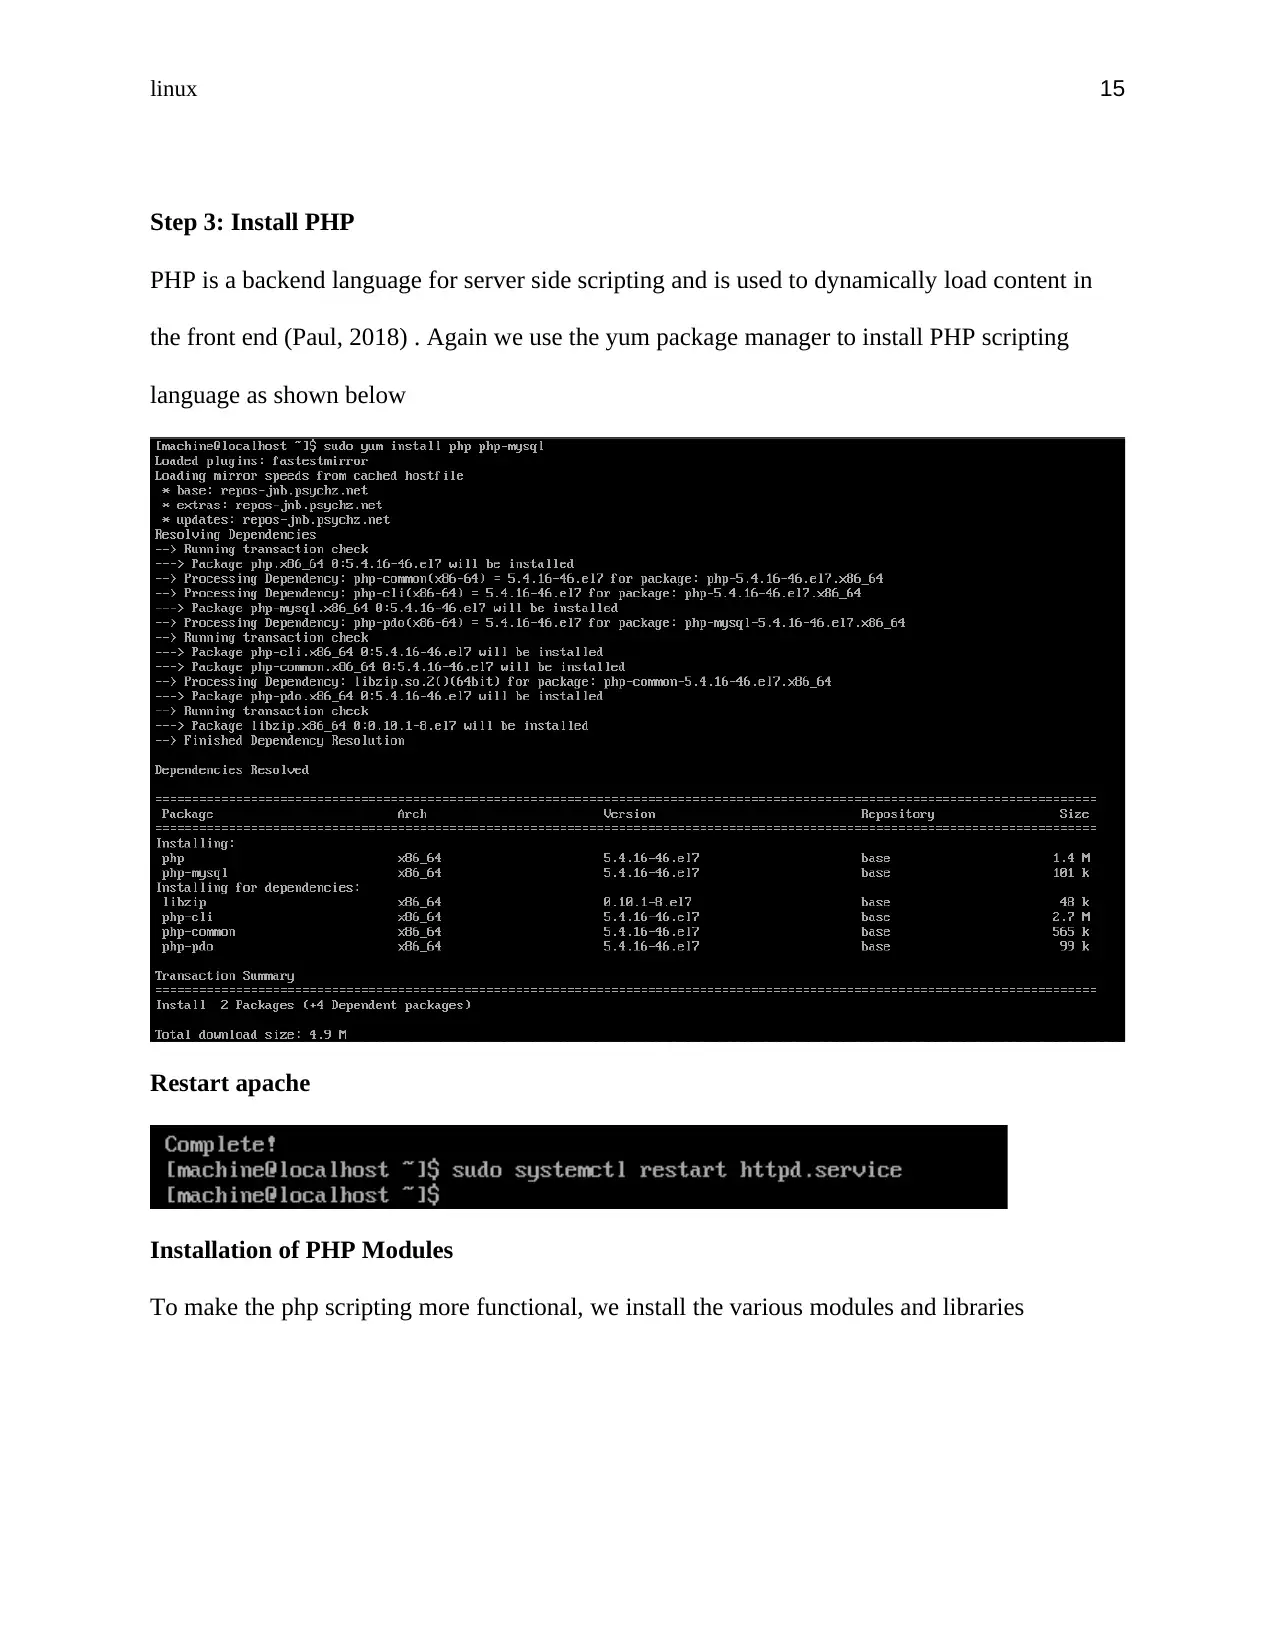
Step 3: Install PHP
PHP is a backend language for server side scripting and is used to dynamically load content in
the front end (Paul, 2018) . Again we use the yum package manager to install PHP scripting
language as shown below
Restart apache
Installation of PHP Modules
To make the php scripting more functional, we install the various modules and libraries
linux 16
Installation of FTP
FTP server service enables faster file transfer between various hosts. The following steps were
used to install and configure FTP in the centOS machine (Rafalovitch, 2013) .
Step 1: Installation of vsftpd
Installation of FTP
FTP server service enables faster file transfer between various hosts. The following steps were
used to install and configure FTP in the centOS machine (Rafalovitch, 2013) .
Step 1: Installation of vsftpd
Secure Best Marks with AI Grader
Need help grading? Try our AI Grader for instant feedback on your assignments.
linux 17
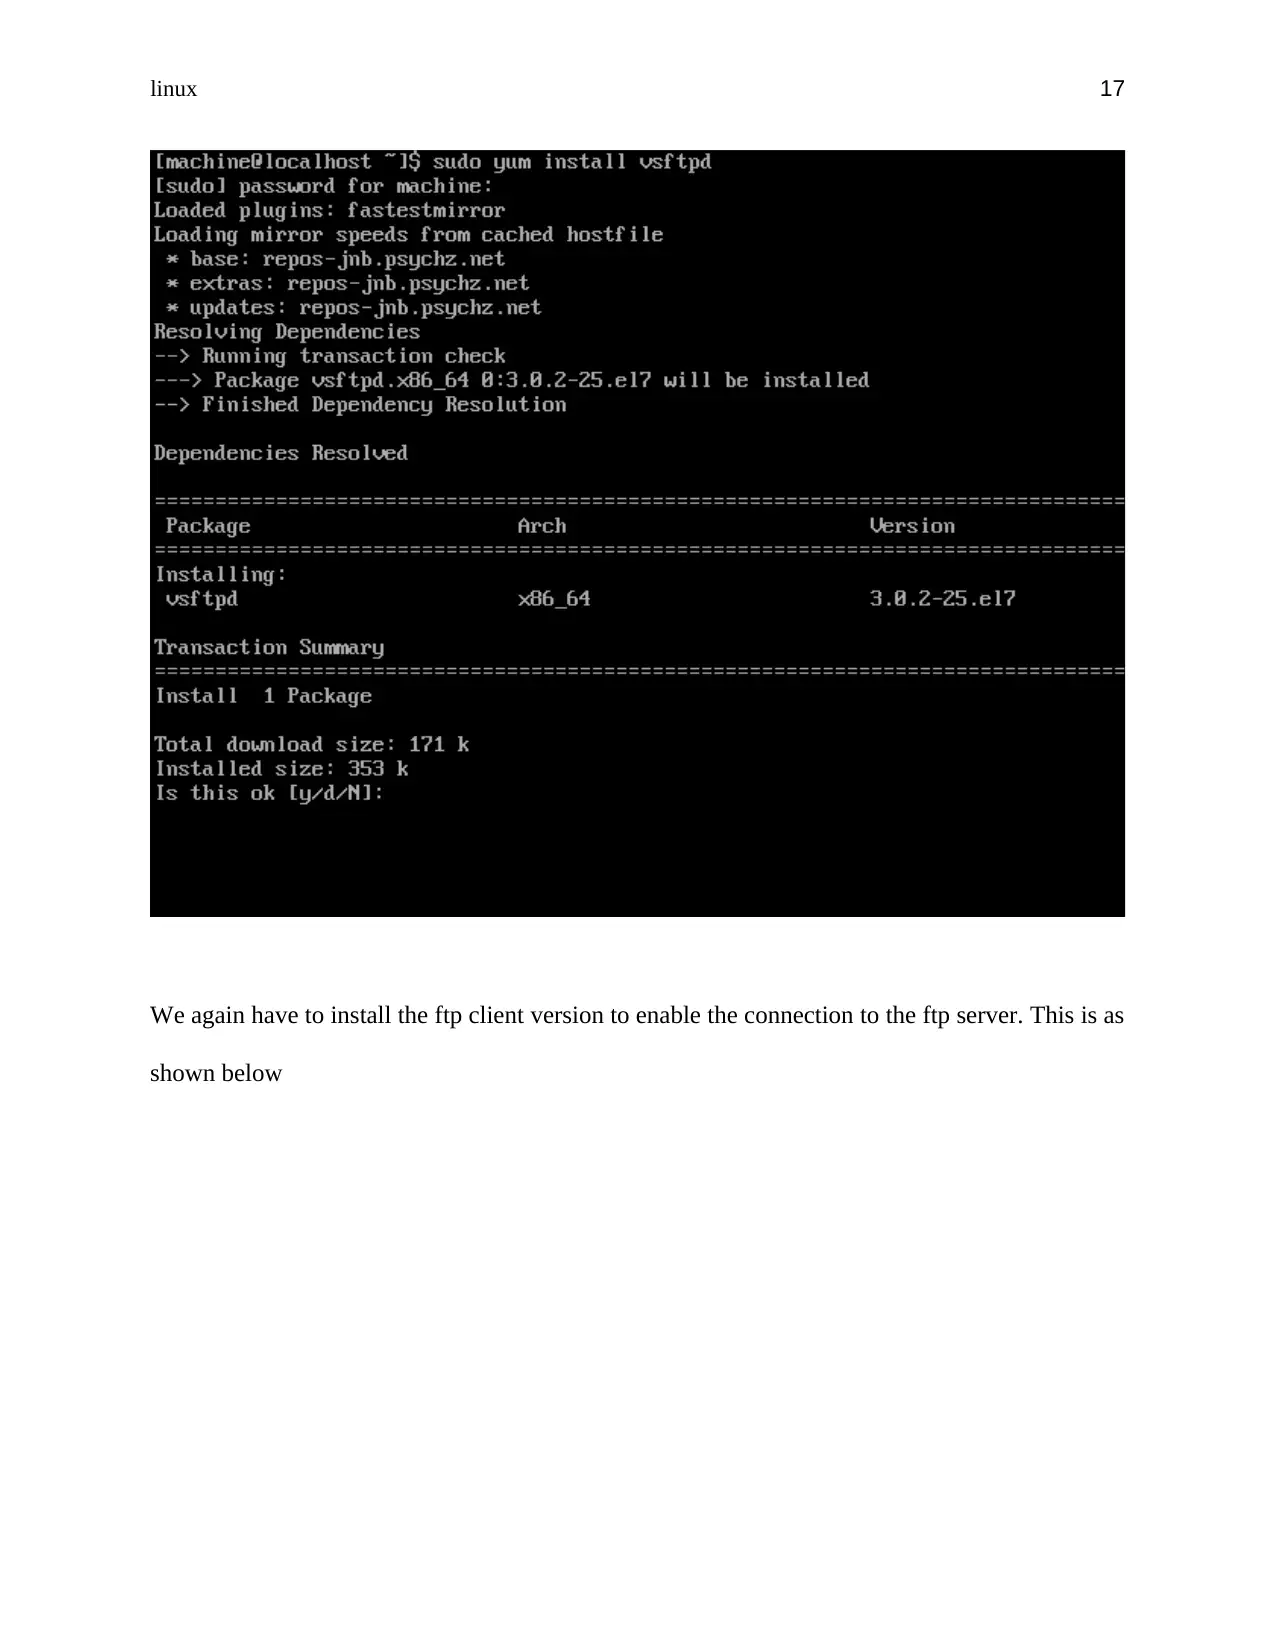
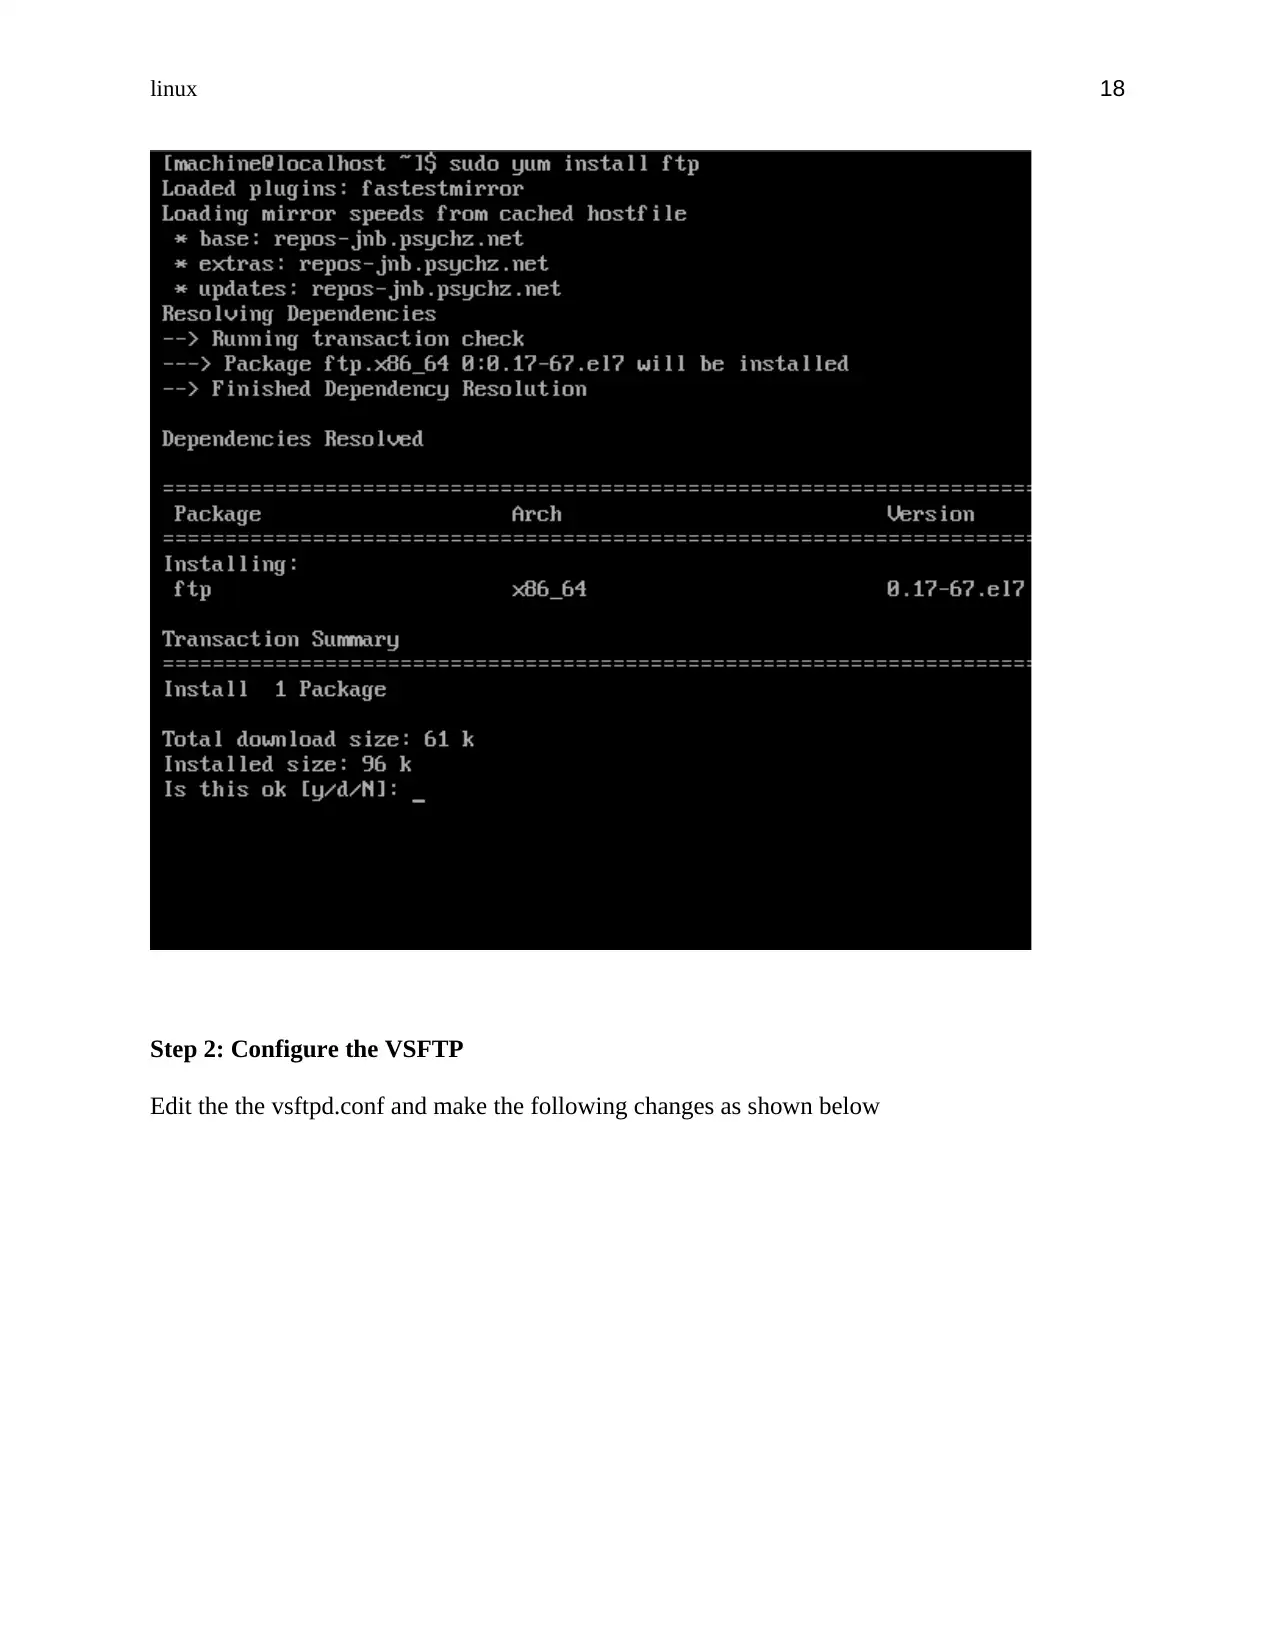
We again have to install the ftp client version to enable the connection to the ftp server. This is as
shown below
We again have to install the ftp client version to enable the connection to the ftp server. This is as
shown below
linux 18
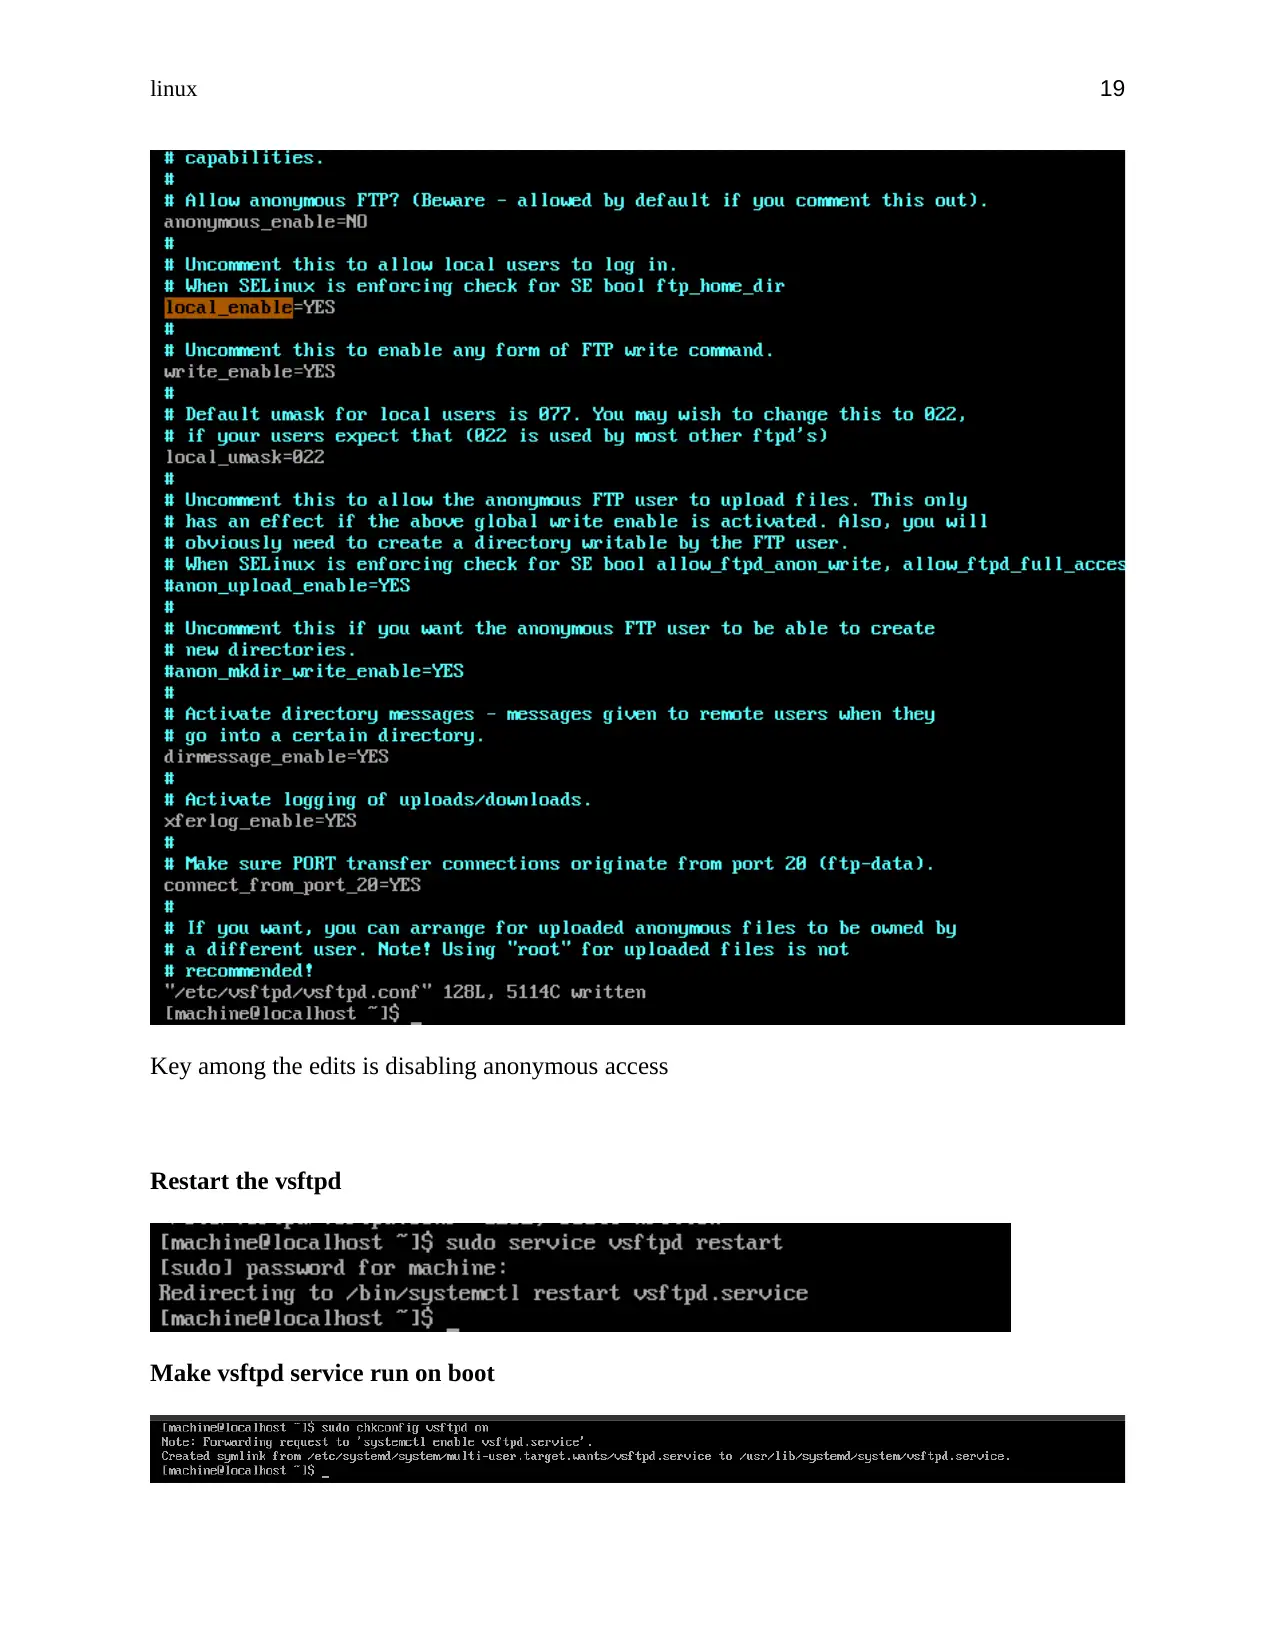
Step 2: Configure the VSFTP
Edit the the vsftpd.conf and make the following changes as shown below
Step 2: Configure the VSFTP
Edit the the vsftpd.conf and make the following changes as shown below
linux 19
Key among the edits is disabling anonymous access
Restart the vsftpd
Make vsftpd service run on boot
Key among the edits is disabling anonymous access
Restart the vsftpd
Make vsftpd service run on boot
Paraphrase This Document
Need a fresh take? Get an instant paraphrase of this document with our AI Paraphraser

linux 20
Step 3: Accessing the FTP Server
We can now access the ftp server by hitting the server address in the browser. From any client.
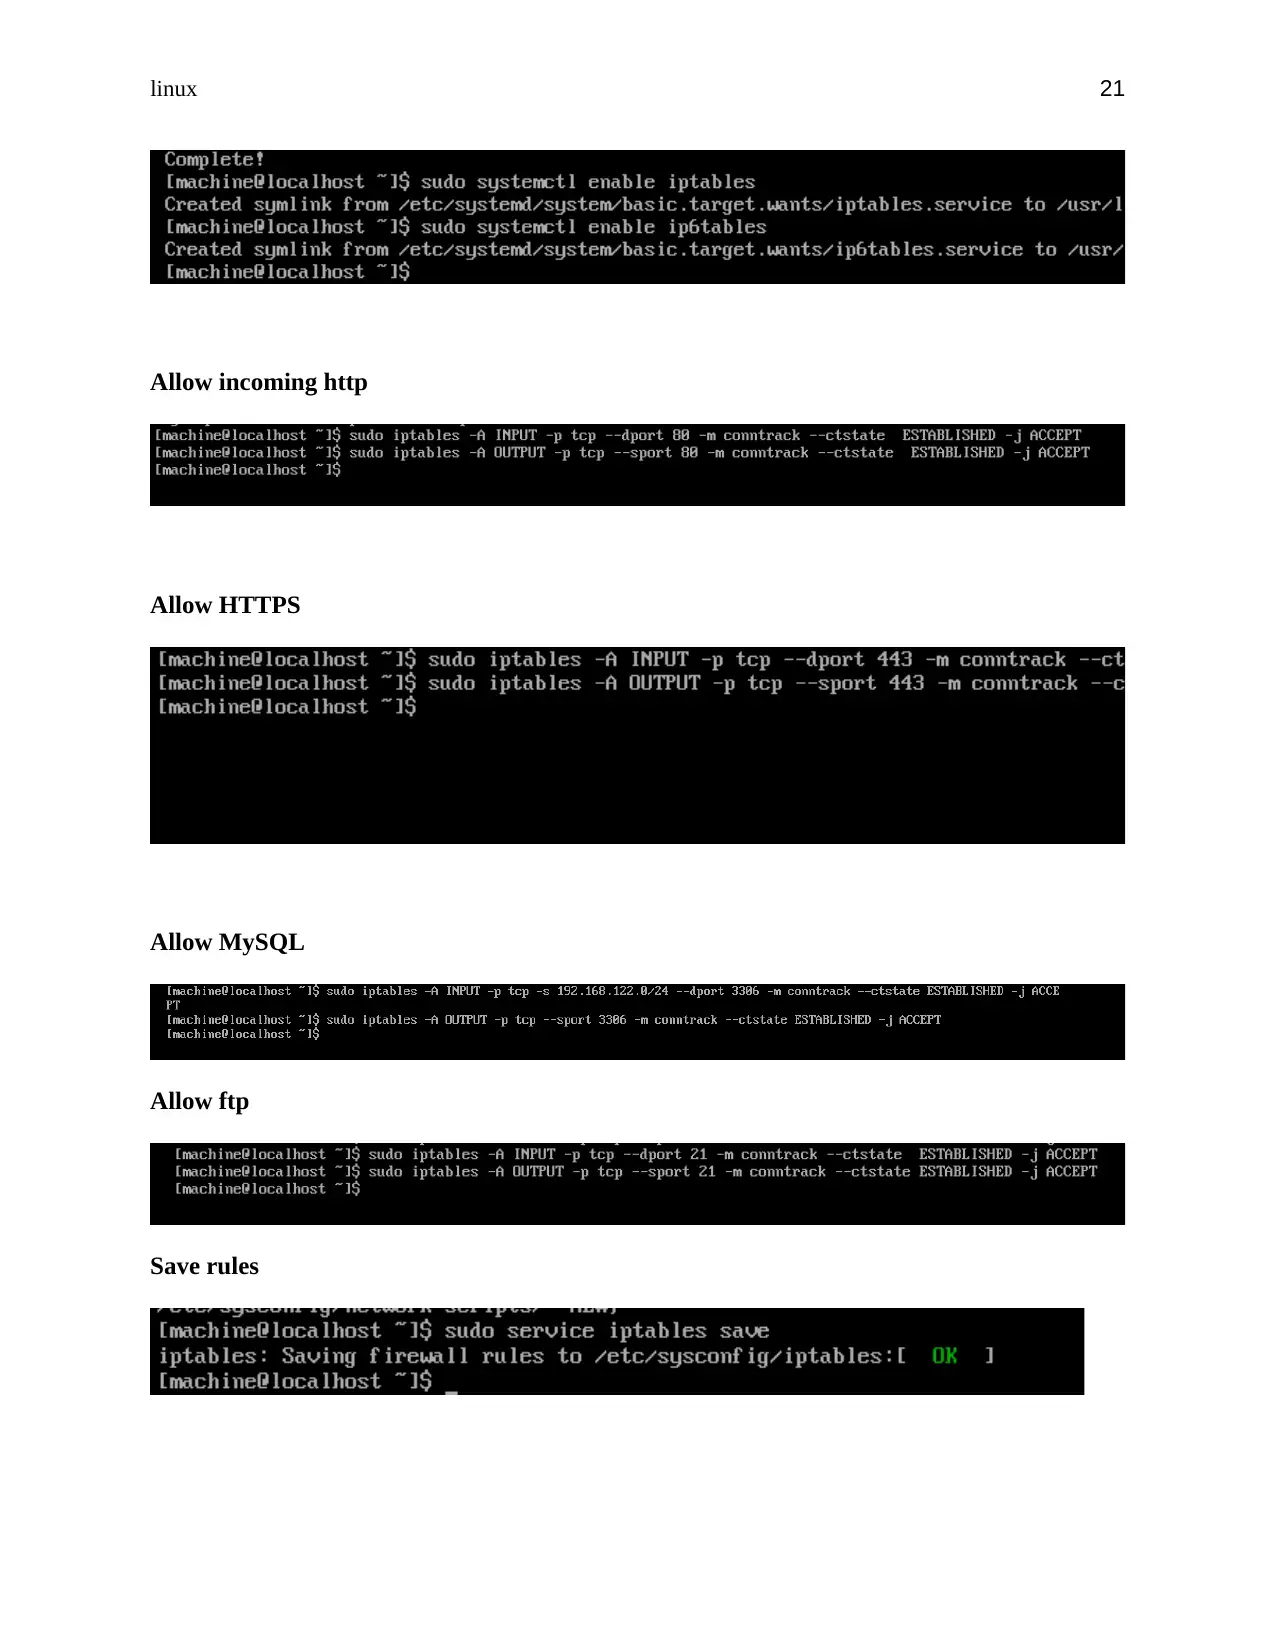
Step 4: Enable services in the IPTABLES
First, we have to stop the firewalld
Then install and configure the IPTABLES
Enable the iptables to start on boot
Step 3: Accessing the FTP Server
We can now access the ftp server by hitting the server address in the browser. From any client.
Step 4: Enable services in the IPTABLES
First, we have to stop the firewalld
Then install and configure the IPTABLES
Enable the iptables to start on boot
linux 21
Allow incoming http
Allow HTTPS
Allow MySQL
Allow ftp
Save rules
Allow incoming http
Allow HTTPS
Allow MySQL
Allow ftp
Save rules
linux 22
Challenges and experiences
1. The process of setting up the iptables rules was abit technical and needed better
background on information security to ensure correct set up
2. Php modules was tiresome to install since had to install them one by one
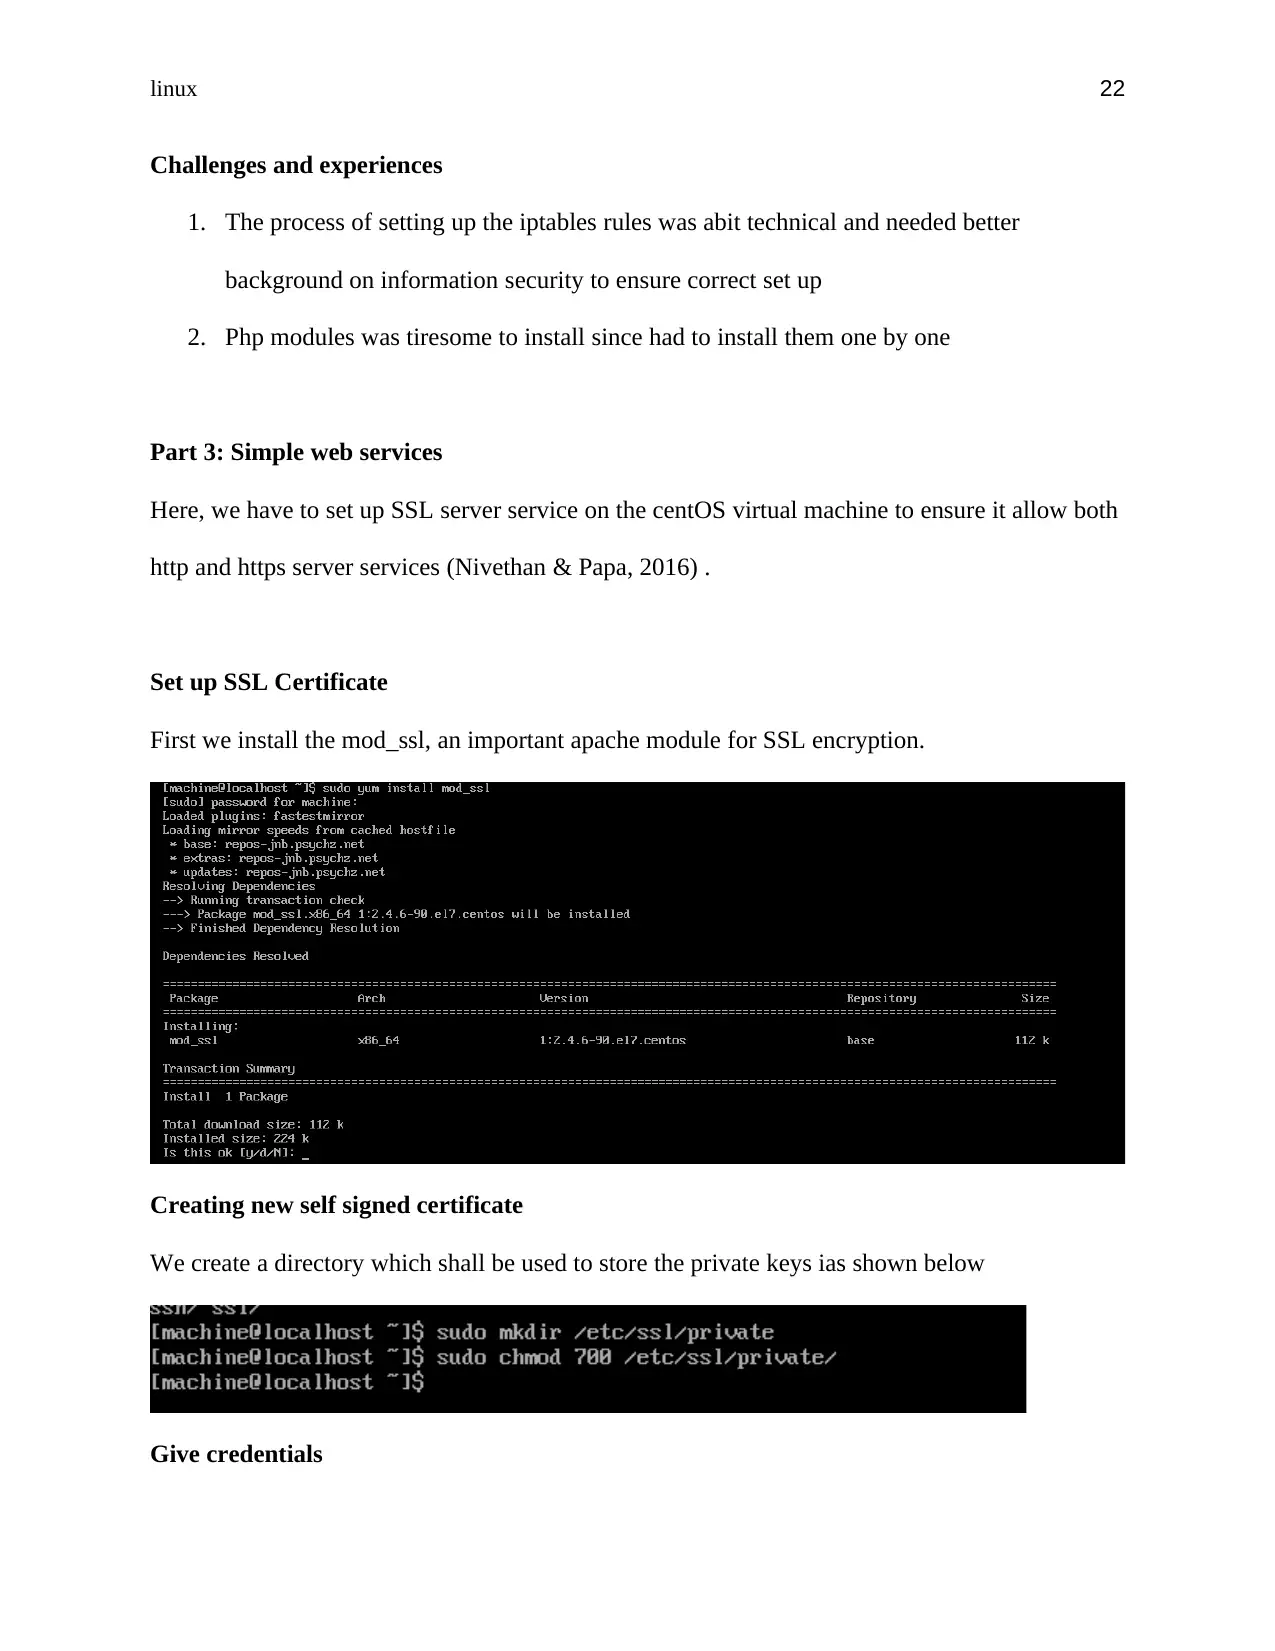
Part 3: Simple web services
Here, we have to set up SSL server service on the centOS virtual machine to ensure it allow both
http and https server services (Nivethan & Papa, 2016) .
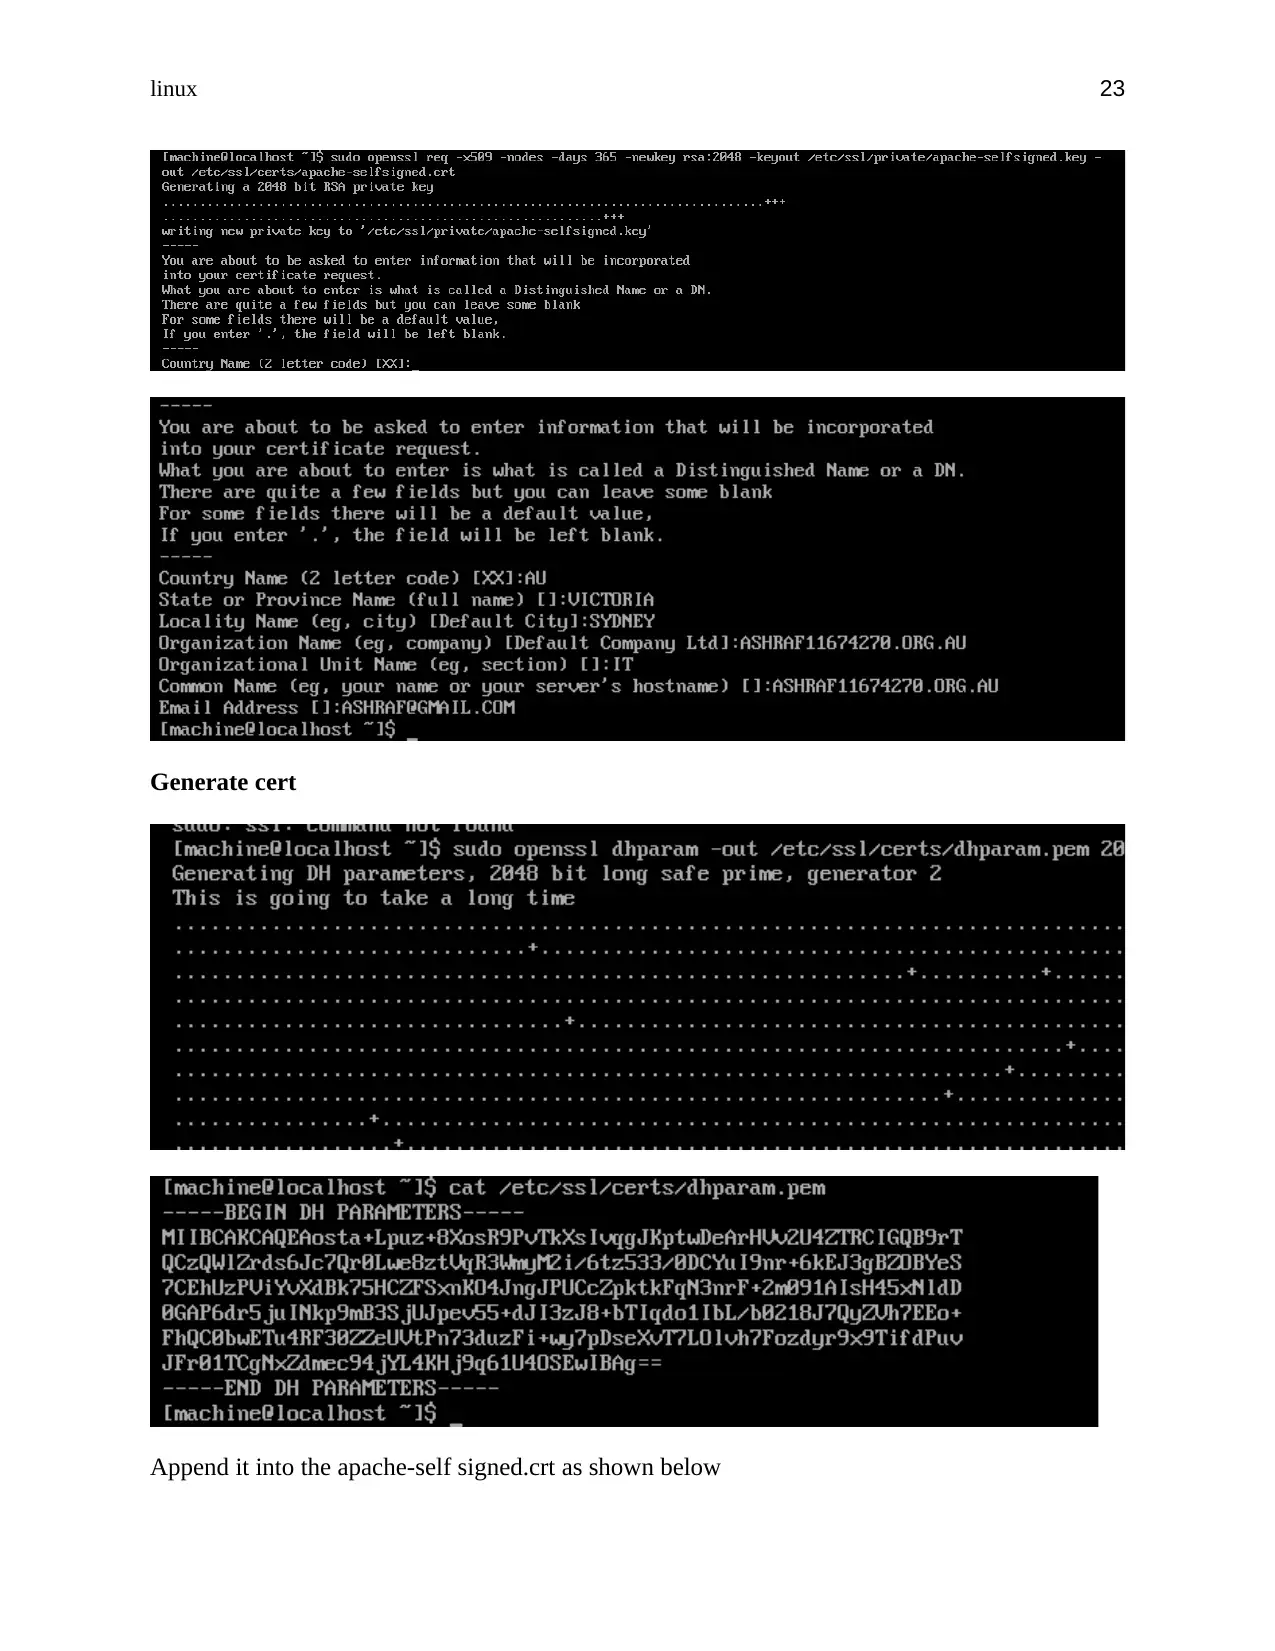
Set up SSL Certificate
First we install the mod_ssl, an important apache module for SSL encryption.
Creating new self signed certificate
We create a directory which shall be used to store the private keys ias shown below
Give credentials
Challenges and experiences
1. The process of setting up the iptables rules was abit technical and needed better
background on information security to ensure correct set up
2. Php modules was tiresome to install since had to install them one by one
Part 3: Simple web services
Here, we have to set up SSL server service on the centOS virtual machine to ensure it allow both
http and https server services (Nivethan & Papa, 2016) .
Set up SSL Certificate
First we install the mod_ssl, an important apache module for SSL encryption.
Creating new self signed certificate
We create a directory which shall be used to store the private keys ias shown below
Give credentials
Secure Best Marks with AI Grader
Need help grading? Try our AI Grader for instant feedback on your assignments.
linux 23
Generate cert
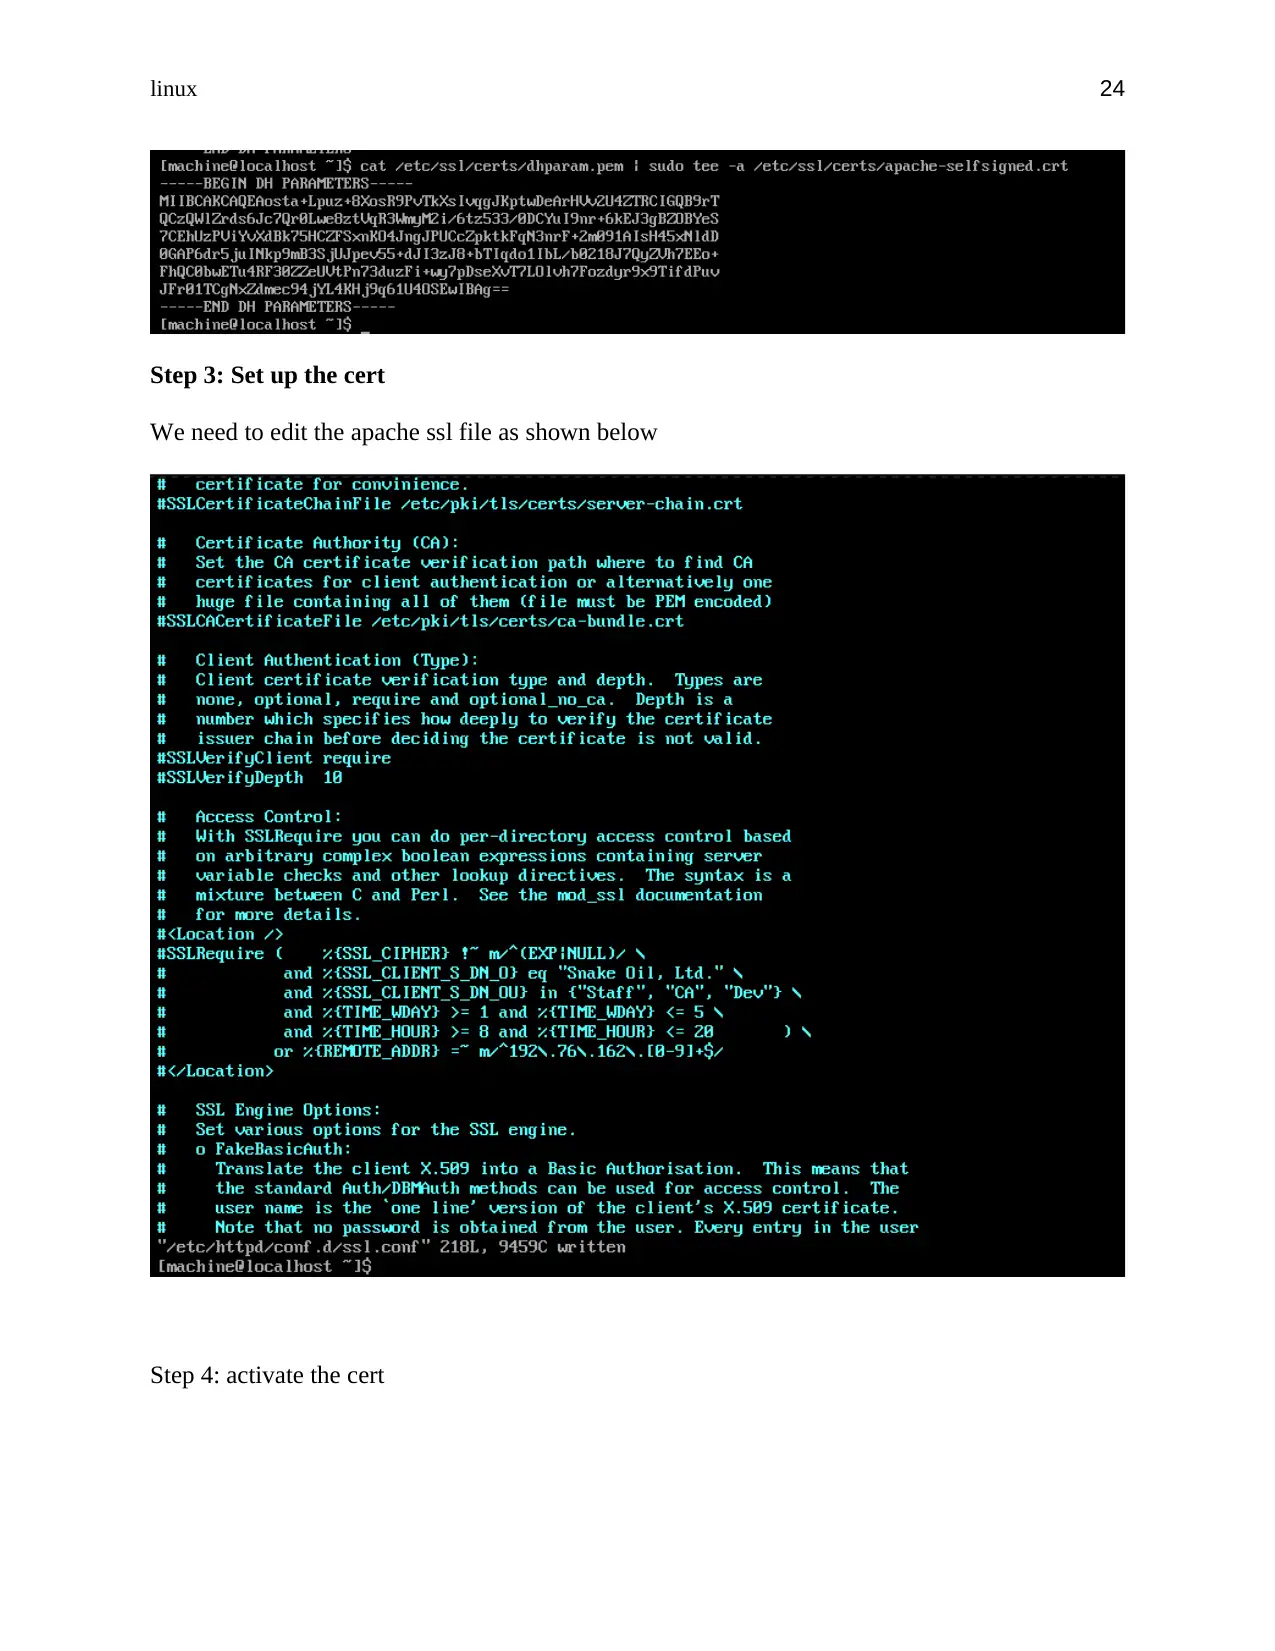
Append it into the apache-self signed.crt as shown below
Generate cert
Append it into the apache-self signed.crt as shown below
linux 24
Step 3: Set up the cert
We need to edit the apache ssl file as shown below
Step 4: activate the cert
Step 3: Set up the cert
We need to edit the apache ssl file as shown below
Step 4: activate the cert
linux 25
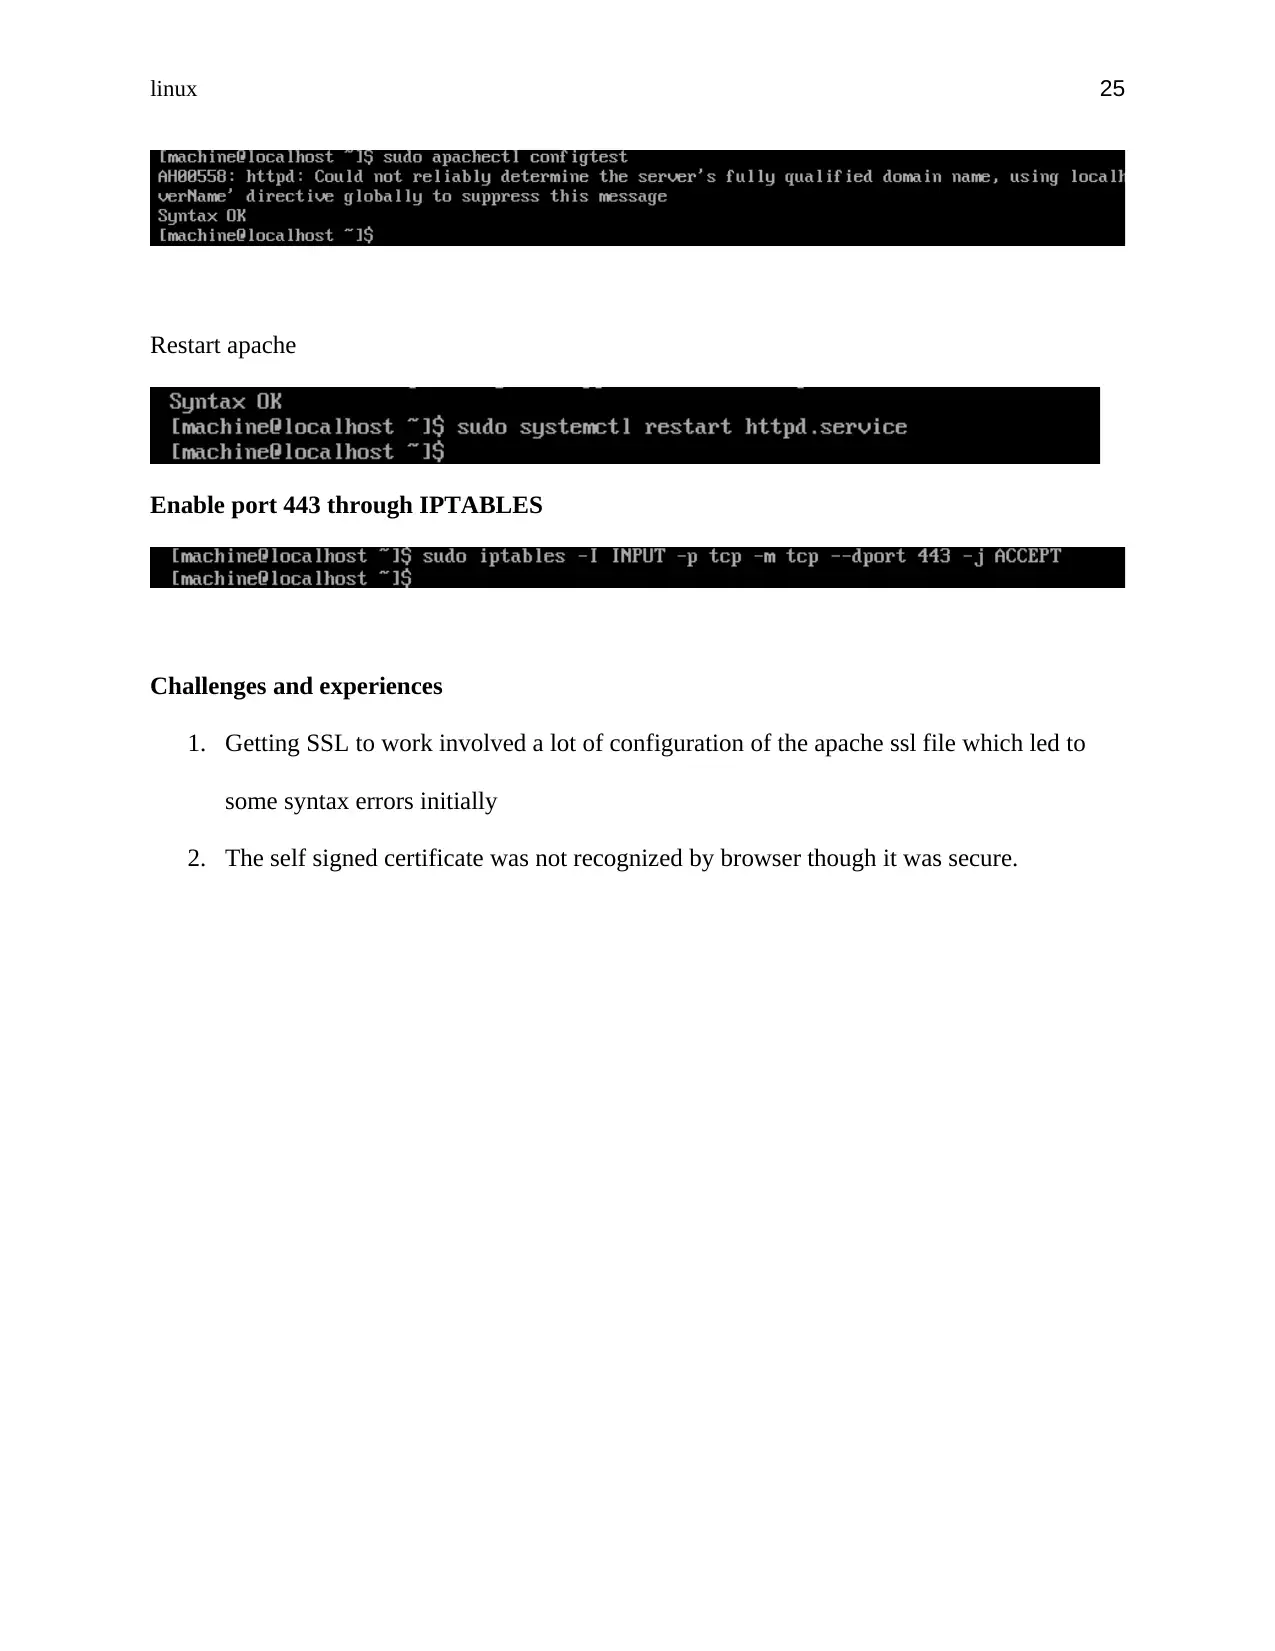
Restart apache
Enable port 443 through IPTABLES
Challenges and experiences
1. Getting SSL to work involved a lot of configuration of the apache ssl file which led to
some syntax errors initially
2. The self signed certificate was not recognized by browser though it was secure.
Restart apache
Enable port 443 through IPTABLES
Challenges and experiences
1. Getting SSL to work involved a lot of configuration of the apache ssl file which led to
some syntax errors initially
2. The self signed certificate was not recognized by browser though it was secure.
Paraphrase This Document
Need a fresh take? Get an instant paraphrase of this document with our AI Paraphraser

linux 26
References
Baş Seyyar, M., Çatak, F. Ö., & Gül, E. (2018). Detection of attack-targeted scans from the
Apache HTTP Server access logs. Applied Computing and Informatics, 14(1), 28–36.
https://doi.org/10.1016/j.aci.2017.04.002
Hintsch, J., Kramer, F., & Turowski, K. (2018). An information system architecture for build- and
engineer-to-order production of application services. Information Systems & E-Business
Management, 16(3), 649–682. https://doi.org/10.1007/s10257-018-0369-z
Hoffman, R. (2010). Apache OFBiz Cookbook. Retrieved from http://165.193.178.96/login?
url=http%3a%2f%2fsearch.ebscohost.com%2flogin.aspx%3fdirect%3dtrue%26db
%3dnlebk%26AN%3d345706%26site%3deds-live
Kerner, S. M. (2019). Debian and PHP PEAR Projects Update for Application Vulnerabilities.
EWeek, N.PAG-N.PAG.
Khan, R., & Khan, S. U. (2017). Design and implementation of Ad-Hoc collaborative proxying
scheme for reducing network energy waste. Digital Communications and Networks, 3(2),
118–128. https://doi.org/10.1016/j.dcan.2016.11.001
Mihalos, M. G., Nalmpantis, S. I., & Ovaliadis, K. (2019). Design and Implementation of Firewall
Security Policies using Linux Iptables. Journal of Engineering Science & Technology
Review, 12(1), 80–86. https://doi.org/10.25103/jestr.121.09
Nivethan, J., & Papa, M. (2016). On the use of open-source firewalls in ICS/SCADA systems.
Information Security Journal: A Global Perspective, 25(1–3), 83–93.
linux 27
https://doi.org/10.1080/19393555.2016.1172283
Paul, I. (2018). Five Chromebook hacks that give your laptop surprising new talents. PCWorld,
36(3), 112–115.
PR Newswire. (2014). Akamai Warns of IptabLes and IptabLex Infection on Linux, DDoS
attacks. MA-AkamaiTechnologies. Retrieved from http://165.193.178.96/login?url=http
%3a%2f%2fsearch.ebscohost.com%2flogin.aspx%3fdirect%3dtrue%26db%3dbwh
%26AN%3d201409030630PR.NEWS.USPR.NE02425%26site%3deds-live
Rafalovitch, A. (2013). Instant Apache Solr for Indexing Data How-to: Learn How to Index Your
Data Correctly and Create Better Search Experiences with Apache Solr. Retrieved from
http://165.193.178.96/login?url=http%3a%2f%2fsearch.ebscohost.com%2flogin.aspx
%3fdirect%3dtrue%26db%3dnlebk%26AN%3d593527%26site%3deds-live
Vinayakumar, R., Soman, K. p., Poornachandran, P., Thampi, El-Alfy, Mitra, & Trajkovic. (2018).
Detecting malicious domain names using deep learning approaches at scale. Journal of
Intelligent & Fuzzy Systems, 34(3), 1355–1367. https://doi.org/10.3233/JIFS-169431
Wang, Z., Huang, J., & Rose, S. (2018). Evolution and challenges of DNS-based CDNs. Digital
Communications and Networks, 4(4), 235–243.
https://doi.org/10.1016/j.dcan.2017.07.005
1 out of 27
Related Documents


Your All-in-One AI-Powered Toolkit for Academic Success.
+13062052269
info@desklib.com
Available 24*7 on WhatsApp / Email
![[object Object]](/_next/static/media/star-bottom.7253800d.svg)
Unlock your academic potential
© 2024 | Zucol Services PVT LTD | All rights reserved.